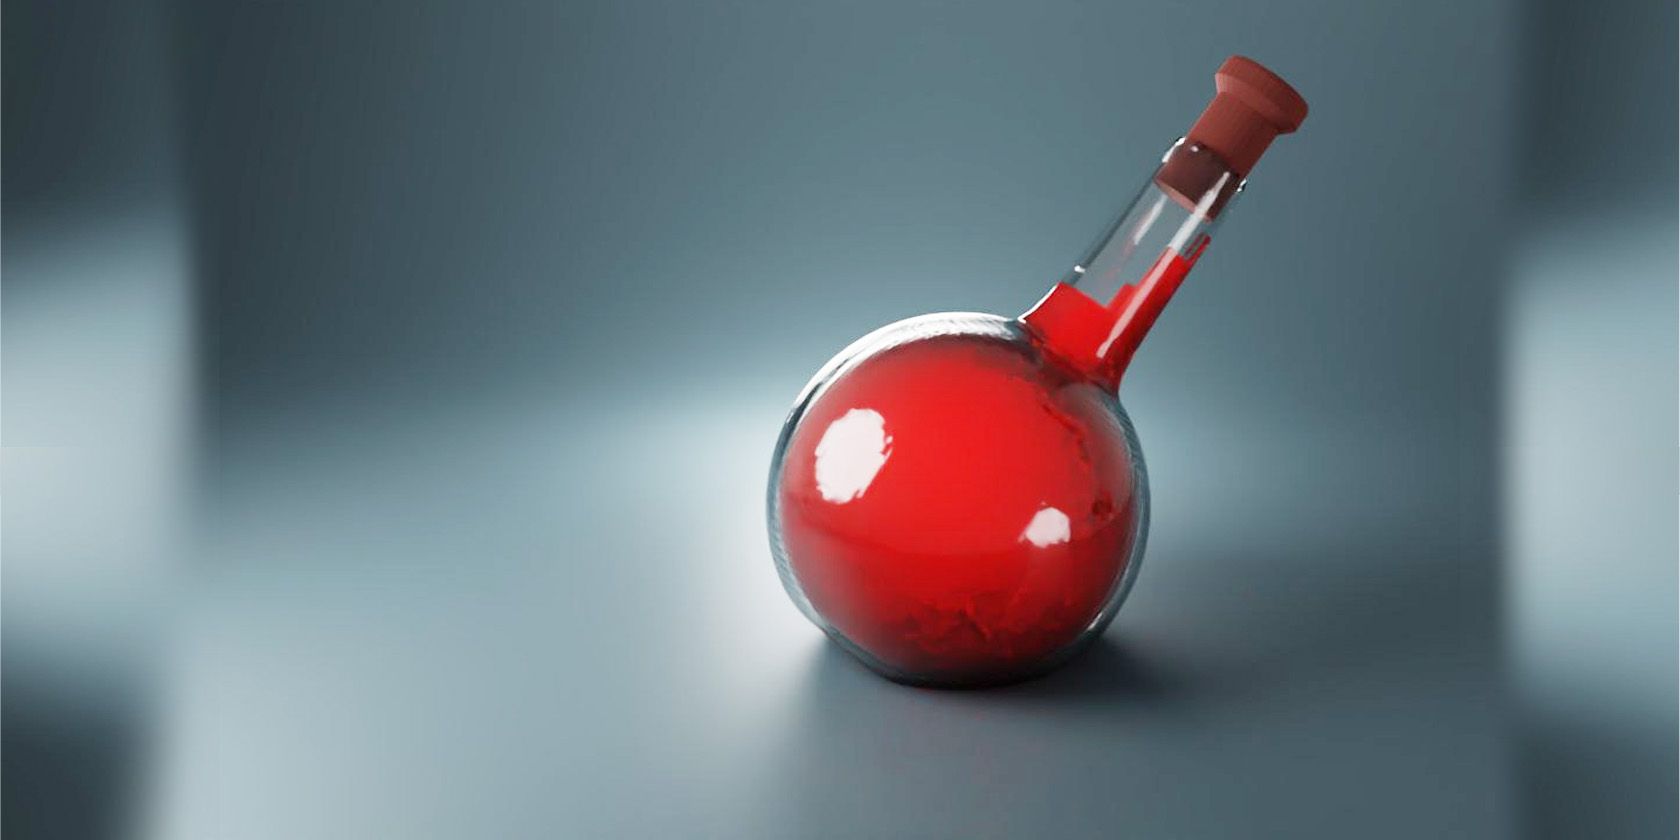
Are you looking for a new project to keep you occupied? Why not try designing a simple plastic bottle in 3D modeling software? This is a great way to improve your skills and may even lead to some interesting creations. The 3D design software that we are going to use is SelfCAD. We will go over the different steps required to create the model, as well as some tips on how to prepare it for 3D printing.
How to Get Started With the Modeling Process
Sign up for SelfCAD or log in if you already have an account. You can use the utility online, or you can download SelfCAD for Windows or macOS. Both the online and offline programs are synchronized together. This is helpful as you can work anywhere anytime.
Once you have created an account, launch the software and create a new project. You can then follow the eight simple steps below to create your simple plastic bottle.
Step 1: Activate the Sphere From the 3D Shapes Section
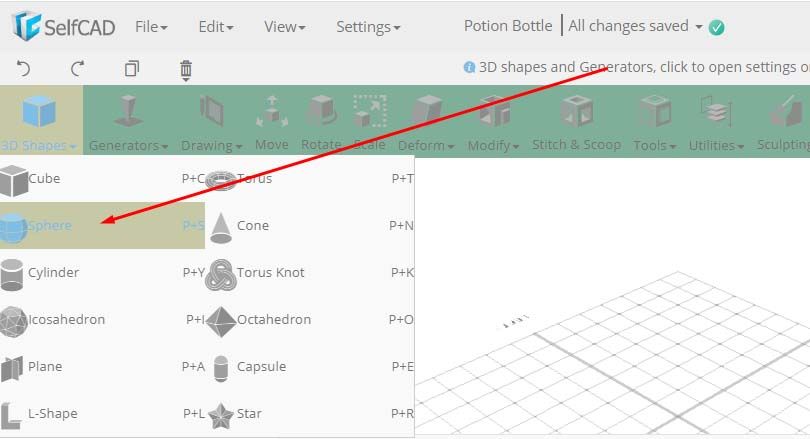
We are going to start with a 3D primitive model and modify it to create the plastic bottle. The primitive shape that we are going to use is the sphere. From the 3D Shape category of the toolbar, choose Sphere. You can also use the keyboard shortcut (P + S). Once you have done that, retain the settings as they are and click the check-mark icon to finalize.
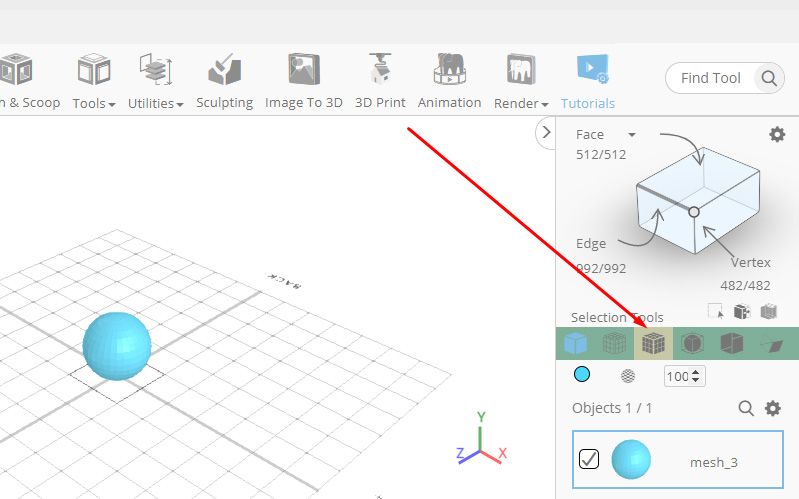
Next, change the rendering setting from Solid to Solid + Wireframe (or use the keyboard shortcut: V + C). These settings are found just below the Selection Tools heading, as illustrated below.
Step 2: Activate the Selection Tool
Activate the Face Selection option found in the top-right corner, or use the shortcut Ctrl/Cmd + 1. Click the top section of your sphere to select it; you can use the marquee selection (R + M, or right mouse button in the offline editor). Once selected, click Delete (trash can icon). You will get a prompt to check you are sure you want to delete the selection; select Yes.
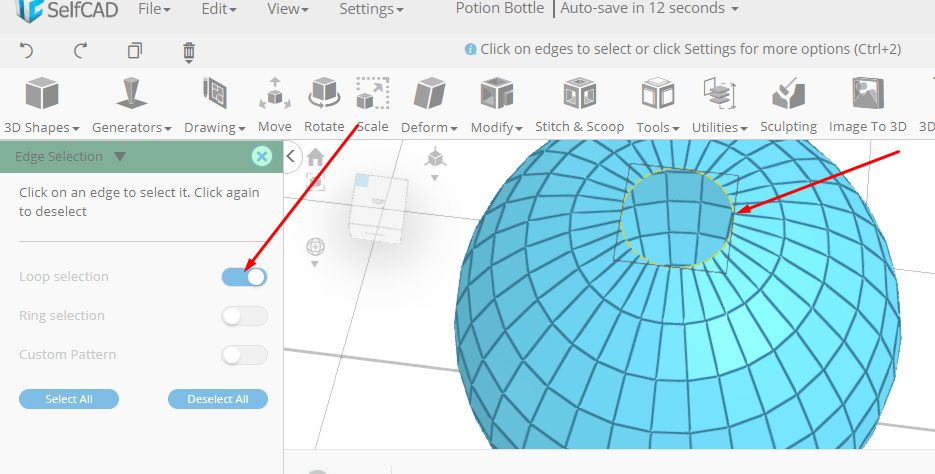
Activate Edge Selection (Ctrl/Cmd + 2)and click the cog icon for Advanced Settings. Set Loop selection to true, then select the top circular edge as shown below (you may need to click on a couple of edges there).
Once you have done that, close the settings panel by clicking on the X icon.
Step 3: Activate the Extrusion Tool
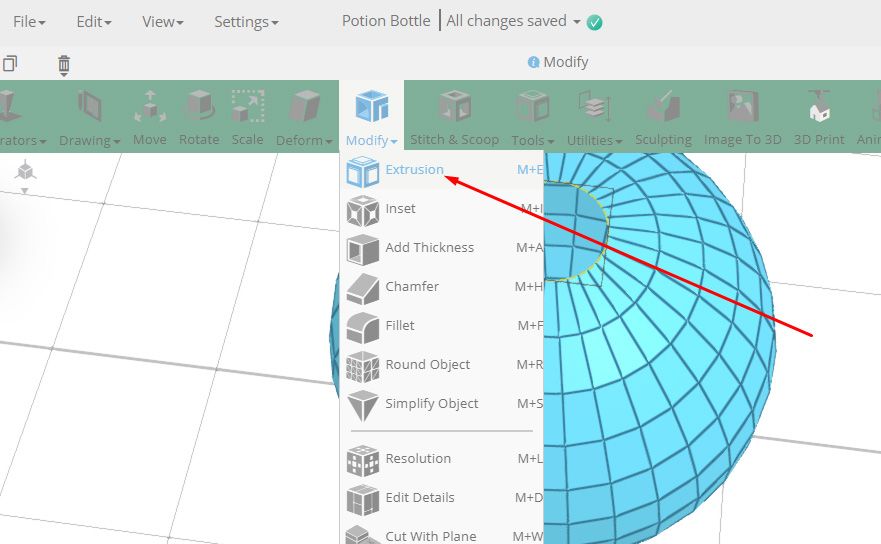
Activate the Extrusion tool from the Modify menu on the toolbar (or use the shortcut M + E), as shown below.
Once the extrusion is activated, set the Amount to 70 and click the check-mark icon to finalize.
Step 4: Activate Add Thickness Tools
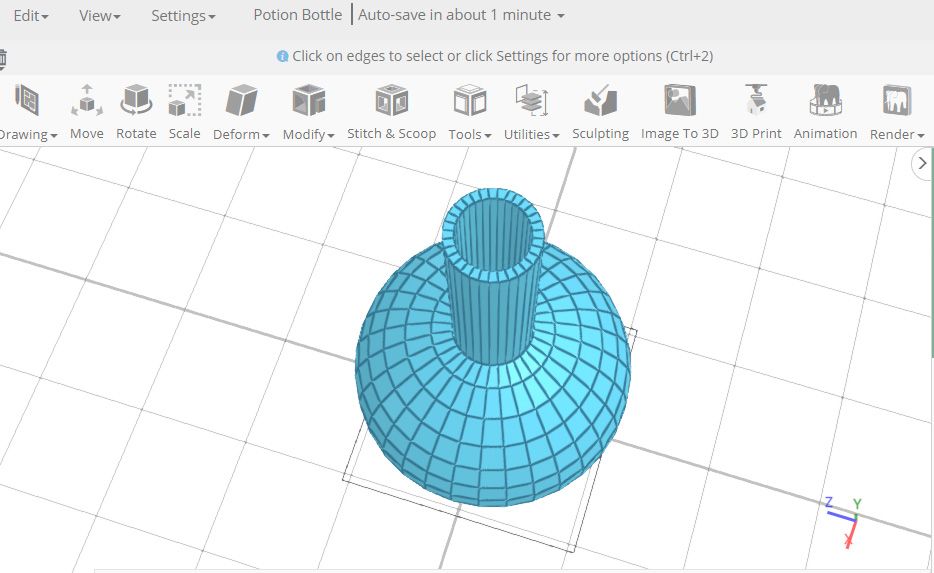
With the extrusion still selected, select Add Thickness from the Modify menu, or use the shortcut M + A. Set the Thickness to 3, then finalize it, and your model should resemble the one shown in the image below.
Activate Face Selection again, click the cog icon, and set the Loop selection option to true. Now select two polygons in the top section and the whole top ring will be selected. Once it is, click the Copy icon (or press CTRL + C) to copy the selected section.
Step 5: Activate Fill Polygons Tool
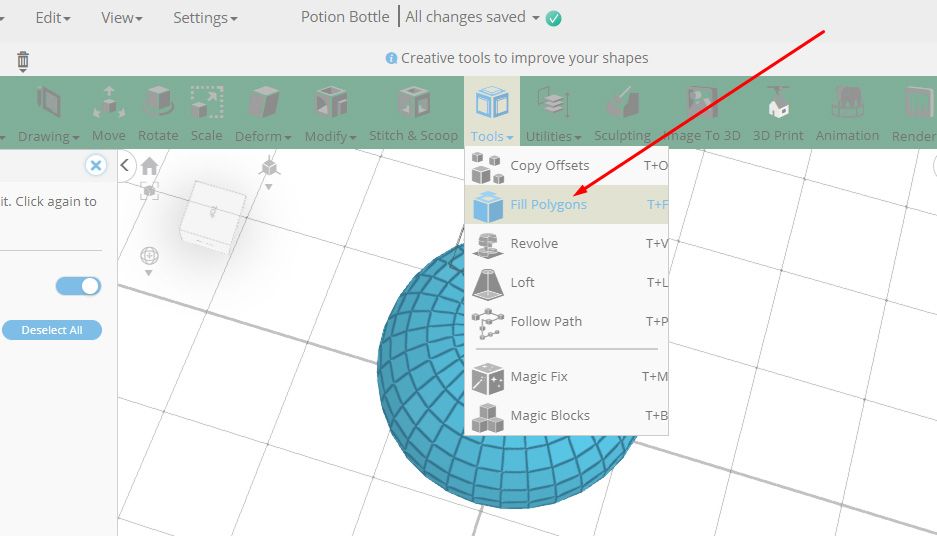
From the Tools category on the toolbar, select Fill Polygons (or use the shortcut T + F), then finalize the design.
Step 6: Use Geom Clean and Add Extrusion
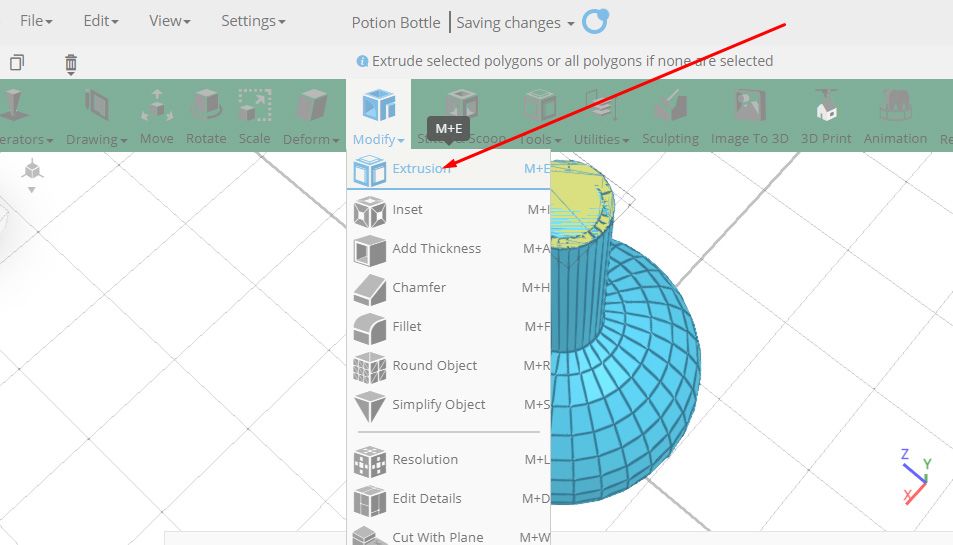
From the Utilities menu on the toolbar, choose Geom Clean (or use the shortcut U + C). Once selected, finalize. Then select Polygon selection from the top right (Ctrl/Cmd + 4). You can now click on the top of the bottle to select it. Go to Modify > Extrusion (or use the shortcut M + E). Then set the Amount to 30 and finalize.
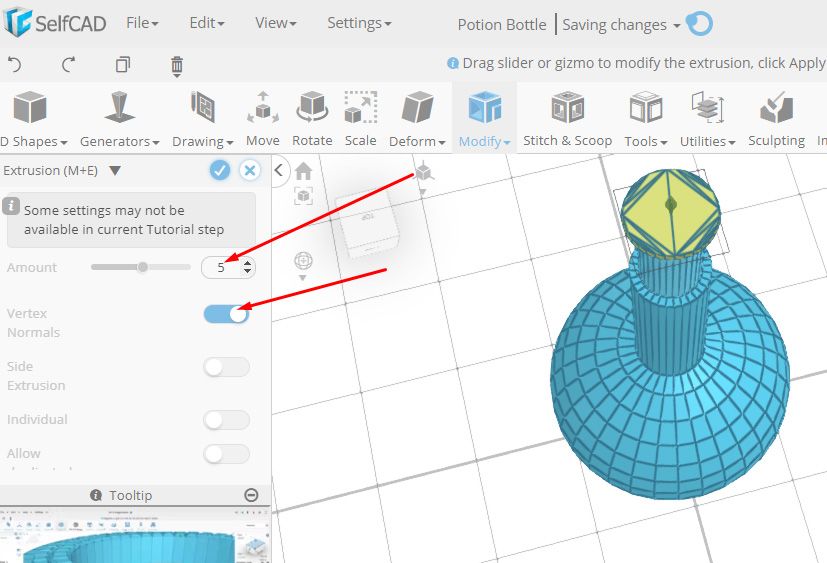
Go to Modify > Extrusion again, set Vertex Normals to true, and Amount to 5, then finalize.
Step 7: Add Thickness Again
Click on the grid to deselect the top region. Select Modify > Add Thickness again. Once the settings panel pops up, set the Thickness to 0.1, then finalize it. Click on the Move tool from the toolbar and set Y to 155.93, then click the X icon to close the panel.
Step 8: Modify the Meshes
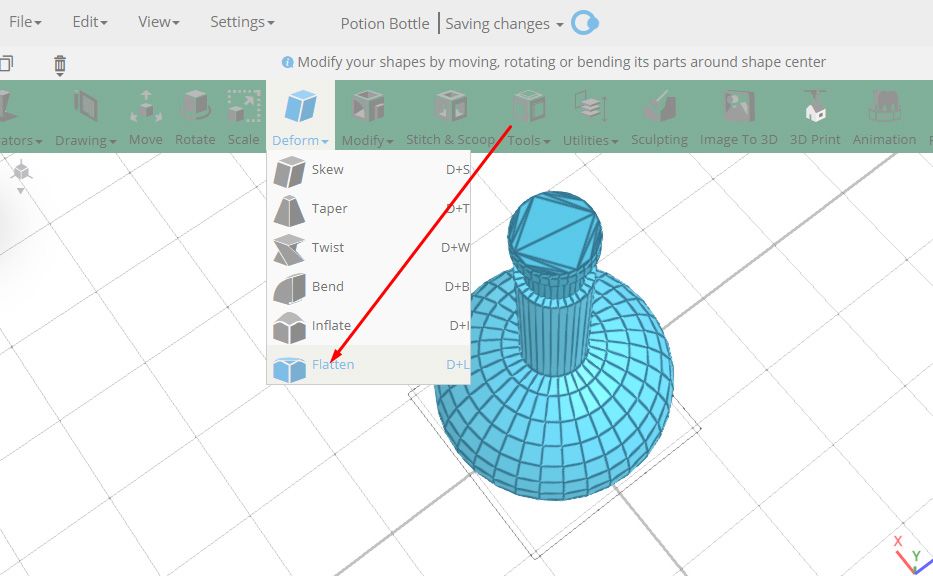
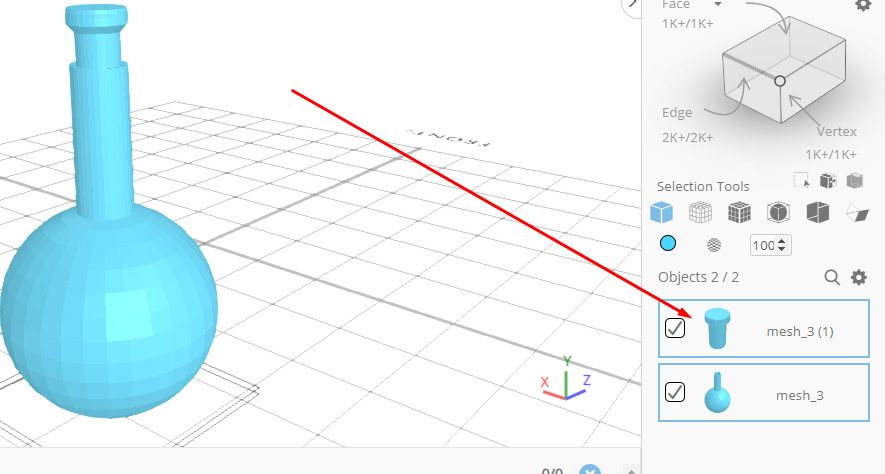
In the Objects panel (bottom right), click on the bottle to select it (ours is called mesh_3). Deselect the bottle lid (named mesh_3(1) in our case). From the Deform menu on the toolbar, select the Flatten tool (or use the shortcut D + L).
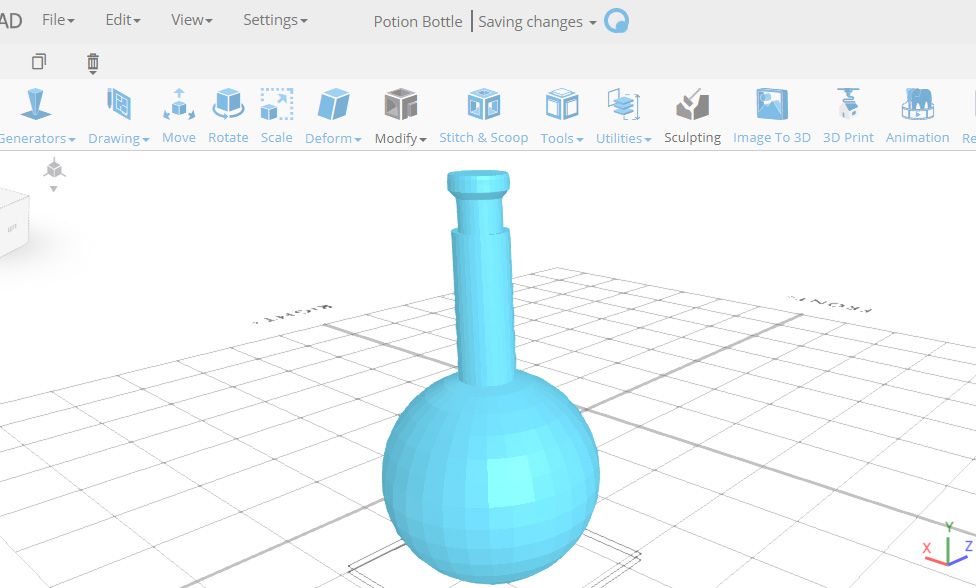
Once the settings panel pops up, set Y to 168.03, then close the panel, and you should have the design shown below (in Solid view mode).
In our example, the lid of the bottle is the one that is indicated by mesh_3(1) in the Objects panel, but yours may be named differently.
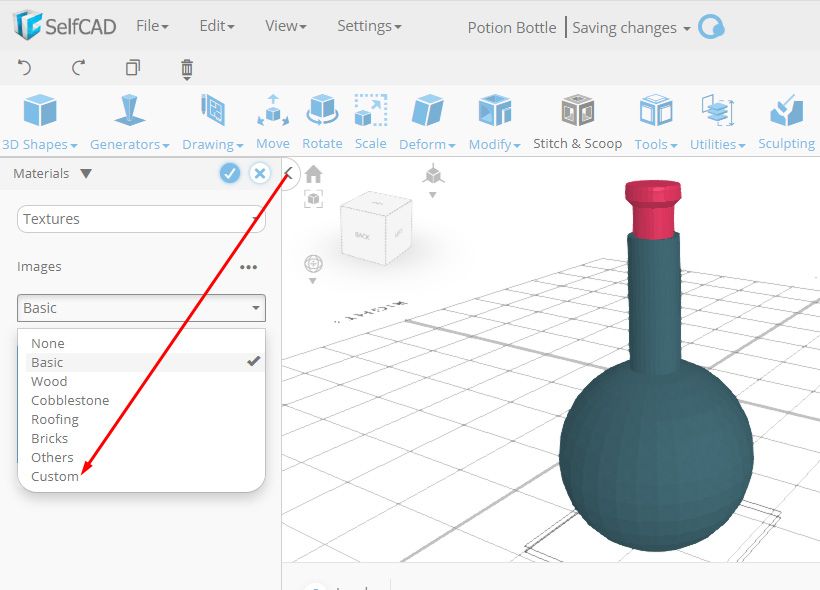
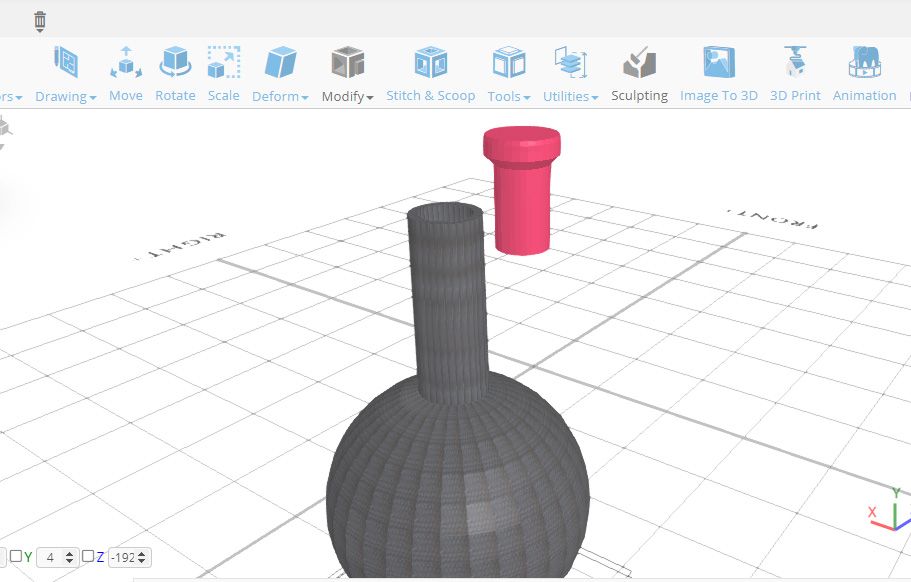
You can change the color and the material based on your preferences. For example, in the image below, the color of the lid has been changed to red. To add the textures, you can open the Materials panel (by clicking its icon in the middle-right panel) and then choose Custom to use your own textures. Or you can use those already available in the software.
Once added, finalize the design, and you will have added textures to your 3D model as shown in the design below.
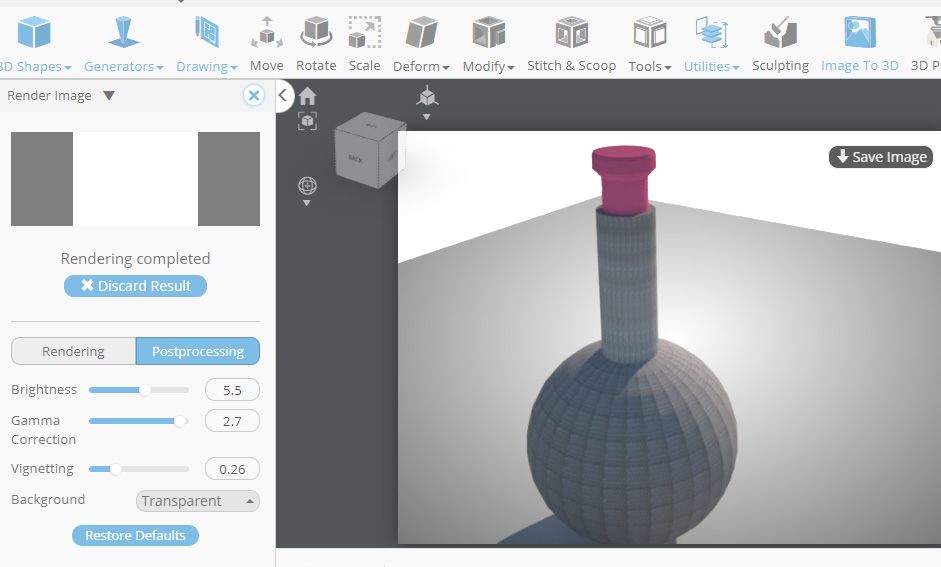
Once you are done with the 3D modeling stage, you can generate a realistic render of your design by selecting the Rendering tool on the toolbar. This will prompt you to download the Renderer app which you can use to create a realistic image of your design. Once you download and install it, you will be able to see your design being rendered as shown in the image below.
You can also adjust the brightness, gamma correction, vignetting, and even the background for your final render. Once you are comfortable with all the settings, you can then save your image.
Preparing Your Design for 3D Printing
If you would like to 3D print your design (see how to 3D print for beginners), you will need to first slice the model using a 3D slicer. You can find SelfCAD's FDM slicer on the toolbar, labeled 3D Print. Once you click it, it will redirect you to a page where you can choose your specific 3D printer before you start the slicing process.
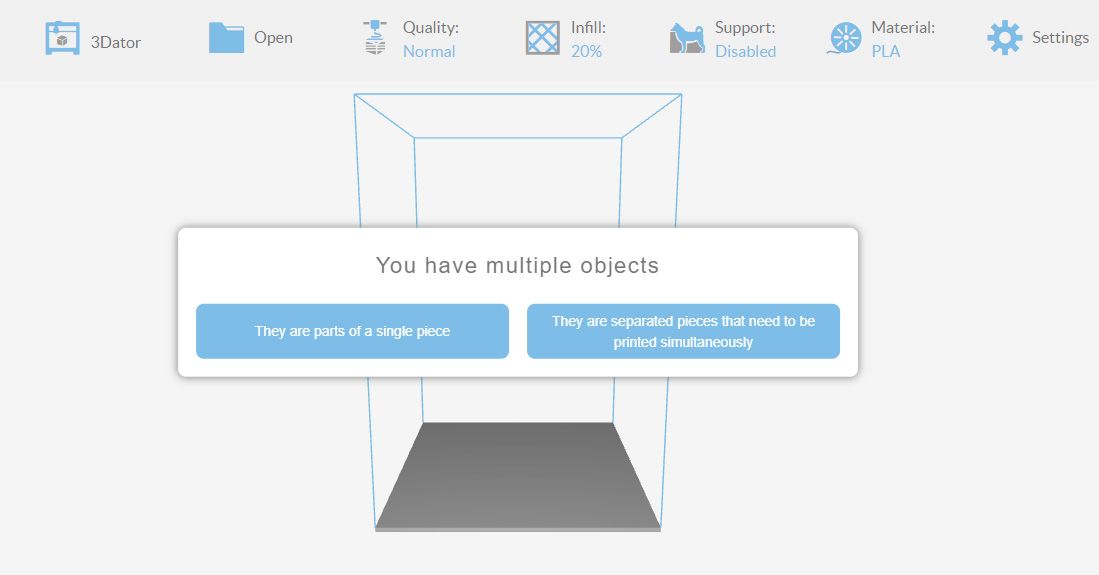
You will then see settings on the toolbar as well as an option to choose if the two parts (bottle and the lid) form a single piece or if they are separated pieces that need to be printed simultaneously.
Choose the second option and then specify your settings, such as the quality, infill, and 3D printing material (see our guide on how to choose the right filament for your 3D printer) to be used, then click Slice. Once you are done slicing your model, you can preview it to see how your 3D printer will print the model.
You are also able to see the amount of time it will take to print, as well as the size of the material that will be required in the process. If everything is okay, click on Save G Code; you will then be able to send this to your 3D printer.
Also, you can save your 3D model as an STL file (see our guide on what an STL file is and what it's used for) during the 3D design process and slice it with the slicer that is compatible with your 3D printer, and then 3D print it.
Customizing the Design to Suit Your Needs
You can create a simple plastic bottle model by following the simple steps above. You can even go ahead and customize it based on your needs by adjusting the colors, textures, and even the material of your design by selecting the Colors and Materials options found on the middle-right of the workspace.

