
An inventory database is essential for any product-based business to flourish. It provides easy access to valuable data and helps make key business decisions, such as ordering new inventory.
While you can find several intricate and detailed inventory management software on the internet, it’s also possible to create a simple inventory system in Excel. Not only is it possible, but it’s also quite easy.
Creating a Simple Inventory Database in Excel
To understand the process of creating an inventory system in Excel, let’s create an inventory database for a mobile phone shop by following the steps below:
- Create the following headers in the top row of a new Excel worksheet: SKU, Model Name, Company, Unit Price, and the Number of Available Units (You can create more headers according to your requirements).
- Use bold fonts for the headers.
- To make the headers prominent, add background color to the header cells.
- Select all the headers and go to the Font section in the Home tab.
- Click the arrow next to the Fill Color option and select your desired color.

Once the headers are ready, it’s time to fill in the information. By now, you should have something like this:

You can add borders to make your Excel database visually pleasing, and easier to read, by following the steps below:
- Select all the cells in your inventory database.
- Go to the Font section in the Home tab.
-
Click the arrow next to the Borders icon.
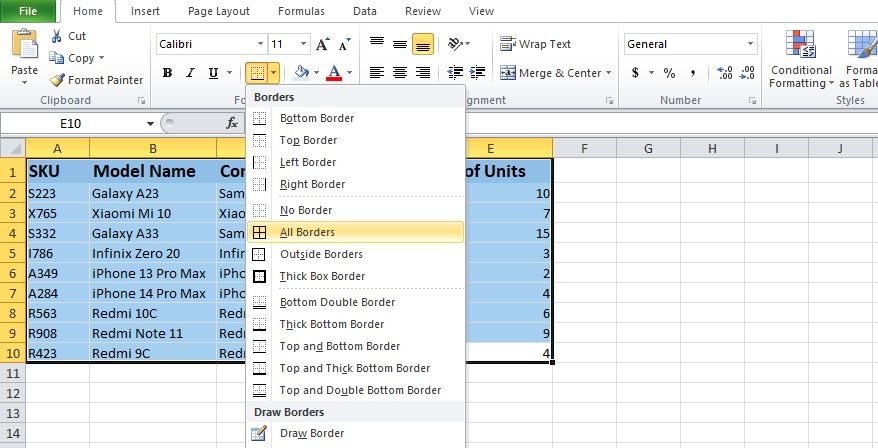
- Select the kind of borders you want for your inventory database cells.

To add the filter option to your database:
- Select any cell in your database.
- Go to the Editing section at the far right of the Home tab.
-
Click the arrow next to the Sort & Filter icon.
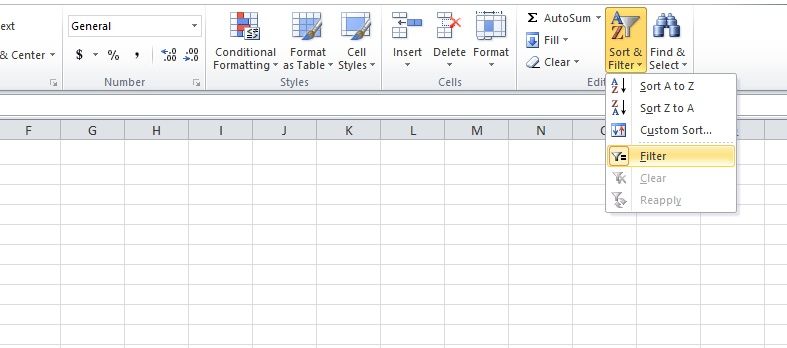
- Click on Filter.

Congratulations, you’ve just created an inventory database for a mobile shop.

You can easily update the database by adding new data or by modifying existing data. Also, you can filter out desired information from the newly created inventory database.
For example, if you want to filter your inventory database entries for a particular company:
-
Click the arrow next to the Company header.
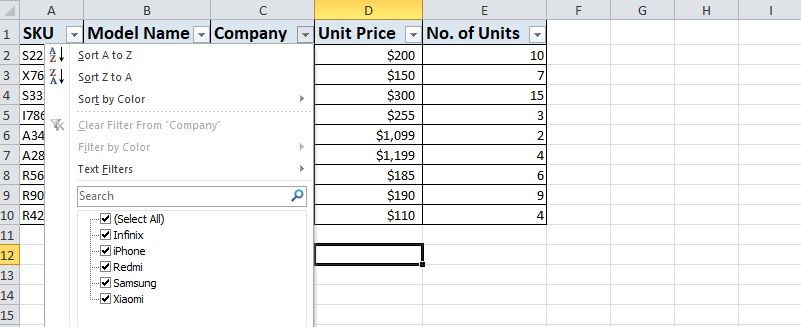
- Select the desired company/companies.
- The database will only show entries (mobile phones) for only those companies.

Using the VLOOKUP Function in Excel Inventory System
Suppose you want to search for the price of a particular item in your database. Instead of searching for it in the database, you can use the VLOOKUP function in Excel. The formula for VLOOKUP is as follows:
=VLOOKUP(lookup_value,table_array,col_index_num,[range_lookup])
Where:
- LOOKUP_VALUE is the value that you want to look for in the first column of the assigned table array.
- TABLE_ARRAY is the assigned cell range in which you want to apply the VLOOKUP function.
- COL_INDEX_NUMBER is the column number that contains the return value.
- RANGE_LOOKUP (optional) is either TRUE or FALSE. Specify FALSE if you want Excel to return an exact match or TRUE if you want it to return an approximate match. If you don’t specify any value, Excel (by default) will set a TRUE value and return approximate matches.
When you apply the VLOOKUP function, Excel locates the LOOKUP_VALUE in the first column of the assigned cell range. That is why, for the VLOOKUP function to work, it’s important that your LOOKUP_VALUE is in the first column of the TABLE_ARRAY (assigned cell range.)
After finding the LOOKUP_VALUE, Excel counts the number of cells based on the specified COL_INDEX_NUMBER and returns a result. The return value will either be exact or approximate, depending upon whether you specified a FALSE or TRUE value to RANGE_LOOKUP.
Now that you’ve got a fair understanding of the VLOOKUP function, let’s use it to extract data from our mobile phone inventory database. To search for a price of a particular mobile phone from your database, follow the steps below:
- Create the following two headers in new cells: SKU and Price.
-
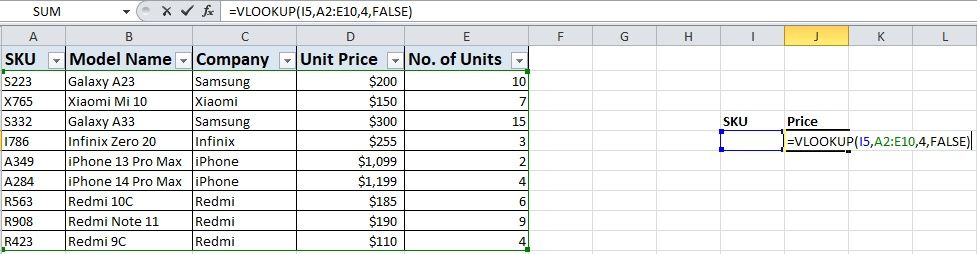
Type the following formula under the Price header:
=VLOOKUP(
- To provide a LOOKUP_VALUE, select the cell under the SKU header (I5 in our case), then add a comma.
- For the TABLE_ARRAY select all the cells in the database, under the headers (A2:E10 in our case), followed by a comma.
- We want to find the price of our desired SKU, so we’ll set the COL_INDEX_NUMBER to 4 (because the Unit Price header is the 4th column in our database), and follow it with a comma.
-
Lastly, specify the RANGE_LOOKUP as FALSE, since we want Excel to return exact values.
- Press Enter.

Excel will return a #N/A error, but don’t worry. That’s just because we haven’t added our desired SKU (LOOKUP_VALUE) under the SKU header.
To find out the price of a particular SKU (from our assigned range i.e. our database), type it under the SKU header and Excel will return the exact price of the item. You can do this for any item within the database.
To find out further information about the item, you repeat the same process. Let’s say you also want to find out the number of available units of an item. To do that, create another header next to the Price header and name it No. of Units. Under this new header, type in the following formula:
=VLOOKUP(I5,A2:E10,5,FALSE)

Notice that, while the rest of the formula is the same, our COL_INDEX_NUMBER has changed from 4 (in the previous formula) to 5. That’s because the No. of Units header is in the 5th column of our database.
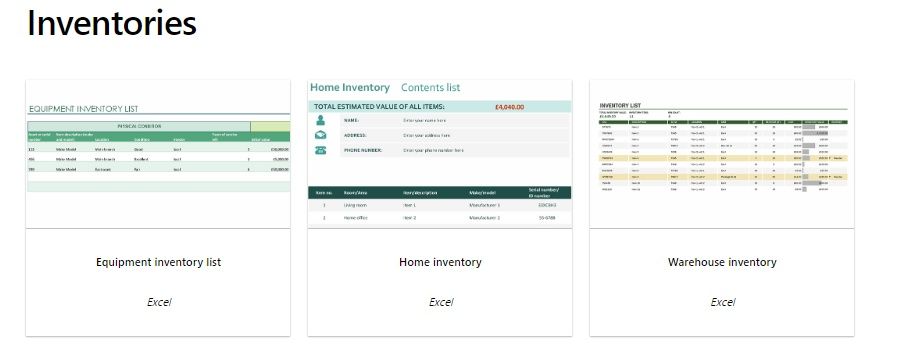
How to Create an Inventory System Using Excel Templates
If you don’t want to go through the hassle of manually creating an inventory system in Excel, you can choose the easier route of using an Excel inventory template.
-
Go to the Office website to find ready-to-use Excel inventory templates.
- Choose the template you’d like to use and download it.
- Once the download completes, double-click it to open the template file.
- Click Enable Editing at the top to start making adjustments according to your requirements.


Now, you can add or remove headers according to your needs and start using the template to manage your inventory by adding items and updating relevant information.
Take Your Excel Inventory System to the Next Level
Now that you've got the basics down, it's time to take your Excel inventory system to the next level. You can easily do that by learning about different Excel formulas and applying them to your Excel inventory database. This will help you get creative with your Excel inventory database, and you'll be able to use it more effectively.