Instagram carousels are an excellent way to grab your audience’s attention, and they often perform better than single-image posts. In addition to sharing your images, you can also use content of this kind to make it easier for your audience to digest valuable information.
If you want to design Instagram carousels that consist largely of text, Adobe InDesign is an excellent tool for this. You’ll gain access to a wide selection of features, and you can customize your post using numerous fonts and more.
Understanding InDesign can, however, be a little tricky in the early stages. Keep reading if you want to learn how to make Instagram carousel posts with the program.
How to Get Adobe InDesign
To use Adobe InDesign, you must sign up for an Adobe Creative Cloud membership. InDesign costs $20.99 per month; in addition to gaining access to the app, you’ll get 100GB of Creative Cloud storage and access to other useful platforms like Behance.
If you’re going to use other Adobe apps, you should consider getting the Creative Cloud All Apps subscription instead. This costs $54.99 per month and includes all of Adobe’s other programs, including Lightroom and Photoshop—which you might also find useful to grow an Instagram page.
Unfortunately, you cannot buy Adobe InDesign with a one-time purchase.
How to Create Instagram Carousels With InDesign
Now that you know how to get Adobe InDesign, let’s look at how you can create Instagram carousels with the app. To make things easier for you to follow, we’ve divided the most important aspects into different sections.
1. Page Sizing
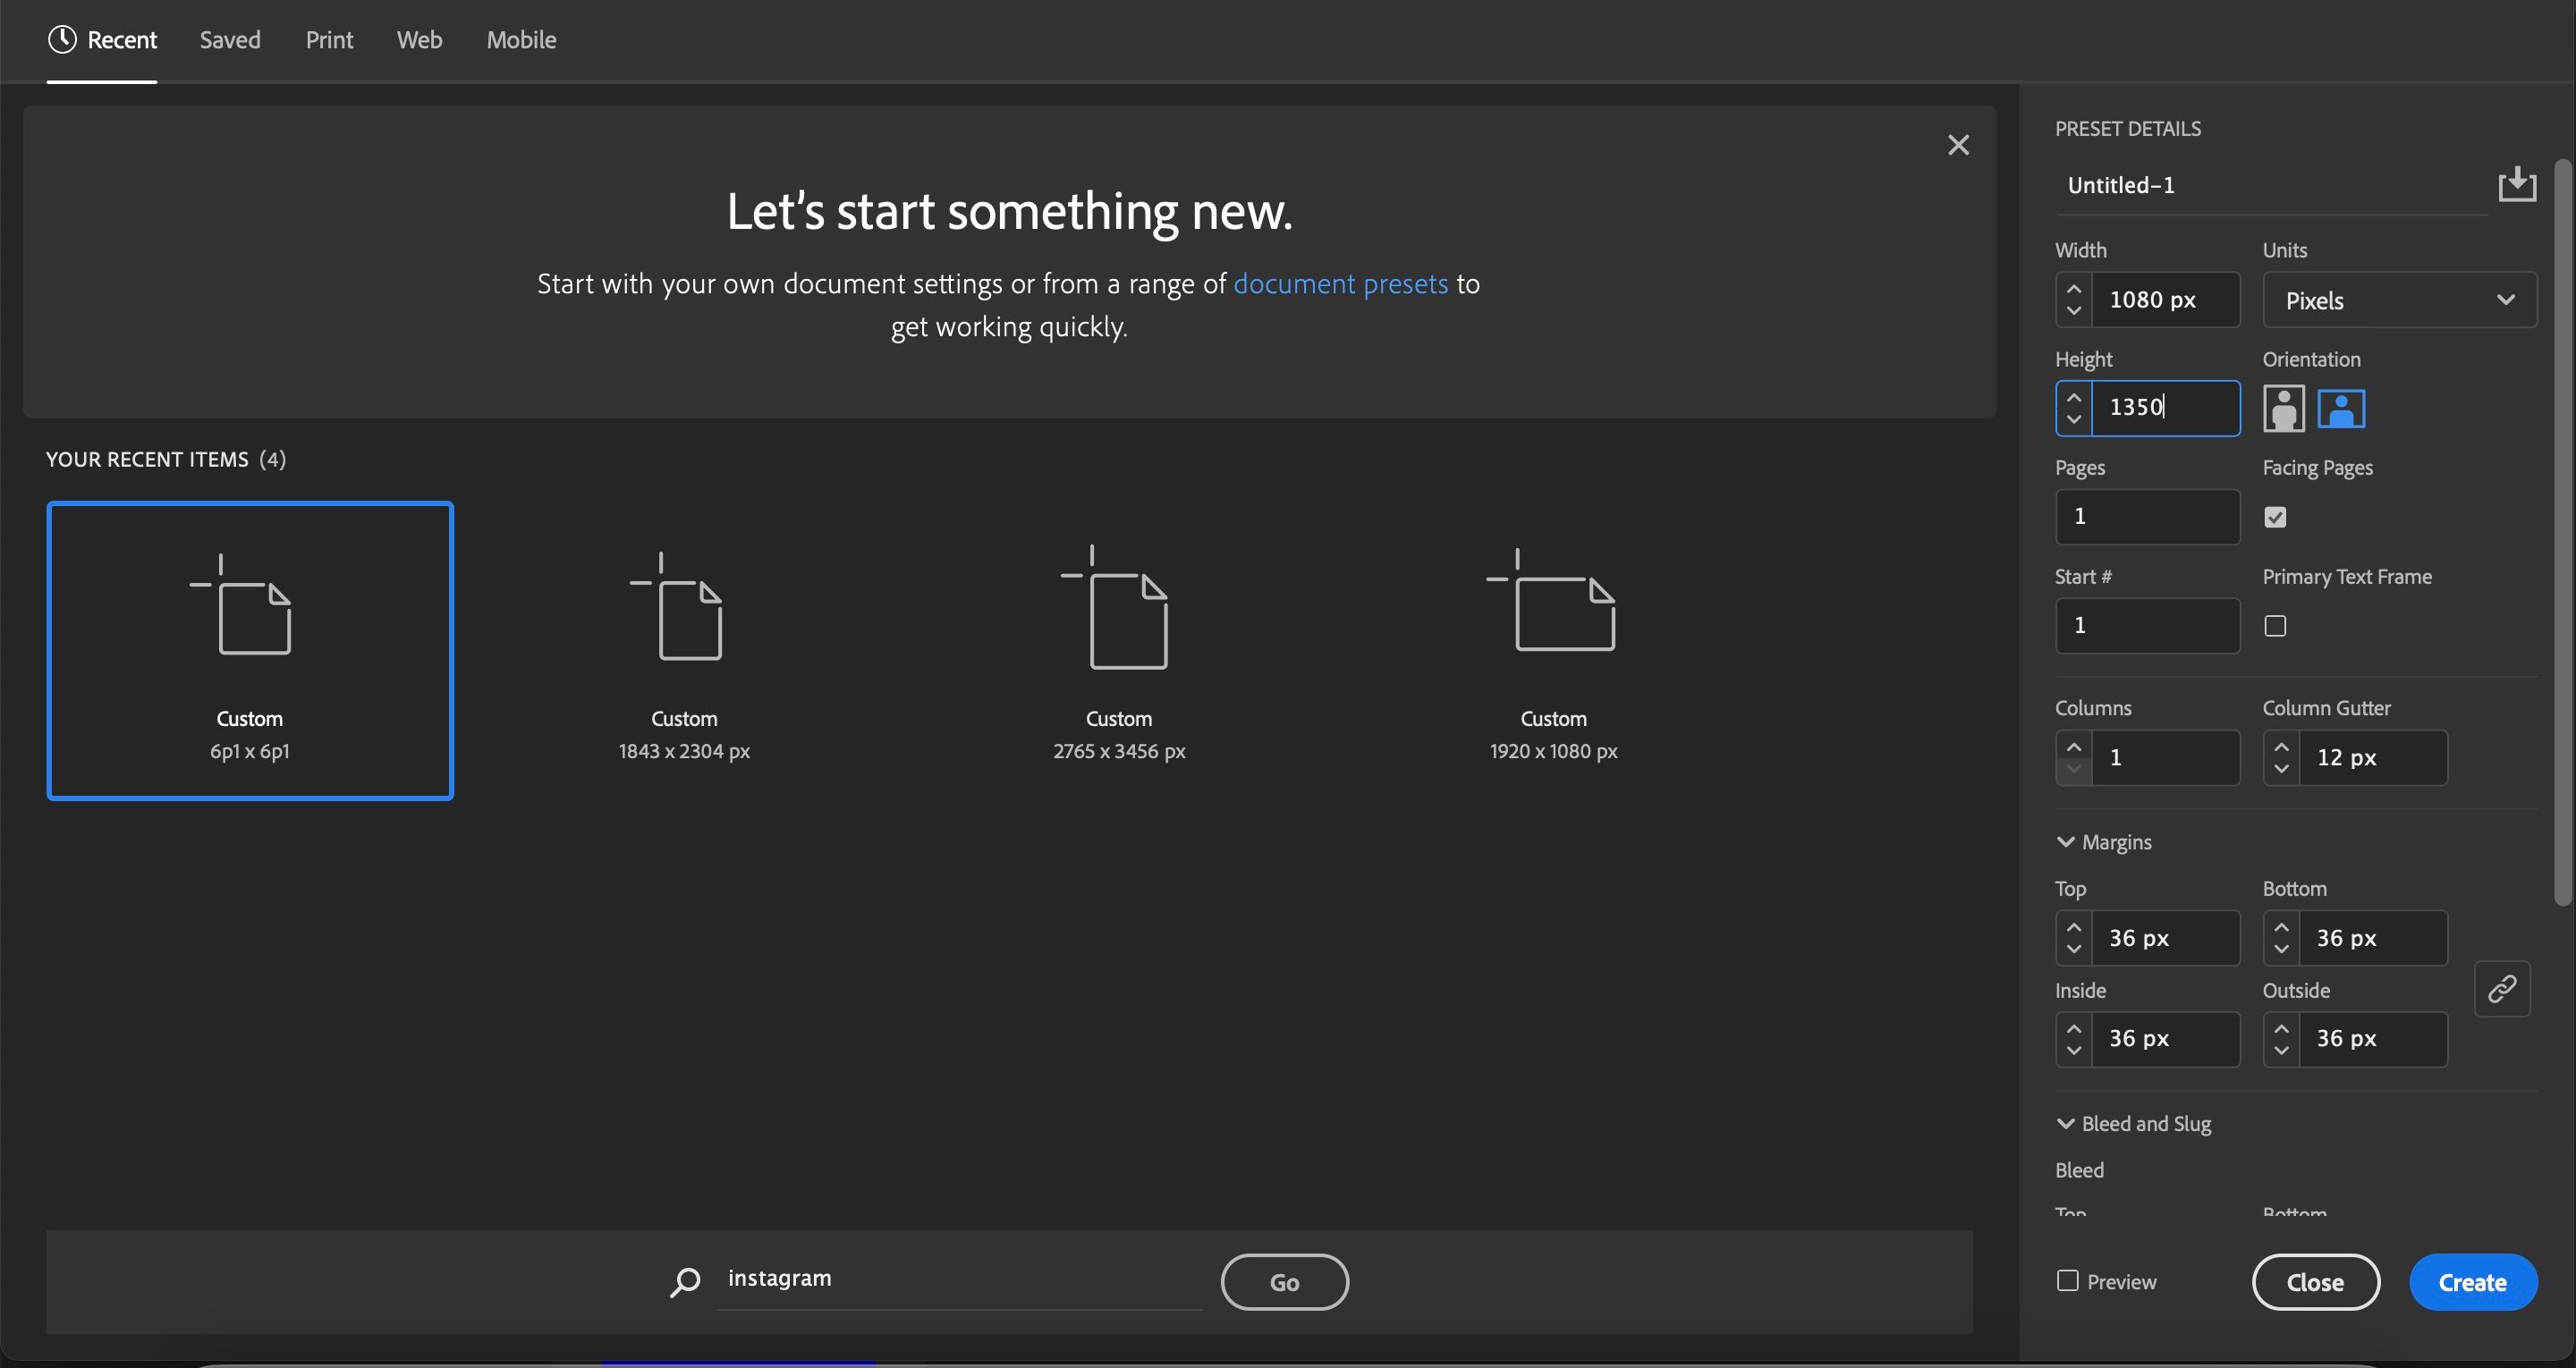
Before you start customizing your Instagram carousels, you’ll need to choose the right page sizing. For static posts, 4:5 is the best option as it’ll take up the most space on your screen. When using InDesign, make sure that you’ve chosen the portrait orientation.
4:5 as an aspect ratio is 1080 x 1350 in pixels. Choose pixels from the Unit dropdown menu when sizing your carousels, then enter the first number in the Width section and the second in the Height section.
2. Choose How Many Pages You’re Going to Use
Instagram carousels involve at least two single posts, and you’ll need to think about how many pages you need for your content. You can choose up to 10, and if you’ve got more to say later, you can always upload separate posts on Instagram in due course.
Before you create your carousel template in InDesign, make a rough estimate of how many pages you’ll need. In the New Document window, which is also where you’ll have entered the pixels for your post, you’ll see an option titled Pages.
In this section, enter the number of pages you’d like to include in your document. After you’ve done that, hit the blue Create button in the bottom right-hand corner.
3. Add Different Sections to Your Carousel Posts
Similar to creating Instagram carousels with Photoshop, you might want to add multiple elements to each page. Of course, you’ll need the main section of content—which could include text or graphics to support what you’re trying to say.
You might also want to add your logo or a picture of yourself to avoid someone else copying your work without crediting you. On top of that, you may wish to create two separate lists—which you’ll find particularly useful if you’re compiling a group of pros and cons for a topic of discussion.
When using InDesign, you’ll see a toolbar on the left-hand side of your screen. Here, you can add frames and rectangles—along with performing various other actions. Have a look and see which ones are the most useful for you.
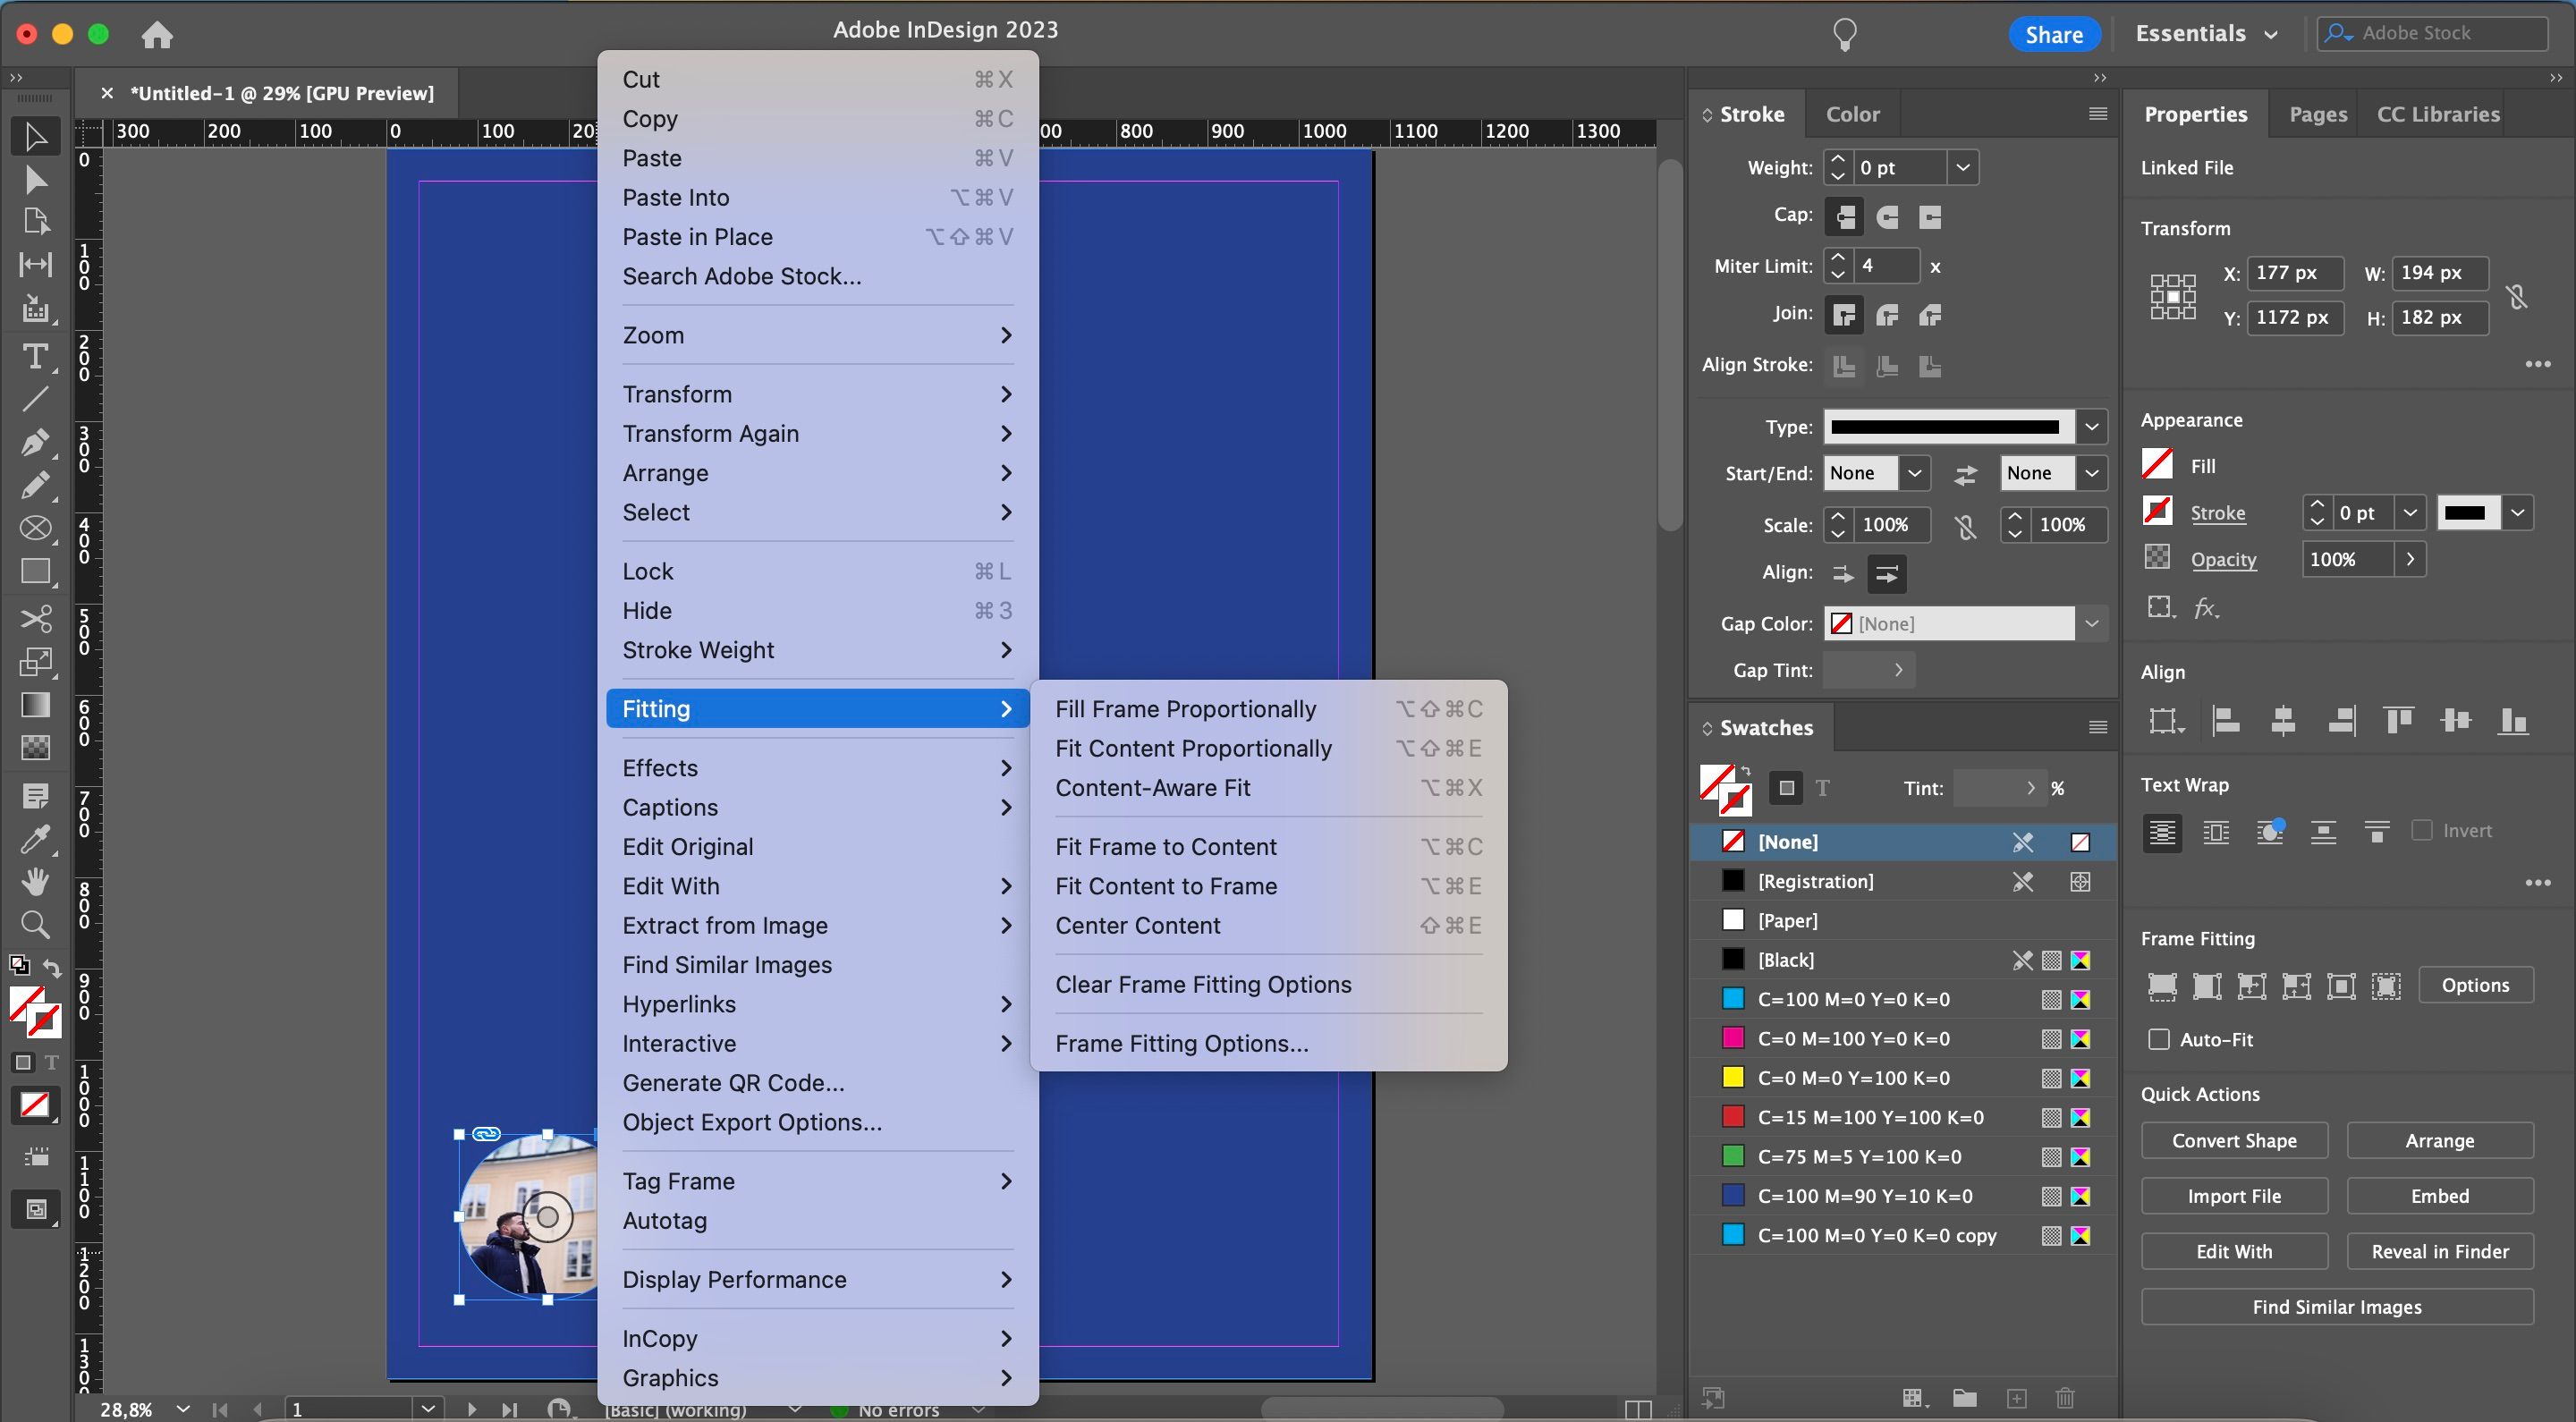
If the elements don’t fit your frame properly, right-click on it and choose Fitting > Fit Content to Frame.
3. Change the Background Color
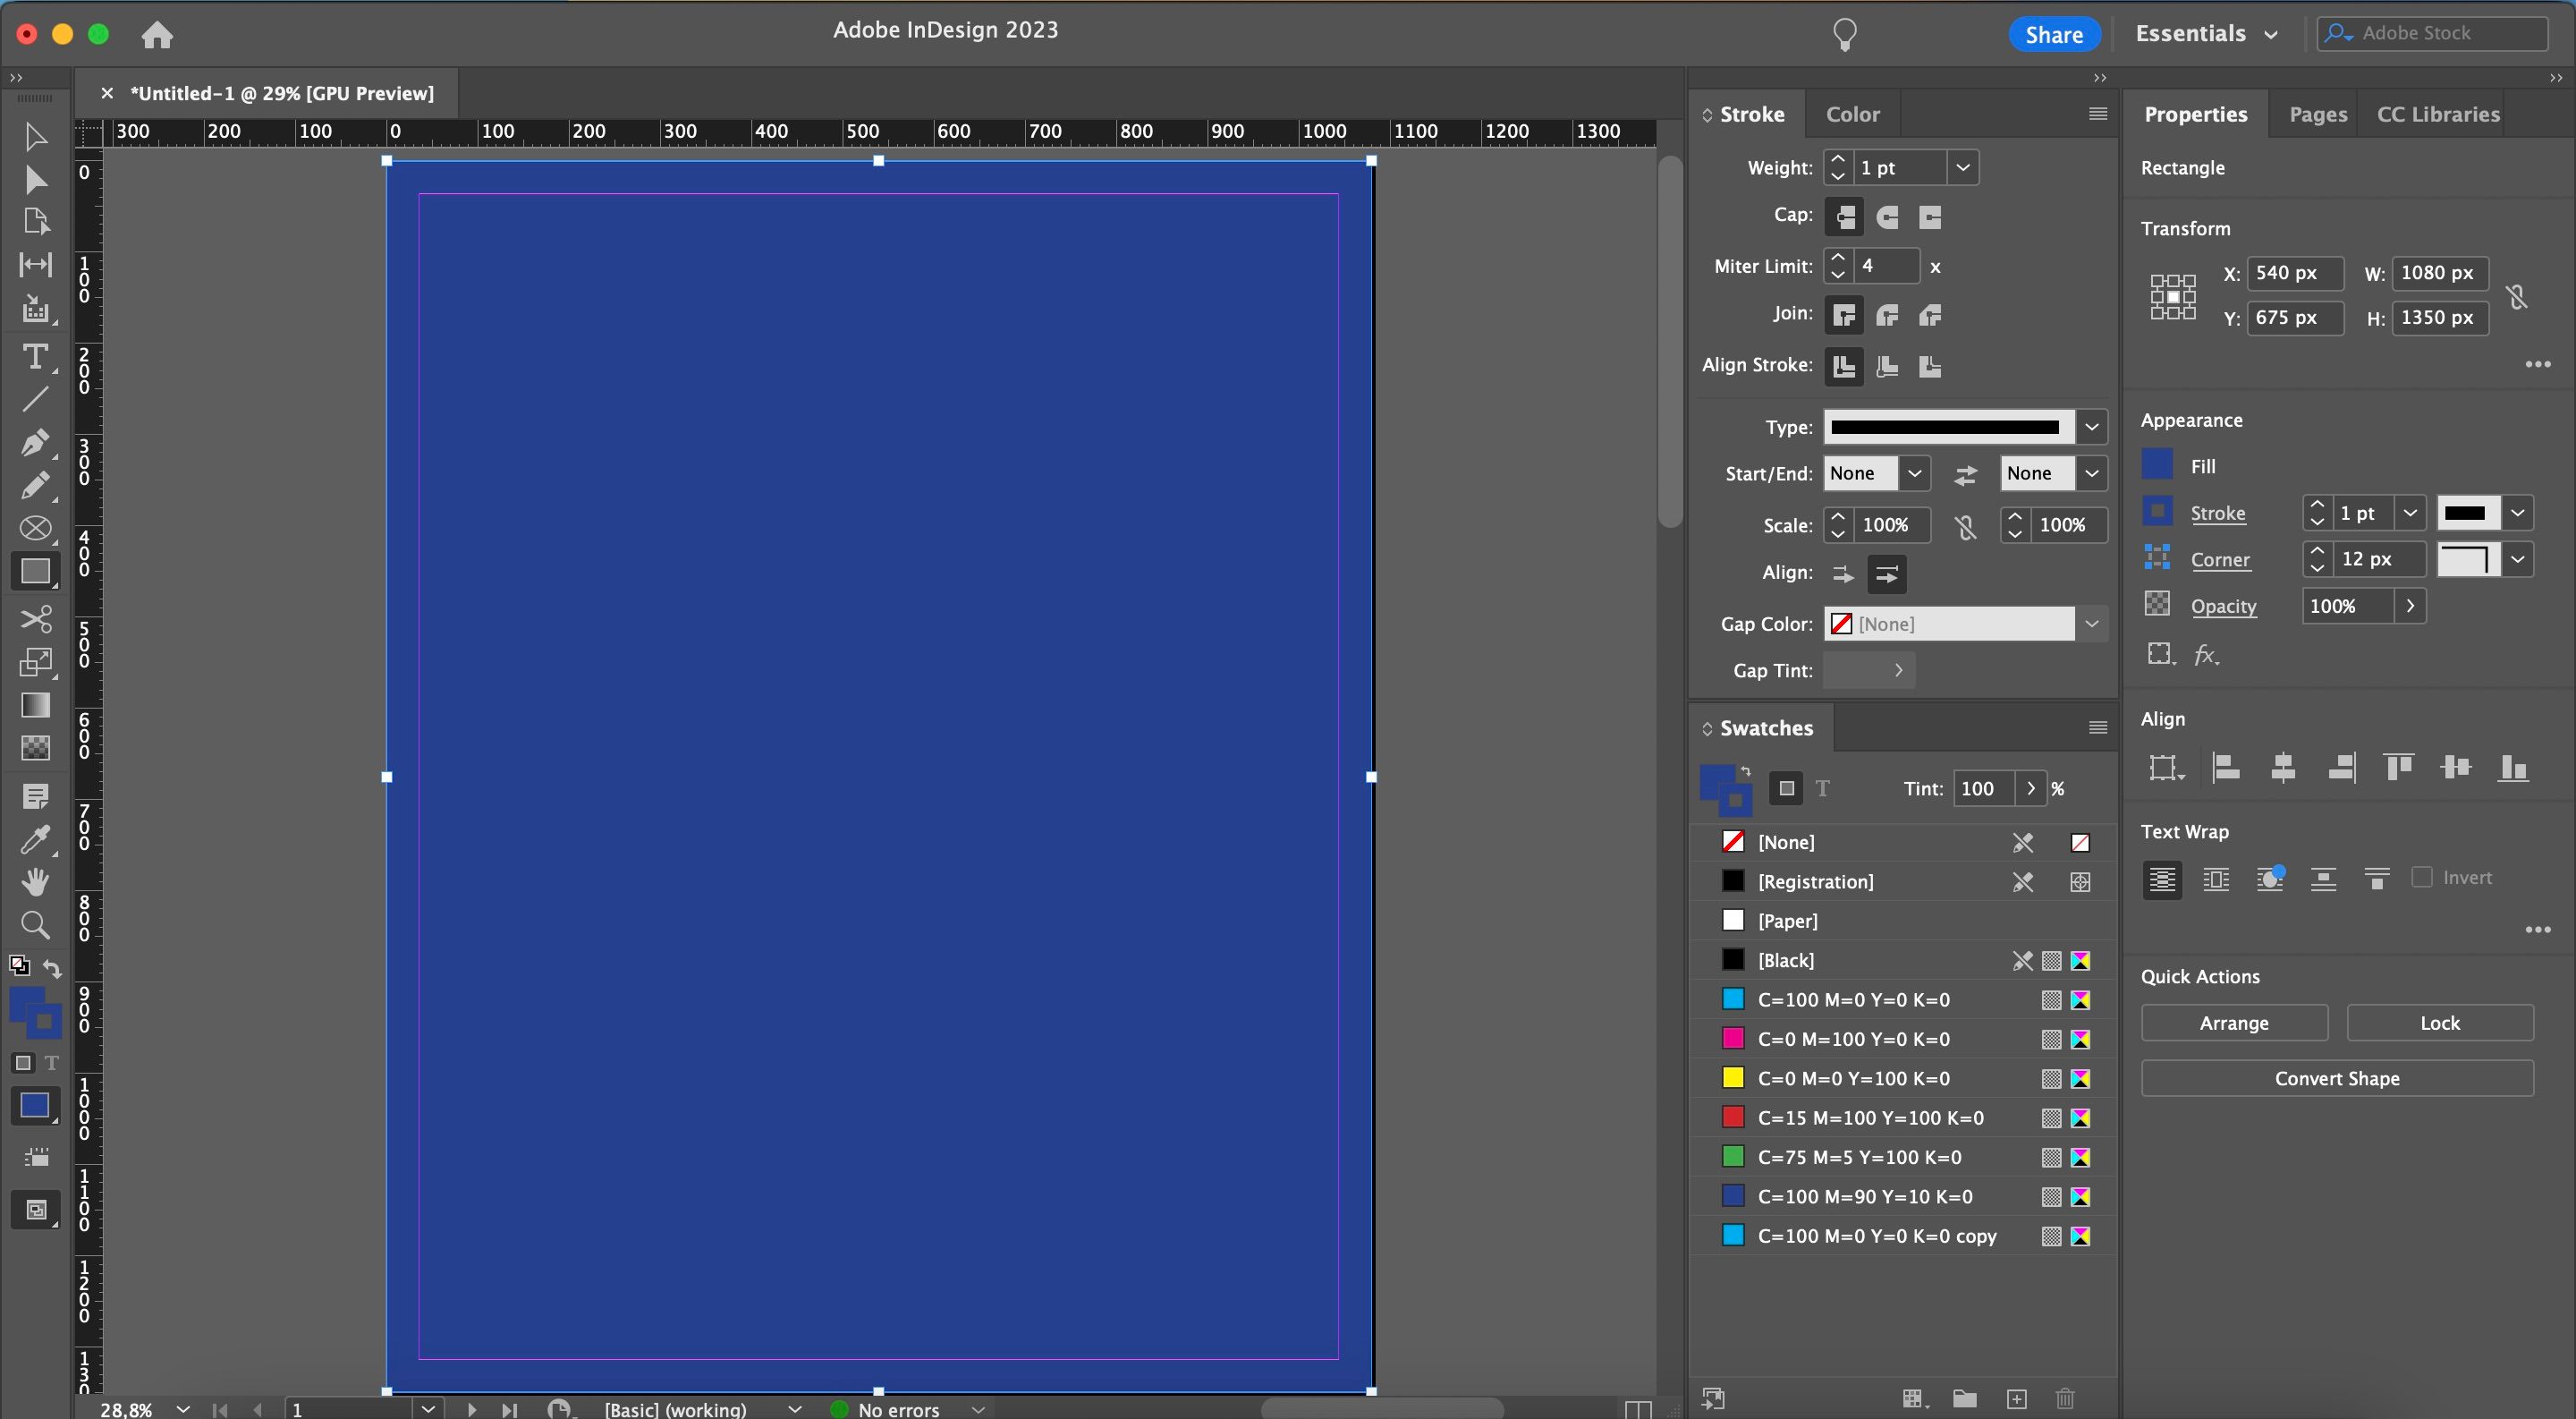
By default, InDesign will give you a white background to work with. However, you might want to change the color to fit your Instagram account’s branding. You can customize your InDesign carousel by adjusting which color you use, and the process is relatively straightforward.
First, go to the left-hand toolbar and select the rectangle icon. Then, expand it to cover the entire page.
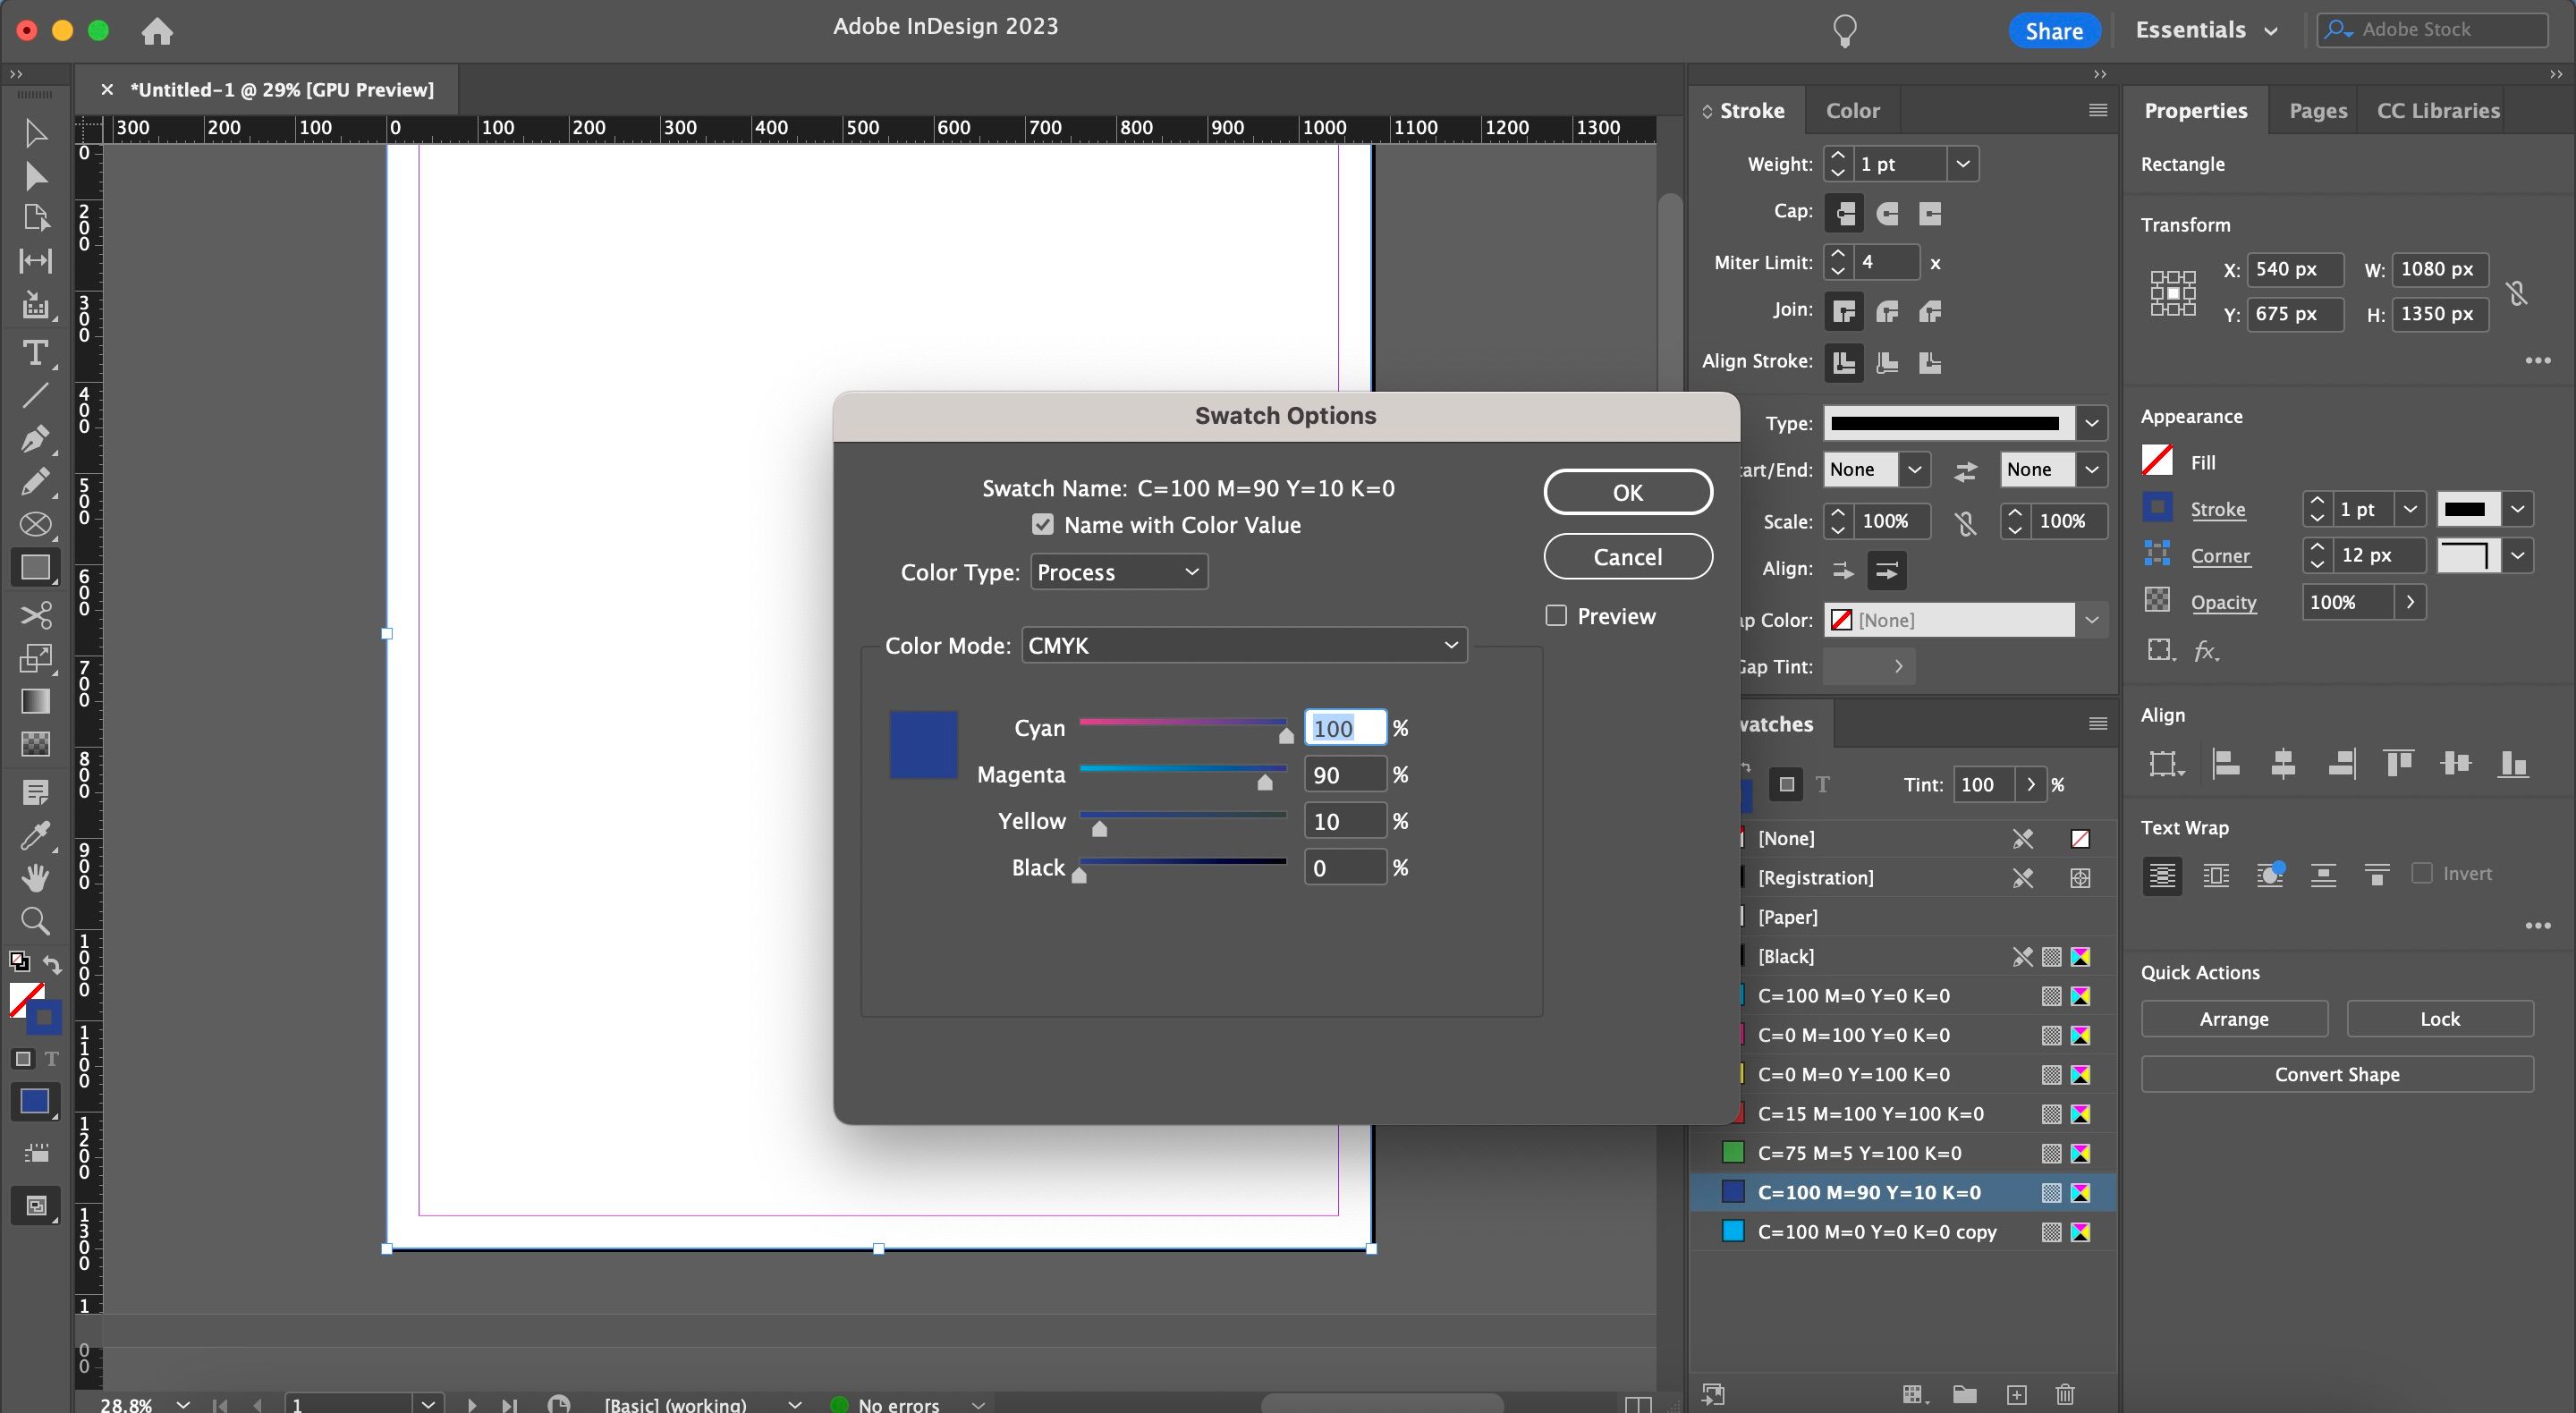
Go to Window > Color > Swatches to make your colors visible. You’ll notice a selection of predefined colors in InDesign, but you can also create your own. The easiest way to adjust a color is by clicking on one (you can hit the + button if you need more) and moving the sliders however you want.
Once you’ve completed the above steps, you’re ready to add color to the carousel. Go to the color you want to include before dragging and dropping it onto your pages.
4. Pick Your Fonts and Add Text
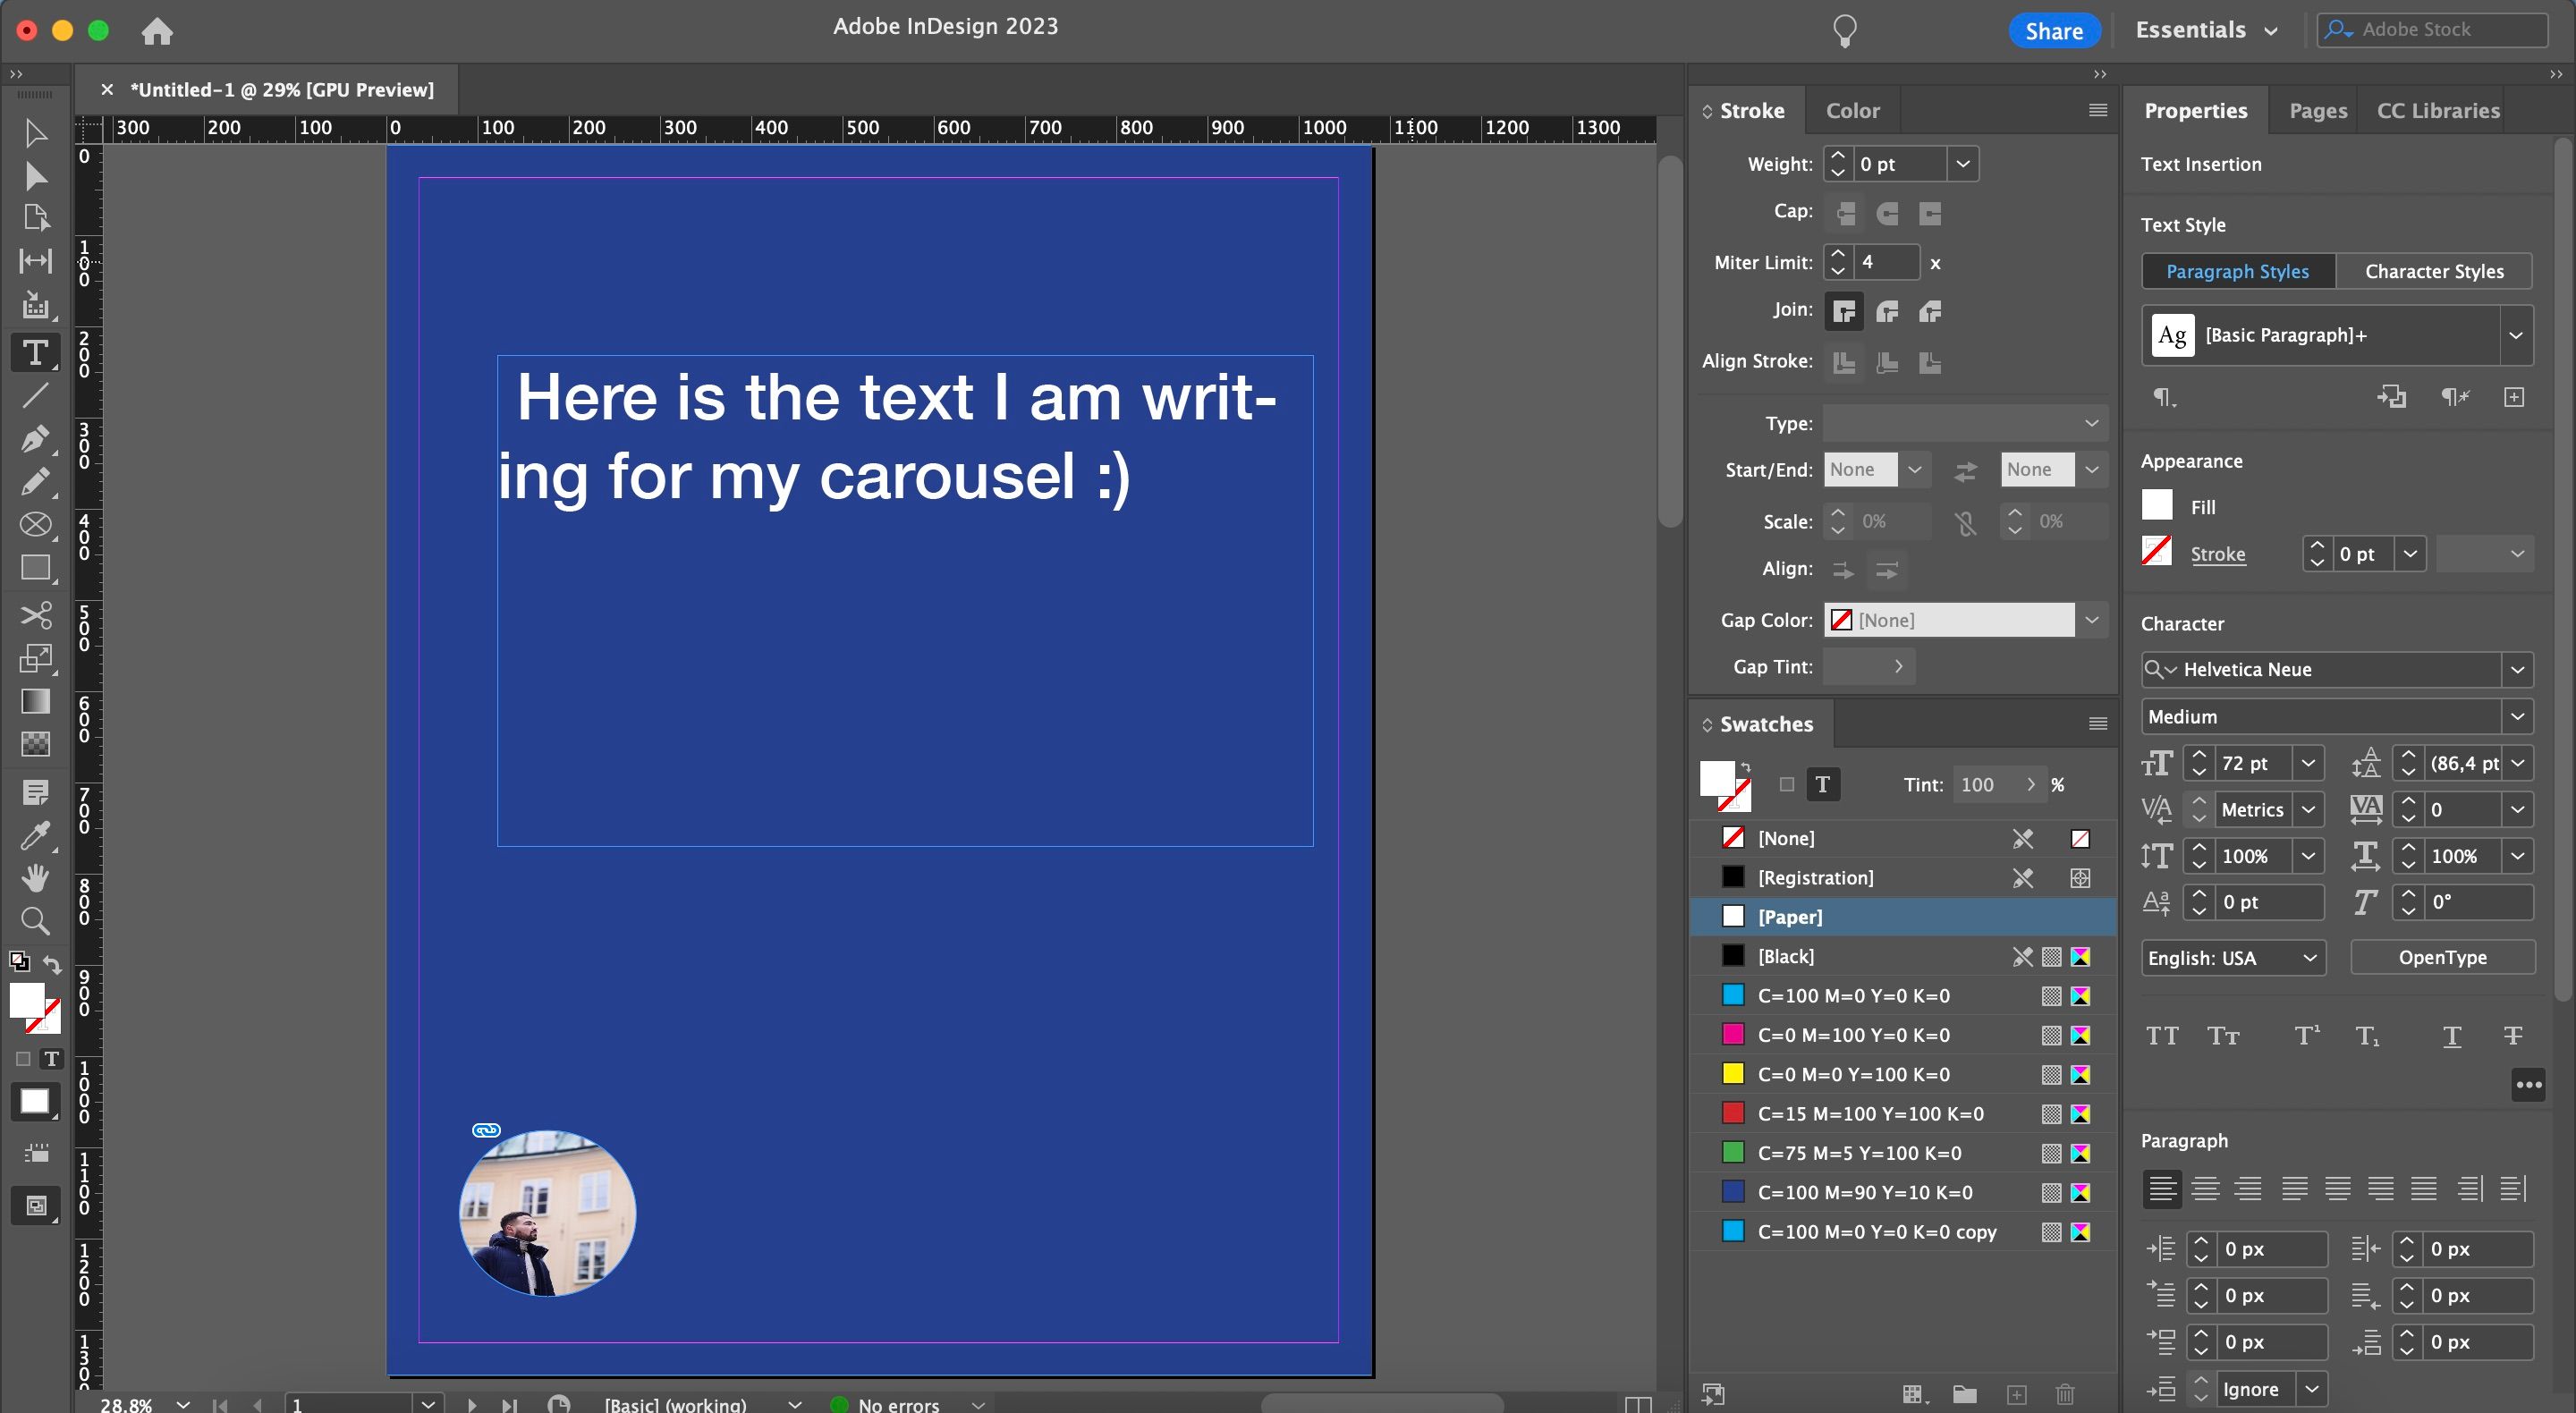
If you want to add text to your Instagram carousel, you can choose from several fonts to give your post more of a unique personality and feel. Before we show you how to do that, creating a text box is a good idea; you can do this by going to the text icon in the left-hand toolbar.
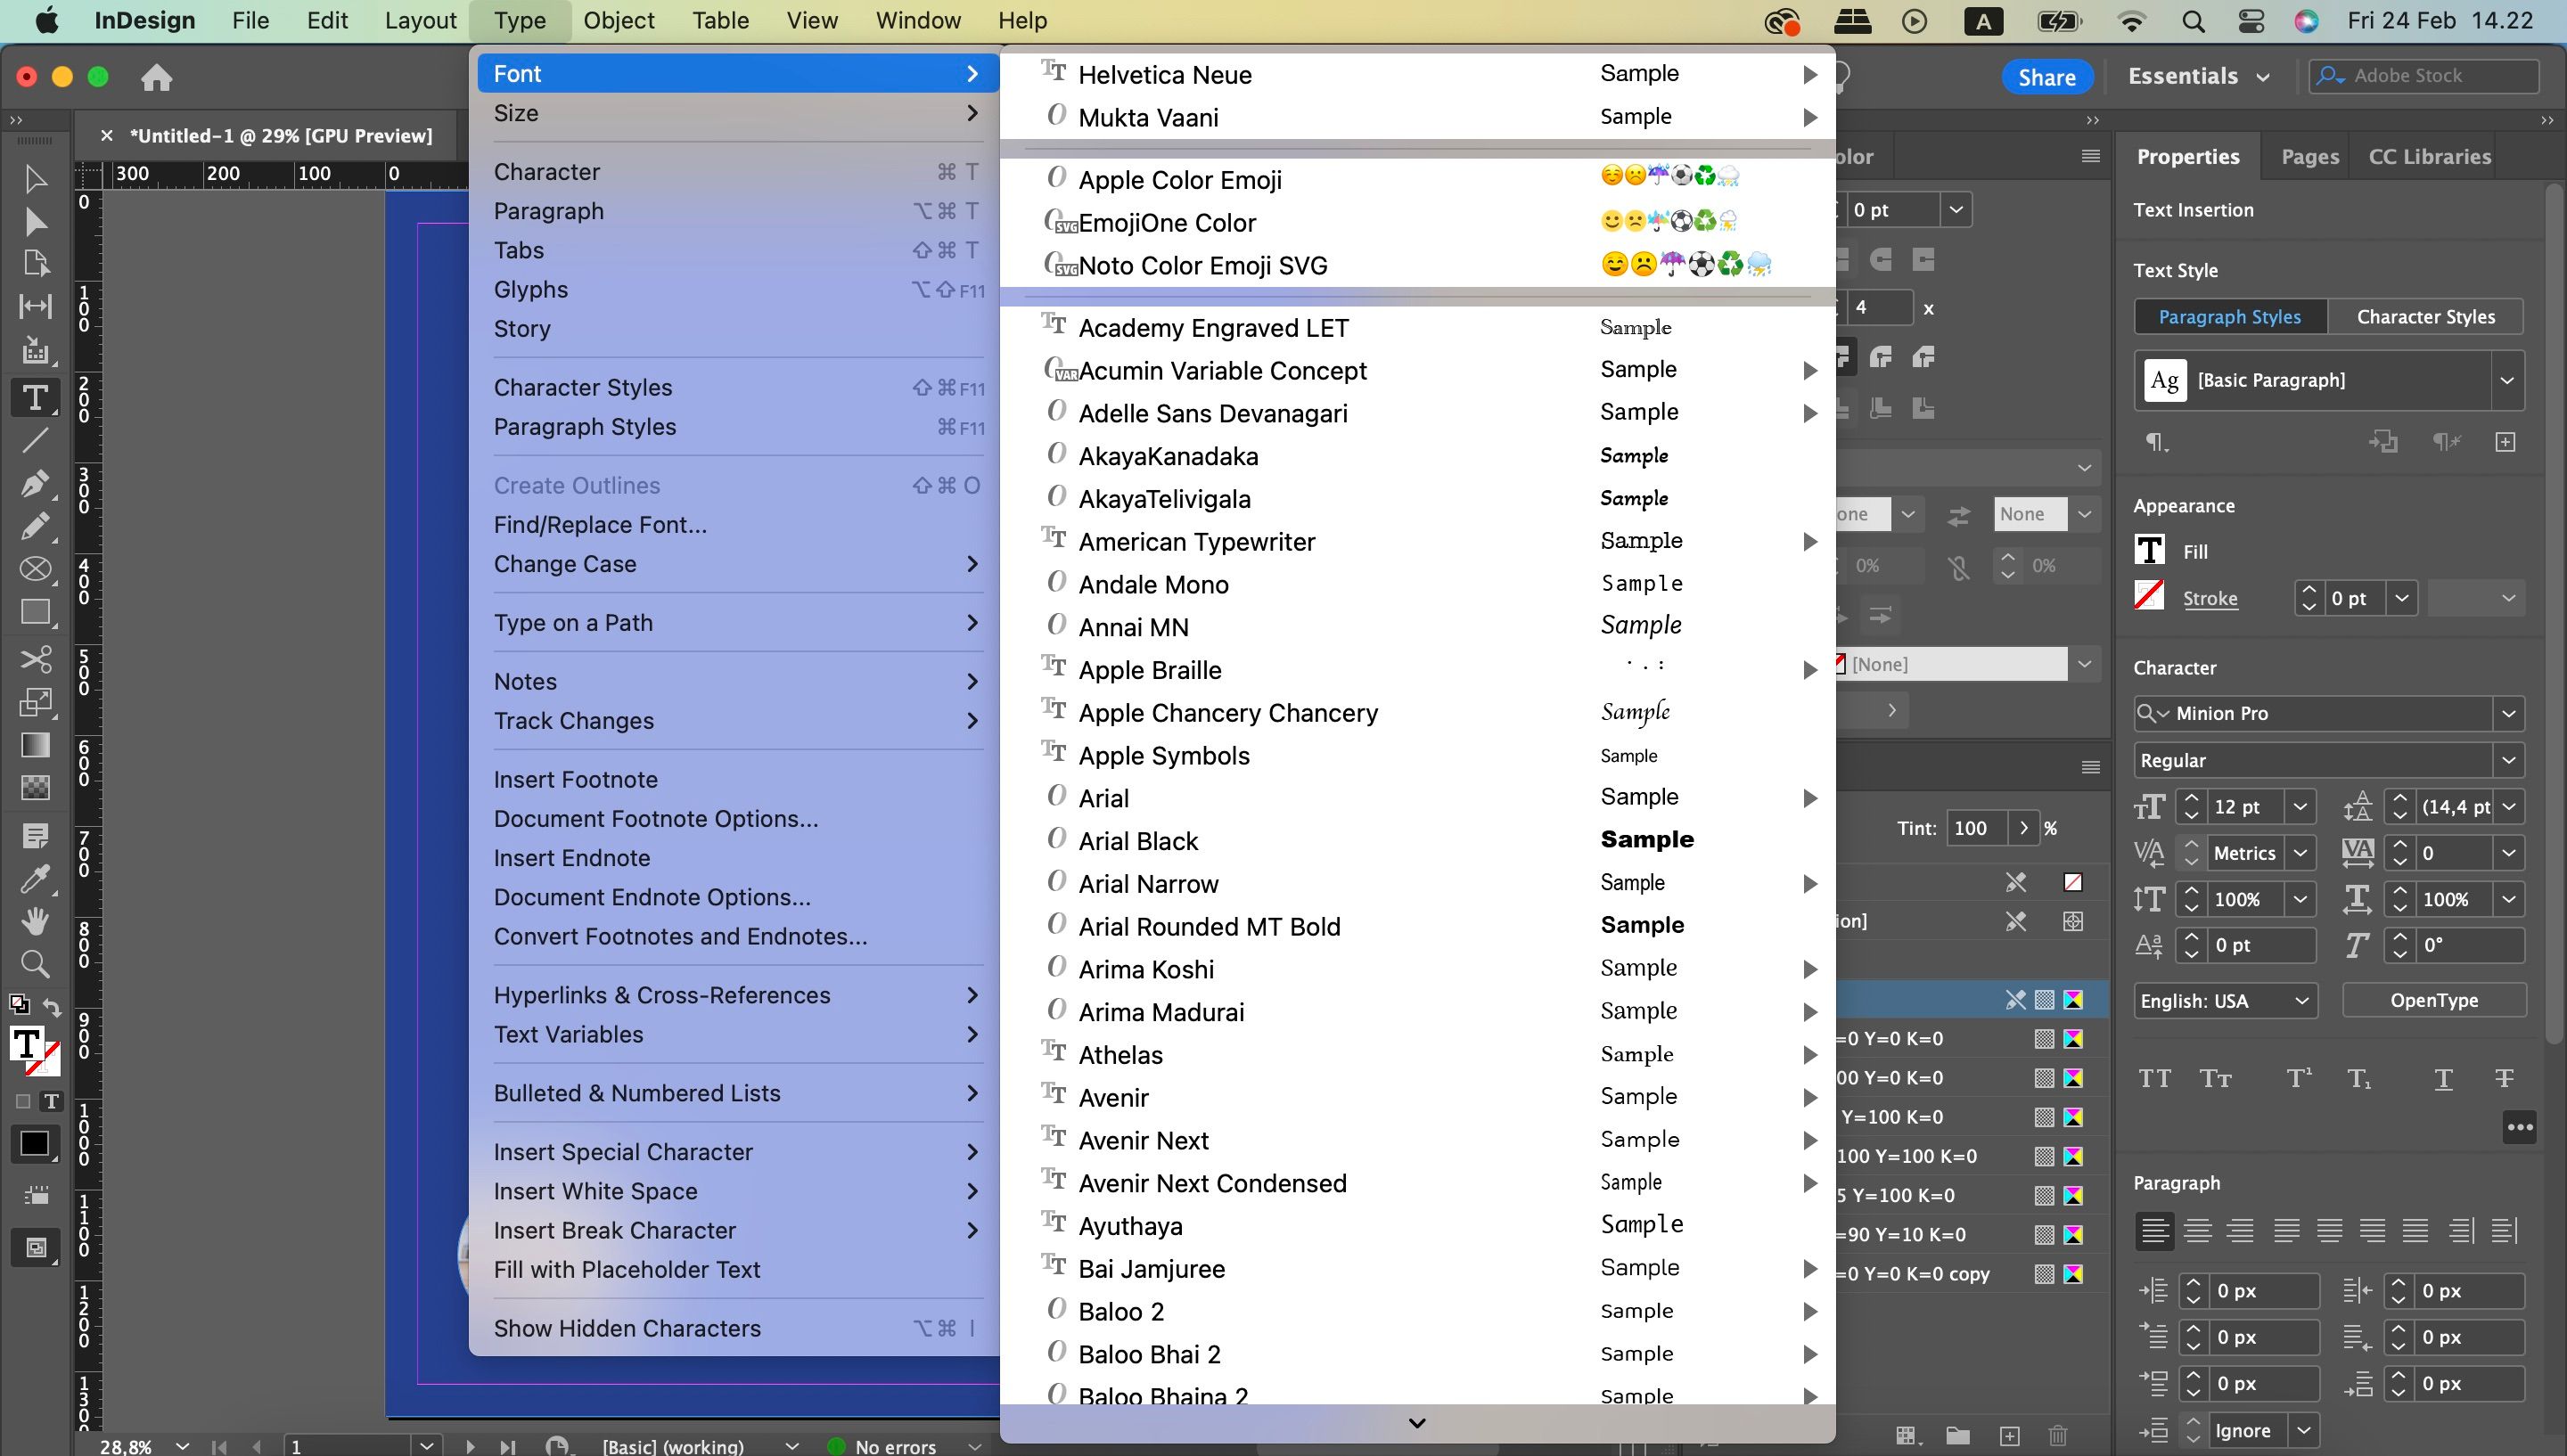
To change the size and style of your font, go to Type > Font at the top of your screen. There, you’ll have access to a wide selection of fonts. You can choose whether you want these to be bold, in italics, and so on.
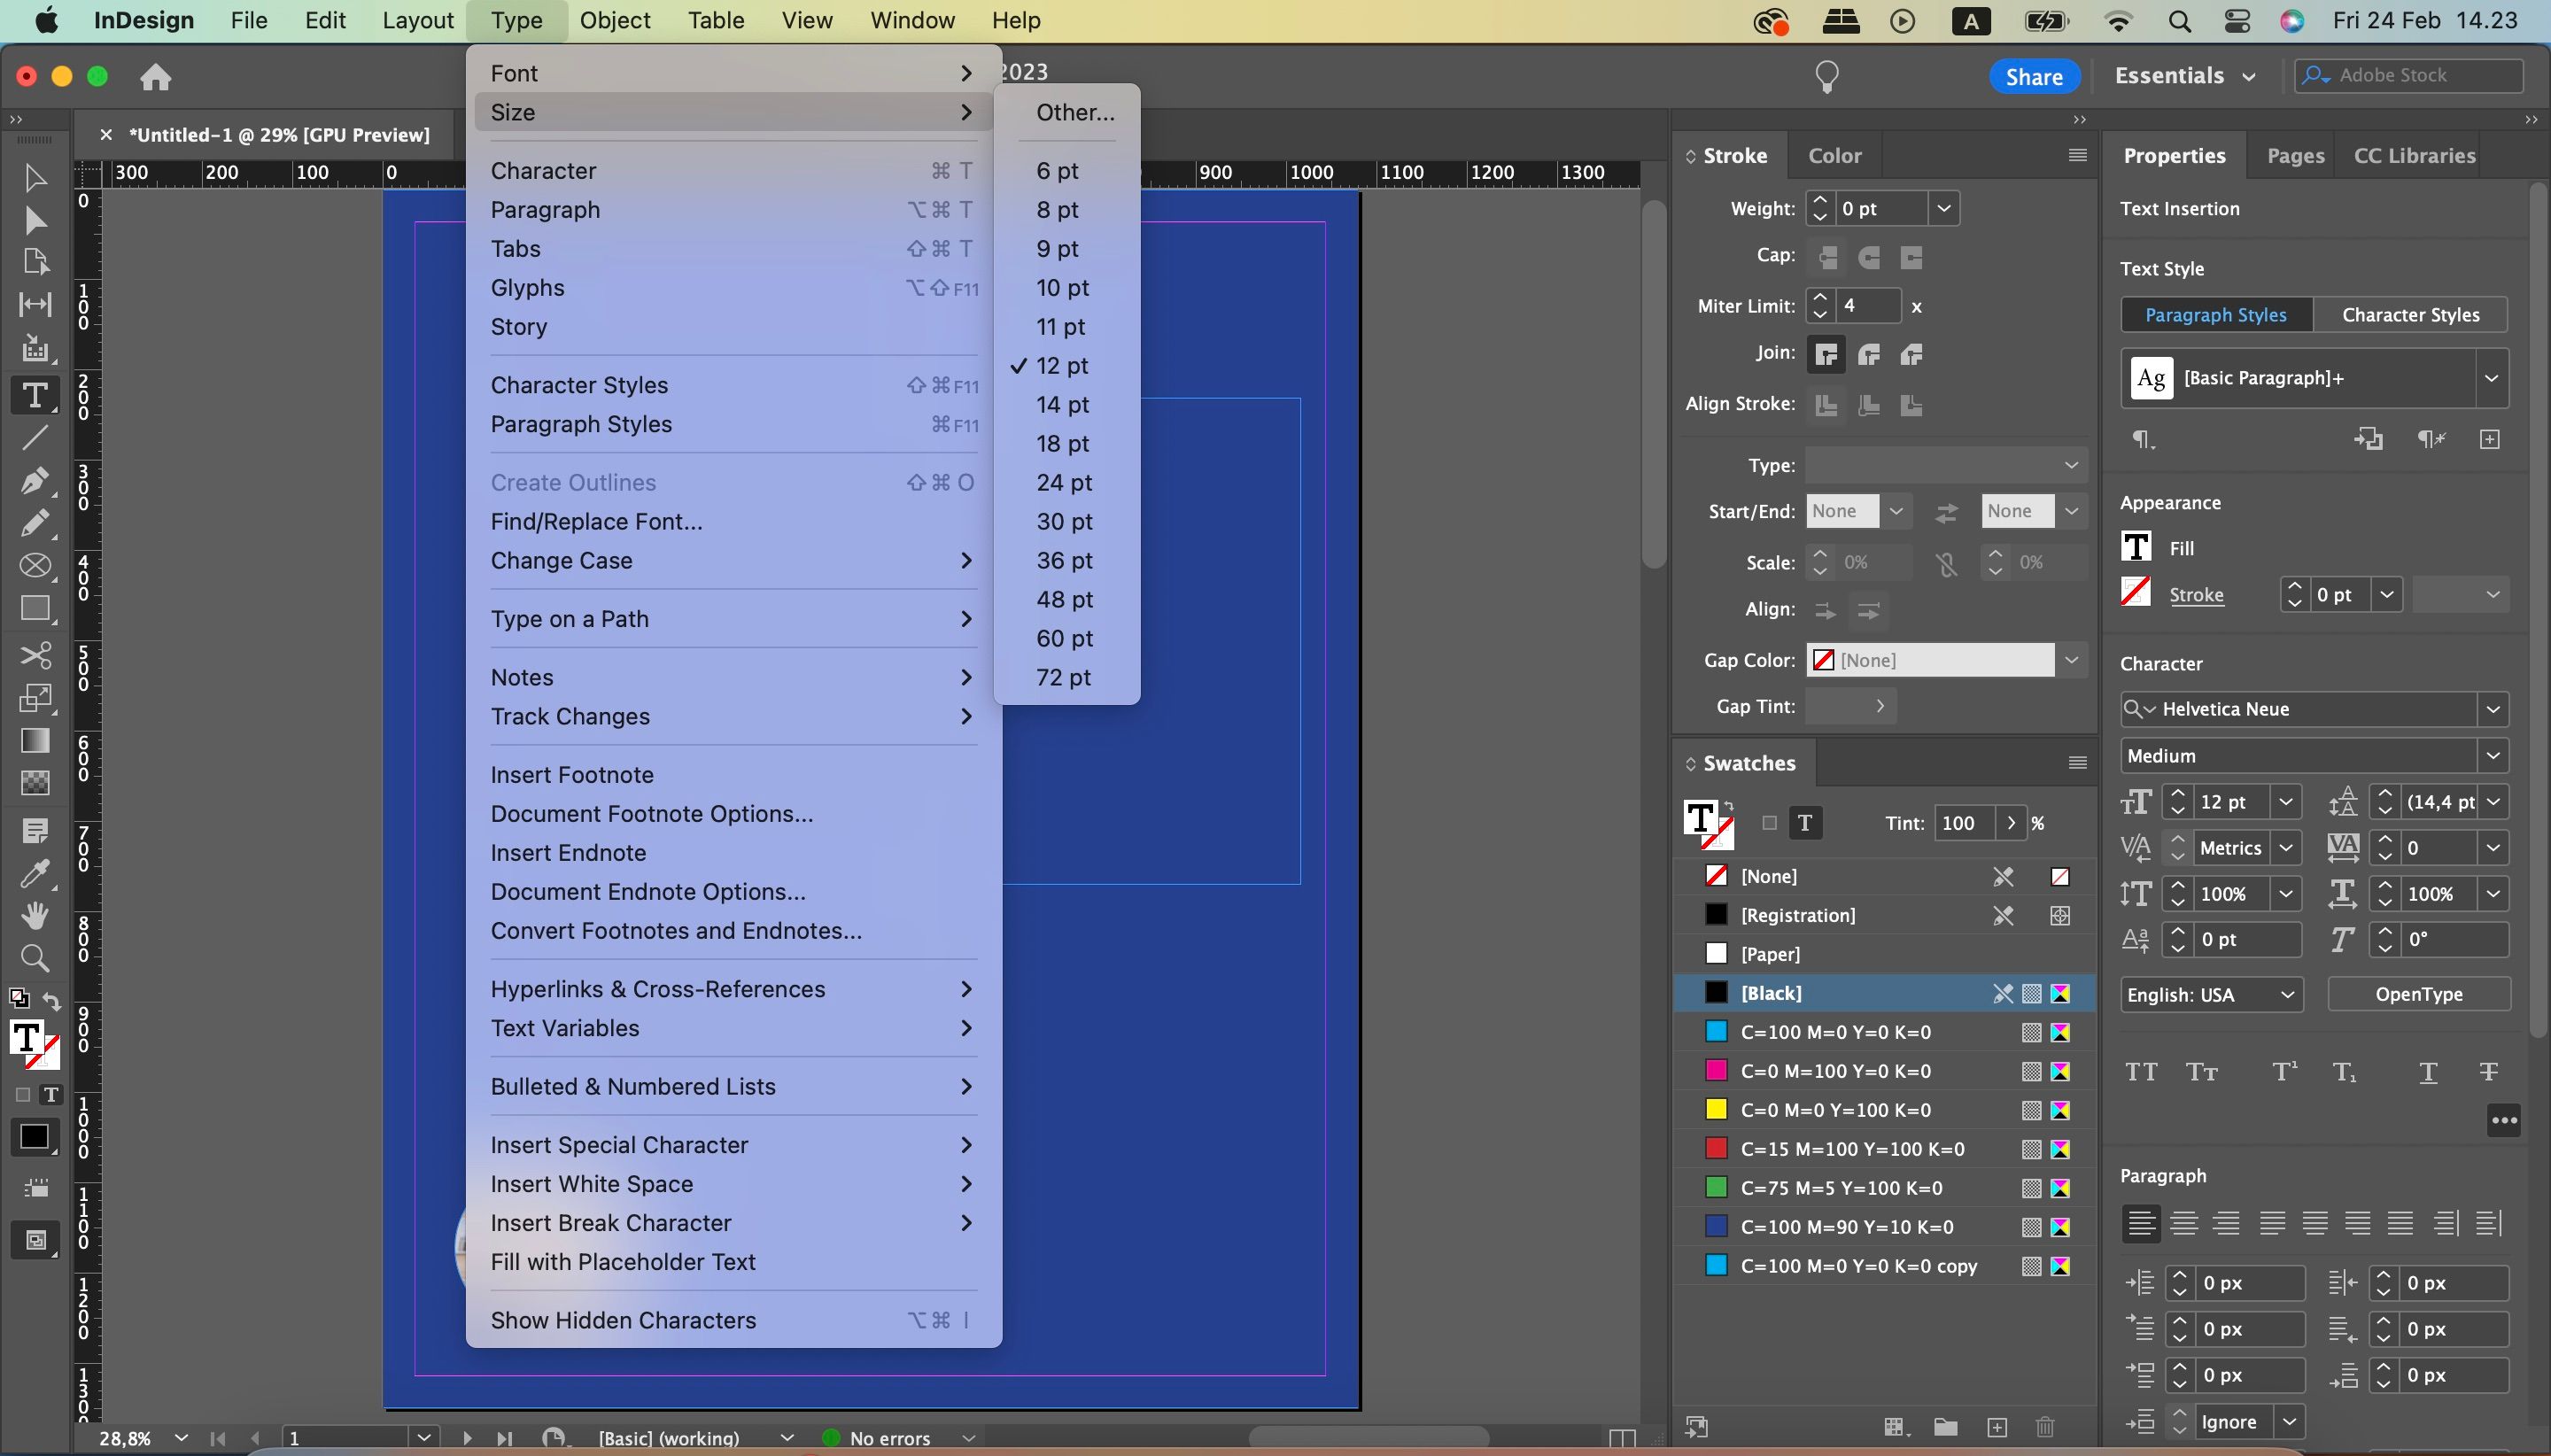
Go to Type > Size to change how big your text is. If you don’t see any that you want from the predetermined selection, you can always choose Other.
Once you’ve changed the font and size, you might want to adjust the color of your writing. To do this, you can go back to the Swatches section and pick whichever best fits your needs.
5. Export Your Carousel
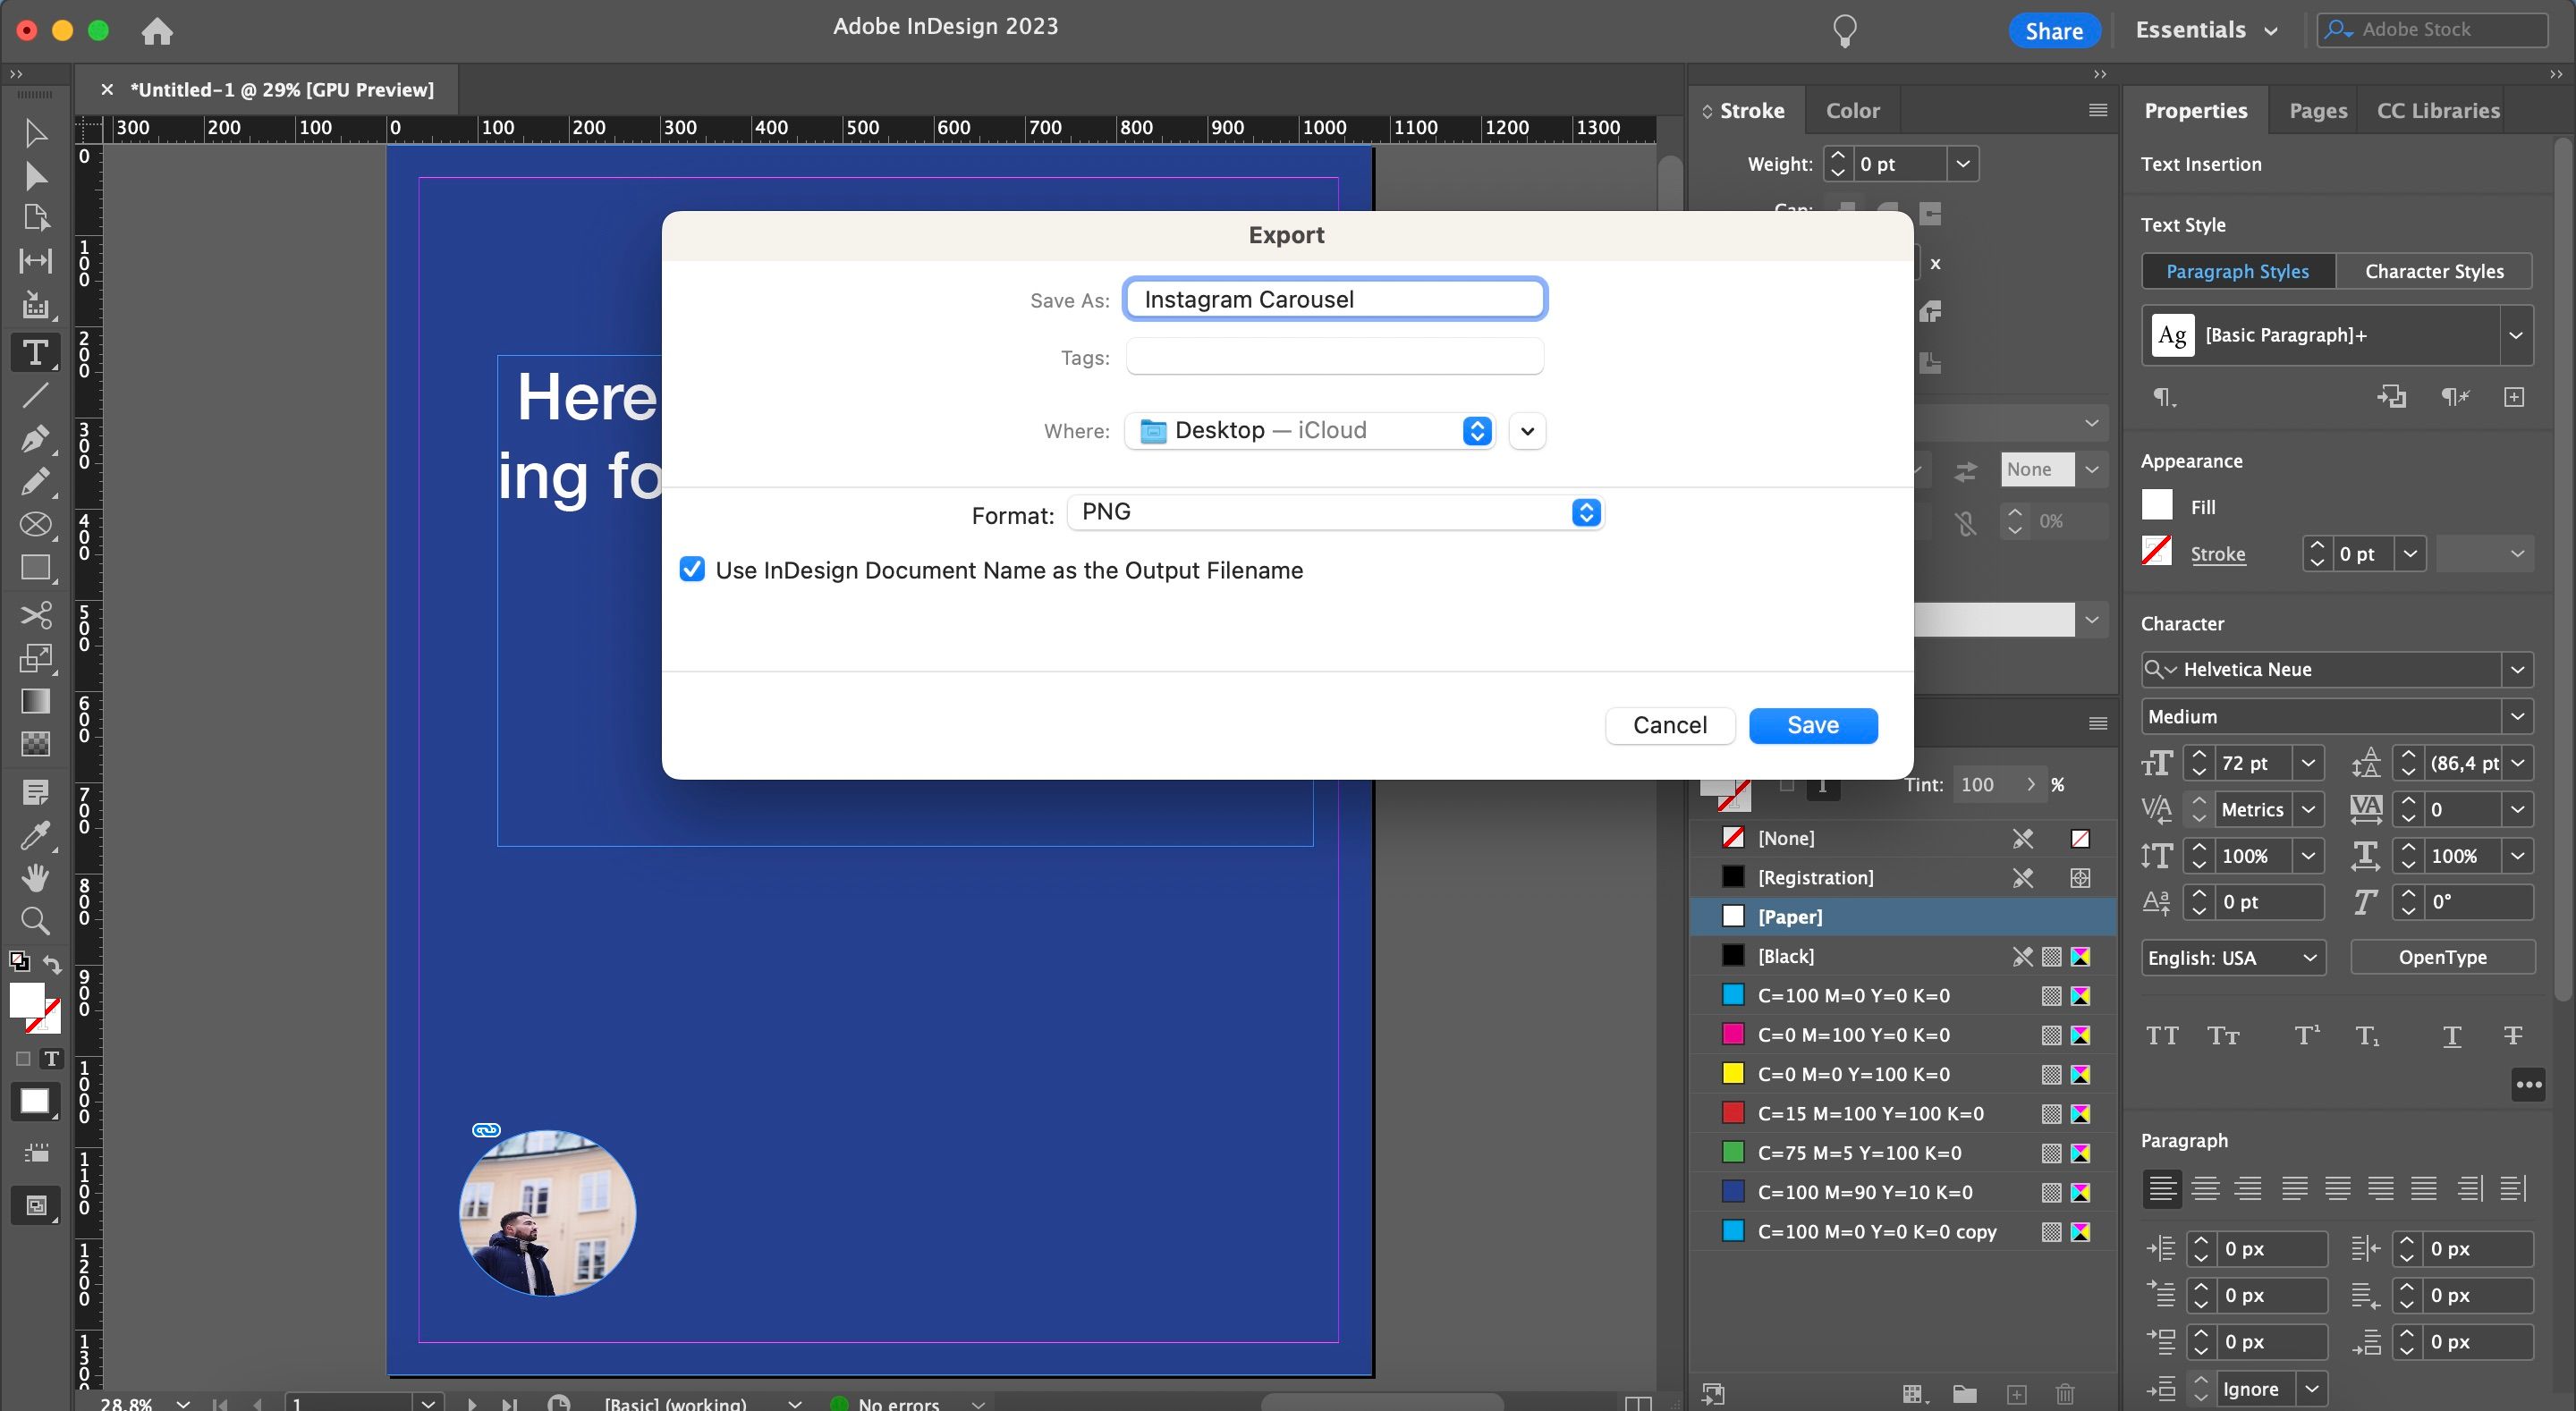
Once you’ve finished editing your carousel, you’ll want to get it export-ready for Instagram. We recommend exporting in PNG format; you can begin exporting your file by going to File > Export at the top of your screen.
After clicking on the Export button, a pop-up window will appear. Here, you can choose your file format from the dropdown menu and rename your carousel. Hit Save once you’ve changed everything as you feel is necessary.
You can then either upload your file to Instagram from your computer or smartphone. If you choose the latter and have an iPhone and a Mac, you can use AirDrop.
Use InDesign for Your Instagram Carousel Posts
Instagram carousels are an excellent way to drive engagement with your audience, and you can easily create your posts with InDesign. Navigating the platform can require some initial effort—but once you’ve gone through everything, you’ll find plenty of tools at your disposal.
Having read this guide, you should better understand how to create carousels with InDesign.

.jpg)
