Google Docs is a versatile platform that offers a wide range of features for users, where inserting tables is just one of the many things you can execute on Google Docs.
Thanks to the tables feature, Google Docs is an excellent choice for anyone who needs to analyze, create well-designed documents, or perform data visualizations. Here, in this guide, you'll find how to create and edit tables in Google Docs so that you can keep your data organized and easy to read. Let’s find out how!
How to Create a Table in Google Docs
Learning how to create and format tables in Google Docs is quick, easy, and transferable. Once you know how to create a table in Google Docs, you can use this skill to add and format tables in Microsoft Word as well. But first, this is how tables are inserted in Google Docs with a few simple clicks:
-
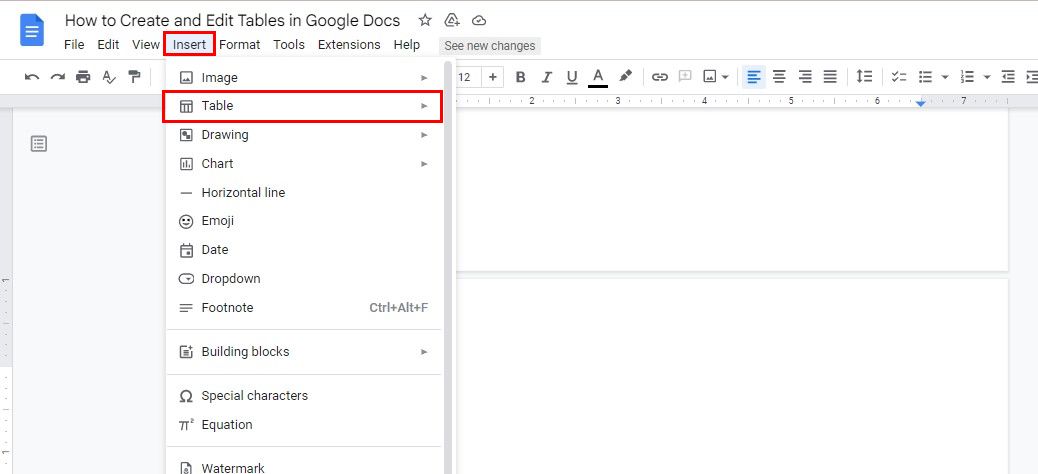
Open a Google Doc and locate the Insert tab on the menu bar.
-
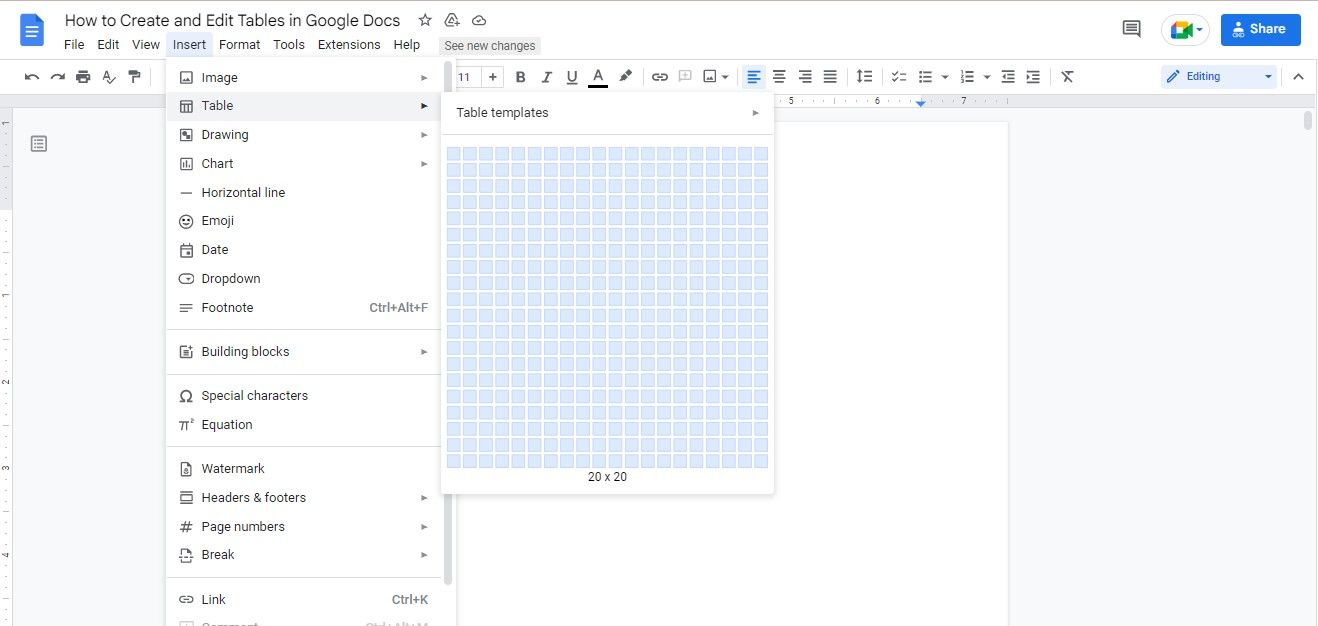
Then, select Table and drag your cursor to choose the desired number of rows and columns. Click once satisfied with the table's size (you can insert a maximum of 20 x 20 cells through this method).
- Insert the table and start entering information into the cells.


How to Format and Edit a Table in Google Docs
Being able to edit a table in Google Docs is an essential skill if you want to master the Google Docs features. Without knowing how to edit a table in Google Docs, you won't be able to work with data-heavy reports or proposals. However, if you are going to work with short, simple documents, you can get by without them.
Instead, you can learn how to take advantage of a few different formatting options–like changing the cell's color, alignment, or width of cells–to create an attractive and functional table. Here's how to edit the table for customized needs with a few key steps:
Inserting Rows and Columns in Google Docs Table
Sometimes, you may underestimate the columns or rows your data actually requires. If that happens, don't worry about creating a table all over again. Instead, add as many extra columns or rows as you require by following these steps:
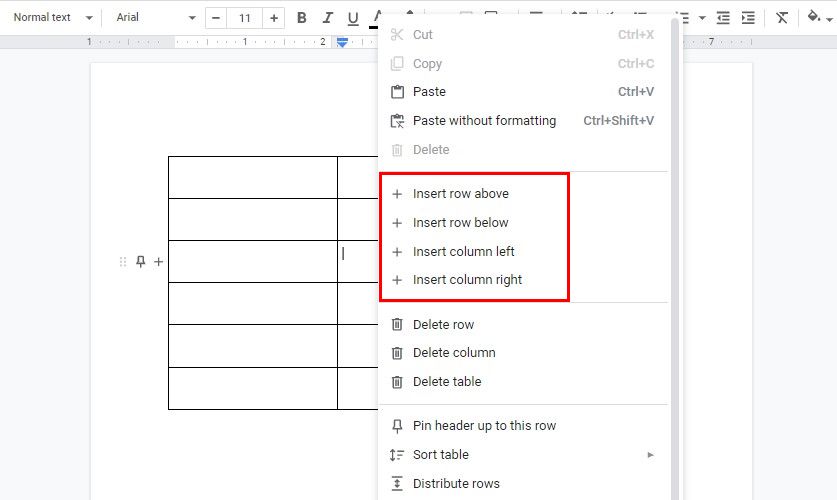
- Right-click anywhere on the table and select Insert row above or Insert row below from the drop-down menu, depending on where you want the extra row.
-
The process is exactly the same as inserting more columns; just tap on Insert column left or Insert column right instead, and you're good to go.
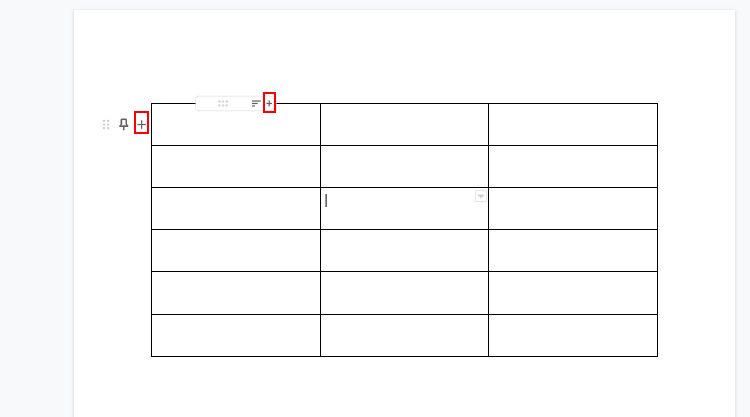
- Alternatively, drag your cursor to the left-most column of the table until a + sign pops up. Clicking on it will add one more row below in the Google Docs table.
-
Similarly, to add another column, bring your cursor to the top-most row until + appears and select it; this will insert a column to its right.


On the other hand, if your Google Docs table has an extra row/column that you're not going to use, it's better to get rid of it. The process for deleting columns and rows is straightforward, and you can do so without affecting any data inserted in the table.
Simply, right-click the extra row/column you don't require and select Delete row or Delete column. And that's it; you're good to go.
Changing the Width and Height of the Table in Google Docs
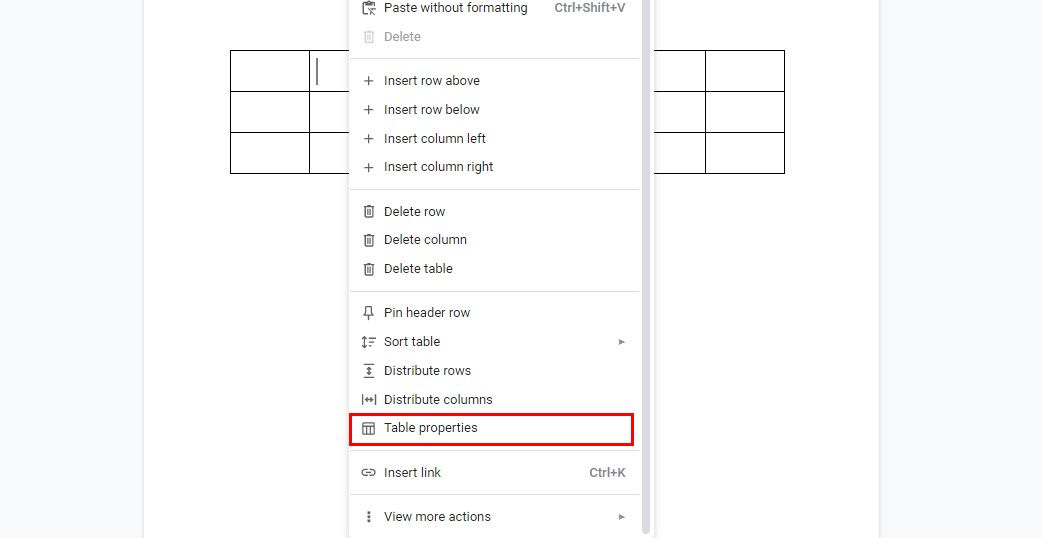
There are a couple of ways to change a table's width and height in Google Docs: using the Table Properties menu or grid lines. First, to access the Table Properties menu:
-
Right-click anywhere on your table and select Table properties. A new pop-up menu will provide different options for customizing your table.
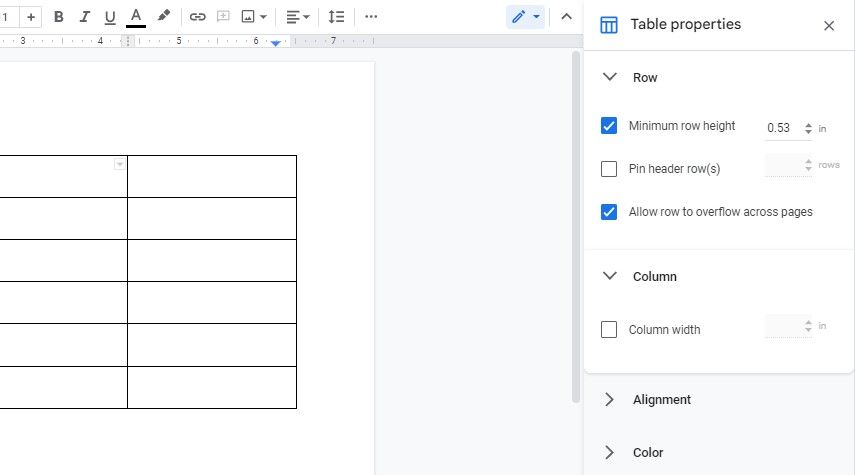
- Expand Row and enter the desired value in Minimum row height. Once you establish a minimum row height for all cells, you'll be able to increase the height using grid lines, but not reduce it.
-
Similarly, expand the Column tab and enter the new value in Column width.
- When satisfied with the table's size, exit Table properties.


However, when you want to resize a particular row/column, move your cursor over its grid line. Once it transforms into a two-sided arrow, click and drag until you get your desired row height or column width.
Formatting Borders in Google Docs Table
The fun of tables goes beyond organizing data; there's also a design element involved, no matter how simple it is. Google Docs lets you format table borders and have fun with them. But first, you have to decide which borders to work on. Do you want to format borders of specific columns, rows, or the entire table? Select all those cells where you want changes to apply.
Once that’s done, a few new icons pop up on the toolbar. You can decide the border's color through the pen icon, whereas the other two icons on the right let you modify the border width, and whether you want a dotted or dashed line. All in all, these are some neat tricks to beautify your Google Docs and make your data stand out.

Merging Cells in a Google Docs Table
Merging cells can help you create more visually appealing tables. It helps align data or make room for longer text entries.
Follow these simple steps to avoid text crowding and make space with cell merging:
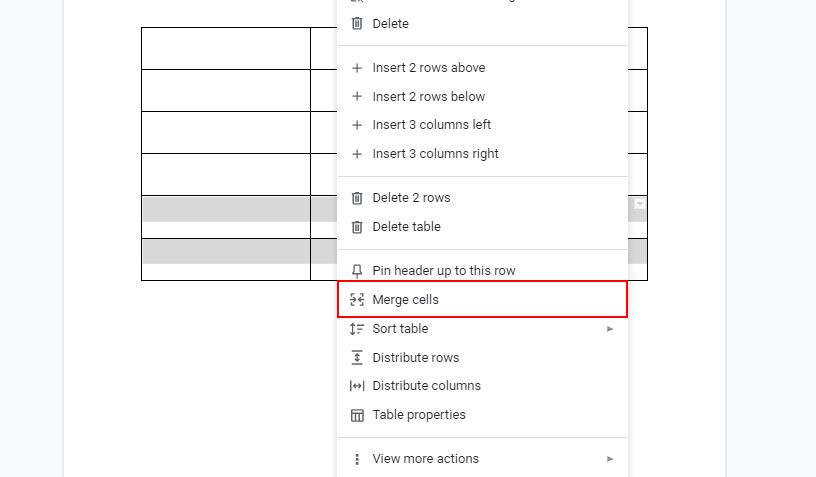
- Select the cells you want to merge.
- Head to Format > Table > Merge cells
-
Alternatively, you can right-click on the selected cells and click Merge cells from the drop-down menu.

And once you've perfected the art of formatting tables in Google Docs, you can try out these nifty formatting tips for perfect tables on Microsoft Word.
Creating and Editing Tables in Google Docs Is Easy
Tables are an essential element of infographics, and now with Google Docs, you can create tables that help your data stay organized and easy to read. Keep practicing until you can make a virtual table just about anywhere, even on Adobe Illustrator, which doesn't have a dedicated tool for creating tables.