
Entering data into an Excel sheet from cell to cell can be tedious and time-consuming. But thankfully, Excel has a hidden data entry form for entering information into your spreadsheet conveniently; without having to deal with laborious cell navigation.
In this article, we'll show you how to make a data entry form in Excel and how you can use it.
How to Make a Data Entry Form in Excel
Making an Excel data entry form requires a few steps, but they're straightforward:
1. Convert Your Spreadsheet Into a Table
You'll start by converting your spreadsheet into a table before you can fill it using an Excel form, as the Excel form only writes to tables. To turn your Excel spreadsheet into a table:

- Place your cursor on the first cell of your Excel spreadsheet and go to Insert on the ribbon.
- Click Tables.
- Tick the My table has headers checkbox.
- Finally, click OK.
2. Add Excel Form to the Quick Access Toolbar
The data entry form is not visible in Excel by default. While you might've customized the Excel Quick Access Toolbar previously, you'll have to add the data entry form to your customization if you've not done so already. To do so:
- Click the Quick Access Toolbar pin at the top-left (above the ribbon).
-
Go to More Commands.
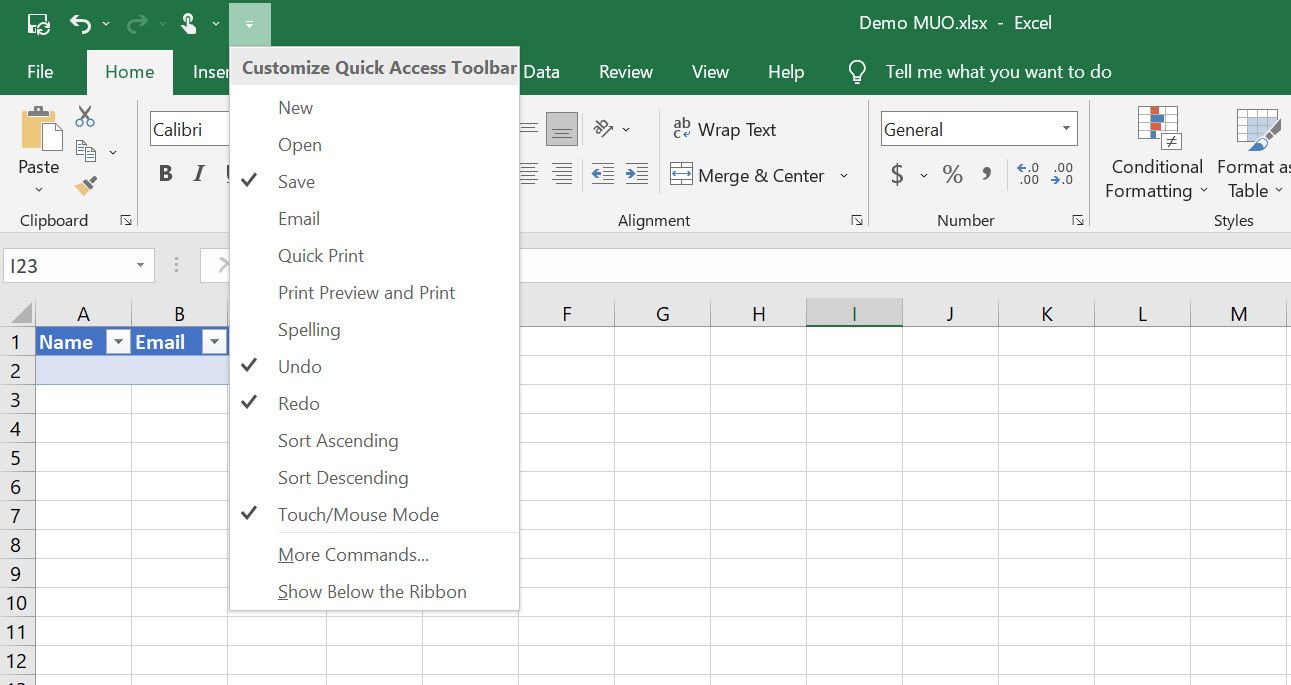
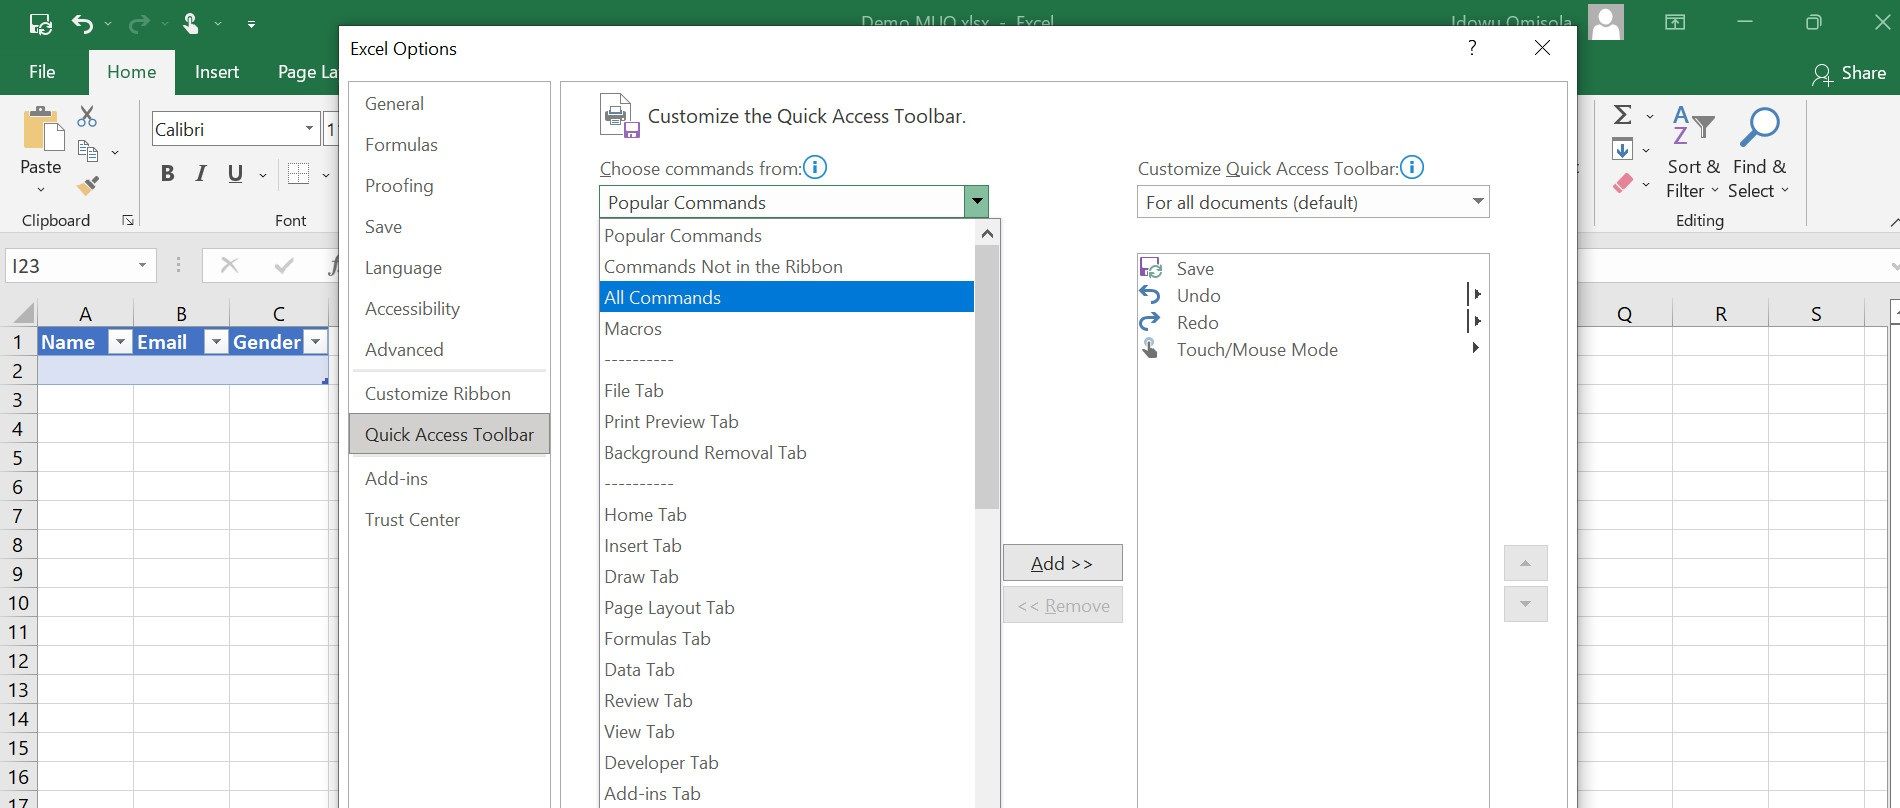
- Click the Popular Commands dropdown under Choose commands from.
-
Select All Commands.
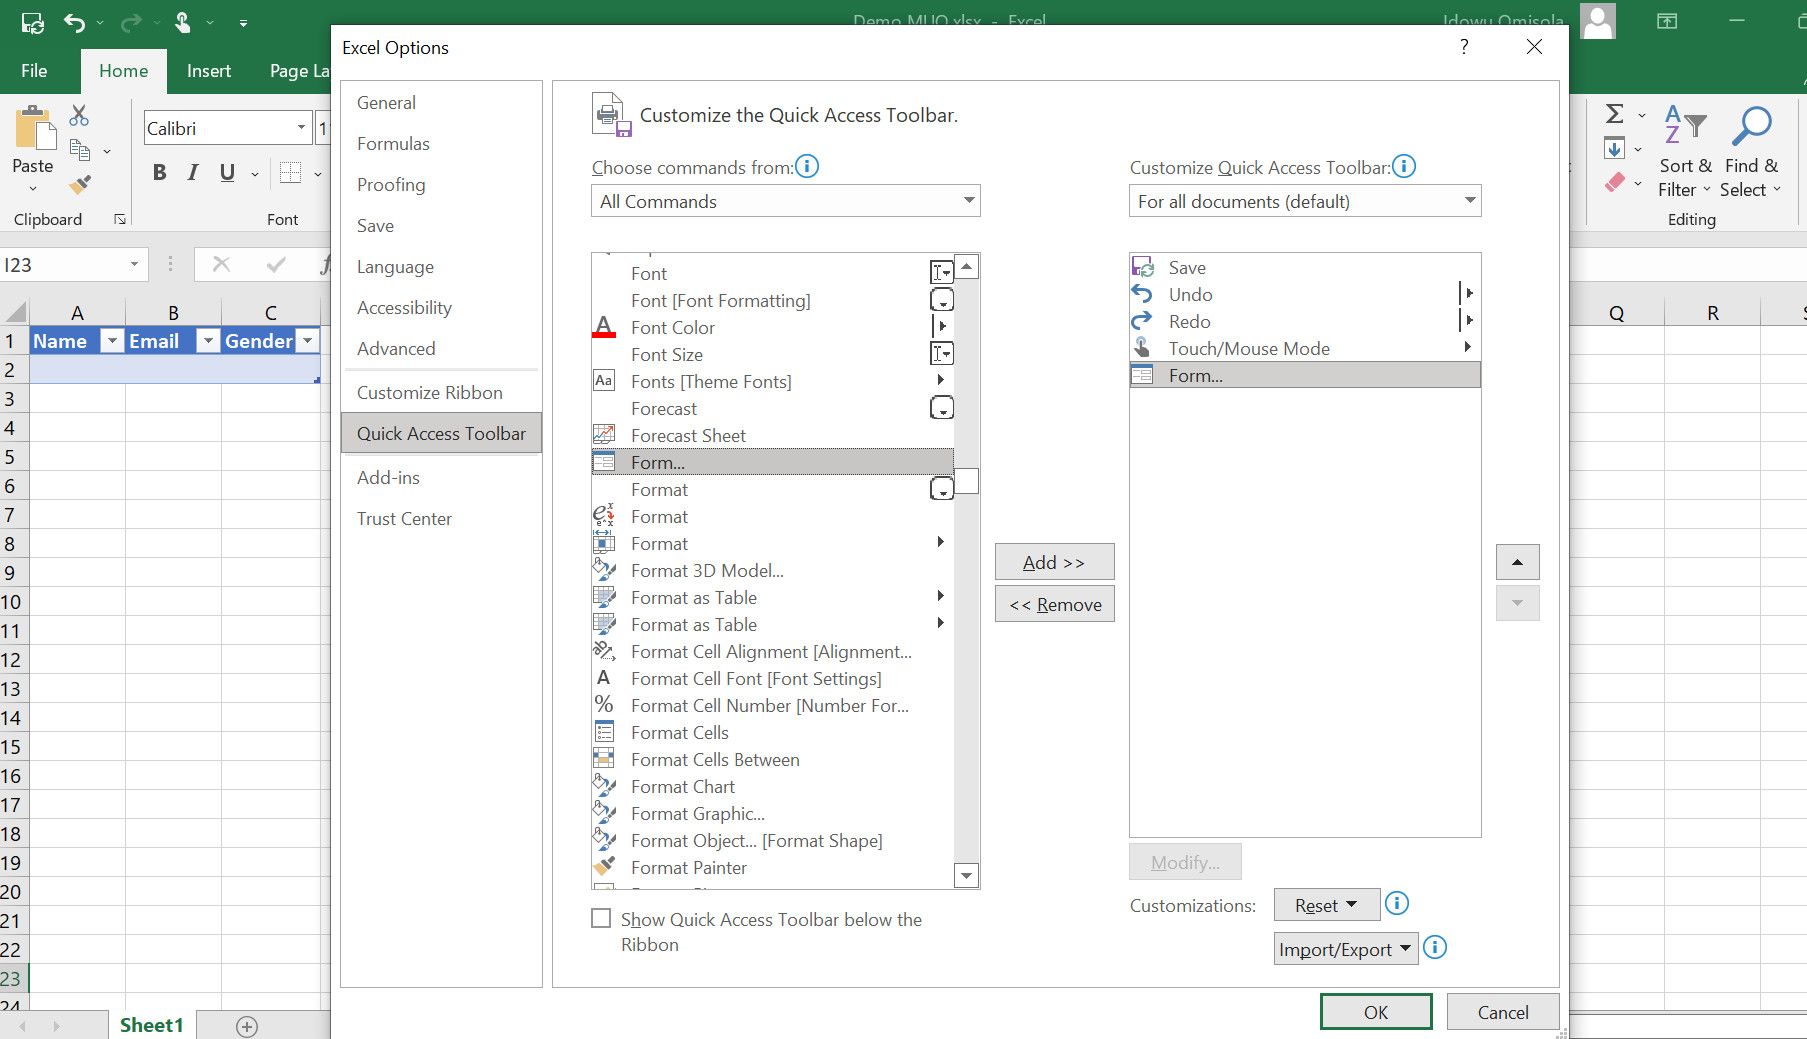
- Scroll through the options in the next section (below All Commands) and select Form.
-
Click Add, then OK in the bottom-right corner of that menu.
-
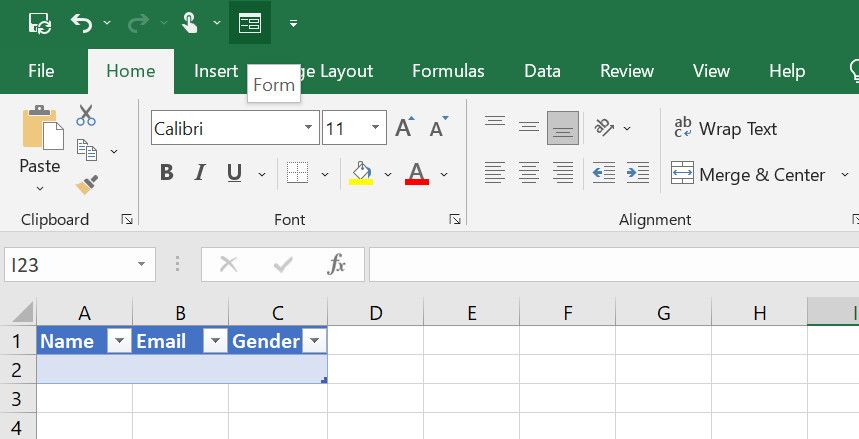
You should now see the Form icon on the Quick Access Toolbar.


3. Create an Excel Data Entry Form
Next up is your aim; create a data entry form for your inputs:

- Place your cursor on the first cell on your Excel spreadsheet.
- Click the Form icon on the Quick Access Toolbar.
- A form with fields bearing your Excel headers will come up.
- Click New. Then enter your data as you want.
- Hit the Enter key each time you finish filling the fields to input your data. Repeat the process for each entry.
- Finally, click Close after entering your data.
How to Use the Data Entry Form in Excel
Bringing up the Excel data entry form is the main work. Using is straightforward. The data entry form is used to locate and edit or delete items. And here's a quick walk around on using the data entry form:
How to Locate an Entry Using Excel Data Entry Form
Although you can use the Find Prev or Find Next to find data through the data form, it may be difficult to filter the entries. However, the best way to locate an entry through an Excel data entry form is to use the Criteria option to filter your Excel spreadsheet. For instance, to edit or delete an entry:

- Click Criteria.
- Then enter your filter criteria in one of the form fields. For instance, to find all Female entries, you can type “Female” in the gender field. You can even use the first alphabet or integer entries to filter your data. Feel free to use whatever works best for you.
- Next, navigate through your spreadsheet column from the form by clicking Find Prev or Find Next.
- You'll only see the query criteria in your form fields. And navigating to next or previous data will only show data based on your filter criteria.
- Edit your entries from there. Then click New to update your changes.
- However, to delete an entry, click Find Prev or Find Next until you locate the entries for the row you want to delete.
- Click Delete, then OK to delete that entry permanently.
Make Your Life Easy With an Excel Data Entry Form
Entering data into an Excel spreadsheet can be tiring, but you can do your job smarter at light speed with the data entry form. And Microsoft Excel makes it easy. To explore the power of Microsoft Forms and Excel further, you might also want to see how to write your survey responses directly to Excel in real-time.