
Since CDs and DVDs have become rather obsolete, USBs are now the primary tool for installing new operating systems. To do so, you first need to make a bootable USB with installation files on it.
On traditional PCs running Windows, Linux, or macOS, you can create a bootable USB using software like Rufus or Etcher. You can even do it through the command prompt or terminal.
If you are using a Chromebook, though, the method is a bit different. Here's how you can create a bootable USB on your Chromebook.
Creating a Bootable USB Using Chromebook Recovery Utility
The app we'll be using to create the installation media is Chromebook Recovery Utility. So, go ahead and install it by adding the extension to Chrome. It’s totally free.

The next thing you need is the image of the OS you want to install. We are using Puppy Linux, one of the most lightweight Linux distros out there, for this guide.
Once you have downloaded the OS image, check its file extension. If it is ISO, change it to BIN. In case you're not sure how to change the file extension, check out this guide on hiding files and folders on Chromebook, which has some information about renaming files.

Now that you have installed Chromebook Recovery Utility and downloaded the image, the next thing you need is a USB drive. It's recommended that the USB stick you use is at least 8GB in size.
After that, follow the steps below to create your installation media:
-
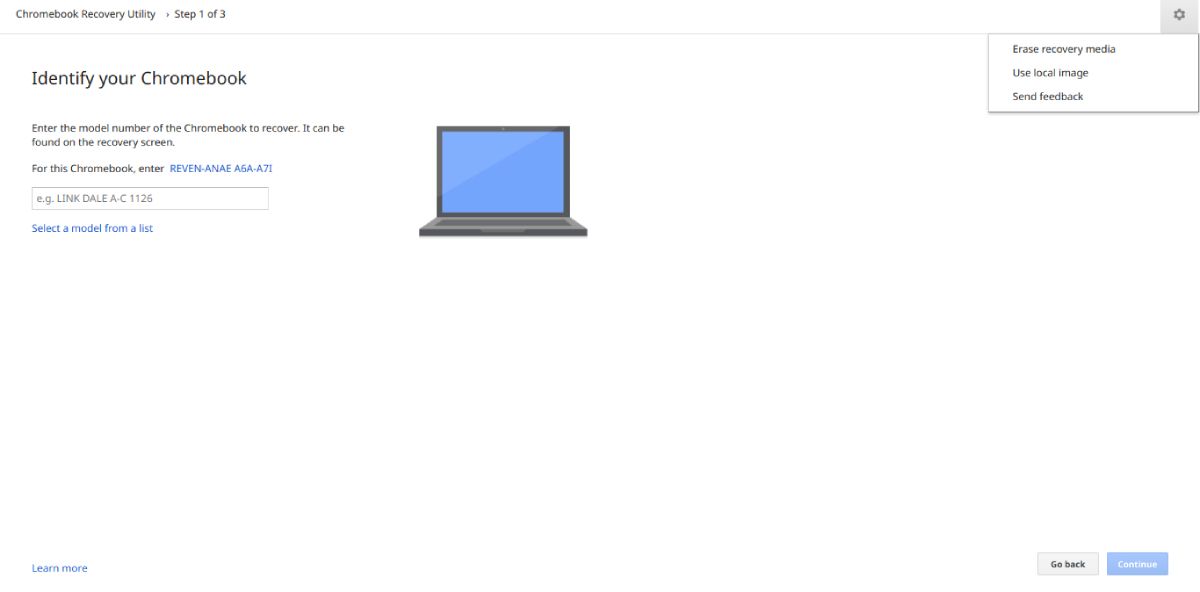
Open Chromebook Recovery Utility from Extensions (puzzle icon) next to Settings (three dots) and click on Get started.

-
On the next page, it will ask you to Identify your Chromebook. You don’t need to, so go ahead and click on Settings (cog icon) in the top-right corner of your screen and choose to Use local image. Locate and select the BIN file in the next dialog.
-
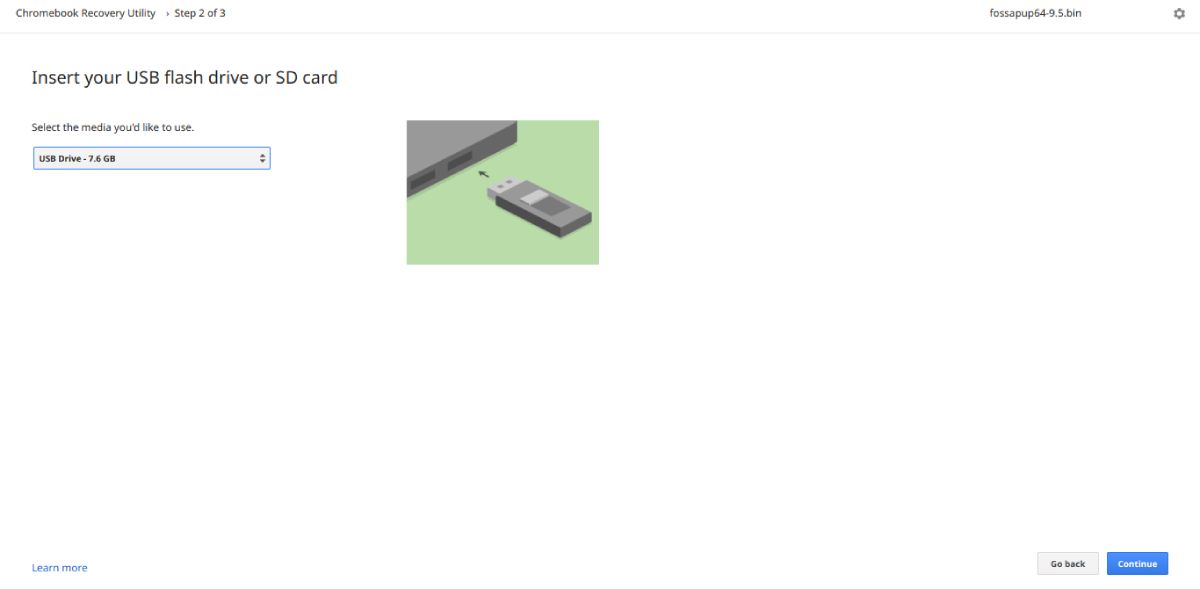
Make sure you have inserted your USB drive at this point. Select it from the dropdown menu on the next page and click on Continue.
-
If everything goes well, you can click on Create now on the following page to begin the process of creating a bootable USB.
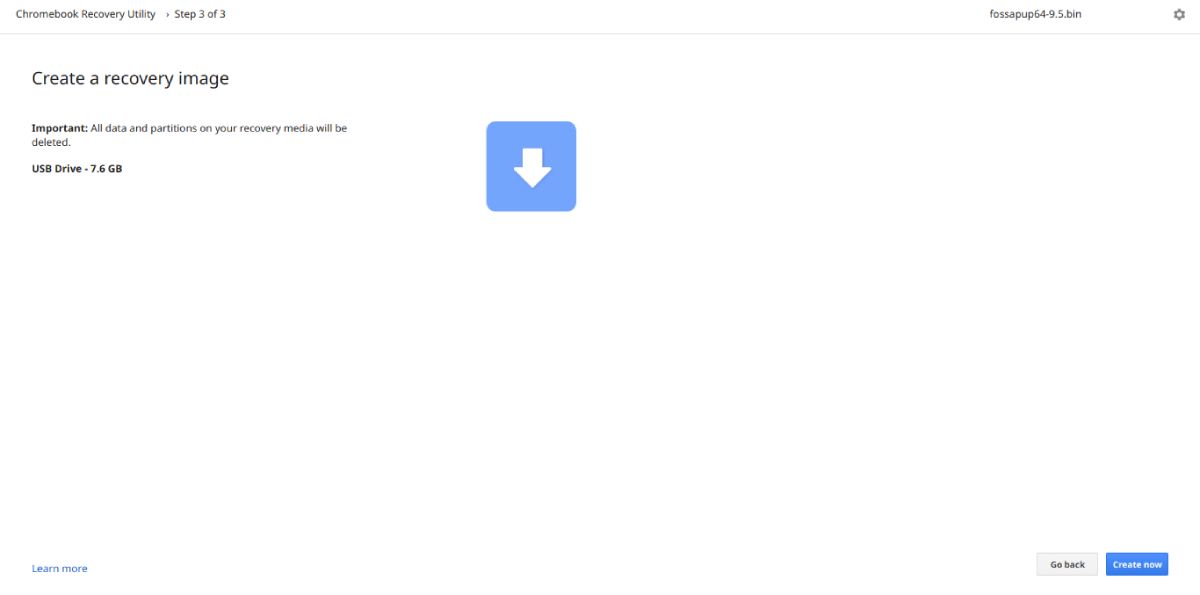


Wait for it to write the image, and that’s it. Your USB should now be bootable with installation files on it. You can use it to install the OS of your choice on your machine.
Create Bootable USBs on Your Chromebook
You can use the bootable USB you just created on your Chromebook or any other PC. It should work fine as long as the OS is compatible.
Here is a list of some of the best Linux distros that you can install on your Chromebook.