Even though an Apple ID isn't required for iPhone, iPad, or Mac users, you won’t have access to all your device’s features without one. That includes Apple Music, iMessage, App Store, Find My, and more.
In this article, we’ll cover how to set up and create an Apple ID using different Apple devices. So whether you're using an iPhone, a Mac, or a Windows PC, you can get an Apple ID and start taking full advantage of Apple's services.
Why Do You Need an Apple ID?
An Apple ID is the key to the whole range of features in the Apple ecosystem. It brings a myriad of benefits, allowing you to install applications from the App Store, download music to your device, make video calls via FaceTime, buy AppleCare, and so on.
Without an Apple ID, you won’t even be able to take advantage of iCloud—a cloud storage service for saving photos, documents, music, and other files.
The list of services that become available with an Apple ID is long. And there's nothing stopping you from creating one—it is free and won’t take much of your time. It is also safe since all of the personal details that you provide will be protected by two-factor authentication.
Do You Need a Different Apple ID for Every Device?
No, you don’t. It's much better to use the same Apple ID for all of your devices. For example, a single Apple ID lets you sync your contacts to iCloud and access them from any of your Apple devices.
Creating multiple Apple ID accounts also runs the risk of splitting your purchases across all your accounts, which means you can't access them all on the same device at the same time.
1. How to Create an Apple ID on Your iPhone
Here’s what you need to do to set up an Apple ID on your iPhone:
- Open the Settings app on your iPhone.
- At the top of the screen, tap on Sign in to your iPhone.
- Choose Don’t have an Apple ID or forgot it? and tap on Create Apple ID.
- Enter your first name, last name, and your date of birth. After you enter the required information, tap Next in the top-right corner of the screen.
- Now you need to enter your email address. Ensure that your email account is active because you’ll get an email to verify your Apple ID. Also, this email address will be used as your new Apple ID. If you don’t have an email address, you can create an account with iCloud. To do this, tap on Do not have an email address? and select Get an iCloud email address.
- The next step will be to create a password for your Apple ID. Think of a strong one and type it in.
- Then you’ll need to confirm your phone number and tap on Continue.
- Read and accept the Terms and Conditions by selecting Agree.
- And the last step will be to verify your email address. To do this, simply open the email account that you used in the registration process, find the Verify your Apple ID email, and tap on Verify now.


If you’re new to the Apple ecosystem and just bought yourself an iPhone, you can create an Apple ID when turning on your phone for the first time. It'll ask you to choose whether you want to log into an already existing account, set up a new one, or skip this step and enter these details later.
To create an account now, tap on Create a Free Apple ID and follow the instructions. Your iPhone will ask you to enter your personal details, such as your full name, birthday, and email address.
After you’ve created your Apple ID, you can add more information to make your account complete.
For example, if you plan to make in-app purchases, you should enter your payment details. To do this, head to the Settings app and open your Apple ID account at the top of the page. Tap on Payment & Shipping to add a payment method. Here you can also set up Family Sharing, Find My, iCloud, and more.


2. How to Create an Apple ID on Your Mac
Here’s how to create a new Apple ID from your Mac:
- Launch System Preferences from the Apple menu in the top-left corner.
- At the top-right of the screen, you’ll see a Sign In option; click on it.
- Choose Create Apple ID to begin the registration process.
- You’ll be asked to enter your date of birth, first and last name, email address, and to create a password for your Apple ID account. When you’re done filling out this info, tap Next.
- Then you need to type in your phone number and choose whether you want to verify your identity with a text message or a phone call.
- After you finish the verification, you’ll need to read through the Terms and Conditions, put a checkmark under the text, and click on Agree.
- Next, click on Verify Email Address. Open the Mail app on your Mac or any preferred browser to log into the email account that you provided when creating your Apple ID. Find the most recent email from Apple and type the code given in that message in the newly opened window.

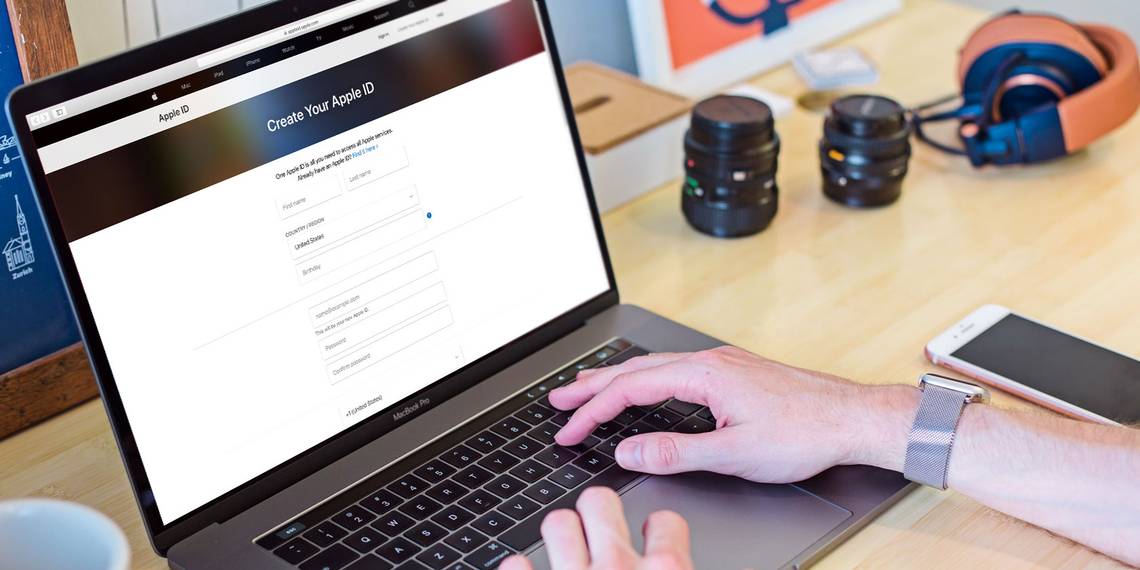
3. How to Create an Apple ID on the Web
For this method, you can use any device with a web browser: an iMac, Windows PC, iPad, Linux laptop, and so on. Here’s what you should do:
- Go to appleid.apple.com/account to open the Apple ID account page.
- Enter all of the requested personal details—first and last name, country of residence, date of birth, email address. Also, create a password for your Apple ID account and type in your phone number to verify your identity.
- Check everything to make sure that you provided accurate information. When you’re ready, click on Continue.
- The final step is to verify the email account and phone number that you used during the registration. Check your inbox to find a verification email from Apple.

How to Get the Most Out of the Apple Ecosystem
Imagine that one day luck wasn’t on your side, and you lost your iPhone. If you have an Apple ID set up on that device, you can track it with the Find My app or disable it with Activation Lock so that whoever stole it can't use it.
The features and services that become available to you after you create an Apple ID go way beyond this as well. Don’t put off creating an Apple ID for later because you're seriously missing out on security, social, and entertainment features that take your Apple device to the next level.