Depending on your scenario, you might want core isolation memory integrity to be on or off. For instance, since the feature can affect performance, it is ideal to switch it off when you want to use your Windows PC for gaming. But if your computer is strictly for business, you might want to turn the feature on to make it more secure.
No matter the case, enabling and disabling core isolation memory integrity is quite easy. We’ll even discuss what to do in the event you can’t turn it on.
What Is Core Isolation Memory Integrity?
Core isolation is a security measure that protects system processes on Windows from malware by keeping them separate from the operating system and its devices. Windows uses virtualization to make this happen. Memory integrity, which is part of core isolation, only separates high-security processes from the rest, preventing malware from accessing them during an attack.
How to Turn Core Isolation Memory Integrity On or Off
In this section, we’ll discuss two ways to enable or disable core isolation memory integrity: in the Windows Security app and in the Registry Editor.
Using the Windows Security App
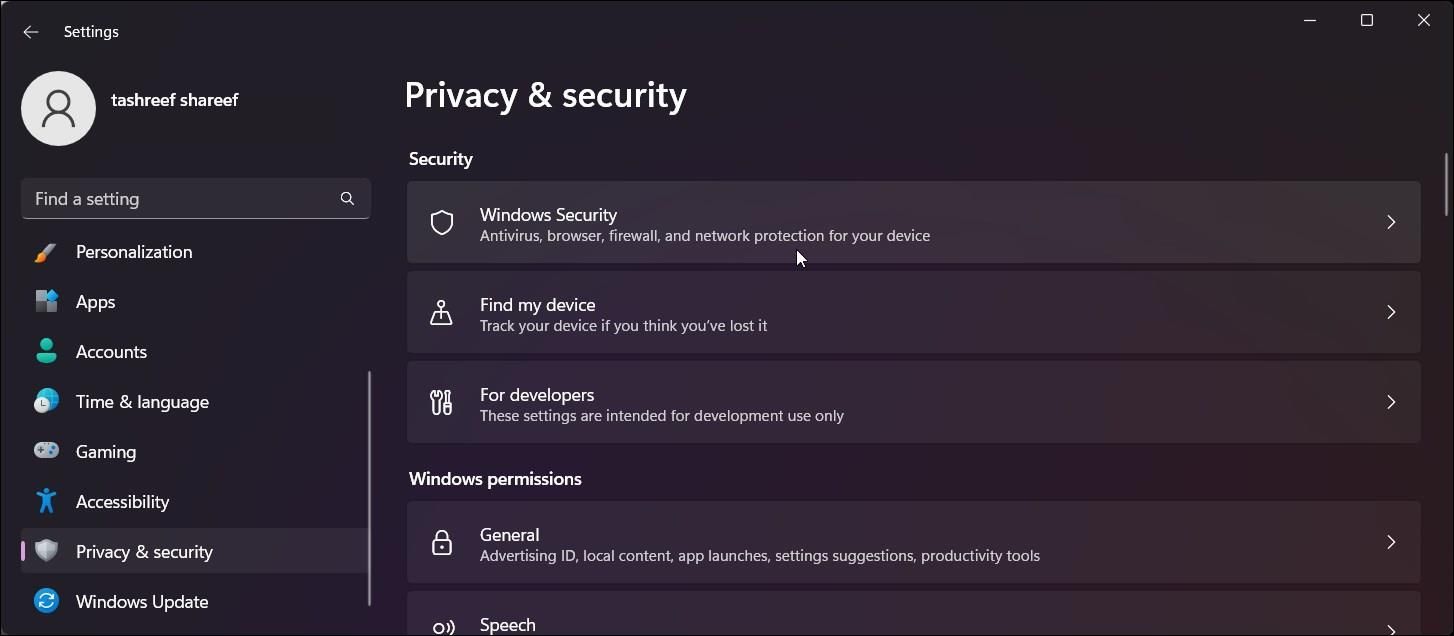
Press Win + I to open settings, and if you can’t access them, please read our guide on what to do if you can’t open the Settings app. Then, select Privacy & security on the left side menu, and then click on Windows Security on the right side.
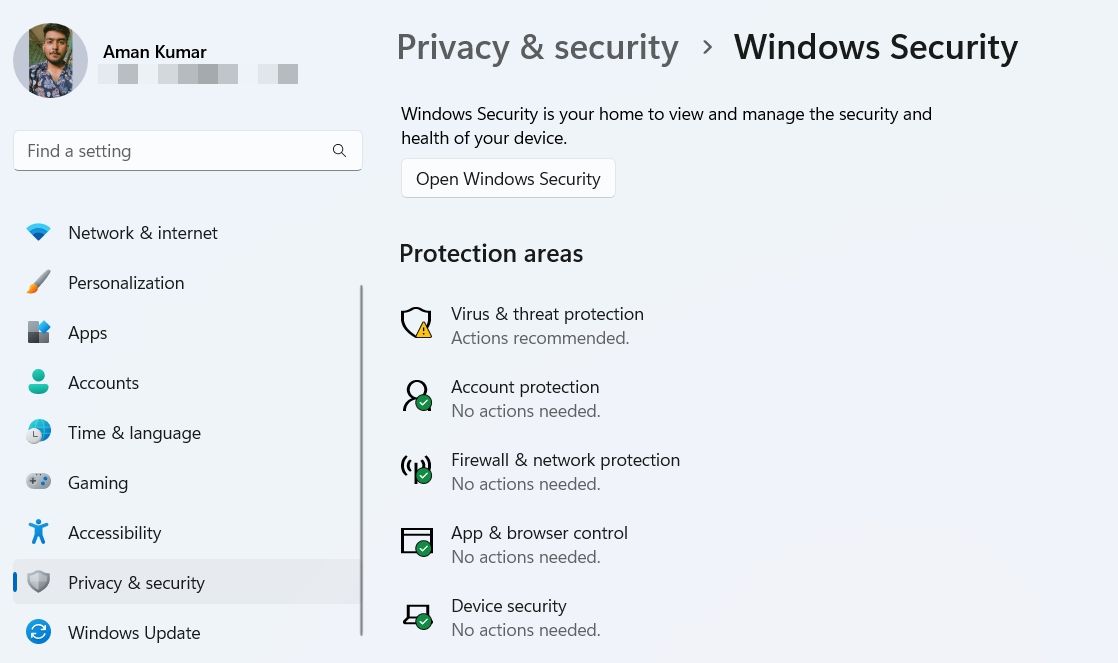
On the Windows Security page, click Open Windows Security to launch the app.
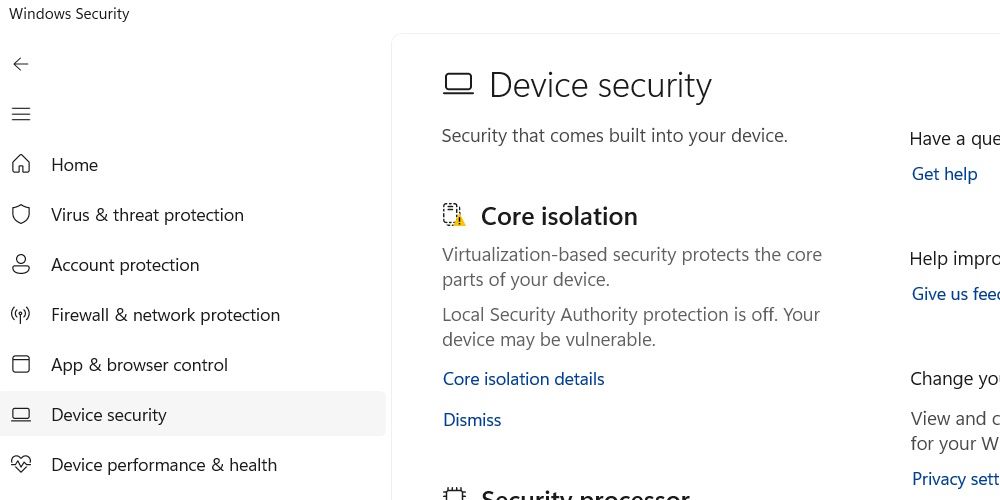
On the left side menu of the Windows Security app, select Device security. Then, on the right side, click on the Core isolation details link.
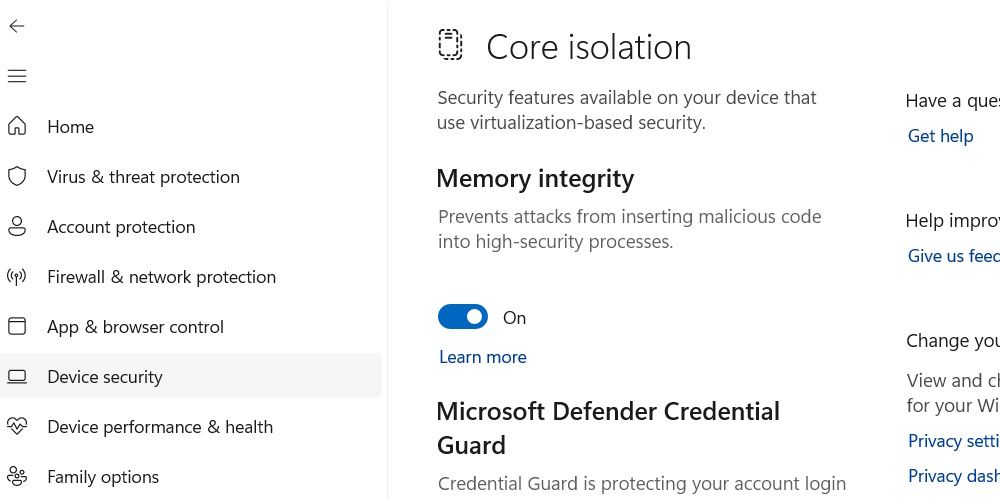
Click the toggle under Memory integrity to turn core isolation memory integrity on and off.
Now you just need to restart your device for the changes to take effect.
Using the Registry Editor
Press Win + R to open Windows Run. In the text box, type regedit and then hit the Enter key on your keyboard. When the UAC prompt comes up, click Yes.
We strongly advise that before you make any changes to the Windows registry, you should know exactly what you’re doing. If you aren't familiar with the Windows registry, then please read our refresher on what the Windows registry is and how to edit it.
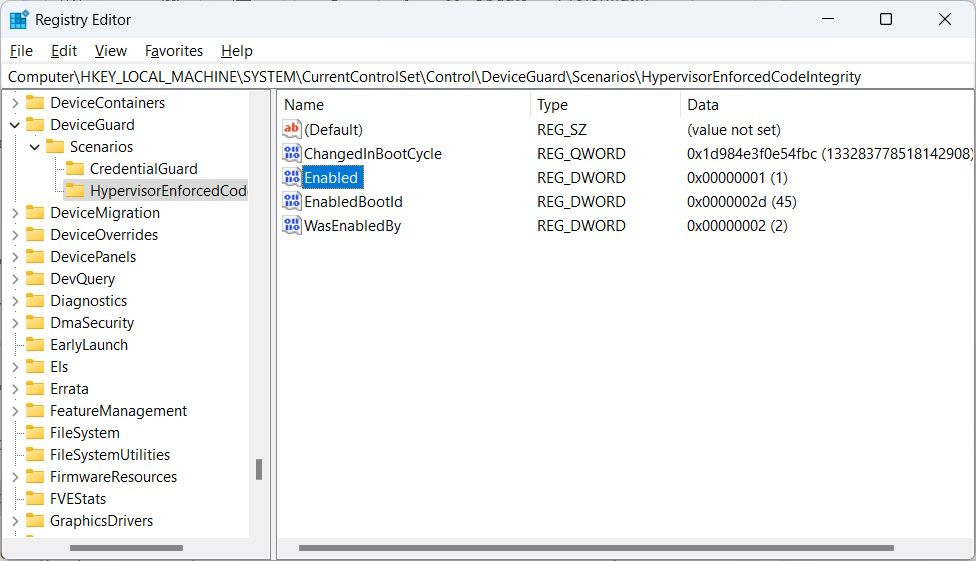
Next, copy and paste the following text in the address bar of the Registry Editor and hit the Enter key:
HKEY_LOCAL_MACHINE\SYSTEM\CurrentControlSet\Control\DeviceGuard\Scenarios\HypervisorEnforcedCodeIntegrity
Double-click the Enabled value in the right panel of the Registry Editor to edit it.
Then, enter 1 in the Value data text box and click OK if you want to enable core isolation memory integrity. If you want to disable it, enter 0 in the Value data text box.
What to Do When You Can't Turn On Core Isolation Memory Integrity
Sometimes, you can get an error message telling you that "Memory integrity is off. Your device may be vulnerable." But when you go to turn it on in the Windows Security app, you find that the toggle for core isolation memory integrity is grayed out. Other times, it might not be grayed out, but refuse to turn on no matter how many times you click it.
There are a lot of reasons why this can happen – the biggest one being driver issues. In any case, you should first try to turn the feature on and off using the Registry Editor (as we have discussed above). If that doesn’t work, read our guide on fixing memory integrity grayed out on Windows 11.
Taking Control of Core Isolation Memory Integrity
Core Isolation Memory Integrity is a feature that adds an extra layer of protection from malware. Since there's a performance cost associated with it, it's up to you to decide whether you want to sacrifice some performance for a more secure Windows PC. But no matter what you do, enabling or disabling the feature is quite easy.


