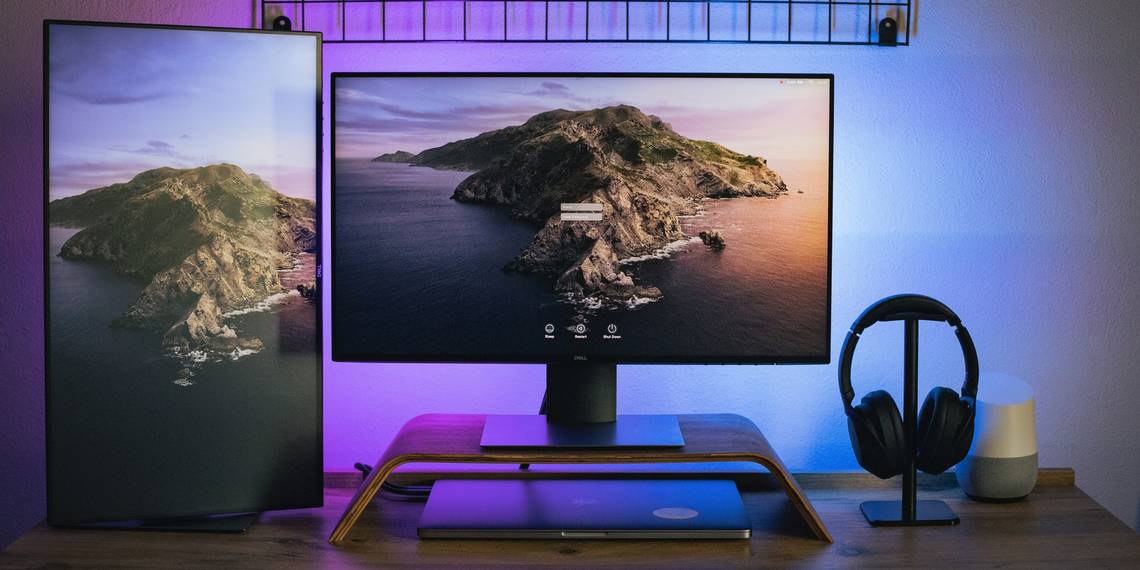
Hooking up multiple monitors or display devices to a computer is a surprisingly simple task. Physically connecting the devices is relatively simple, but you will need to configure the various options to customize the display to your personal needs.
You will need to arrange the proper layout to navigate between screens, configure the correct size and resolution for each monitor, and determine the primary display. Failure to do so will leave your desktop more difficult to use and lacking in functionality.
Connecting Multiple Monitors in Windows 11
You can connect multiple display devices to your laptop or desktop using the ports found on the computer. There are several different types of connectors you can use, and which one you choose will largely depend on which port each device has.
To start, check the back of the monitor or screen and the back, front, or sides of your laptop or desktop. The two primary types of connectors that you are likely to come across are a High-Definition Multimedia Interface (HDMI) connector and a Digital Visual Interface (DVI) connector.
These serve similar purposes; however, they are slightly different.
An HDMI cord carries both visual and auditory information from your desktop or laptop to the display device. Most modern monitors have an HDMI port on them which allows for easy connection to a computer. One of the nicest features that an HDMI port offers is the ability to set up multiple monitors from a single HDMI port.
The next most common type of connection that you may see is a DVI connection. These connections are similar to HDMI connections, however they don’t carry audio, only video. That means that if you use a DVI connection to hook up your computer to a monitor, you will need a separate connector to carry audio.
Today, most monitors and TVs have either a DVI port or an HDMI port, and the majority of computers have HDMI ports. If needed, you can get a converter to change an HDMI port over to a DVI port or vice versa.
Accessing Your Display Settings on Windows 11
Once you have all of the devices that you want to connect attached to your computer you can access the display settings. On Windows 11 this is a fairly simple process.
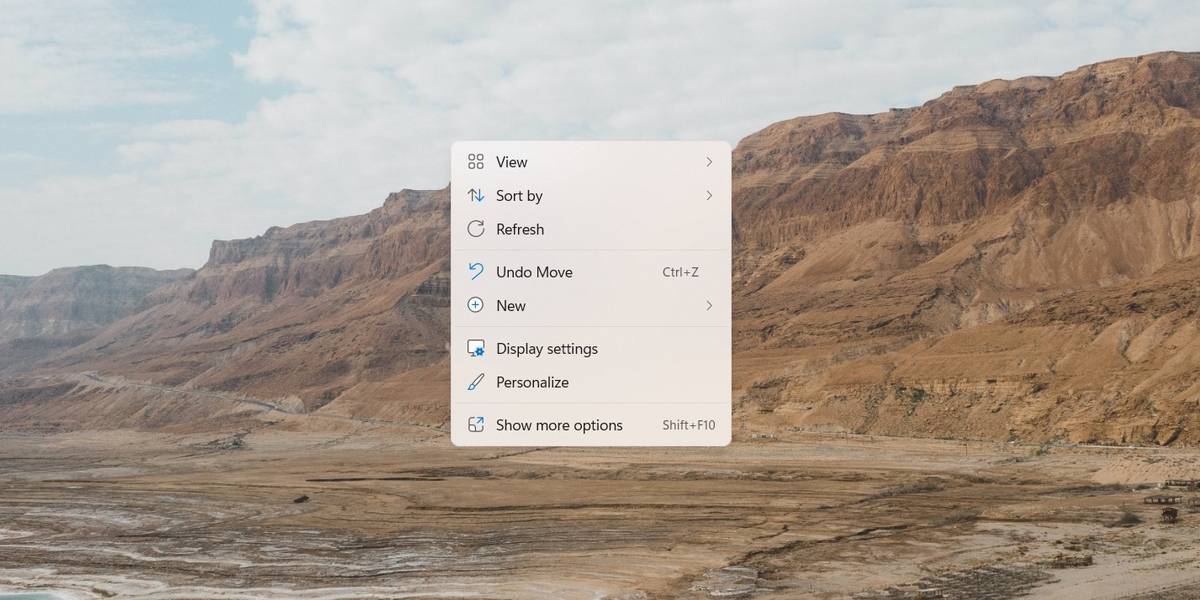
Right-click anywhere on your desktop to bring up a contextual menu with various system options in it. Near the bottom of the list, you will see an option labeled Display Settings. Click on it to bring up the Windows display options.
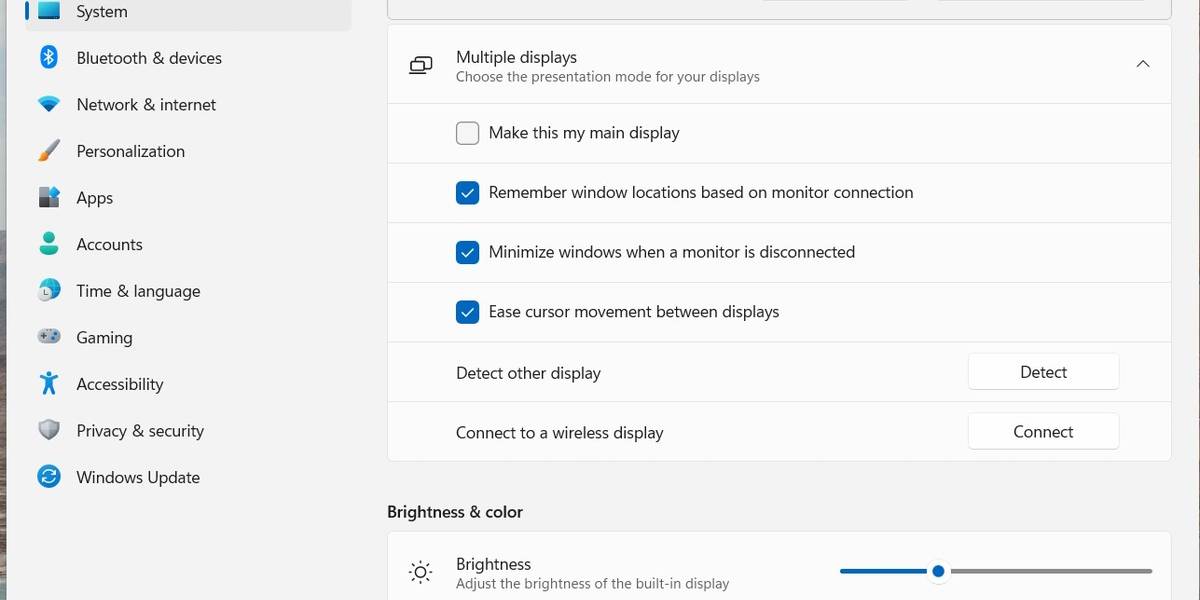
From here you can adjust all of your display settings. These include attributes like brightness, color schemes, resolution, and settings for multiple displays. As long as you have multiple monitors connected the first section you see will deal with managing multiple displays.
Configuring the Devices on Windows 11
There are several settings you can choose to manage for your new displays. In the first section, you will see all connected monitors displayed with large numerals on them. Clicking on any one of them will cause that monitor to become active. Adjusting any of the settings below will affect the selected monitor.
The Primary Display
The first option to affect your monitors is selecting the primary display. All other displays are positioned and oriented relative to the primary display. Additionally, many apps will preferentially launch on the display set as primary.
To swap your primary display from one device to another, you need to select the monitor you would like from the display at the top of the window. Once you have selected the proper monitor, you will see that the first checkbox in the settings becomes active.
Selecting this checkbox, labeled Make this my main display, will convert the selected display to your primary display.
Display Location
Once you have your primary display selected you can configure the locations for each of your monitors. The locations are all laid out relative to the primary display. To rearrange your displays, drag and drop the boxes in the top section of the display window.
Each display is denoted by a specific number. If you aren’t certain which is which, you can select any monitor and click on the Identify button. This will cause an indicator to appear on the selected monitor.
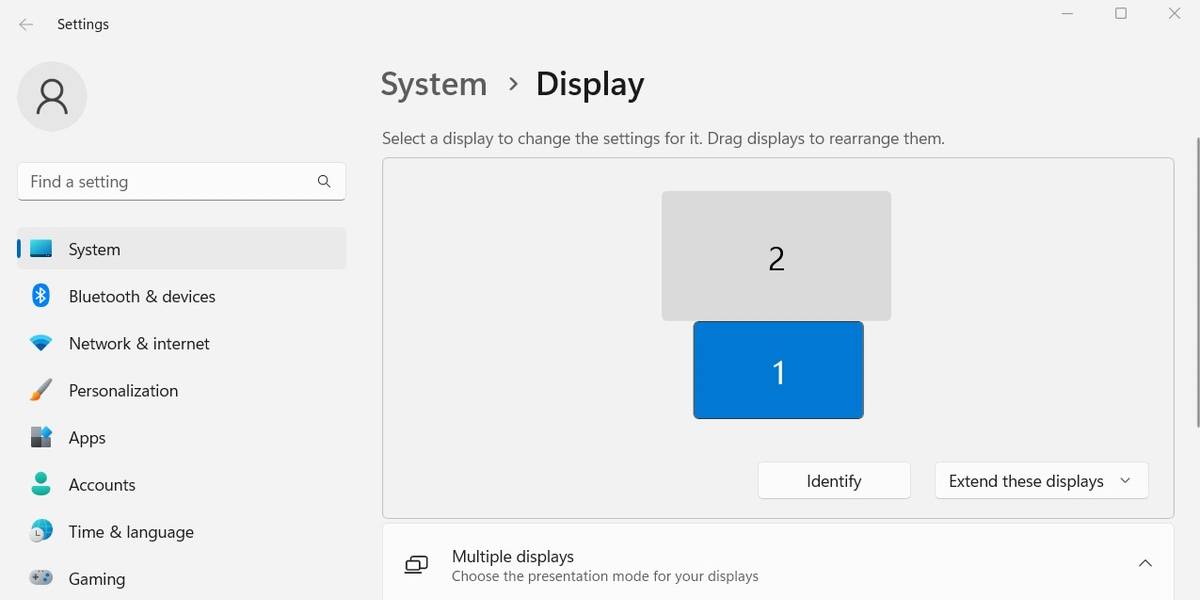
When you arrange your displays you want to try to position them as close to how they are positioned physically as possible. Failure to do so will result in your mouse not moving smoothly from one monitor to another.
Mirroring and Extending
Another setting you can adjust from the Display settings screen is the behavioral mode for each monitor. On the bottom right of the top section, you will see a dropdown menu containing choices such as Extend these displays, and Duplicate these displays.
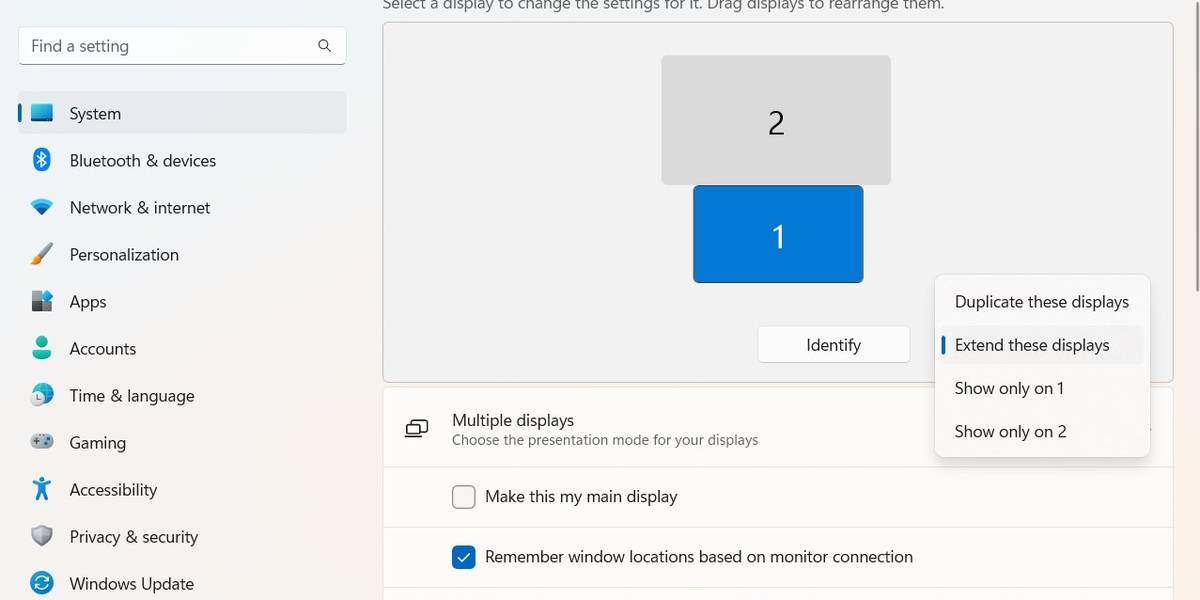
Choose the extend option to cause the monitors to act as a single, continuous display. Choose the duplicate option to cause this monitor to mirror the content displayed on the currently selected primary display.
Display Orientations
Further down in the list of settings for the individual monitors, under the Scale & Layout section, is an option for altering the orientation of a monitor. This allows you to change the position of the bottom on the monitor allowing you to rotate your Windows display device by 90 degrees.
You can alter the orientation of a monitor to display content in portrait mode instead of landscape.
Monitor Sizes
In general, most modern display devices are excellent at communicating their relative size and preferred resolution. Most display devices can determine their best settings based on what type of monitor they are.
Occasionally, however, it may be necessary to reset some specific settings in order to correct potential display issues.
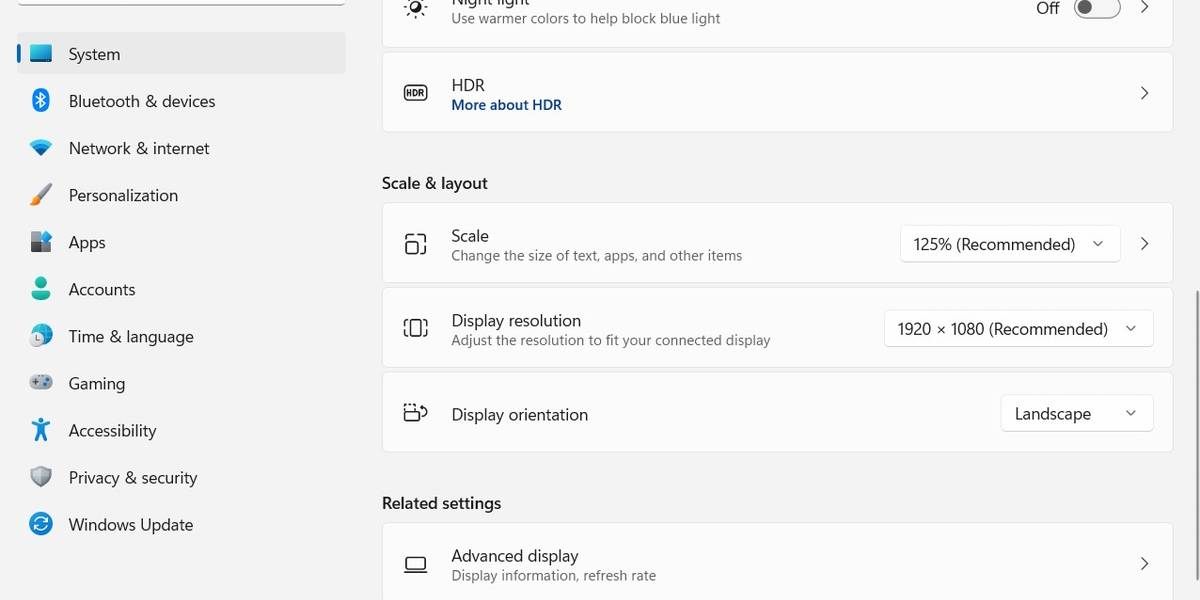
The first two options under Scale & Layout allow you to adjust the scaling of the selected monitor and the device’s resolution. These settings are managed on a per-device level, meaning that you can adjust the display for a single monitor or display without affecting the others.
Customizing Your Display With Multiple Devices
To get the most out of having multiple monitors or display devices, it is important to know how to properly configure them. While modern monitors may be able to communicate a lot of information with the computers they are hooked up to, there are still certain features it is up to you to set.
Configuring the arrangement of your displays, setting up a primary display, and determining the behavior of each monitor is important to get the best user experience.