Has your video turned out to be too large? More often than not, that's the case these days. Fortunately, you can use various tools and methods to compress videos and reduce video file size.
Here we show how to compress a video on Windows, Mac, iPhone, and Android.
How to Compress a Video on Windows
You don't need to know how file compression works to compress video on Windows. There are multiple ways to compress a video file on Windows, and here are three of those ways.
1. Compress a Video by Zipping It
ZIP archives help you compress and combine your files on Windows. You can create a file archive (such as a ZIP or 7Zip archive) for your video, which can reduce video size on Windows.
- To compress multiple videos, put them all in a single folder on your PC.
-
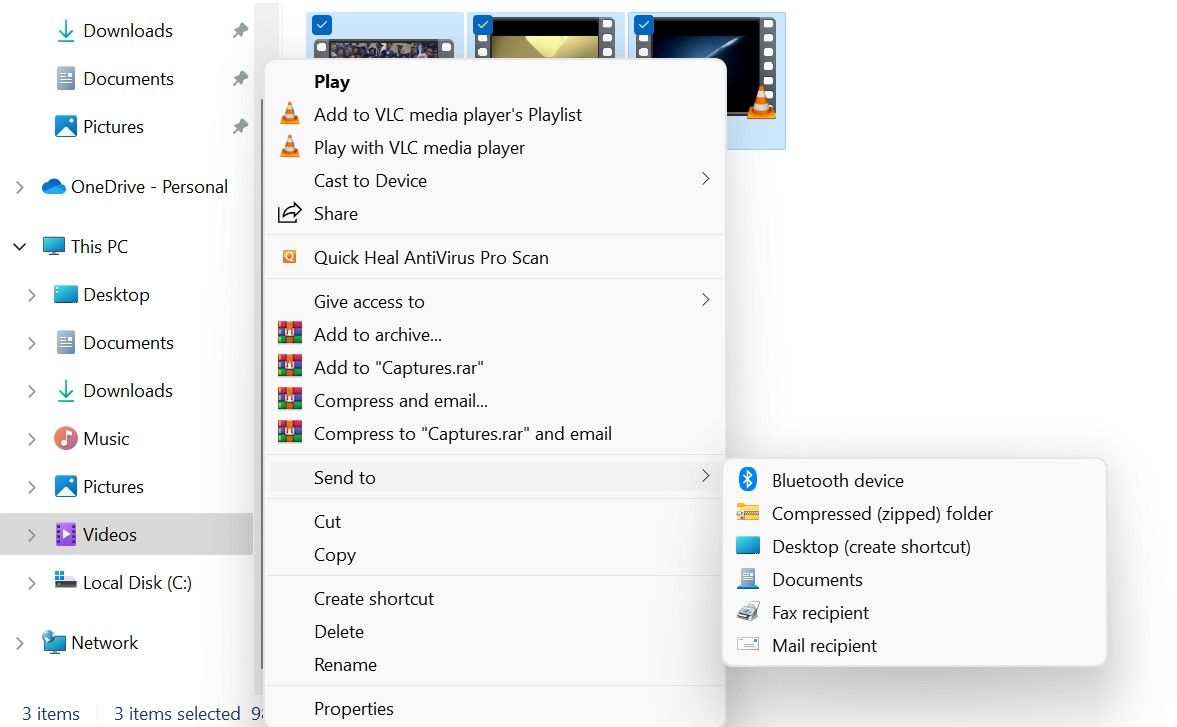
Open that folder, select all the videos you want to compress, right-click on any one video, and select Send to > Compressed (zipped) folder.
- Windows will create a new archive and save it in the same folder as your videos.
This works on most standard file types, such as if you wanted to compress MP4 files on Windows 11.
Want to do it with a single video? Start at step 2 in the above list, using the single video you want to compress.
Compressing a video file into a ZIP archive does not typically reduce its file size significantly. Many video files are highly compressed using codecs like H.264 or HEVC, and Zipping them only provides minimal additional compression.
2. Compress Your Video Size Using the Built-In Video Editor
Windows has an integrated video editor, which you can use to reduce video size on Windows 11. There are multiple options for how to compress a video in this app.
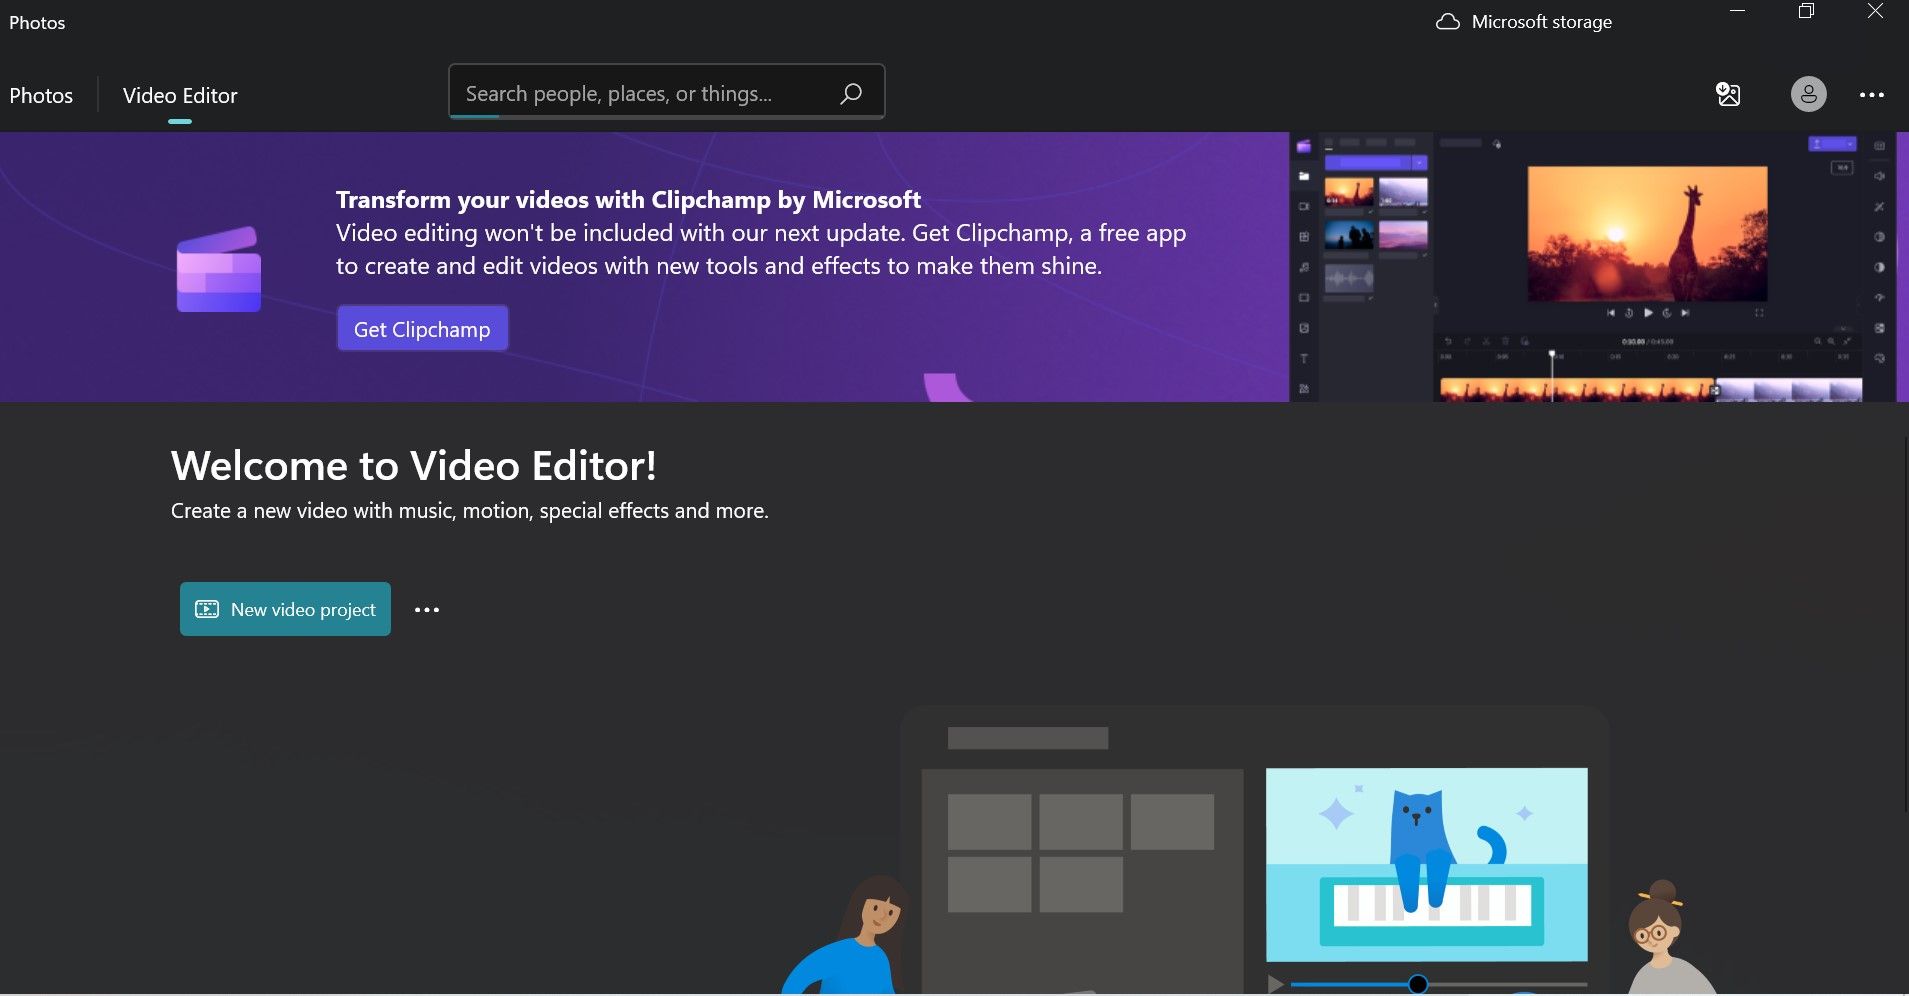
- Search for Video Editor using the Start Menu and select the Best Match.
-
Click on New video project, and then enter (or skip) a name for the video you are about to compress.
-
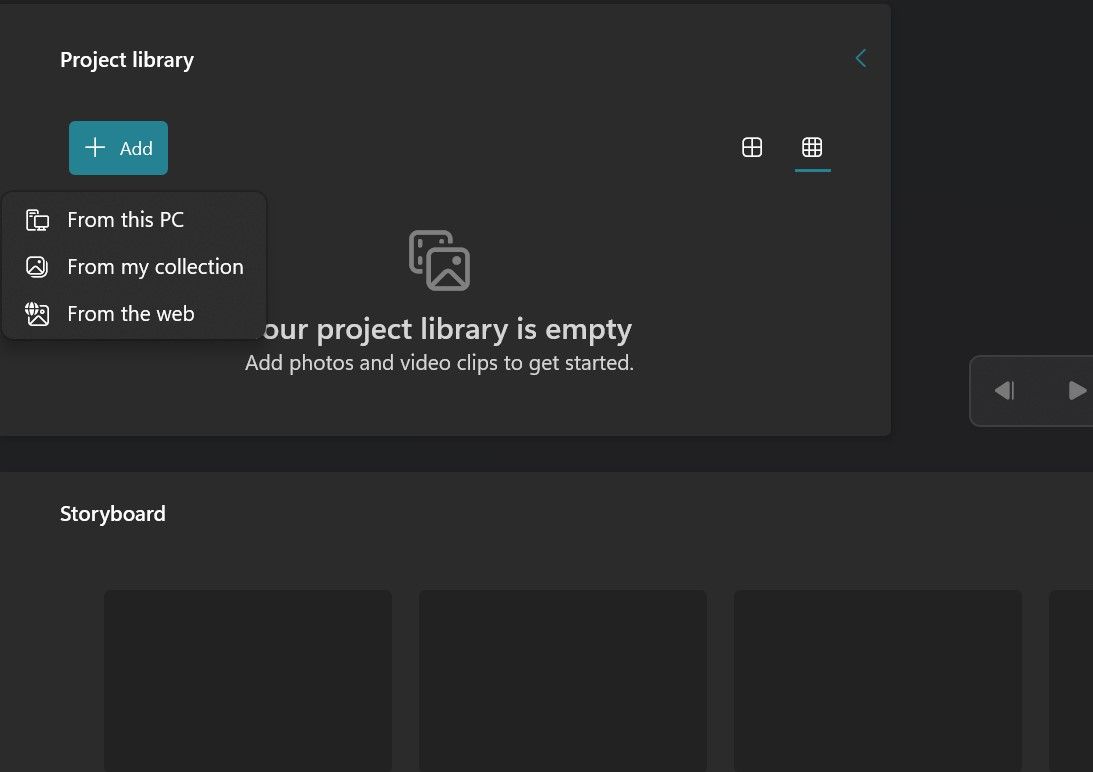
Click + Add and add the video you want to compress from your PC, photo collection, or the web.
-
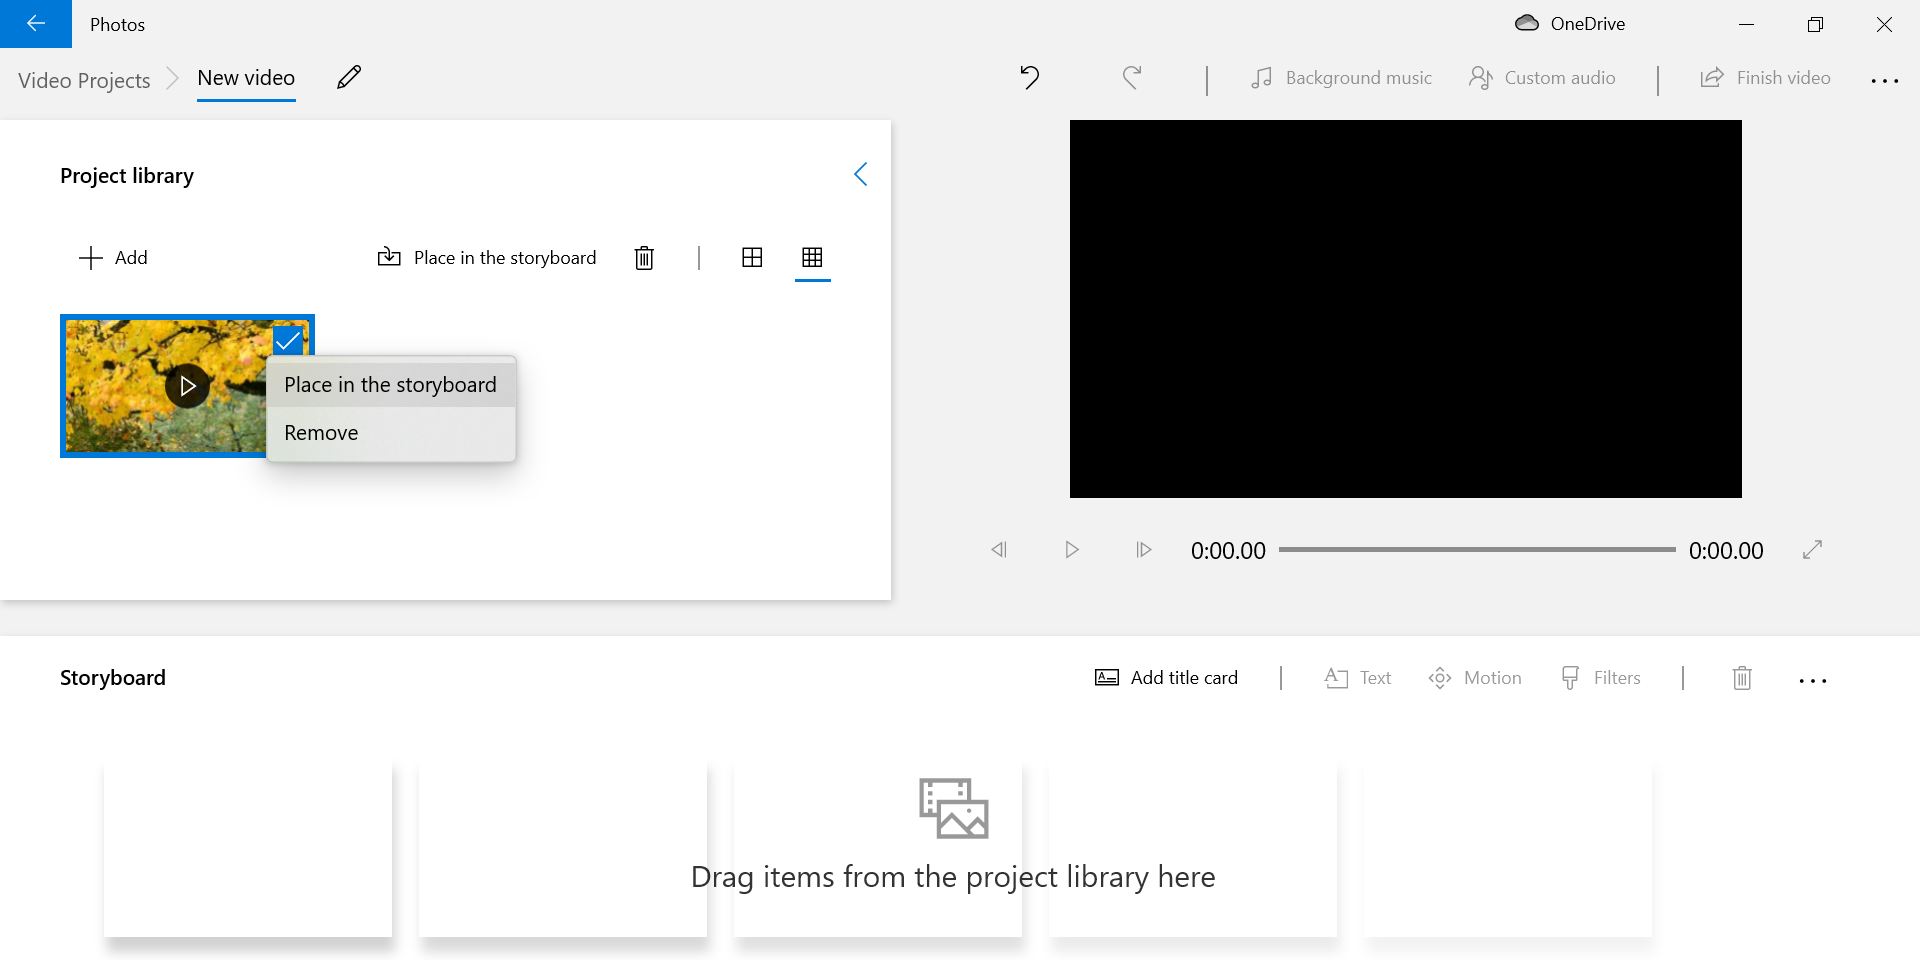
Right-click on your video and select Place in the storyboard.
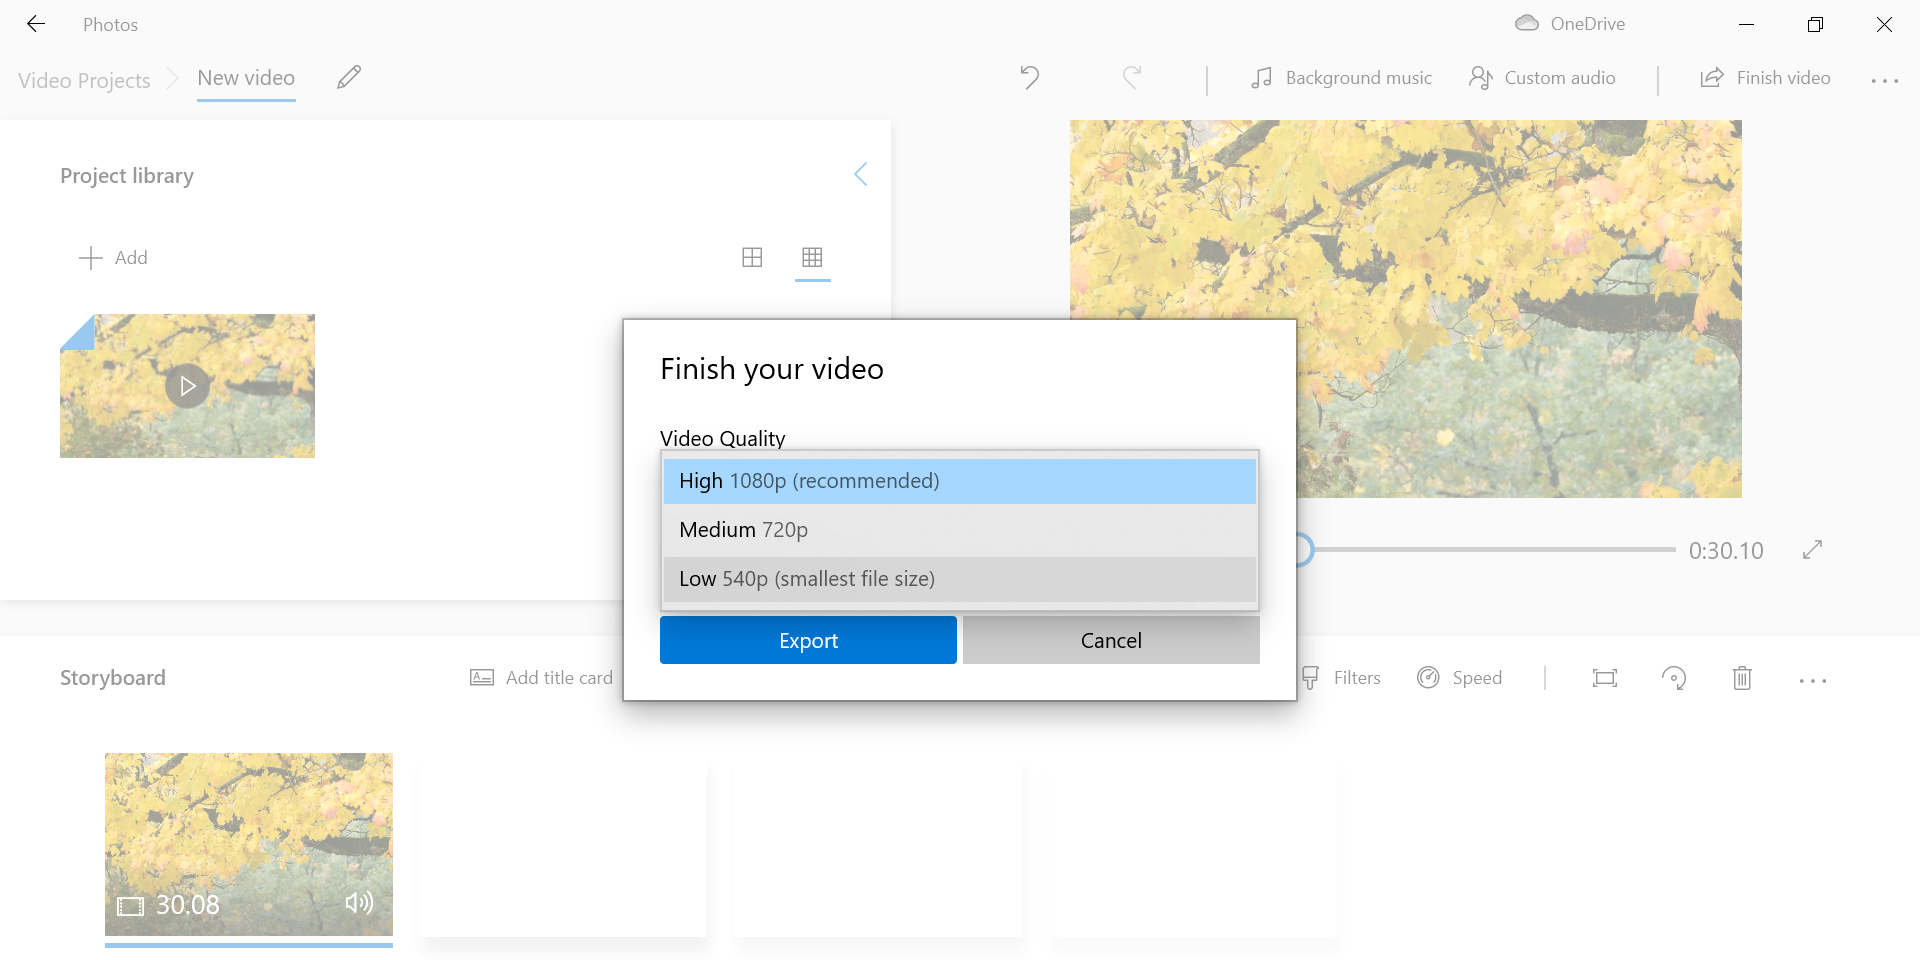
- Click Finish video in the top-right corner.
-
Choose an option from the Video Quality dropdown menu to compress your video. This is how to lower the quality of a video; the lower the resolution you choose, the smaller the file size of your resulting video will be. Then, hit Export.
Please note that selecting a small resolution size can decrease the quality of your video. If you want to know how to lower the quality of a video, then this is a great way to do it. You may have to play around with video compression settings to find the sweet point between quality and file size.
3. Reduce the Video File Size Using VLC Media Player
VLC media player is not just a media player app. It's more than that. You can use this app to encode your videos using various codecs, which should help you compress videos on Windows 11. You can also reduce video file size on Windows 11 this way.
Here's how you use VLC as a compression tool:
- Open VLC, click the Media menu at the top, and select Convert/Save.
-
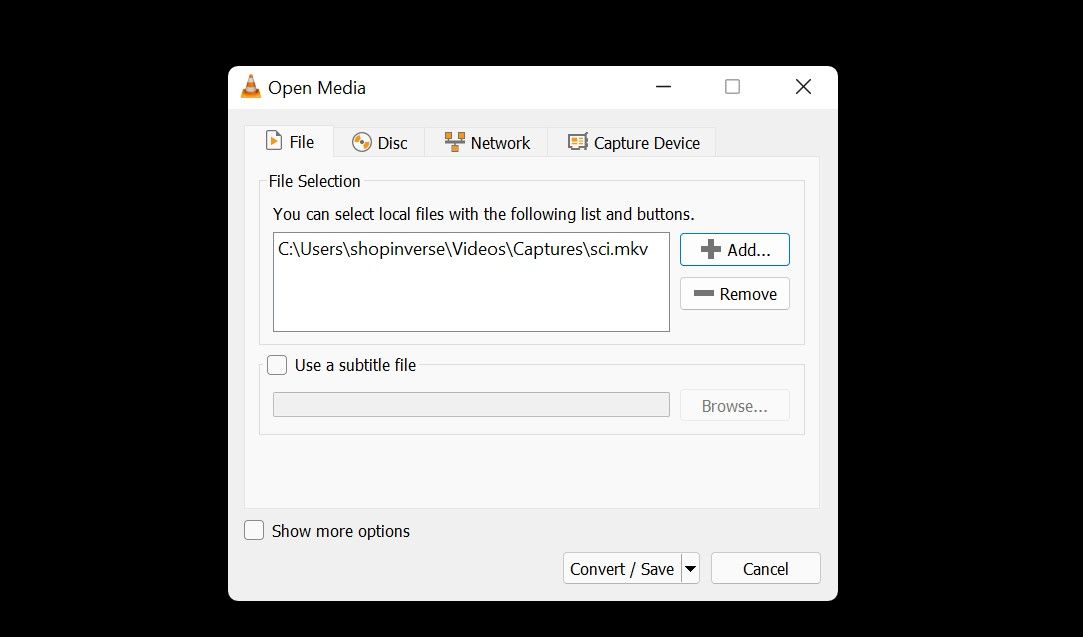
Click the Add button, add your video file, and hit Convert/Save at the bottom.
-
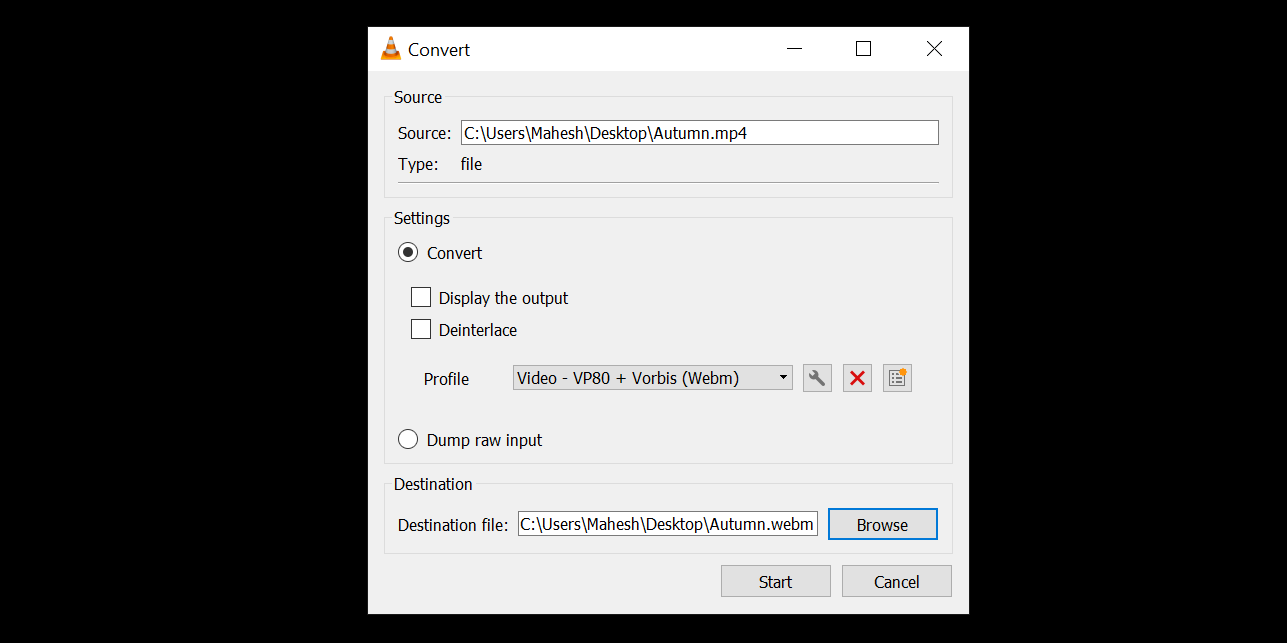
The Profile dropdown menu is what lets you compress your video file. Click this menu, choose the profile or resolution that best suits the device where you will be playing this video, select a destination, and click Start at the bottom.
- If you want to change the video resolution or specify other settings like encapsulation, video and audio codecs, click the spanner icon next to the Profile dropdown menu to do that before clicking Start.
Once completed, you can compare the file size of the compressed video with the original and see how much space you saved. This method actually re-encodes and reduces the size of the video file, unlike just zipping it. The compressed video will have lower quality, but the smaller file size may be worth it.
If you want to know how to compress MP4 files on Windows 11, this is a great way since VLC natively supports many different file types.
How to Compress a Video on a Mac
There are internal and external methods to reduce the file size of a video on your Mac. If you want a simpler option, the built-in method is excellent. For more flexibility and customizations, go for the external method.
You can use both of those methods as follows.
1. Make a Video Smaller Using QuickTime Player
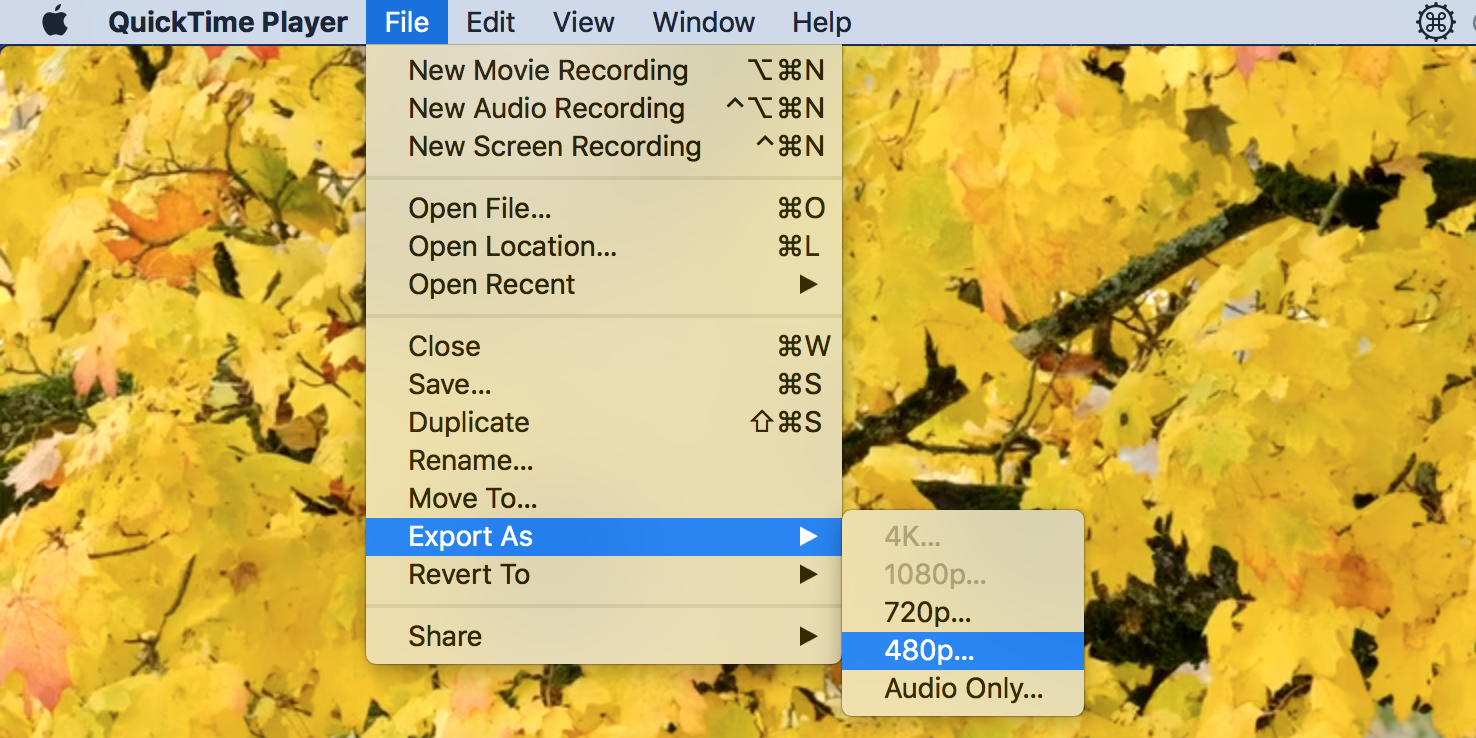
QuickTime Player is the default video player for Mac, but if you know how to lower video quality in this program, you can save your videos in a lower resolution. This allows you to create a copy of your video that's much smaller than the original video file. As with other forms of compression, you may experience some quality loss in the output video file.
Here's how you do that:
- Open your video in QuickTime Player.
-
Click File at the top, select Export As, and choose a resolution for your video.
- Select a folder to save your video and hit Save.
2. Use HandBrake to Compress a Video
QuickTime Player doesn't have many options to customize your file compression tasks. If you're looking for more options on how to compress a video, a tool like HandBrake can help you out.
HandBrake is a free and open-source app that converts and encodes your videos using various codecs. It has loads of customizable options, which lets you produce a compressed file exactly how you want.
You can use HandBrake as follows to compress your videos on macOS:
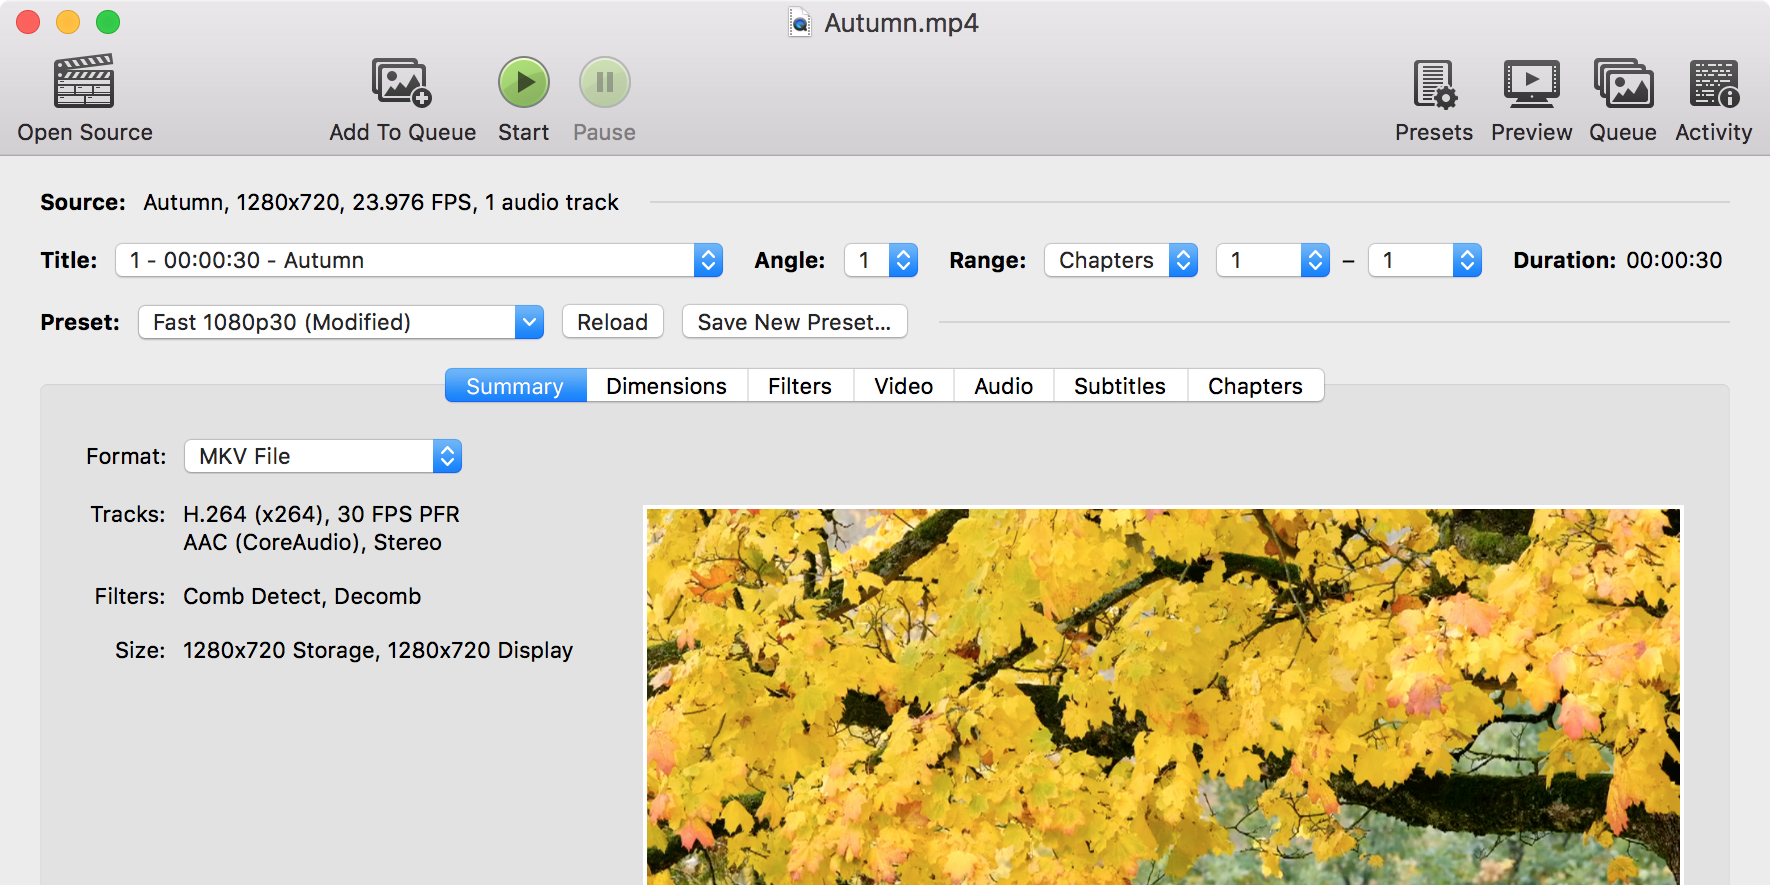
- Launch HandBrake, click Open Source, and load the video file you want to compress.
-
Click the Preset menu and choose one of the many presets to compress your file. Most options are self-explanatory, so you shouldn't have any issues.
- Customize any other options you want.
- When you're ready, click Start to begin compressing your video.
HandBrake is an excellent tool for macOS, but it is also available to Windows and Linux users, too.
How to Reduce the Video File Size on an iPhone or iPad
You don't need to transfer your iPhone's videos to a computer to compress them. There are apps on the official App Store that allow you to compress a video right on your iOS device.
Video Compress is one of those apps that lets you reduce the size of your videos. Load your video in the app, choose appropriate options, and get a reduced-size version of your video.
Here's how to compress a video on your iPhone using Video Compress:
- Launch the app and tap the red icon in the middle of the screen. Then, allow the app to access your phone's content.
- Tap one of the videos in your gallery that you want to convert. Then, tap the checkmark at the top.
-
On the following screen, drag the slider to specify the compression ratio for your video. Dragging the slider to the left will reduce the video file size, but this will impact the quality of the video. Keep a balance, and then tap the icon in the top-right corner.

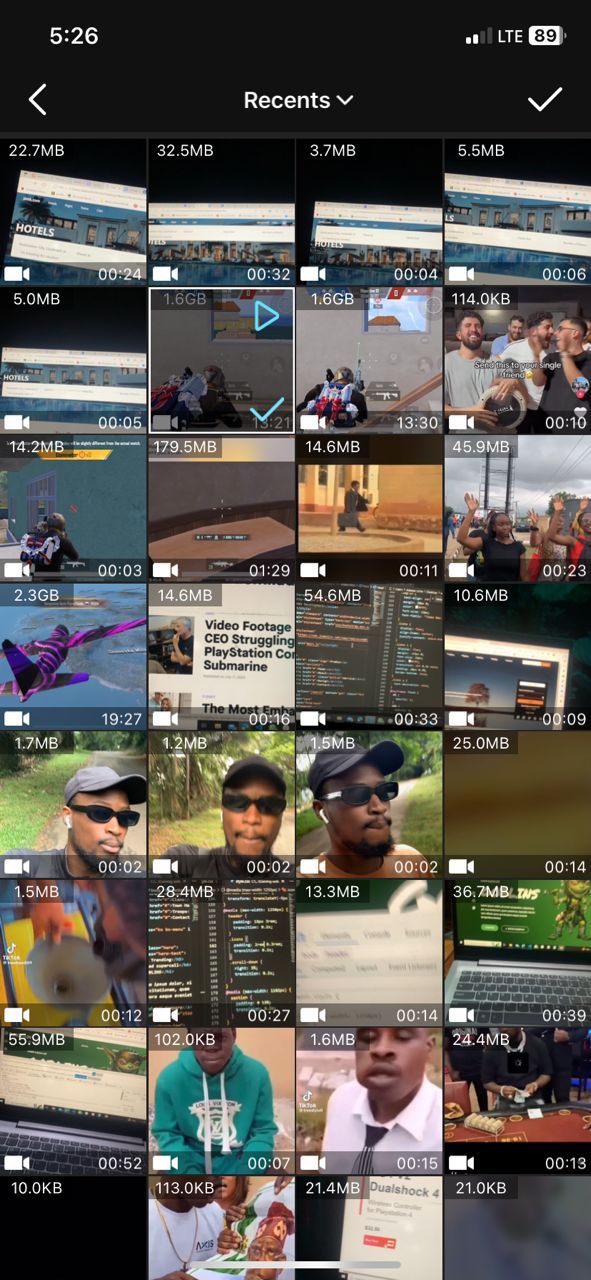
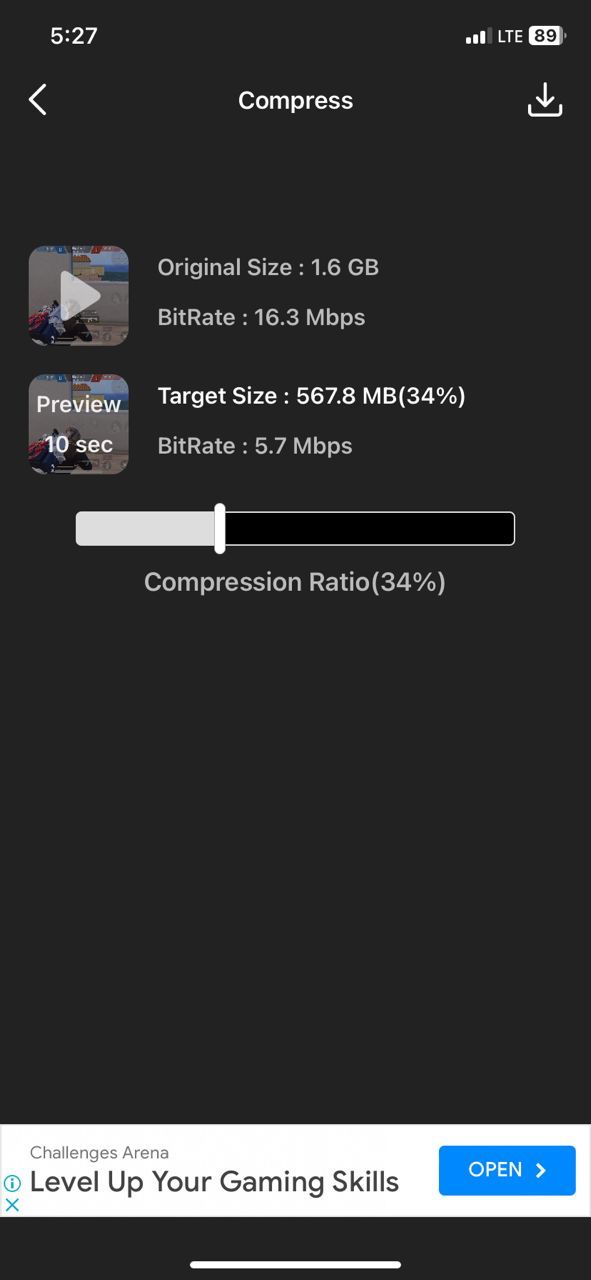
- Let your video compress, and then tap the Save icon in the upper-right corner to save it to the Photos app.
Download: Video Compress for iOS (Free, in-app purchases available)
How to Compress a Video on Android Devices
Android devices have several apps you can use to compress a video. If you want to compress an mp4 video, one app you can use is Compress Video Size Compressor.
This is how to make a video file smaller directly on your Android device using the app:
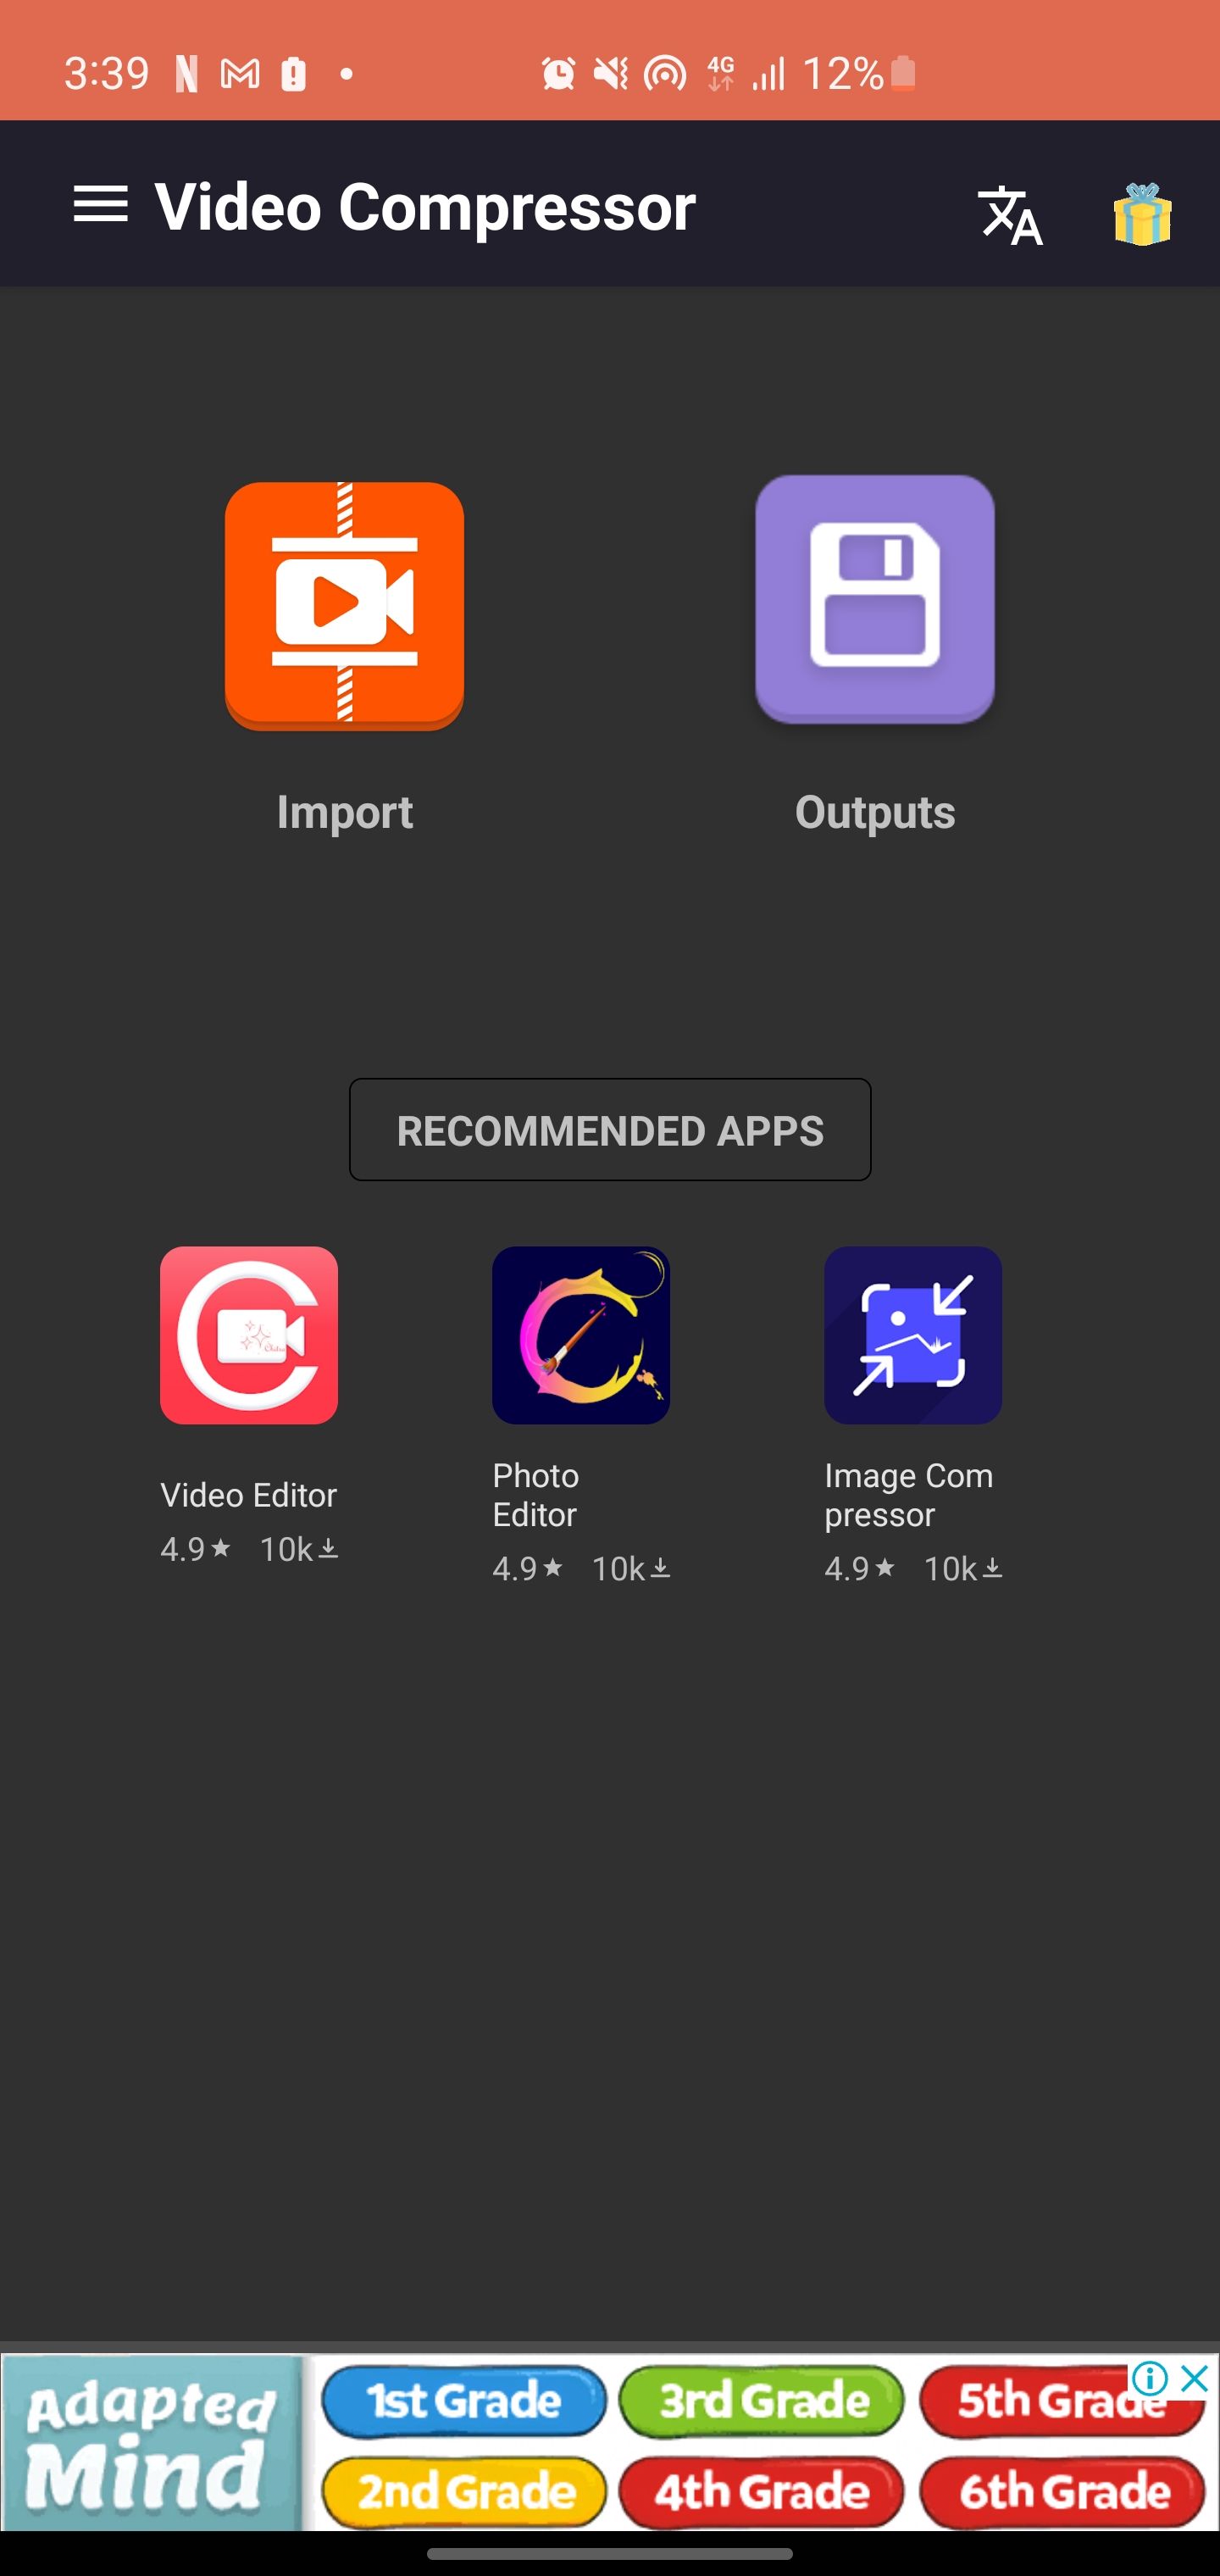
- Open the Compress Video Size Compressor app and tap Import to choose the video file you want to compress from your phone's storage. Tap Next.
-
Once the video is loaded, choose the kind of compressed file you want. You can also adjust the Compression Speed, Codec (H.264 or HEVC), and Format, according to your preference.

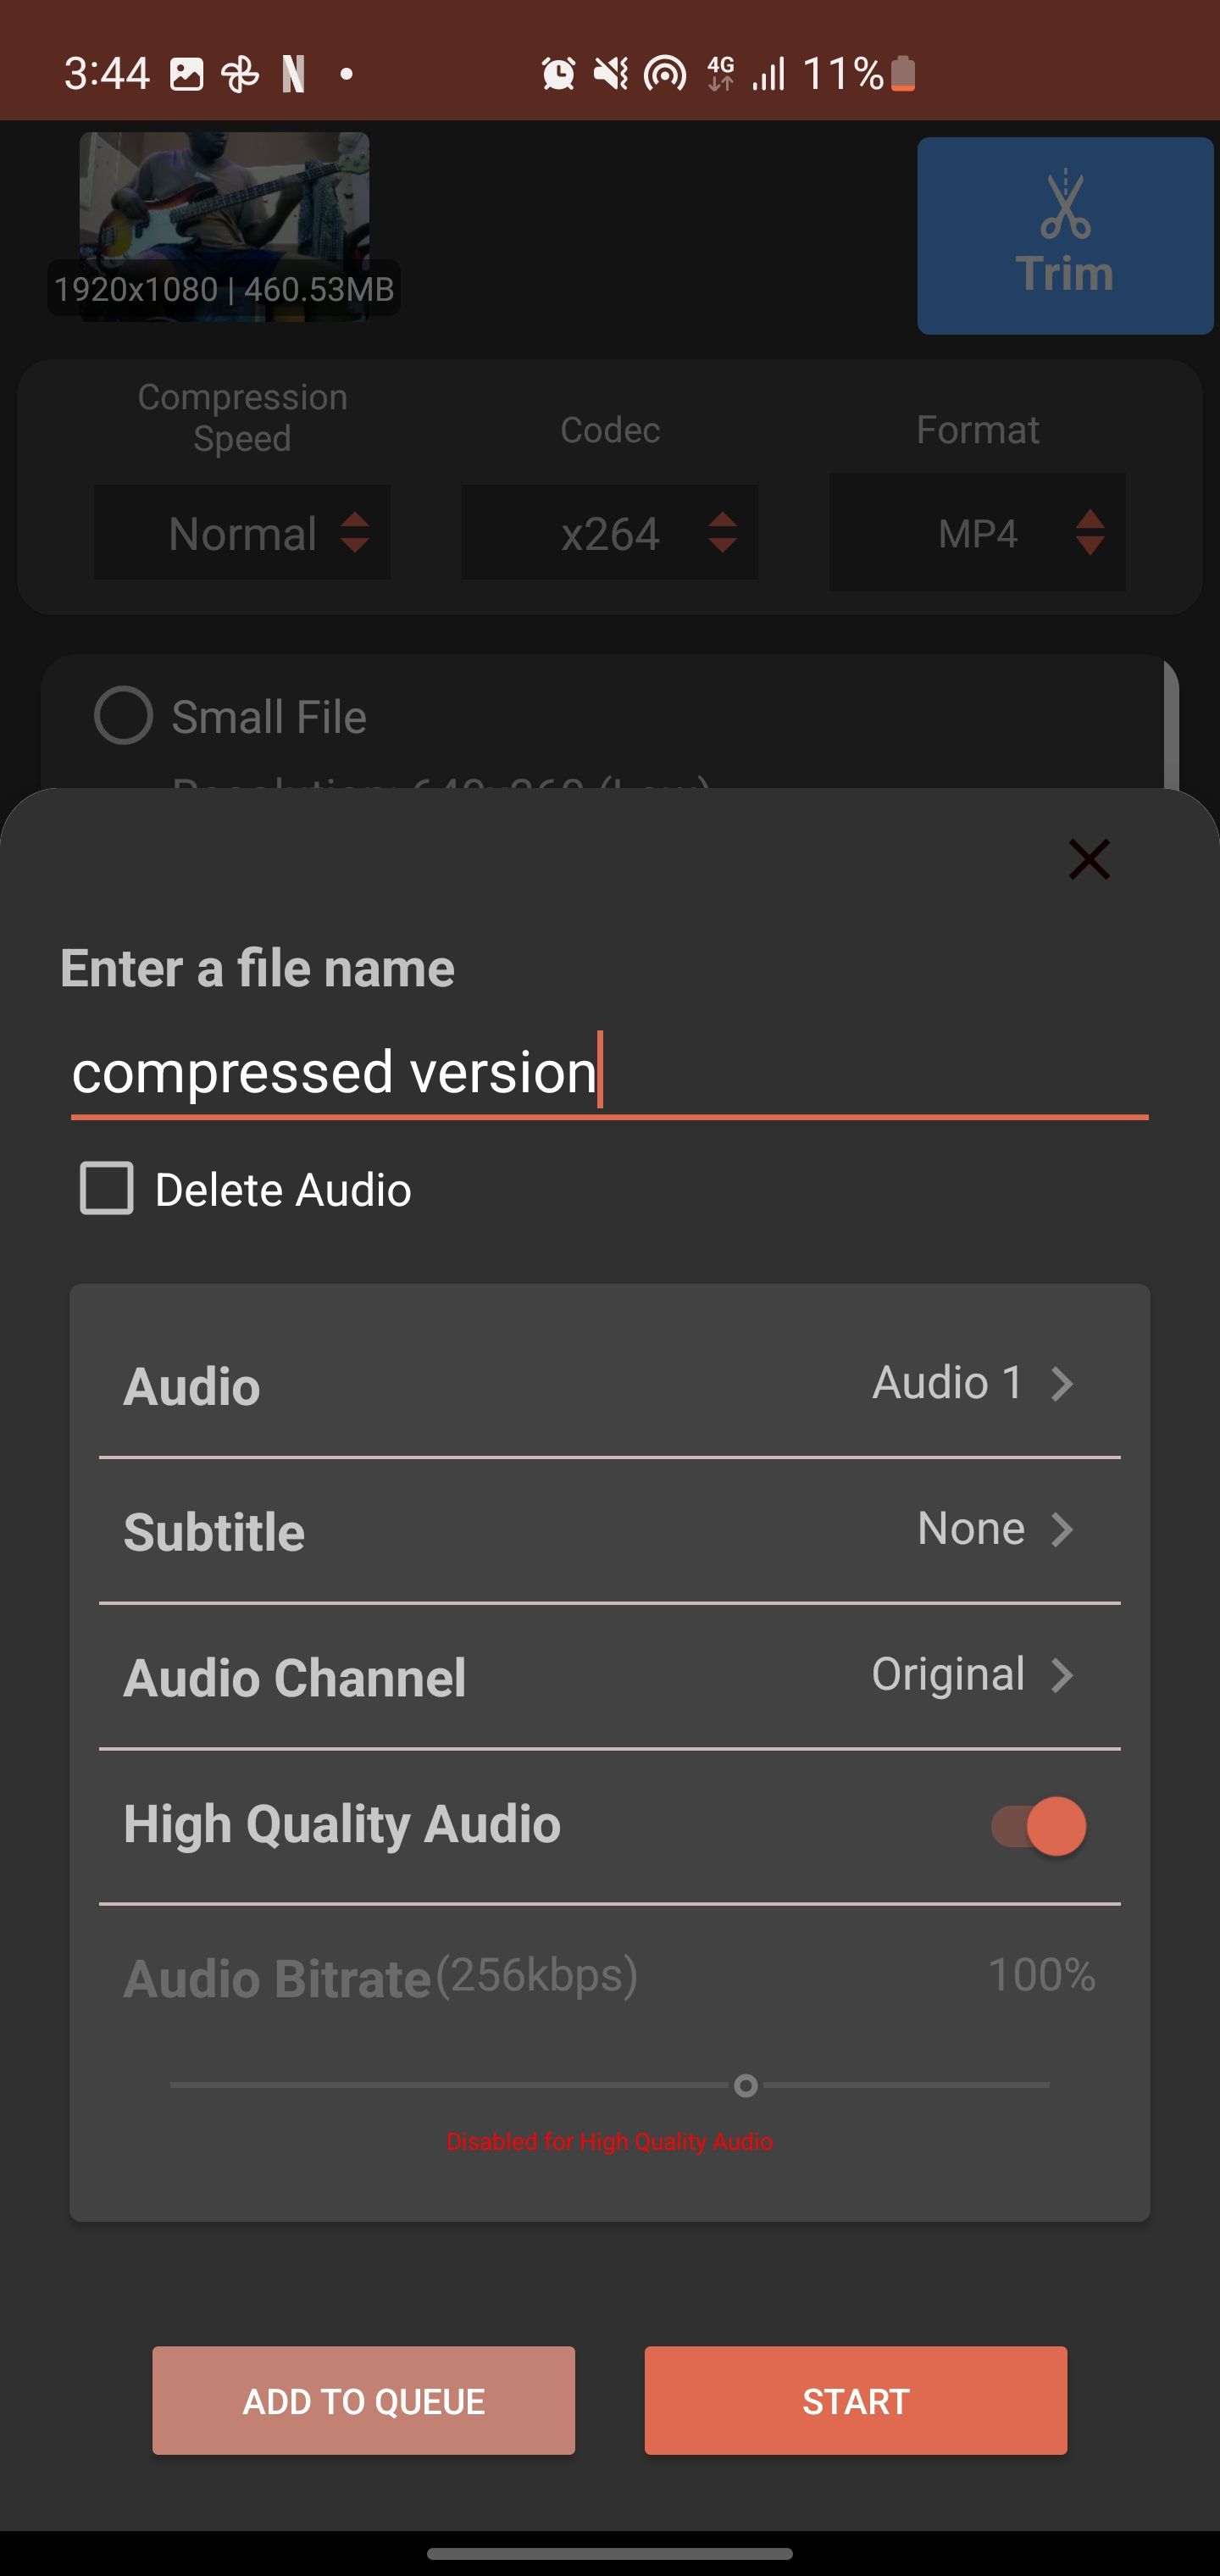
- Optionally, you can tap Custom settings to reduce the video's frame rate, resolution, and quality settings. Or tap on Lossy Compression (Faster) to adjust the resolution and bitrate sliders to your compression preference. Reducing these will compress the video further.
-
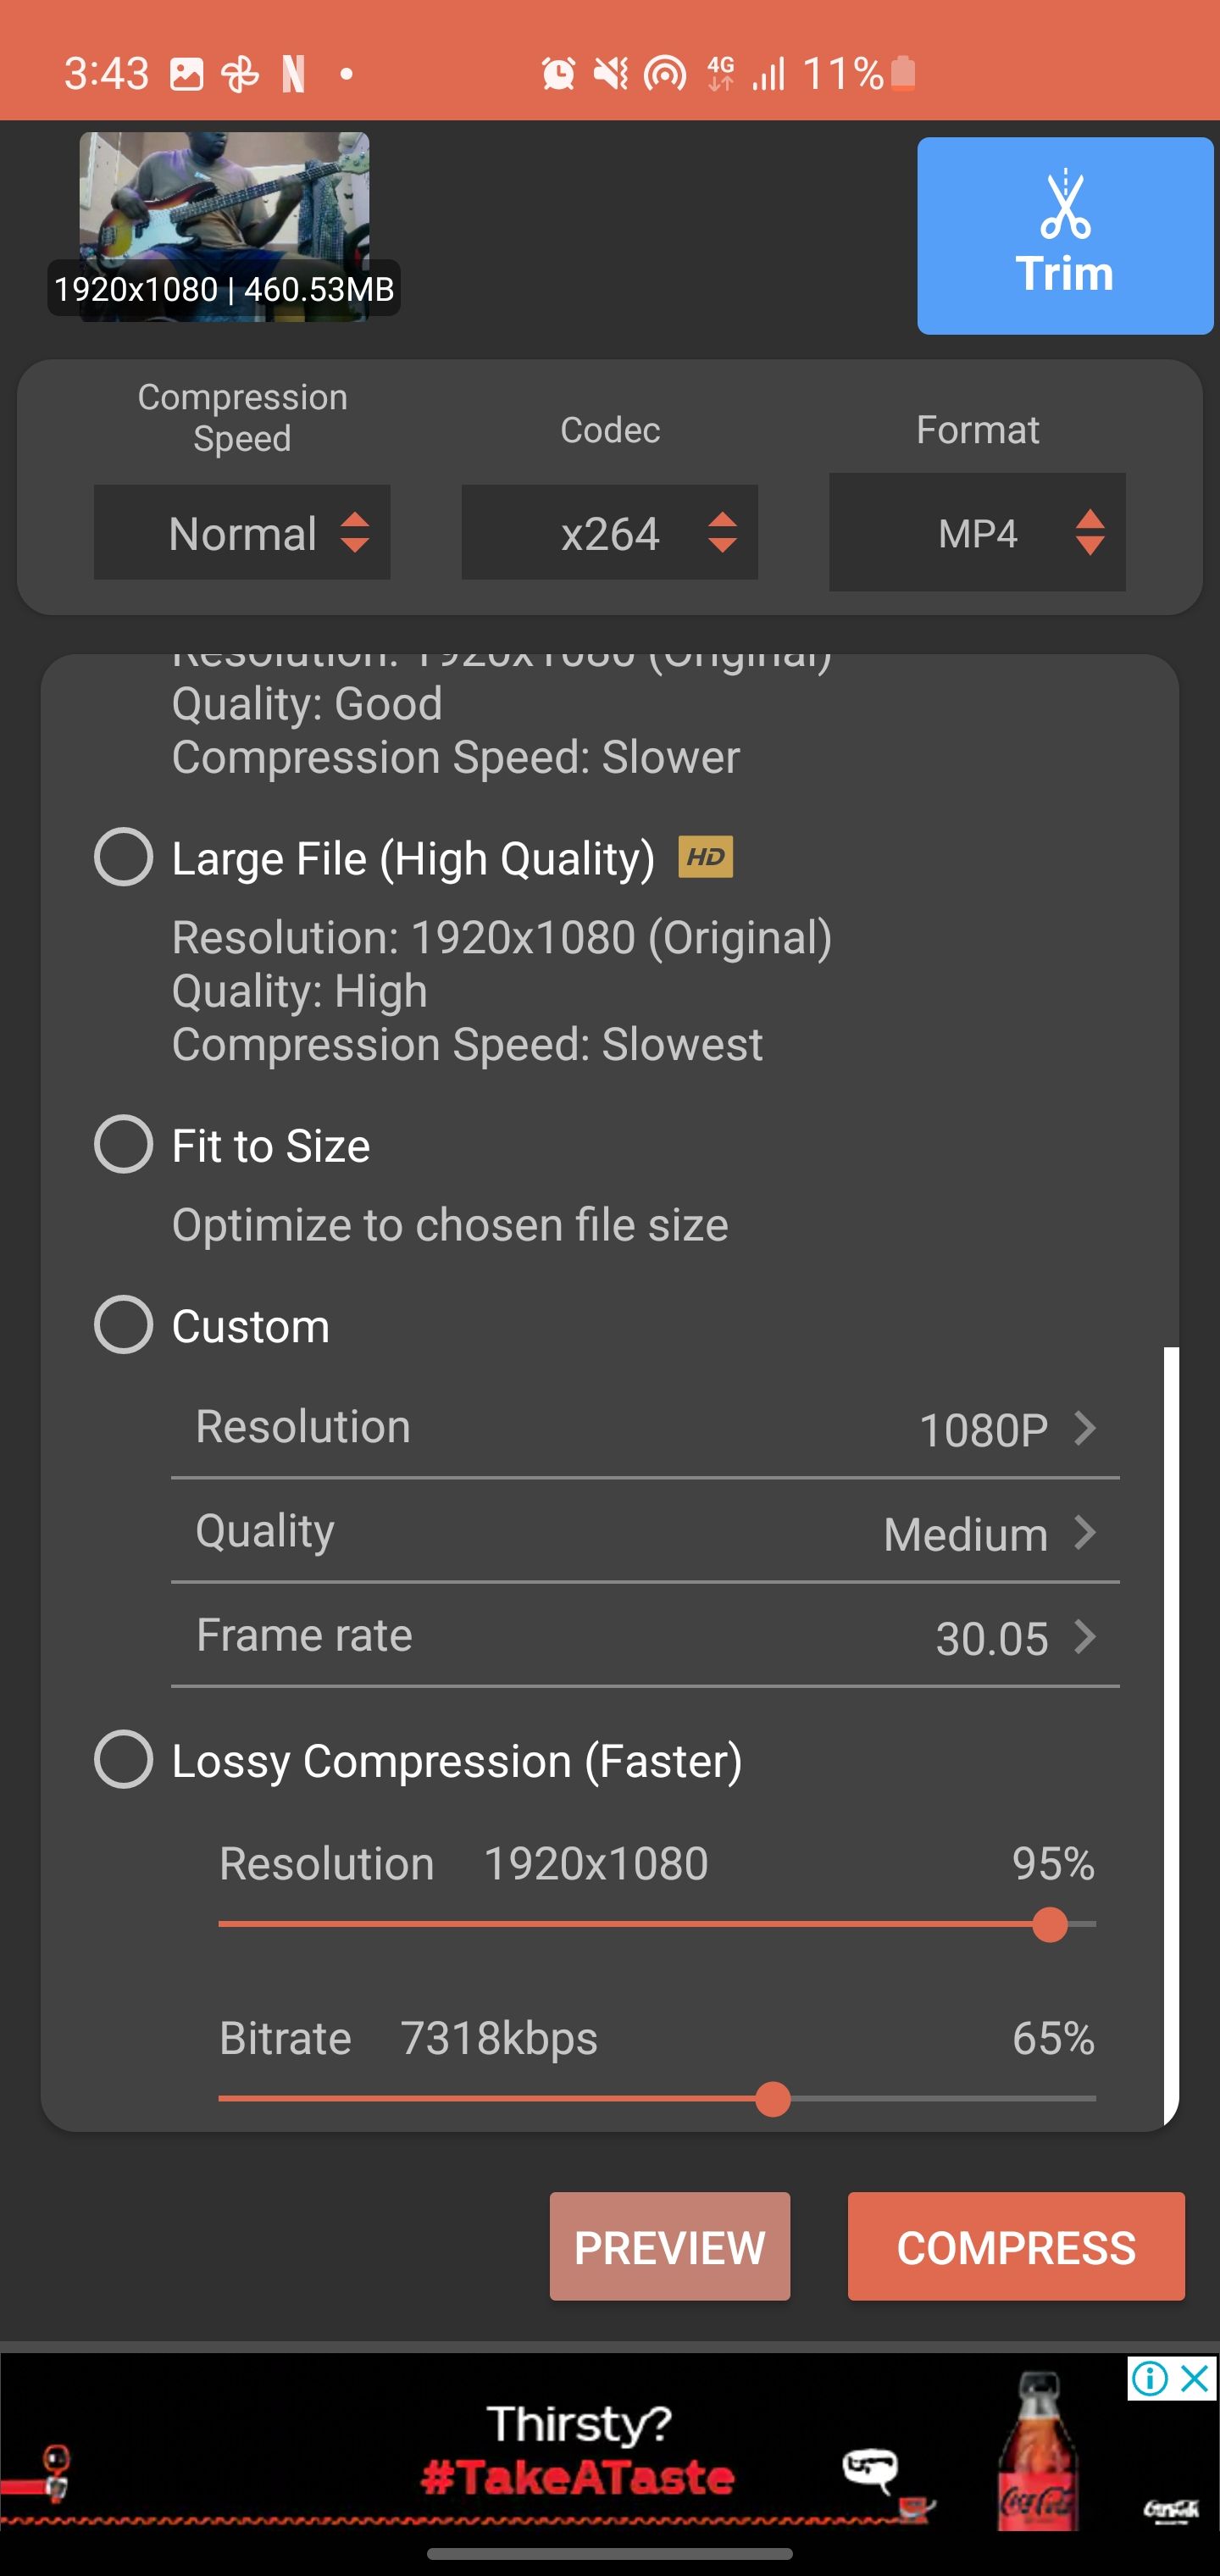
You can preview the video based on your compression settings or tap Compress. Enter a filename and leave the box that says Delete Audio unchecked. Tap Start to begin processing and compressing the video file. The app will show you the compression progress, or you can tap Enable background processing to let you leave the app while it's compressing.

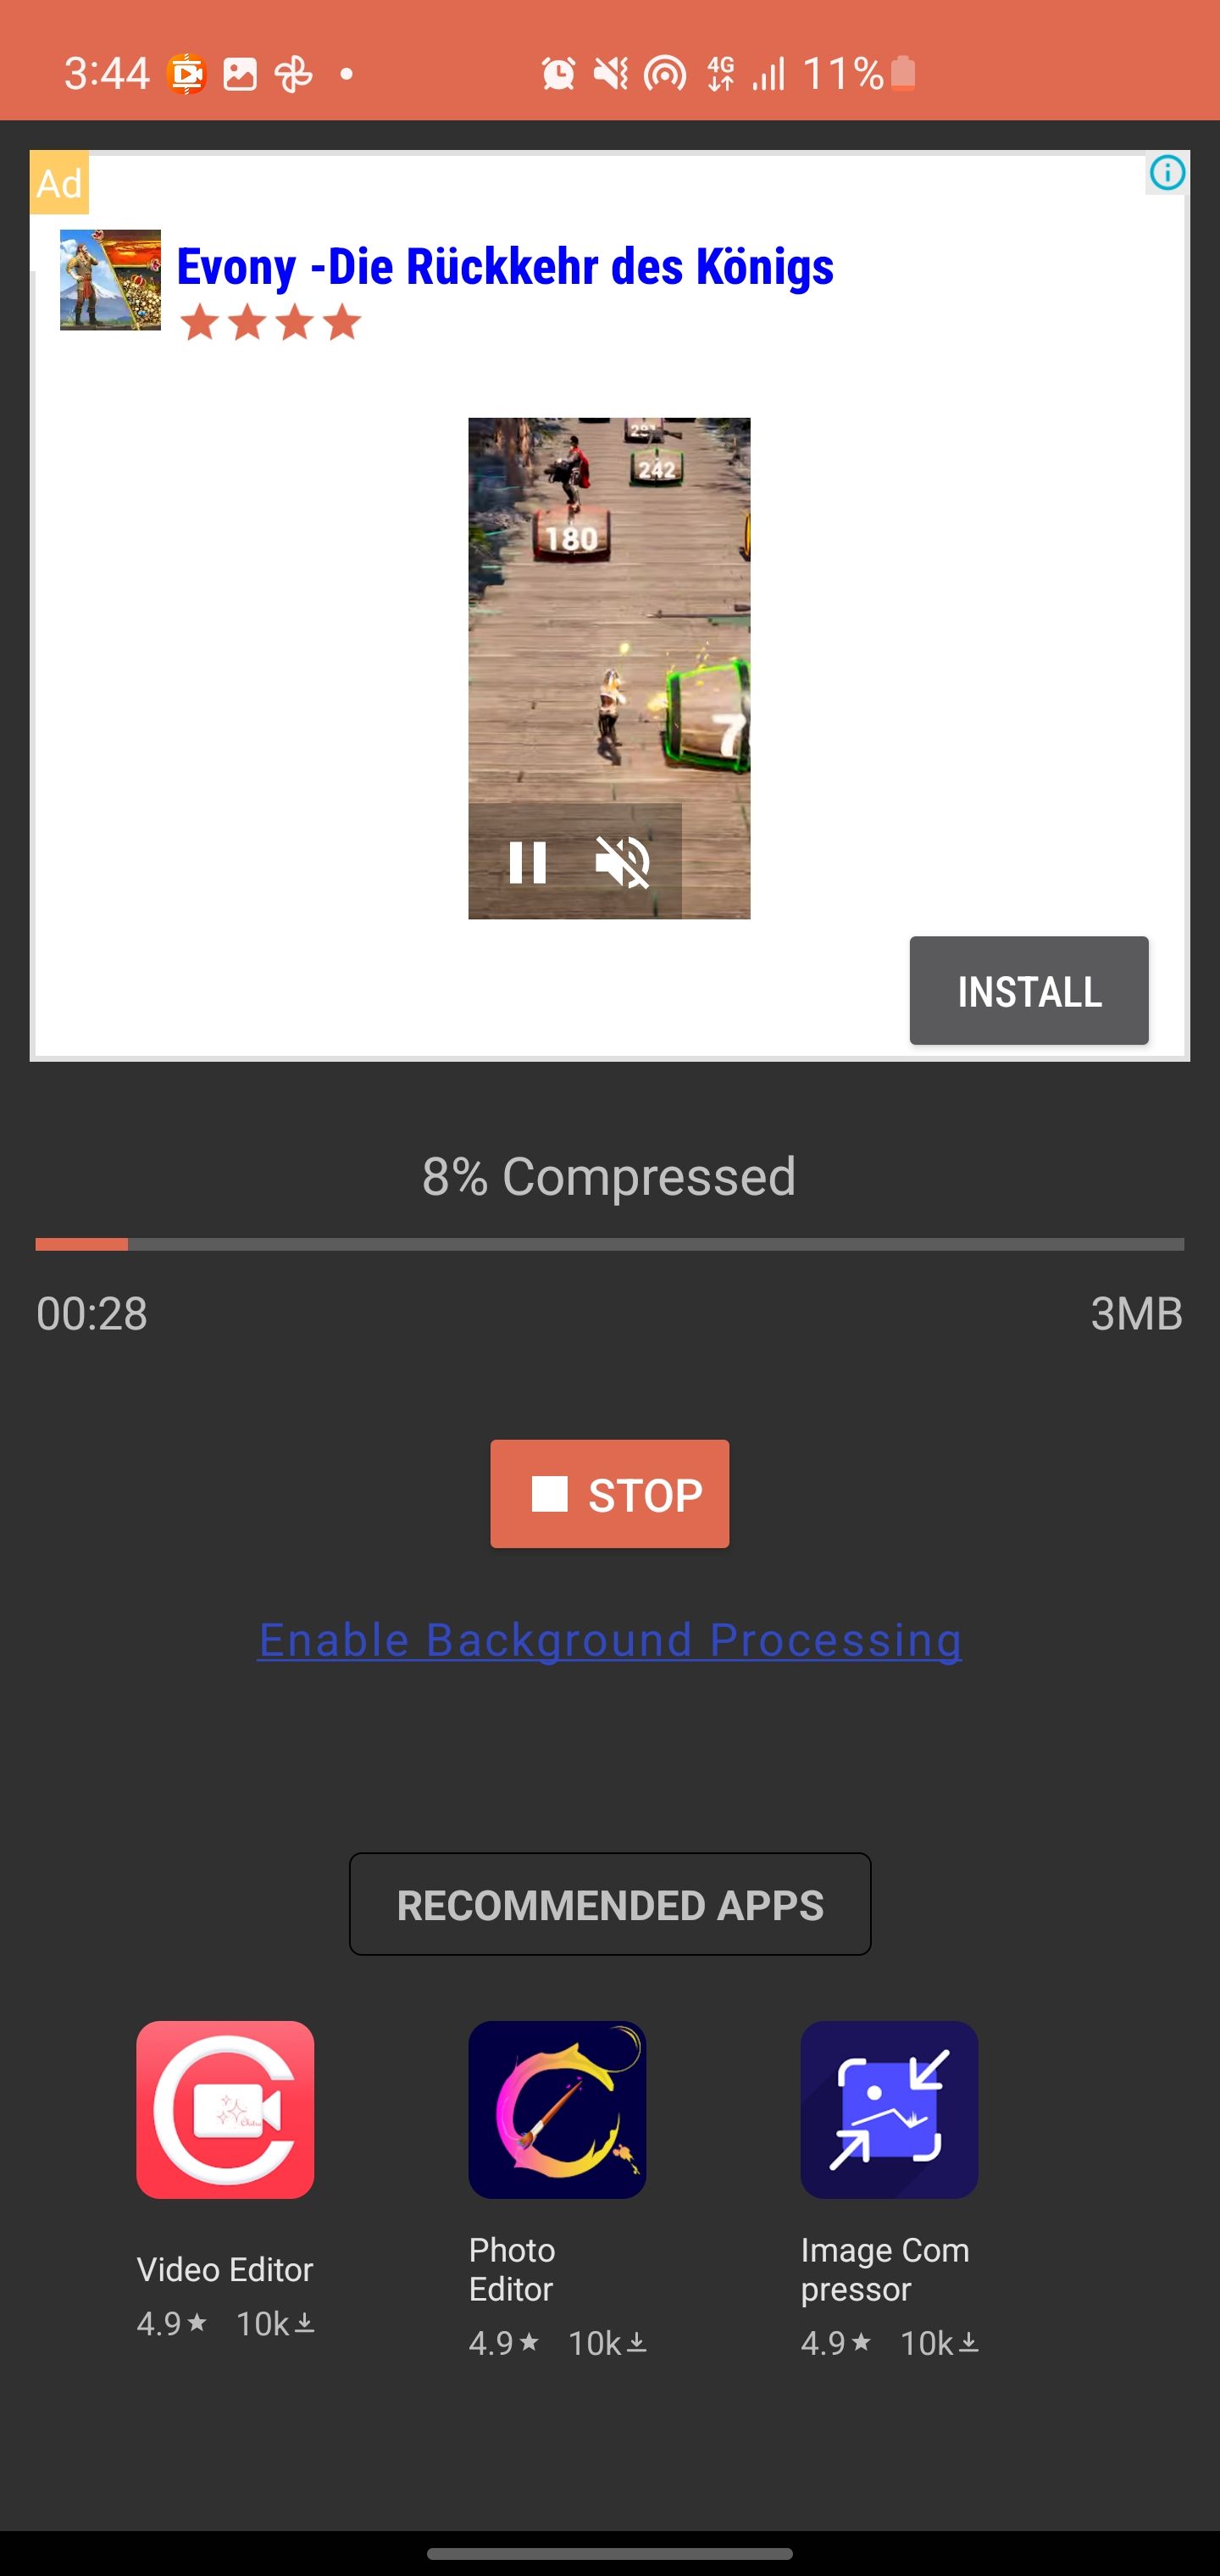
- After completion, check the file size of the compressed video, and you should see a significant reduction compared to the original.
Download: Video Compress for Android (Free, in-app purchases available)
Lower the Size and Not the Quality of Your Videos
If you know how to lower the quality of a video, you can quickly reduce its size, but you don't always have to compromise the quality of your videos to reduce their size. Some tools significantly reduce your videos' size without having much of an impact on quality. This is what the methods above help you achieve on your devices.
Like videos, you can compress your audio files as well. This helps shrink the size of your music files without reducing their quality. You can do this audio compression on various platforms out there.


