
Making changes to your Windows computer, such as installing new software or launching administrative tools, requires administrative permission. If your user account doesn’t have administrator rights, you must enter the admin username and password to act.
If you want to make system changes, you must ensure that your account has administrative privileges. So, how do you check your Windows account type? Check out the ways below.
1. Check if You Are an Administrator via Settings

You can use the Settings app on Windows 10 and 11 computers to view your user account status. The Accounts tab shows information related to your user account, including the account type and level.
To check your account type:
- Open the Windows System Settings.
- Open the Accounts tab in the left pane.
- Next, check the user profile section. You’ll see an Administrator tag if the account has administrator rights.
2. Check if You Have an Administrator Account Using Control Panel
You can use the classic Control Panel to check your user account type and status. The Control Panel allows you to customize your user accounts, such as changing the account name and type.
To check user account type using Control Panel:
-
Open the Windows Control Panel.
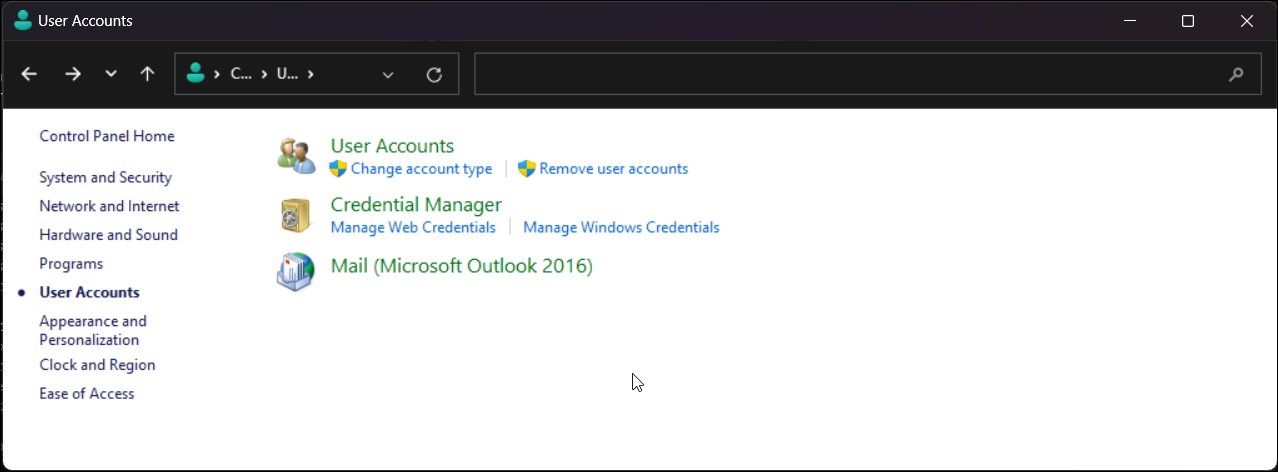
- In Control Panel, click on User Account.
-
Next, click on User Accounts again to view all the user account settings.
- Locate your user account name in the right pane and check for the Administrator tag.


Additionally, if you need to view the account type for all the user accounts, do the following:
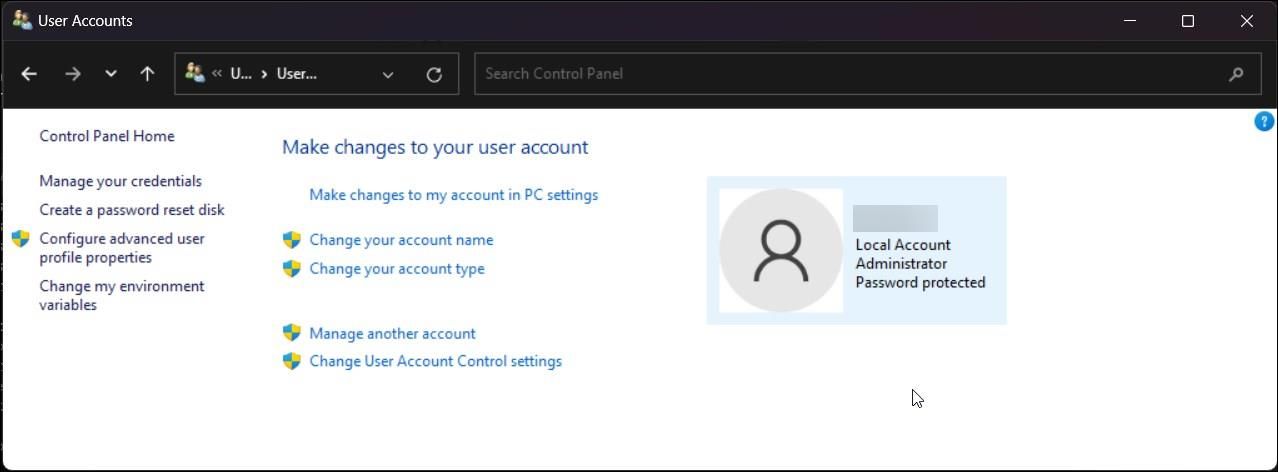
- In Control Panel, click on User Account.
-
Next, click on Change account type under the User Accounts section.
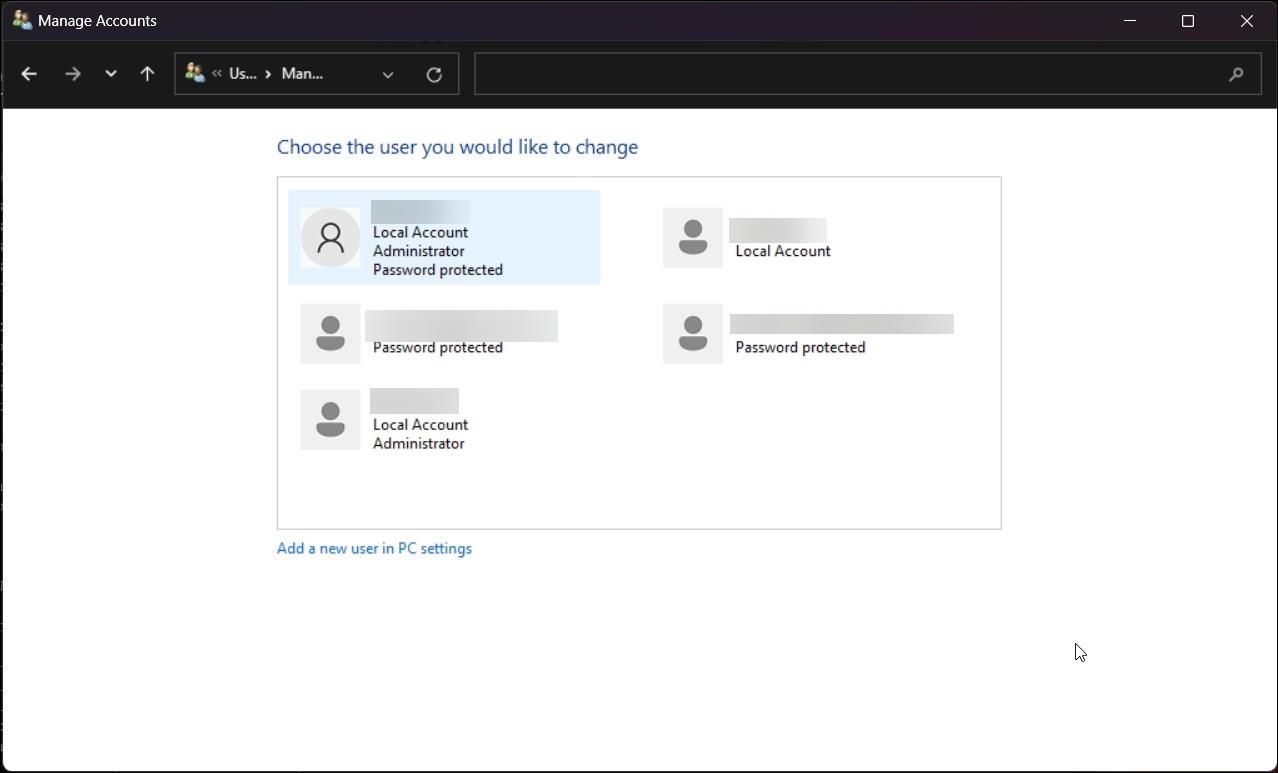
- Here, you can view all the available user accounts and details such as account type, password protection, etc.

3. Check Your Local Group Membership Using the Command Prompt or Windows PowerShell

You can use the net user command in Command Prompt to view the user account information. Apart from the standard account properties, it also shows the account status for the specified account name. These steps also apply if you prefer to use PowerShell over Command Prompt.
To check if you have a standard user account:
- Press the Win key and type cmd or powershell.
- Right-click the Command Prompt or PowerShell option from the search result and select Run as administrator.
-
In the Command Prompt window, type the following command and press Enter to view all the user accounts on your computer:
net user -
Next, type the following command and press Enter to view account details:
net user accountname - In the above command, replace accountname with the user account name for which you want to find the account type.
- Next, scroll down and locate Local Group Membership to check the account status as User or Administrator.
- Type exit and press Enter to close the Command Prompt.
4. Check if You Are an Administrator Using Local Users and Groups
Local Users and Groups is part of the Computer Management utility. You can use the snap-in to view and manage advanced settings. However, this feature is unavailable on Windows 11 Home Edition.
- Press Win + R to open Run.
- Type lusrmgr.exe and click OK to open the Local Users and Groups snap-in.
-
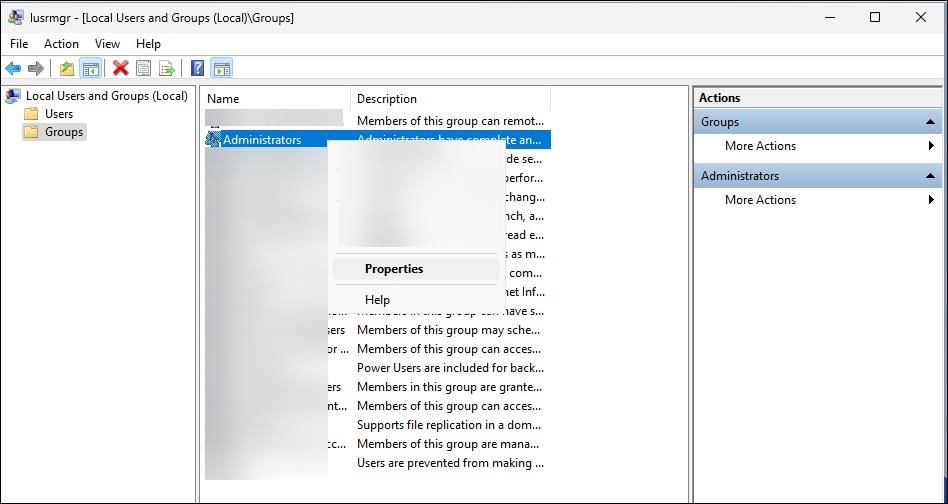
Next, select the Groups option.
-
In the right pane, double-click on Administrators.
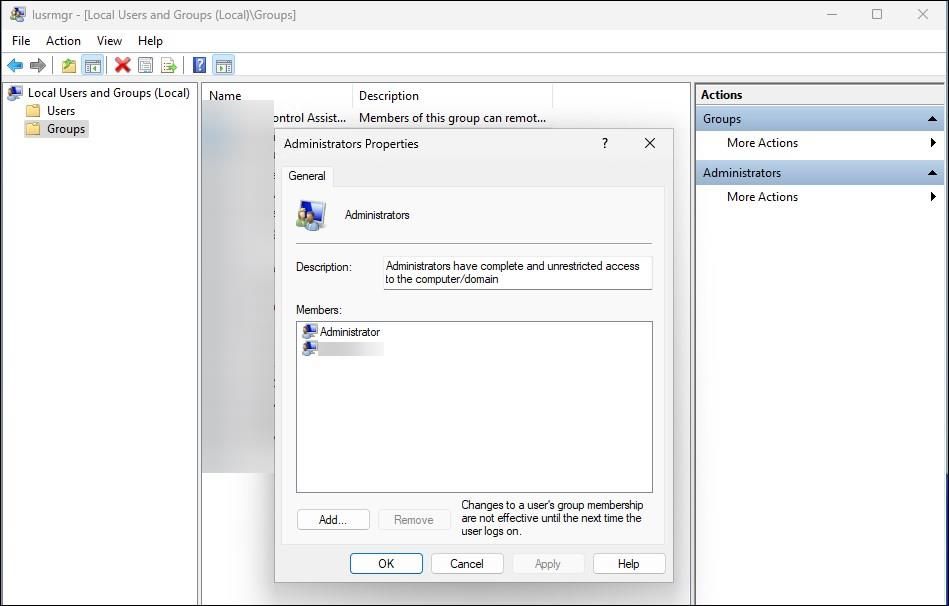
- In the new dialog, you can view all the users with administrative access under Members. The dialog also offers additional options to add existing users to the administrator group.


If you are on a Home Edition version of Windows, you must use a third-party tool to enable the Local Users and Groups feature.
There Are Many Ways to Check a User Account Type on Windows
Windows OS requires you to use an administrative account to complete some tasks, such as installing new apps. This helps prevent malicious third-party apps from making unauthorized changes to your computer without your knowledge.
You can follow these steps to check your user account type. Once determined, you can easily change the user account type from standard to administrator from the Settings app and Control Panel.