
By default, Windows assigns typical names to every drive you connect to your PC. However, you can always change the volume labels to make them more descriptive.
You can assign a unique name of up to 32 characters for NTFS drives or 11 characters for FAT drives, including spaces. While NTFS drives can have mixed-case labels, FAT drives are always stored in uppercase, regardless of how they are entered. We'll show you how to change the volume label on Windows in six different ways.
1. Change Volume Label With File Explorer
File Explorer is the quickest way to change the volume label on Windows. It's as simple as renaming a file on Windows. Here's how to do it.
- Press Win + E to open File Explorer.
- Use the left pane to navigate to This PC.
- Right-click on your drive and select Rename.
-
Specify a new name for your drive and press Enter.
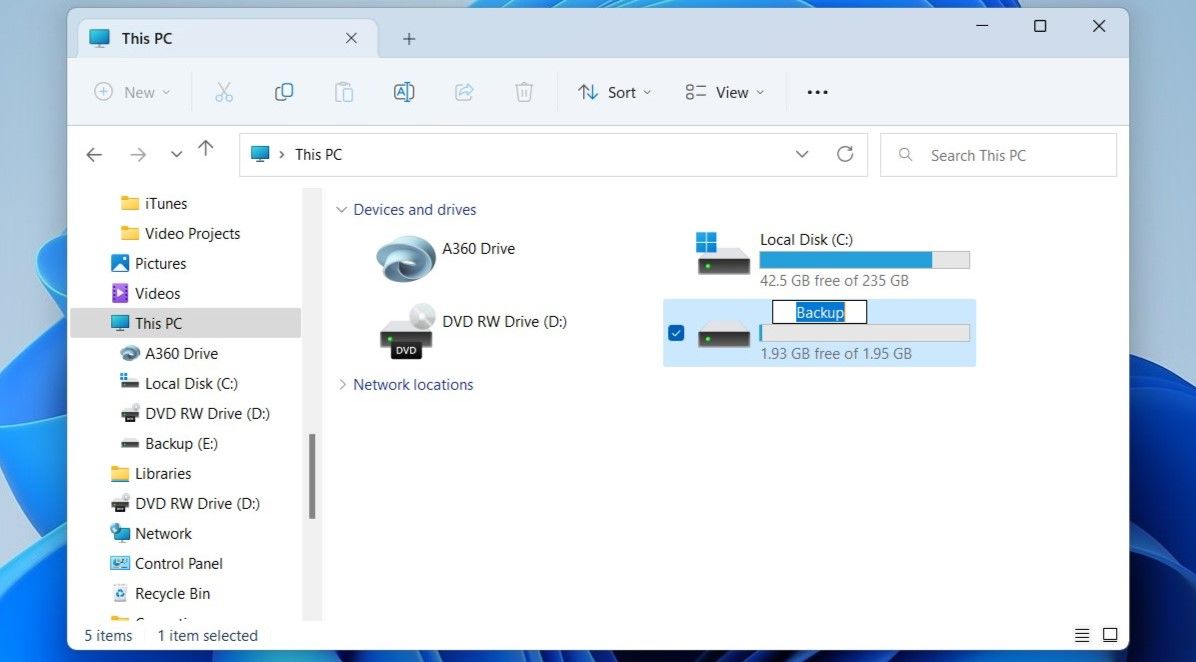
- Click on Continue.

If you're using a Standard account, you'll need to enter the administrator's password to proceed with the change.
2. Change Volume Label Using the Settings App
The Settings app has a dedicated Disks & volumes section that lets you manage drives and perform advanced storage-related tasks. Aside from changing the volume label, you can also change the drive letter or format a drive from this menu.
Follow these steps to change the volume label using the Settings app:
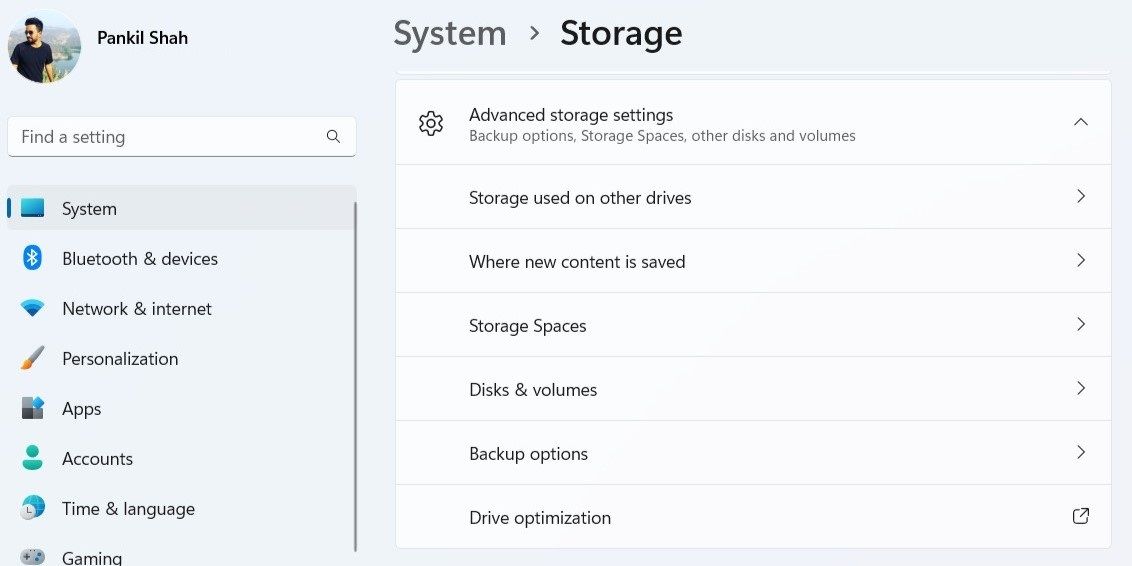
- Press Win + I to open the Settings app.
- In the System tab, click on Storage.
-
Expand Advanced storage settings and click Disks & volumes.
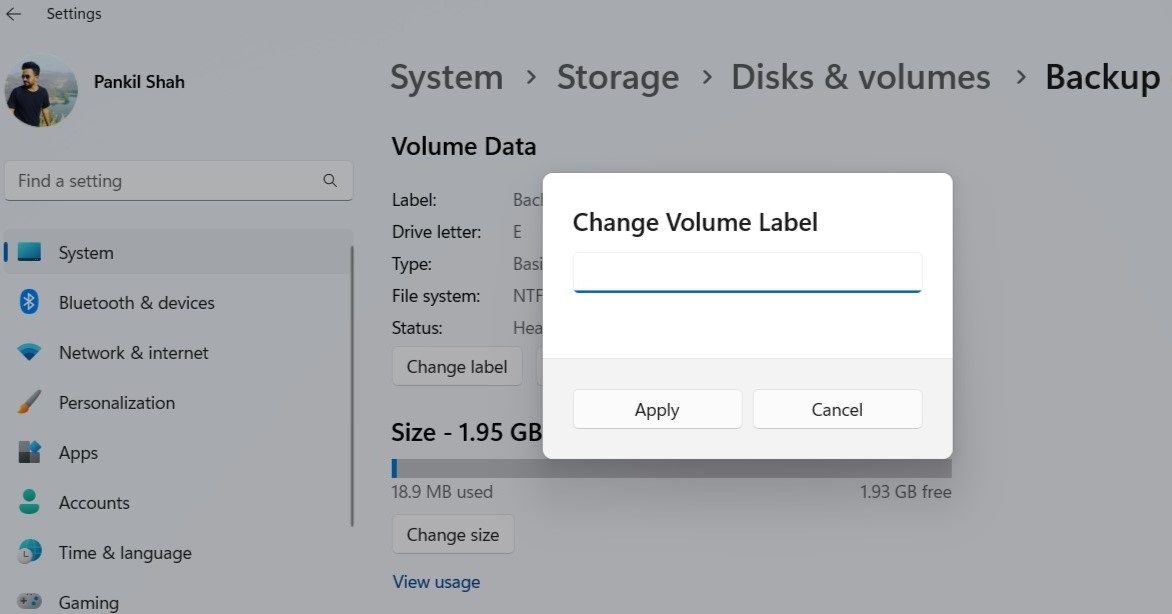
- Open the Properties of the drive you wish to rename.
- Click the Change label button.
-
Enter a name for your drive and hit Apply.


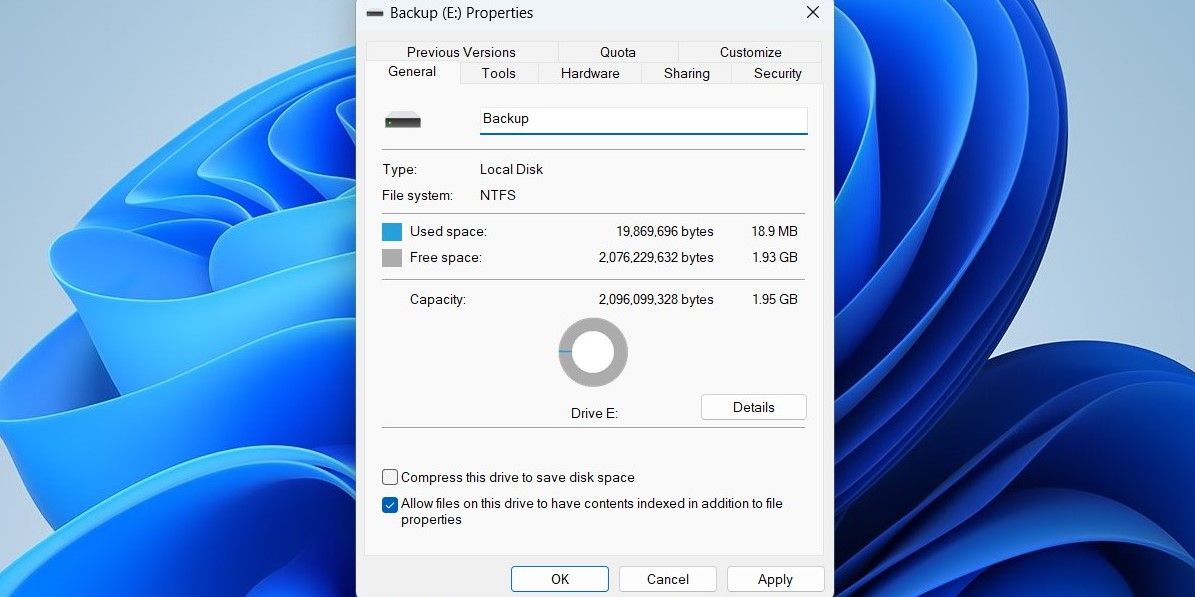
3. Change Volume Label via the Disk Management Tool
If you prefer to do things the old-fashioned way, you can use the Disk Management tool on Windows to quickly rename a drive on your PC. Here's how you can go about it.
- Press Win + R to open the Run dialog box. Type diskmgmt.msc in the Open field and press Enter.
-
In the Disk Management window, right-click on the drive you wish to rename and select Properties.
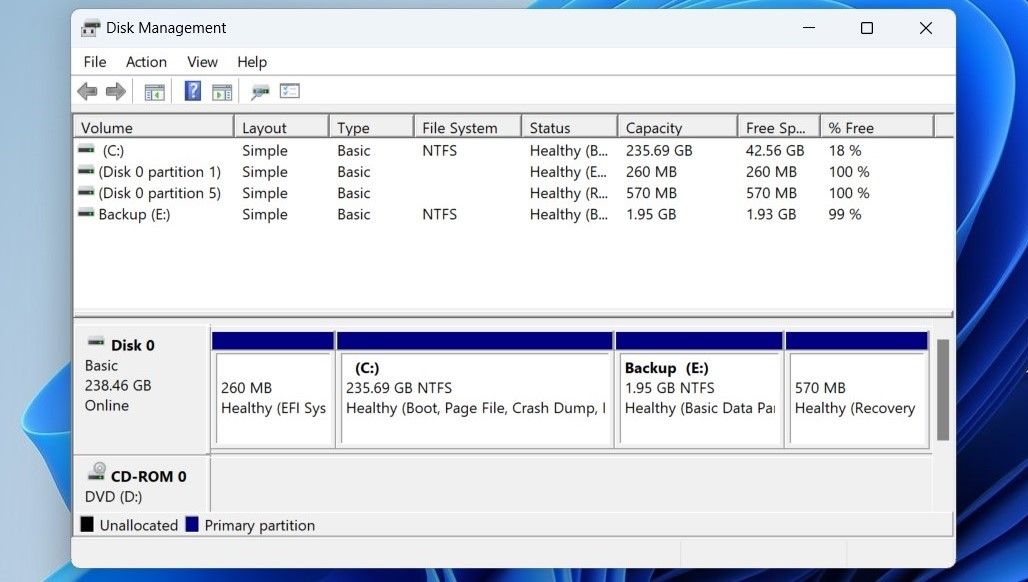
- Under the General tab, specify a new label for the drive in the text box.
-
Click Apply followed by OK.


4. Change Volume Label Using Command Prompt
If you're an avid Windows user who prefers to make changes via the command-line interface, you can change the volume label on Windows by running a few commands. Fortunately, this isn't as intimidating as it might sound.
Follow these steps to change the volume name using Command Prompt:
- Press Win + X and select Terminal (Admin) from the menu that appears.
- Select Yes when the User Account Control (UAC) prompt shows up.
-
In the console, run the following commands to view a list of drives connected to your system.
        diskpart
list volume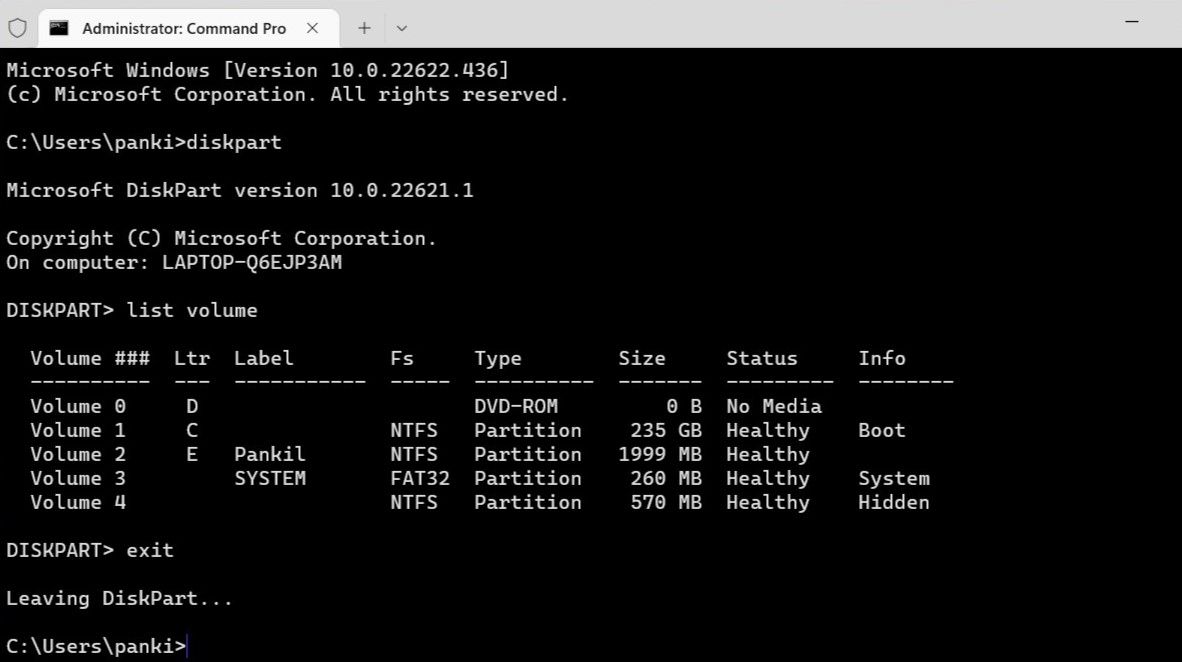
- Note down the letter associated with your drive from the Ltr column.
-
Type the following command and press Enter to exit DiskPart:
exit -
Run the following command to change the volume name:
label <DriveLetter>: <DriveName>

Replace <DriveLetter> in the above command with the drive letter noted earlier. Likewise, replace <DriveName> with the actual name that you wish to use.
So, for instance, if you were to rename the drive E to Backup, here's what your command should be:
label E: Backup

If you already know the drive letter, you can change the volume name by running a single command mentioned in the last step. For more, why not try some fun tricks in the Command Prompt?
5. Change Volume Label Using PowerShell
Like Command Prompt, you can also use Windows PowerShell to rename drives on your PC. Here's what you'll need to do.
- Press Win + S to open the search menu. Type in Windows PowerShell and select Run as administrator.
- Select Yes when the User Account Control (UAC) prompt appears.
-
Run the following command to view a list of drives on your PC:
get-volume
- Note down the letter of the drive you want to rename from the DriveLetter column.
-
Run the following command to change the volume label:
set-volume -driveletter <DriveLetter> -newfilesystemlabel "<DriveName>"

First, replace<DriveLetter> in the above command with the drive letter noted in the last step. Next, replace <DriveName> with the actual name you want to use.
For instance, you would enter this command to rename the drive E to Backup:
set-volume -driveletter E -newfilesystemlabel "Backup"

6. Change Volume Label With Registry Editor
The Registry Editor on Windows holds essential files for Windows and its services. If you're a power user familiar with the Registry Editor, you can change the volume name using the following method.
It's important to note that modifying registry files without knowledge can cause irreversible damage to your system. Thus, you should only use this method if you're comfortable editing registry files. Also, ensure you back all your registry files or create a restore point before proceeding with the changes below.
- Press Win + R to open the Run dialog. Type regedit in the text box and press Enter.
- Select Yes when the User Account Control (UAC) prompt appears.
-
Use the left pane to navigate to HKEY_LOCAL_MACHINE > SOFTWARE > Microsoft > Windows > CurrentVersion > Explorer.
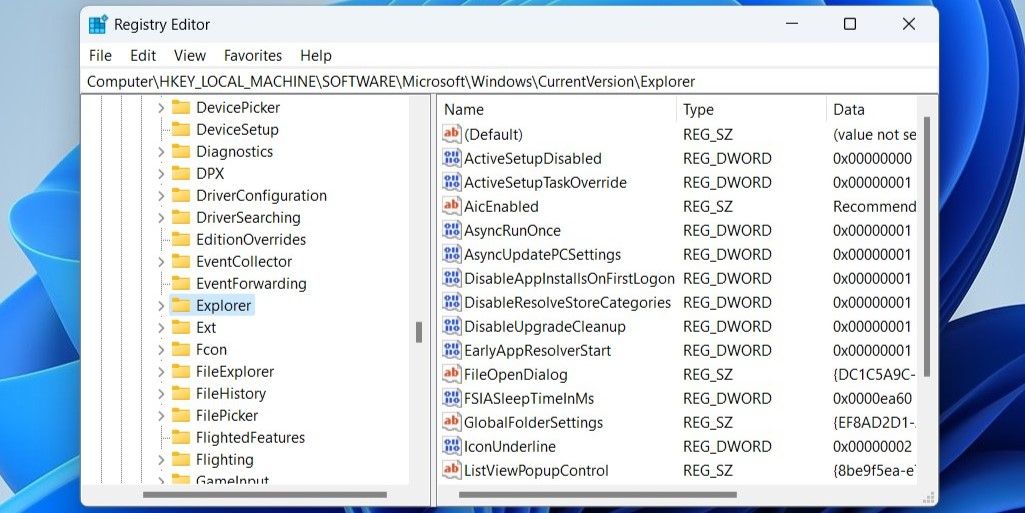
- Within the Explorer key, locate a key named DriveIcons. If you can't find it, right-click on the Explorer key and choose New > Key. Name it DriveIcons.
-
Right-click on the DriveIcons key and select New > Key. Name it the letter of the drive you want to rename. For instance, if you were to change the label for E drive, you should create a key named E.
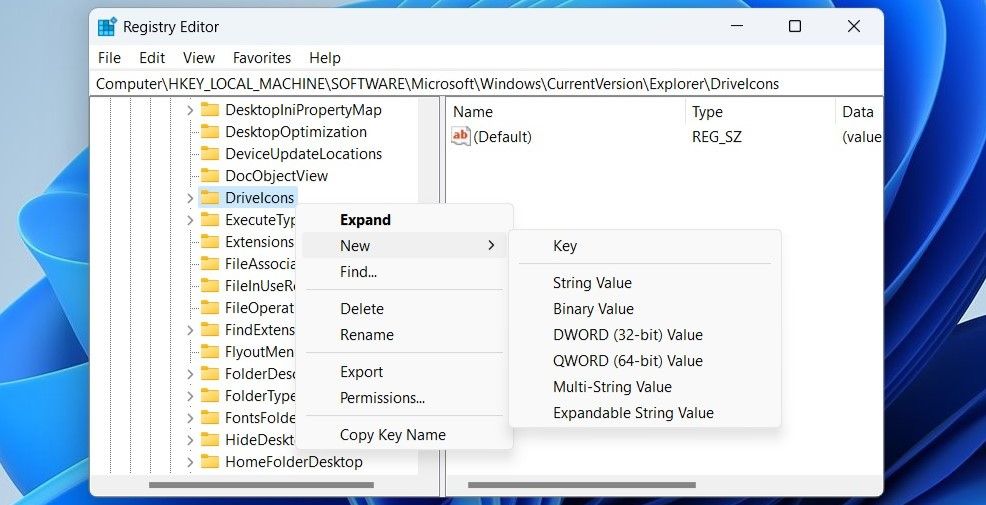
- Within the newly created key, create another key and name it DefaultLabel.
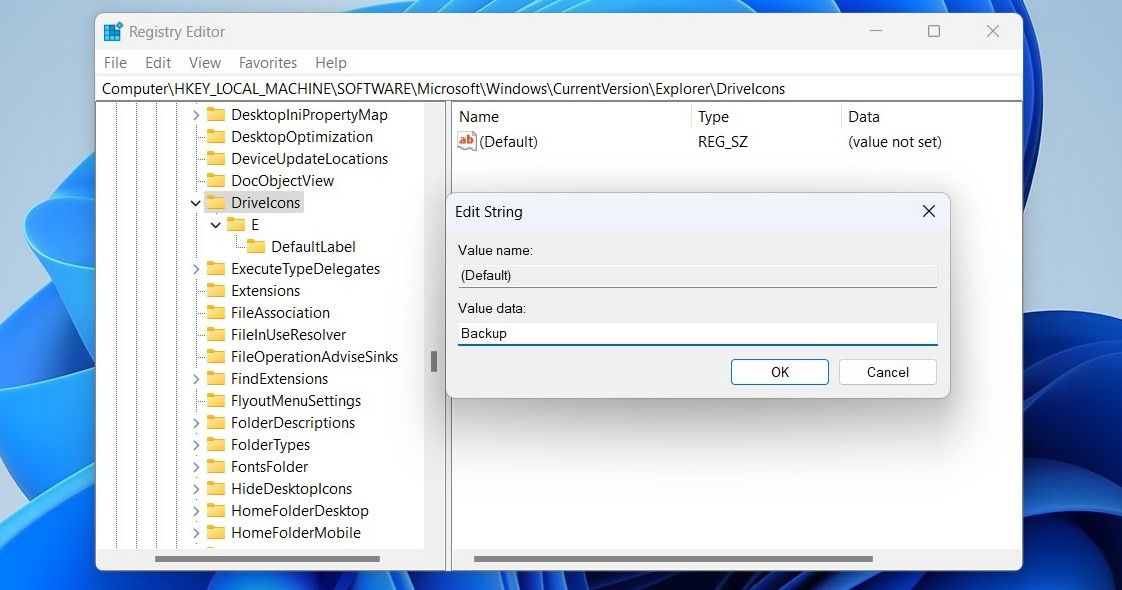
- Select the DefaultLabel key and double-click the (Default) value from the right pane.
-
In the Value data field, specify a name for your drive and hit OK.
- Exit the Registry Editor window and restart your PC to apply the changes.


Changing Volume Labels on Windows
By giving your drives descriptive names, you can easily distinguish them. You can pick any methods you like to rename drives on Windows. With volume labels sorted, don't forget there are other ways to categorize your volumes in Windows.