The Chrome Web Store is home to tons of free apps, extensions, and themes to add to your Chrome browser, allowing you to do much more. Adding browser extensions can make visiting web pages and using the web more beneficial, as they can offer new features or shortcuts.
Many users don’t know that they can change the permissions of their browser extensions. Here, we will look at how you can control your Google Chrome extension permissions.
What Are Extension Permissions in Chrome?
You'll have more than likely installed at least one Chrome extension at some point. You might have noticed the permissions message display, asking you for access to specific data. While most permissions are understandable, others are questionable.
There are three types of permission levels that extensions may request, each with risk alerts:
- Low alert only requests access to precise data such as your bookmarks, a list of apps and extensions you have installed, and data you copy and paste.
- Medium alert may request access to most of your data on every website you visit and webpages you visit on specified websites.
- High alert will access all data on your computer and every website you visit, meaning it has the potential to access personal files outside the browser.
If you've allowed an extension with specific permissions, you can go and change these at a later date.
How to Change Chrome Extension Permissions
Google Chrome offers a control menu that limits extension access that allows you to examine and control permissions for your installed extensions and the ability to remove or disable extensions.
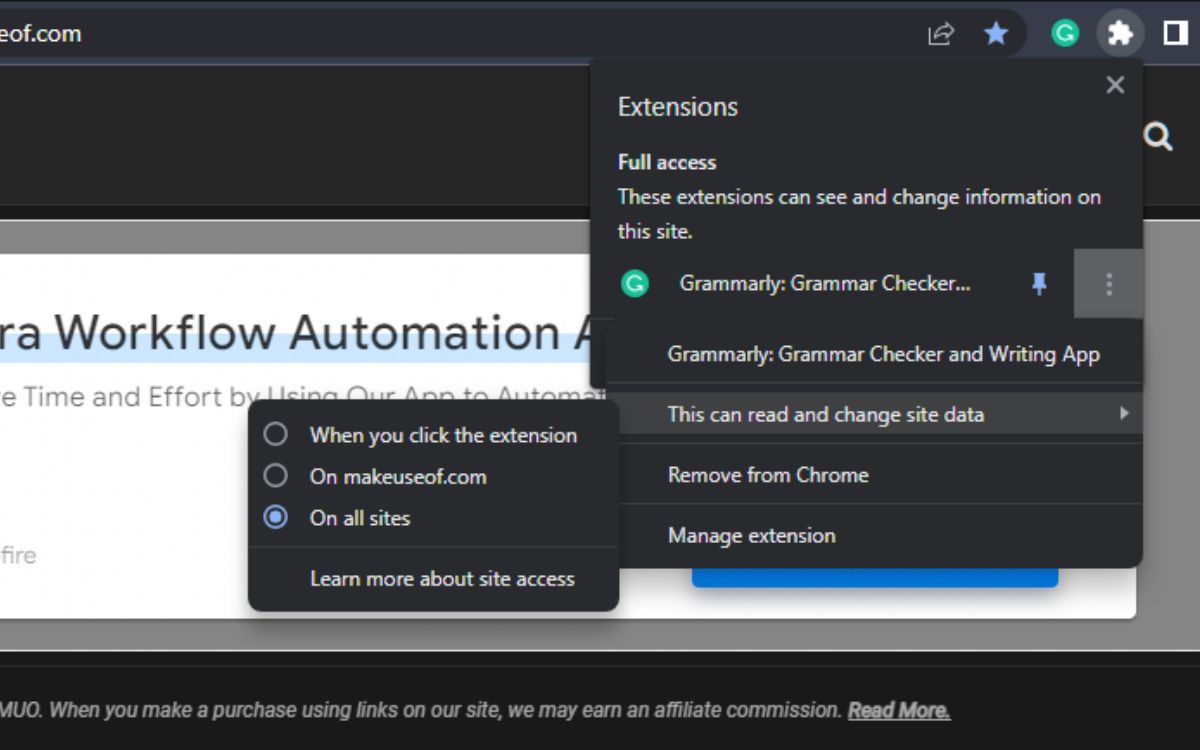
To change the permission, click the Extensions icon shaped like a jigsaw puzzle on the top right to see your extensions. When you click on the three vertical dots, hover your mouse over the This can read and change site data section, and you will see the site’s access.
Clicking Learn more about site access will take you to Google’s support page detailing more information on installing and managing extensions. Clicking on Manage extension will take you to the extension’s details page.
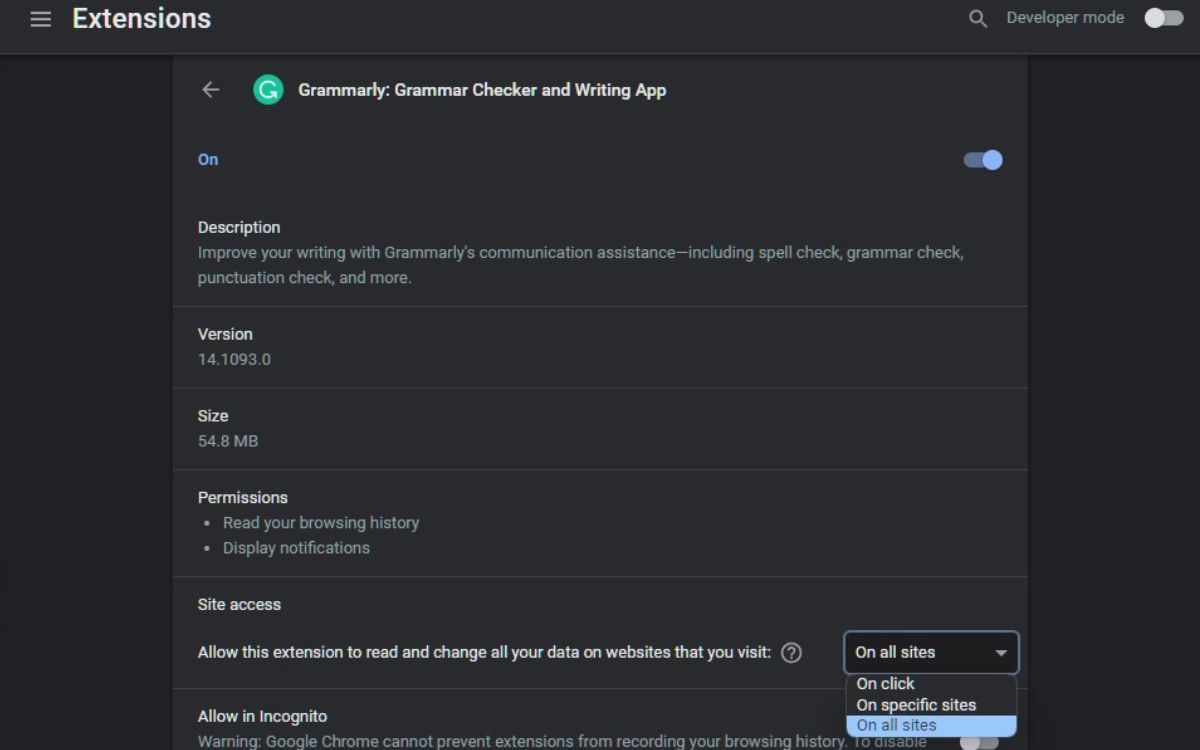
Here, you will get more information about the extension, such as the version, size, and permissions. In the Site access section, you can control from the dropdown menu how you want the extension to work on websites you visit:
- On all sites will have the extension activated on all sites you visit.
- On specific sites will have the extension activated on the websites you allow. When you click this option, a pop-up will allow you to add the link to a website you want the extension to be activated. You can also remove any websites you have added.
- On click will deactivate the extension by default and will only be activated when you click on the extension icon and reload the webpage.
Be aware that not all extensions will have a list of permissions. In the screenshot above, the Grammarly extension only has permission to read the browsing history and display notifications.
Note that extensions are deactivated in Incognito Mode by default. To enable it, go to the extension details page and click on the toggle in the Allow in Incognito section.
When you install a particular extension, make sure the extension is safe by reading the permissions. Some extensions could be malicious and dangerous. If you’re in doubt, look at the star rating and read the user reviews.
You’re in Control of Chrome Extensions
You can install any extension to your computer, but read the permissions to make sure they are not asking for too much. Keep in mind that all extensions, by default, read the data you’re viewing and what you’re typing, including confidential data like login credentials.
Take control of the extension and allow it to be active when you want it to be. Does the extension need to be active on every site? Should you have to give up your online privacy for the sake of an extension? And just how safe are extensions?


