Blender references can be extremely helpful when modeling something specific, such as a vehicle, a character, or an everyday object. In this tutorial, we'll go over the basics of importing reference images into Blender and following the design that they lay out to a T.
Finding images for Blender modeling is a lot of fun—Pinterest, Tumblr, and other sites like these are all excellent resources for fashion, architecture, and other Blender reference images depicting your subject of choice.
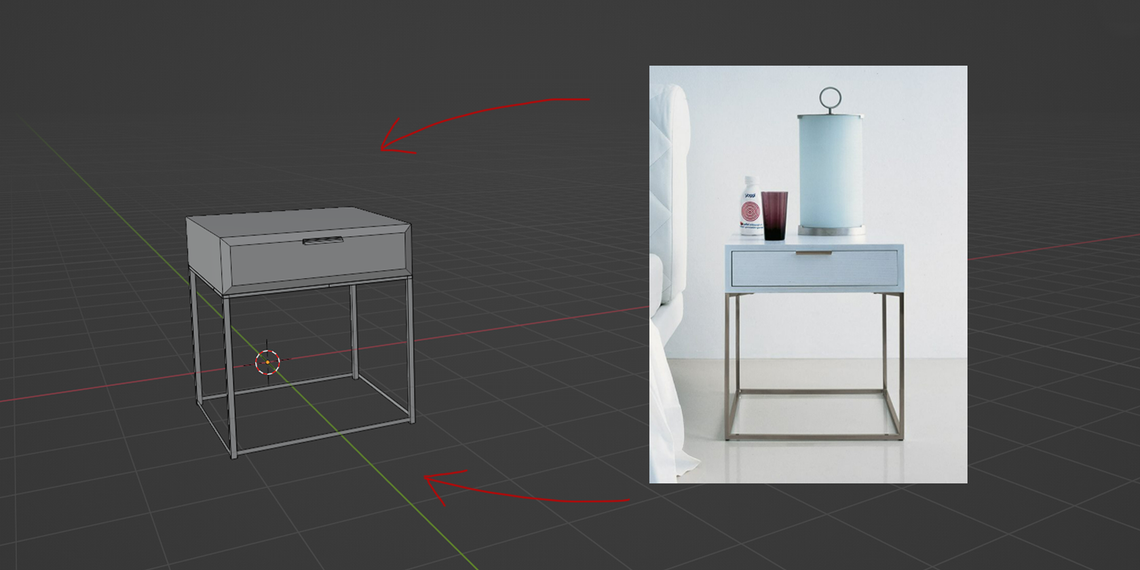
Step 1: Find the Right Reference Images
The first step in this process will be choosing your reference images. For this Blender tutorial, we're going Blender Guru: the Oscar end table by Zanotta, complete with a 2D blueprint with three viewing angles to exploit. Get it here if you'd like to follow along.
We recommend starting somewhere in this zone, but you can use anything that offers you a clear view of your subject, ideally from all sides. Once you've found something high-quality that interests you, you're ready to begin.
Step 2: Import the Reference Images

Importing images for Blender modeling is easy, but you'll want to make sure that they land with the right viewport settings enabled. This keeps your setup neat and perfectly perpendicular. Follow the below steps.
- While in Object Mode, use Numberpad 5 to toggle Orthographic View on.
- Hit Numberpad 1 to align the viewport with your X and Z axis.
- Click Add above or use Shift + A.
- Hover over the Image pull-out and select Reference. This first imported image reference should be the front-facing view of your subject.
- Use Numberpad 3 for a side view. Add in your second reference image if you have one. Do the same for your top-down view as well, if applicable.
Adjust these reference images until they're totally aligned, using things like the feet and the top to guide you. Before moving on, you're going to want to make all three images Unselectable.

- In the Outliner, use the Filter dropdown and enable the Selectable toggle.
- Toggle Selectable off for all three reference image layers.
- You can stash these images into a New Collection, as well.
Adjusting their Opacity might also be helpful in some cases. Use the search bar at the top of your Properties panel to enable the Opacity setting for all three. Use the slider to find what you need.

Also worth noting: it can be helpful to keep a few real-life reference photos of your subject off to the side for extra inspiration.
Step 3: Add Primitives to Match the Reference Images
Industrial objects and furniture are great to practice on—you can adapt simple Blender primitives in order to get yourself off of the ground.
The Oscar is simple; we can start with an ordinary cube primitive.

Using our trusty Blender blueprint as a guide, gently nudge the cube into place. Once it's congruent with the overall shape of the table from all sides, we're ready to start adding more detail.
Step 4: Rough Out a 3D Primitive
Next, we're going to channel our inner Michelangelo. It's time to bring this block to life in Edit Mode.
During this initial "tracing" phase of the operation, you might want to toggle on Blender's X-Ray viewport display mode, either through your viewport settings or with the command Alt + Z.

You can start by using a Bevel or the Inset Faces tool in order to pull out the shape of the drawer.

We can continue etching out the drawer handle, the metal legs, and other supporting details by tracing over the design with the Knife tool. You can constrain each cut to your perpendicular axes by hitting X, Y, or Z after marking each point.
A few other options:
- Mirroring each operation from the Properties panel ensures that everything stays completely symmetrical. Depending on your subject, you could also save some time by using a Mirror modifier to create the body itself.
- The same can be said of the handle—use the Knife to add more geometry where you need it. Give it dimension with a simple Extrude command.
- Adding more primitives is an obvious one. Be sure to Join them all together in Object Mode after everything is in place.
- Your Snap options can also be used to model with ease and precision.
Experiment and see what works for you; other tools like Edge Loops and Spin may also come in handy, depending on what you're modeling. Remove all the extra faces these operations leave you with, and you're ready to move on.
Step 5: Clean Up the Model
Once you've got all of your geometry laid out, you can start adding in more detail.
Before getting ahead of ourselves, you might need to clean the mesh up, removing oddball geometry and confirming that all of your Normals are facing the right way out.

While still in Edit Mode, use the Mesh dropdown for all of your Clean Up tools. We used Limited Dissolve here to remove extra edges that weren't doing anything for us.
- Delete Loose eliminates free-floating geometry.
- Decimate Geometry does what it can to reduce the complexity of the 3D model while impacting its shape minimally, although it may sometimes yield unexpected results.
- Fill Holes works a lot like the Fill command, only with the entire model.
Now, you can start on things like rounding edges, adorning curves, and details like the feet of the table.
Step 6: Add Detail to the Model

For this model, we really only have straight edges to deal with, aside from this curved handle. You might have more luck in Sculpt Mode for natural and organic shapes like plants, animals, and human beings.
There's still plenty that you can do in Edit Mode in terms of refinement, however:
- Simple operations and translations that take your vertices and edges off-axis can be used to add details like the diagonals underneath the body of the end table.
- Subdivisions can be used to add a curve to the top of the drawer's handle, or even to create rounded feet for the bottom.
- We can enhance the frame around the drawer by adding depth at each diagonal corner.
- Using Proportional Edit mode while moving any part of the model will help you create natural, appealing curves and transition from one part of the model to another.
Once you've achieved your goal, feel free to get creative. Half of the fun in 3D modeling is taking control of your subject once you've mastered the basics.

Our advice is to make the end table that you want to see in your own bedroom. There is no limit to what you can do.
Model Anything From Reference in Blender
We've only covered the bare-bones basics of modeling with reference images in Blender. If you can follow along with this approach, though, you can adapt the workflow to literally any subject that you can find a clear reference photo of.
Little compares to the feeling of really nailing the foundation of a 3D model. Whether your ultimate goal is perfect realism or something a bit more imaginative, creating a Blender model from reference will often be a great place to start.