For a piece of free and open-source software, Blender is a powerful and versatile 3D computer graphics tool that is quickly becoming a great addition to the creative's toolset.
One of the most impressive features is its incorporation of a physics engine, allowing for the creation of dynamic animations and graphics. When used correctly, this opens up limitless opportunities for incredible visual content.
Here, we'll provide a quick introduction to just some of the physics settings available in Blender. Adding and adjusting rigid body modifiers to objects will be covered, allowing you to learn more about Blender's physics engine.
Getting Started in Blender
Blender has a plethora of features and tricks. This article is a brief overview of just one small part of what can be a complex application to navigate.
As mentioned, Blender has a built-in physics engine. In layman's terms, this allows you to apply simulations of real-life physics on objects in your 3D space. You can even simulate objects falling and colliding with each other.
This can put a lot of strain on your computer, so in case you're not using particularly powerful hardware, this article will only cover a very rudimentary scenario using a limited set of objects.
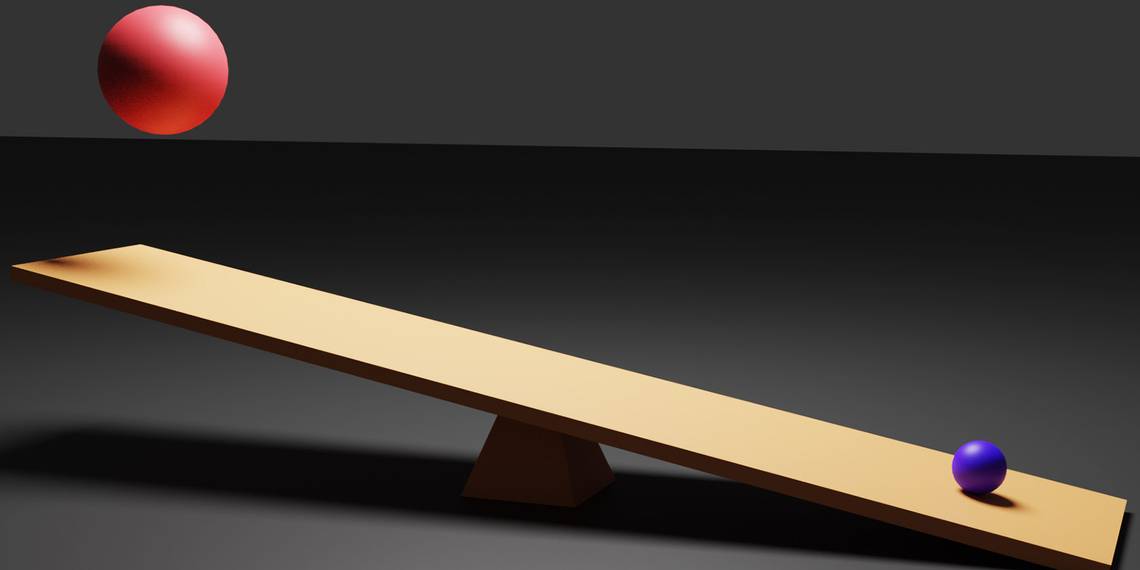
For the scenario, a basic lever/seesaw with two ball weights shall be simulated.
Making a Lever
In this example, a rudimentary lever shall be created, with a "lighter" object sitting on one end, and a "heavier" object falling onto the other. When complete, this will propel the lighter object away.

Five objects are required: two weights, a "plank," and an object to serve as a fulcrum.
A long rectangle shape will act as the "plank," a pyramid will be the fulcrum, and two spheres will act as weights. You'll need to add a "floor" for your objects to sit on. In this scenario, a plane object is used.
In this article, screenshots of a render have been used to show the distinction between the objects. Don't be concerned that your objects are all colorless or look different in the viewport—materials can be added later for rendering.
Preparing Your Objects
First, position your objects in preparation to start incorporating physics. Once you're content, you should have your objects in place. Make sure you are at frame zero in your timeline at the bottom of the window.
Ensure that your objects are set to collide in place when falling. Remember that you need to inspect them from multiple angles in the 3D view to ensure that a collision will occur.

Once you're content, you need to start adding physics parameters to your objects. These can be accessed from the Physics Properties tab in the Properties window.
The setting we're going to add is known as Rigid Body. This means that Blender will apply physics to your selection, treating it as a solid object.
Rigid Body physics come in both Active and Passive forms—choosing which one to use is important for your overall simulation.

To add this setting to your object, simply click Rigid Body under the Enable Physics dropdown box in the Physics Properties window.
Under Type, you can choose whether your Rigid Body settings for that object are Active or Passive. As objects that need to provide collision, but not move, the fulcrum and floor of the simulation need to be Passive.
The weights and the "plank" are required to move, so these will be Active.

Once these settings have been inputted, adjust the start and end frames, and hit the play button on your Timeline to commence the simulation.
You may notice some initial slowdown while Blender calculates the simulation, but this should be smoother on subsequent playthroughs.
It is likely that your first simulation will not yield the results you want. You will need to adjust a number of settings to get a better outcome.
As well as adjusting the size and shape of objects within the 3D view to alter the simulation, there are a number of settings you can adjust in the Rigid Body settings.
One of the most crucial is your object's Mass.

Active Rigid Body objects with a heavier mass will fall quicker and affect other objects on collision—just like in real life.
In the simulation, the larger ball's mass has been set to 100kg, ten times the weight of the smaller ball at 10kg. This ensures that the smaller ball is propelled by the weight of the larger one.

Adjusting the mass of the "plank" will also yield different results, as it will dictate the angle at which the smaller ball is thrown and how much force is absorbed. Playing around with these settings will create dramatically different results.
Perfecting Your Simulation
Like many things with Blender, it's all about experimentation. Be prepared to adjust these settings, in conjunction with the size and position of objects at frame zero to create a variety of effects.
There are many other parameters and settings, such as Friction and Bounce in the Surface Response tab that will also affect the simulation. These dictate how much energy is lost on collision, and how much resistance it will put up.
Adjusting these settings will allow you to perfect your simulation. Once you're content, create another and keep practicing with settings and sizes.
If you wish to manually adjust any movements of your simulation on a frame-by-frame basis, you are able to translate the simulation into keyframes. This process is known as Baking.
To bake your animation, select your objects, navigate to Object in the top bar. From there, select Rigid Body > Bake to Keyframes. This may take some time depending on the complexity of your simulation.

Be aware that once this is done, your simulation settings are removed from the objects and the movement is fixed as keyframed motion data.
Mastering Physics in Blender
So, you've created a basic physics simulation in Blender. This should give you a fundamental understanding of how physics functions in Blender, allowing you to start creating more complex and exciting creations.
Once you're happy with your simulation, you can move into the next steps of adding materials to your objects, creating a 3D camera for rendering, and producing a final visual animation.