Google Sheets gives you several printing options to ensure you get the printout you need. You can change many settings — from printing a single worksheet to printing an entire workbook; there's a lot you can do. This includes adjusting your printout's scale, layout, and alignment, among other things.
So, we'll give you easy-to-follow steps on how to print in Google Sheets, adjust your printout's alignment, fit an entire worksheet on a single page, and more. Let's dive into it below!
How to Print in Google Sheets
Open the Google Sheets worksheet that you want to print and follow the steps below:
-
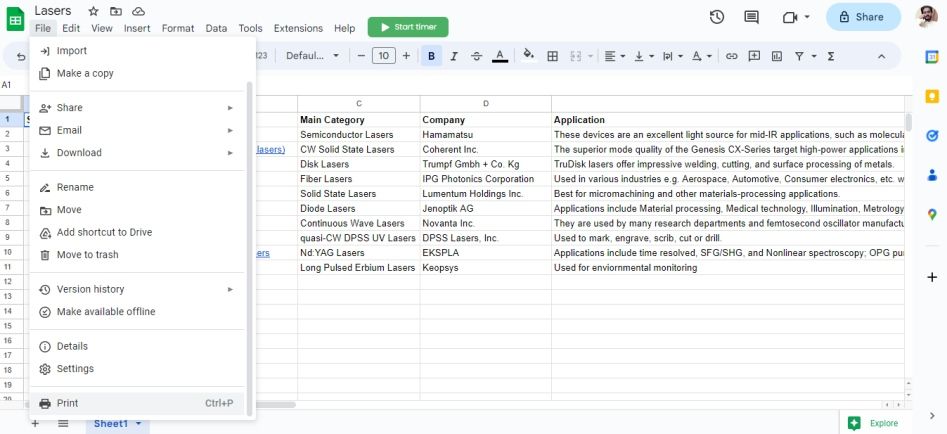
Click File at the top-left and select Print. (Alternatively, you can press Ctrl + P on your keyboard)
-
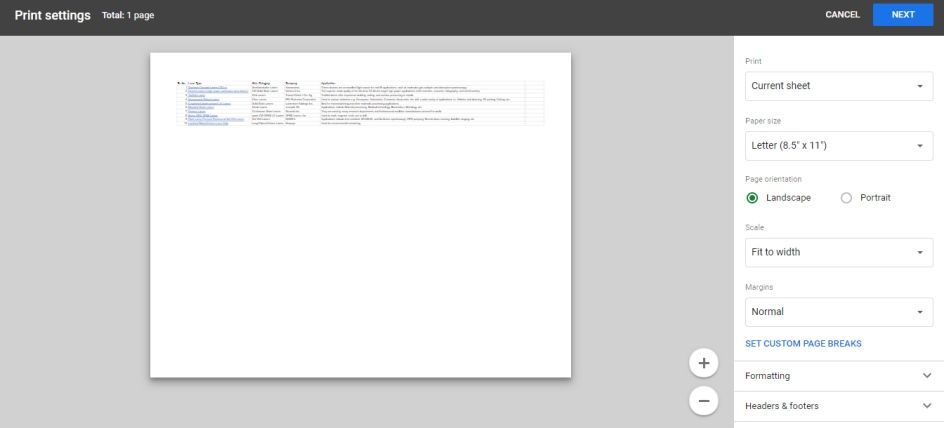
The Print settings screen will appear.
-
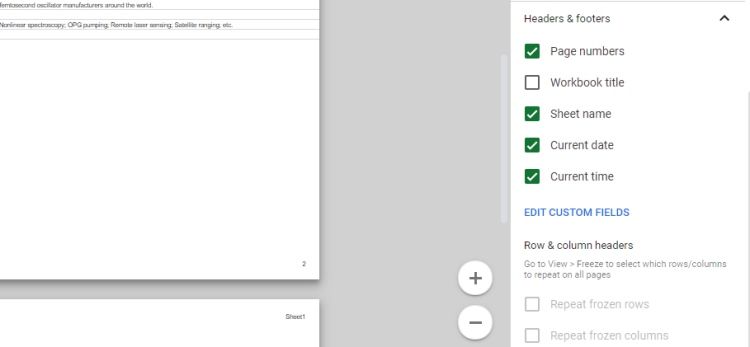
Go to the Headers & footers section to add details to your printout. You can check the Page numbers, Workbook title, Sheet name, or Current date & Current time options to include them in your printout.
-
Click Next, and a Print dialog box will appear.
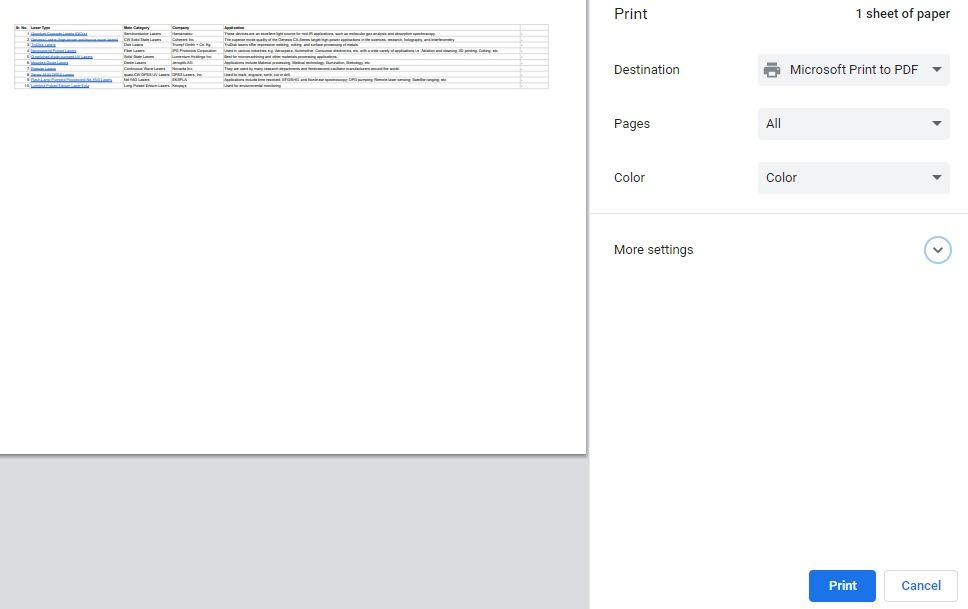
- Click the blue Print button at the bottom. You'll get a physical copy of your worksheet from your printer in a few seconds.


While following the steps, you would have noticed the different options on the Print settings page. It's important to know how to use these settings so that you're able to print your Google Sheets worksheets however you like.
Let's discuss using the different options on the Print settings page.
Choosing the Print Area on Google Sheets
The first option on the Print settings page is Print. By default, you'll have the Current sheet option set, allowing you to print the sheet you are currently on. But there are two other options you can choose from:
-
The Workbook (by default) lets you print the entire workbook (All sheets option). You can also select the sheets you want to print by checking them. (as shown in the image below)
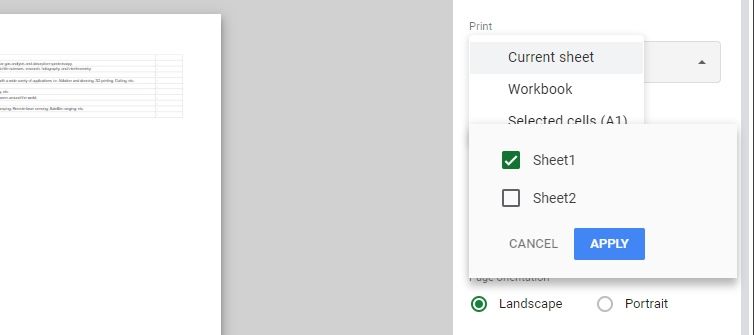
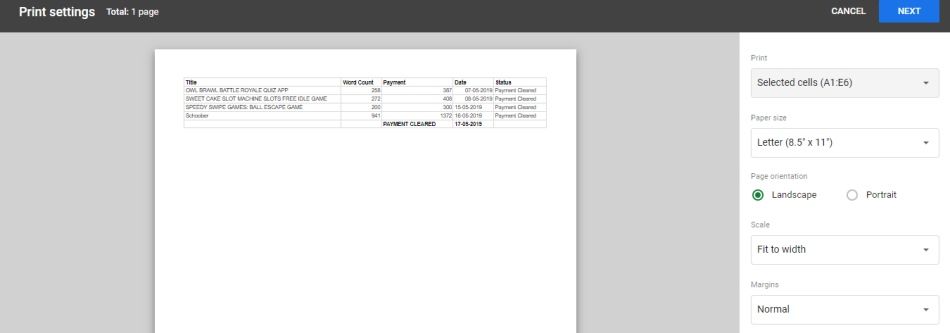
- The Selected cells option lets you print a portion of the current sheet.

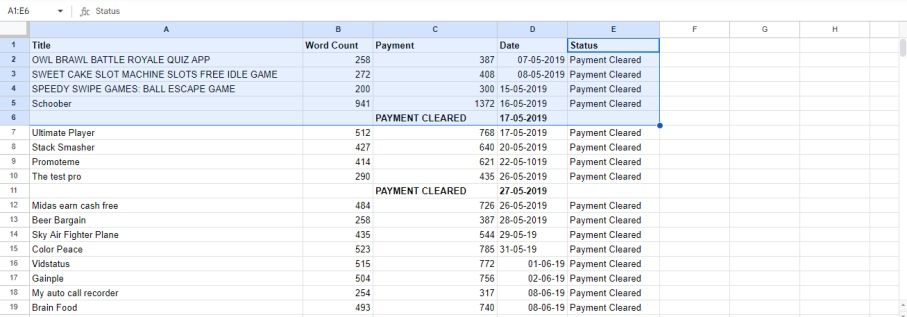
The Selected cells option comes in handy when you've got a large worksheet, but you only need to print a portion. Let's say you want to print the part of the following sheet till the first invoice:

For that, follow the steps below:
-
Select the area you want to print (A1:E6 in our case).
- Enter Ctrl + P on the keyboard.
-
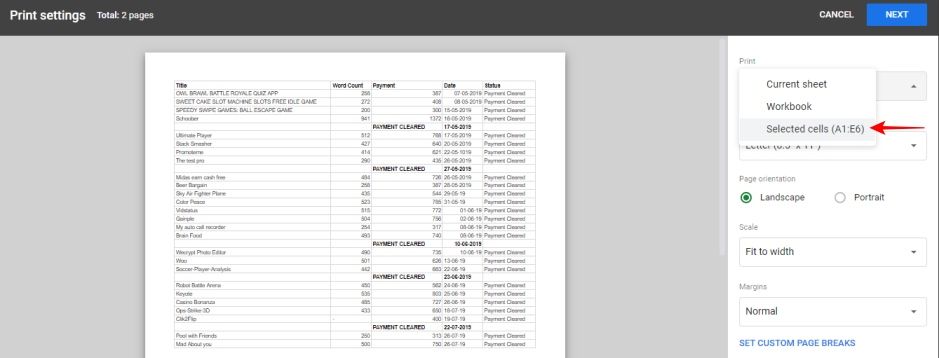
Change the Print option from Current sheet to Selected cells in the Print settings page.
-
The page will now display the cells you selected in the first step.
-
Click Next. A Print dialog box will appear.
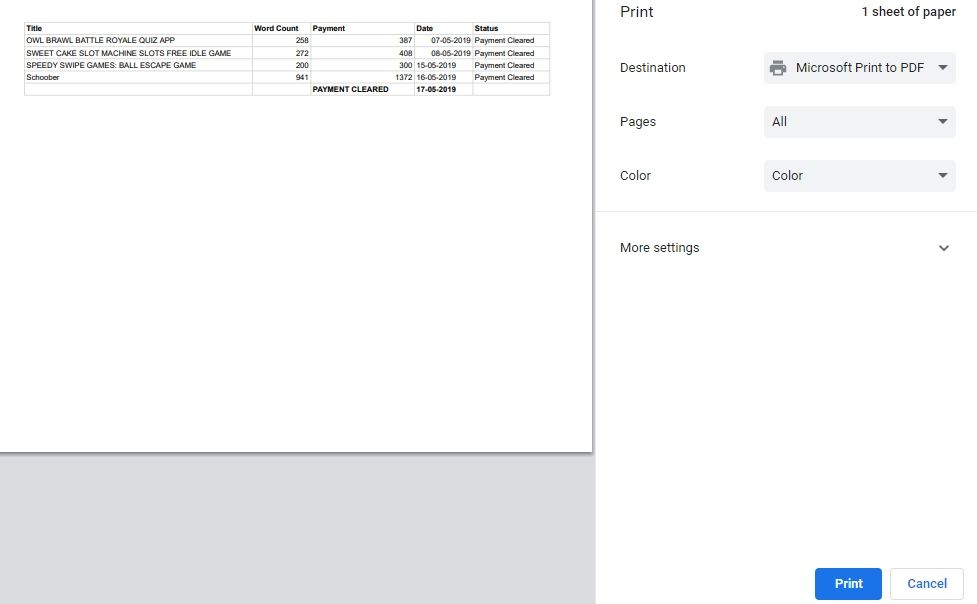
- Click the blue Print button to print the sheet.


Aligning Spreadsheets Before Printing
There's a Formatting section at the bottom right of the Print settings page (just above Headers & footers), which contains Alignment settings. In Google Sheets, the alignment settings are set to center-top by default. Even though the default settings are perfect for most cases, sometimes changing the alignment of your printout brings the best result.
For example, the center-top alignment will look odd if you only want to print a single column. It will also waste a lot of page space. See the image below:

For a better result, you can set the alignment to left-top. For that, change the Horizontal alignment to Left, while the Vertical alignment remains Top.

Other than that, you can change the Page order to Down, then over or Over, then down. You can also choose whether to Show gridlines or Show notes in your printout by checking them. Here's an image that shows the Print settings preview without the gridlines:

Printing a Google Sheets Worksheet on One Page
For a larger worksheet, the columns won't fit on one page. If you haven't changed the cell sizes inside your worksheet, Google Sheets will (by default) print the first nine columns on a single page. The rest of the columns will get printed on the next page.
But that's not always favorable. Most of the time, you want all worksheet columns to show on a single page. To do that, follow the steps below:
- Go to the worksheet you want to print.
- Press Ctrl + P on your keyboard.
- The Print settings page will open.
- Change the Page orientation setting from Portrait to Landscape.
-
Change the Scale setting from Normal (100%) to Fit to page.
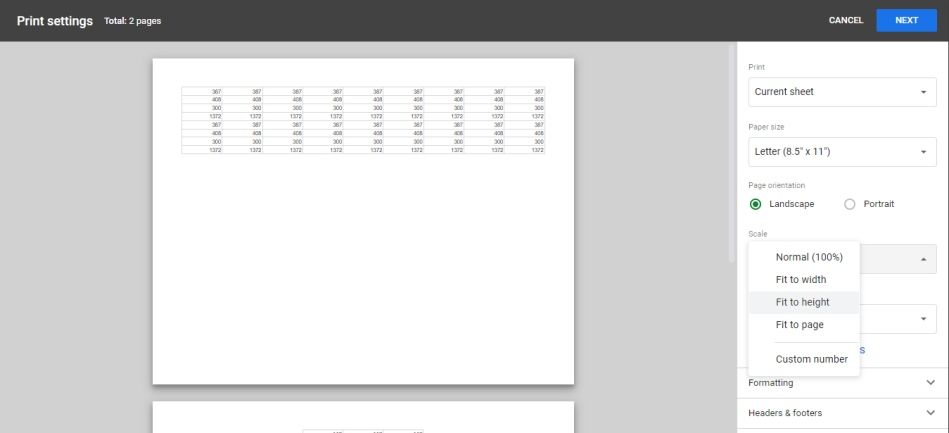

After following these steps, all contents of your worksheet will fit on a single page. Depending on your requirements, you can also change the Scale setting to Fit to width or Fit to height. Or you can use the Custom number option to enter and provide a percentage scale according to your liking.
Solving the Problem of Unreadable Fonts
The Fit to page option does an excellent job of fitting the entire worksheet on a single page. But it does so at the expense of legibility. Google Sheets reduces the font size to fit all the cells on one page. Sometimes, the font is so tiny that the printout becomes difficult to read, especially if you have a large worksheet.
Here are a few tips you can use to solve this problem:
Reduce Column Width
Usually, there's a lot of white space inside columns. If you reduce the column width, the white space will be reduced, allowing more columns to fit into a single page. To reduce column width:
-
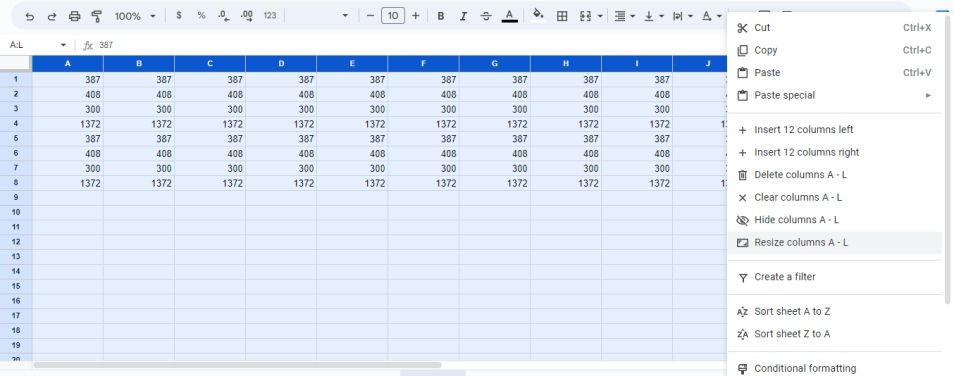
Select the columns (columns A to L in our case).
-
Right-click the highlighted area and click Resize columns A - L.
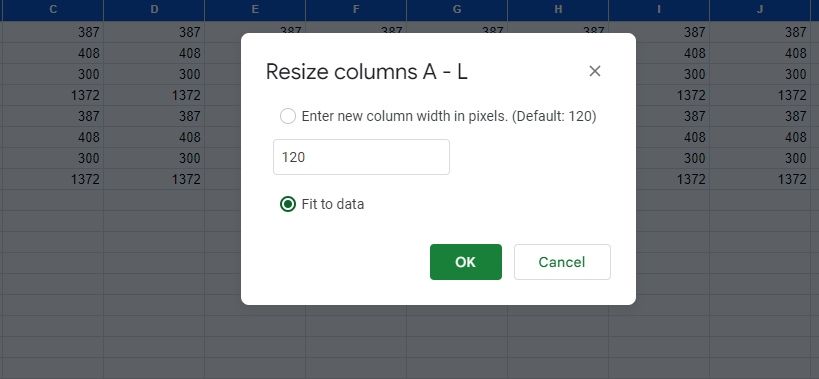
- A Resize columns A - L dialog box will appear.
-
Enter a lower column width or select the Fit to data option, and Google Sheets will automatically resize the columns to remove the white space, as shown in the image below:


Hide Rows and Columns
Hiding unused rows and columns lets you fit more columns into a single page. To hide rows and columns:
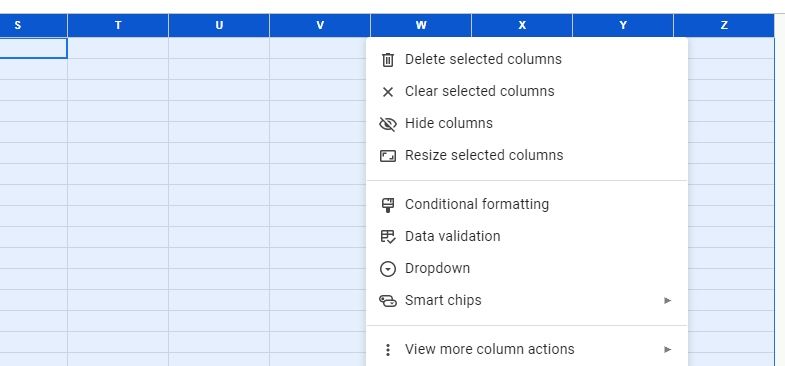
- Select the (unused) columns you want to hide.
-
Right-click the highlighted area and click Hide columns.
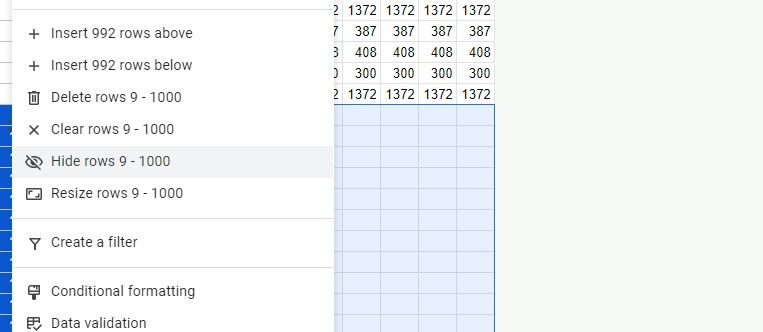
- Now select the (unused) rows you want to hide (Select the first unused row, then press the CTRL + Shift + down arrow key on the keyboard to select all unused rows at once).
-
Right-click the highlighted area and click Hide rows.
-
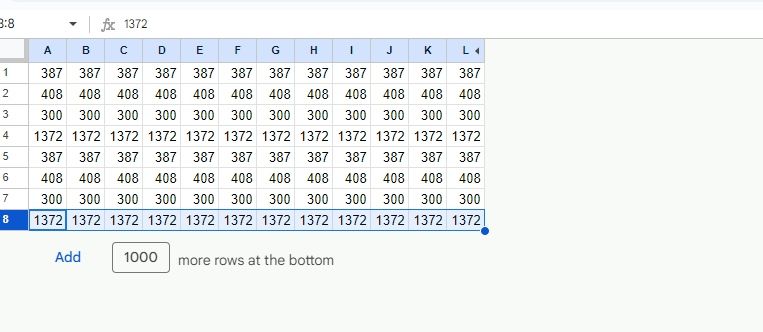
After hiding unused rows and columns, your worksheet should look something like this:


Format Cell Content
We can format the worksheet content in many ways to occupy less space. That is why knowing the best Google Sheets formatting tips is essential for any Google Sheets user.
For example, if you're using a thousand separator in your numbers, removing it from hundreds of cells can free up enough space to squeeze in a few more columns. Similarly, choosing a shorter date format (if your worksheet includes dates) helps free up space.
If you suspect your worksheet has duplicate information, remove it to save space. Here are some steps to remove duplicates in Google Sheets to make your data fit on one page.
Reduce Margins
In the Print Settings page, the Margin option lets you set the margins of the printed page. You can select Normal, Narrow, or Wide margins. By selecting Narrow margins, you can free up space for more columns. Also, you can manually adjust the margins by dragging the margin lines to your desired positions with the Custom numbers option.

Formatting Is Important When You're Printing
Now that you know Google Sheet's Print Settings page and its different options, it's time to play around. Try out different layouts, alignments, and scales to see the results they bring.
But remember, a printout is as good as its digital copy. If the formatting of the digital worksheet is off, the printout will be just as bad. That is why getting good at formatting spreadsheets on Google Sheets is essential to get legible and visually pleasing printouts.