
The public cloud is a common choice for modern websites and apps ahead of private hosting. This is due to factors like cost-effectiveness and scalability.
A static website displays pre-built HTML, CSS, and JavaScript files on a server. It differs from a dynamic website that generates content based on user actions or preferences.
Cloud platforms make static website hosting simple and cheap. You can deploy a static website in the cloud using the AWS cloud provider.
What Is AWS S3?
Amazon Simple Storage Service (S3) is a data storage service offered by Amazon. You can think of S3 as a web platform provided by Amazon where you can store files and any other type of data in the cloud.
AWS S3 is one of the most popular cloud storage mechanisms available on the internet. It is the storage room of many small and large-scale web applications today. An example is Netflix which hosts all its streaming content on it.
AWS S3 adopts an object storage architecture that makes it durable, scalable, and highly available for use in any instance. You can use it for web app storage, backup, data archive, disaster recovery, and—interestingly—website hosting.

What Is an S3 Bucket?
In AWS S3, storage units are of different types, and the most basic one is the object—simply a file. An S3 bucket is a collection of objects of different types. You can picture an S3 bucket as the root folder of an entire system that comprises many files and folders of various kinds.
You can manage S3 buckets in various ways. You can do it from the AWS console, via AWS CLI, using the AWS SDK, and by sending or grabbing data in your application via the REST API.
S3 is scalable, so a bucket can hold almost any file no matter its type or size. In fact, a single object can be as large as 5 Terabytes. This is why an S3 bucket is suitable for backups and disaster recovery.
Objects stored in an S3 bucket are usually accessible (read-only) via a URL that’s unique to each object. You can also use S3 buckets for static web hosting because they can serve objects over HTTP.
How then can you use S3, and maybe make it your default platform for hosting static websites?
How to Create an S3 Bucket and Configure It for Web Hosting
Here’s a step-by-step procedure to create and configure an Amazon S3 bucket. You’ll also learn how to enable static web hosting in a bucket.
To follow along, you should signup for an AWS account if you don't already have one. To create an S3 bucket to host your static website, sign in to your AWS console and follow the five steps below.
-
Search for the S3 service and navigate to the S3 dashboard.
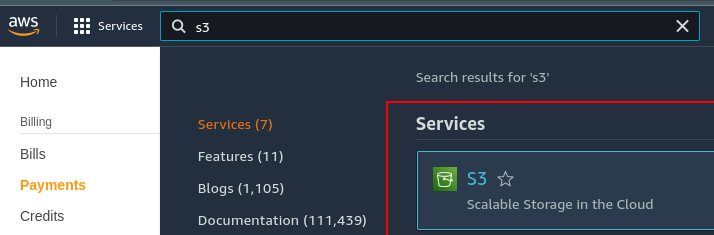
-
Click on the Create bucket button to configure and create a new bucket.

-
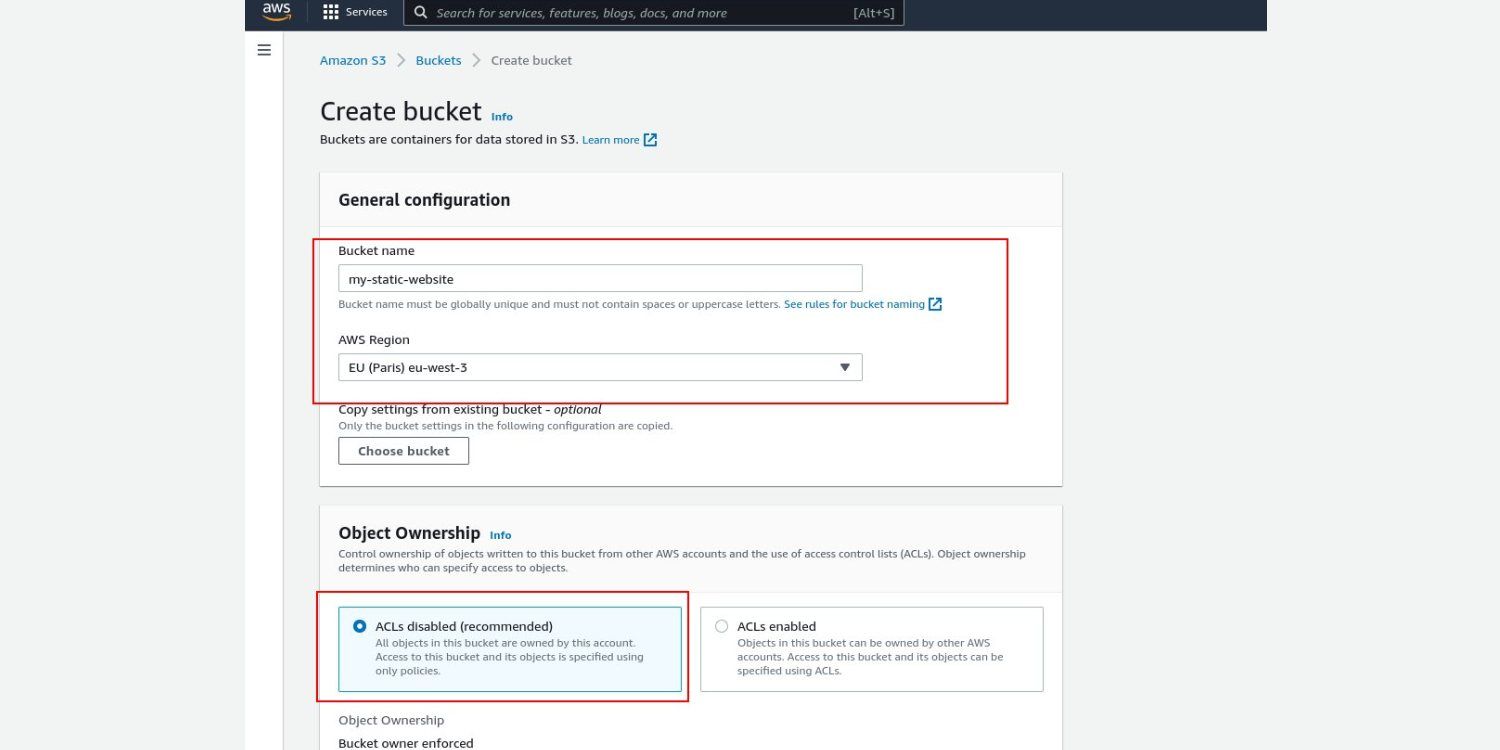
The first thing to do on the bucket configuration screen is to give your bucket a globally-unique name. S3 will prevent you from creating a bucket if the name is already taken. Select a preferred region for your bucket or leave the region selected by default. Also, leave the “Object Ownership” section as default.
-
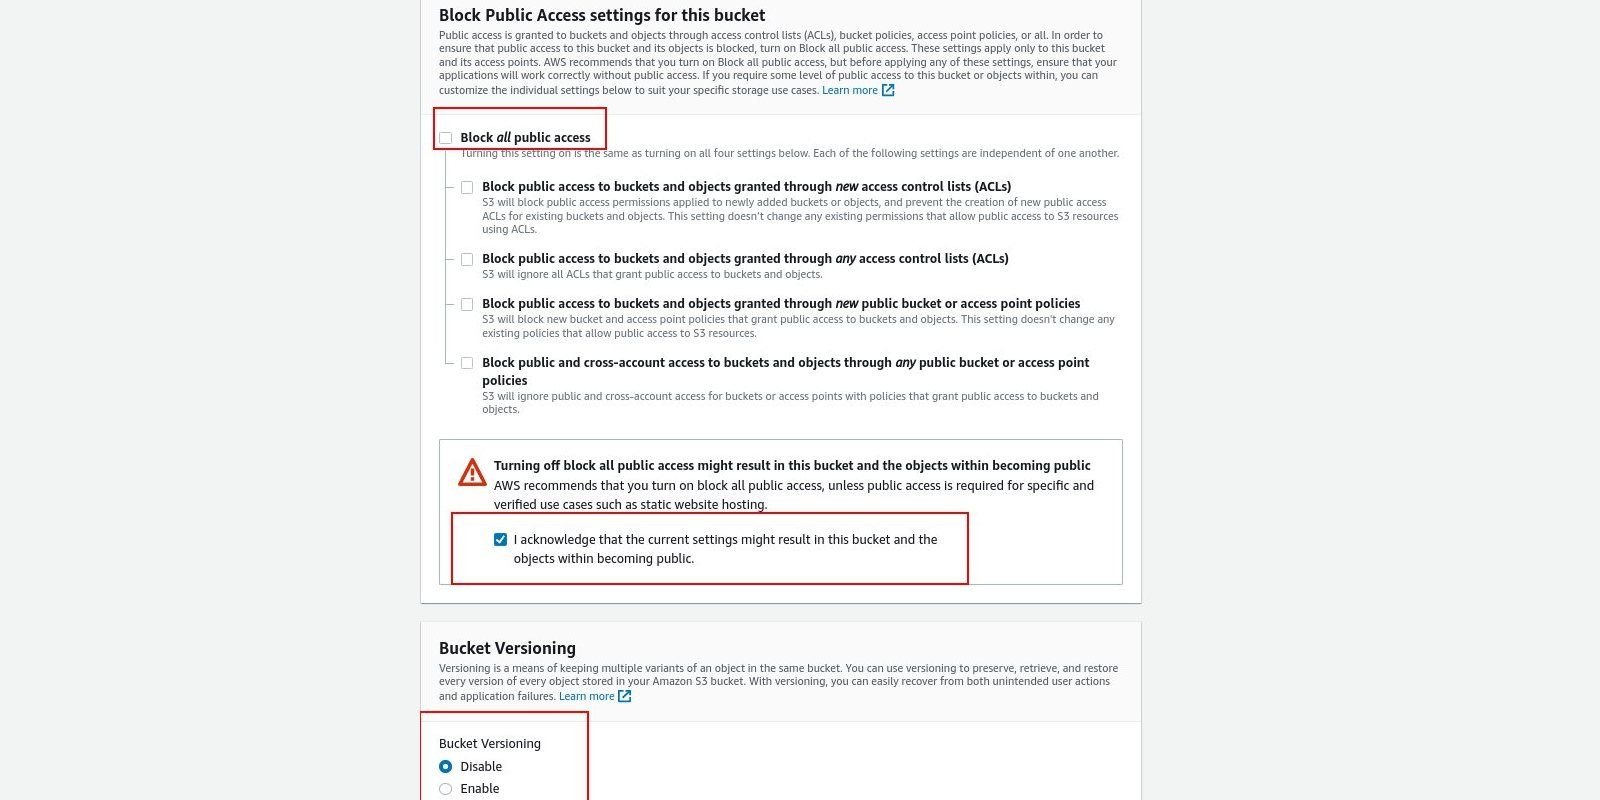
To host static websites on S3, you need to make the bucket publicly available. So in the next step, uncheck the Block all public access option. Then acknowledge in the warning prompt that comes up below it that you agree to make it public. Bucket versioning is not required, so you should disable it.
-
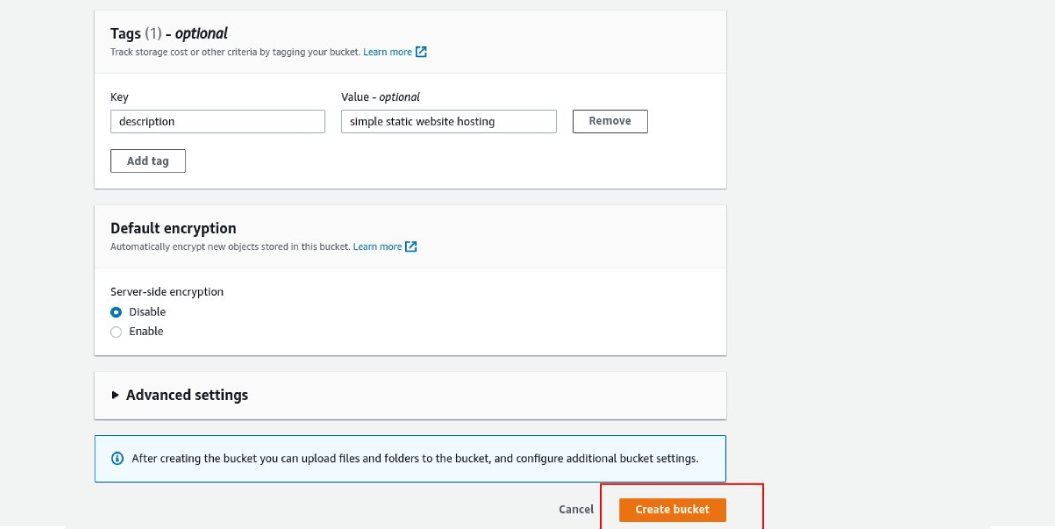
The last 3 steps don’t necessarily need action from you. You can add tags if you want, like the sample tag here which is “description”. Keep the default encryption disabled and click on the Create bucket button to create your new bucket.


The next step is to configure the new S3 bucket for static web hosting. To do this, click on the bucket name in the S3 dashboard and, on the new screen that loads, navigate to the Properties tab.

Scroll down to the Static website hosting section and click on the Edit button. This will open the static website hosting configuration screen.

Enable it and leave the Hosting type as default. A note on this screen says: “For your customers to access the content at the website endpoint, you must make all your content publicly readable…”. This is why it was necessary to allow public access when creating the bucket earlier.
The Index document field is where you specify your website’s index file which is usually index.html. The Error document is the page you want to display whenever an error occurs, such as a 404 error.
Save changes and return to the properties screen. You should notice a new Bucket website endpoint in the Static website hosting section. You’ll be able to use this URL to access your website once you’ve finished setting it up.

You now have your bucket configured and ready to host a static website. How then do you add your website files to the bucket and view your website?
How to Upload Files and Folders to an S3 Bucket
To host your static website in the cloud on S3, you need to upload your files and folders to the configured S3 bucket. Navigate back to the objects tab and click any of the upload buttons to upload your website files.

The next screen is where you can add the files and folders you want to upload to the bucket. Ensure you add your index.html file and every other file or folder associated with your website here. The folders you might want to add are your CSS, JavaScript, and image folders.
You can add files and folders either by drag and drop or by using the “Add files” or “Add folders” button. Once you have added all files and folders, click the upload button at the end of the screen. Wait for the files to upload, and then you can click the close button to return to the "Objects" screen.

How to Secure and Preview the Deployed Website
At this stage, we’re almost done, and the website is almost ready for preview in a browser. The site can’t open yet due to Amazon’s Identity and Access Management policies that prevent access to resources in a bucket.
You need to allow access to the bucket's resources yourself. Navigate to the permissions tab on the bucket dashboard and edit the Bucket policy. Copy and paste the code below, and replace “website-name” with your bucket’s name.
        {
 "Version": "2012-10-17",
 "Statement": [ {
   "Sid": "AddPerm",
   "Effect": "Allow",
   "Principal": "*",
   "Action": "s3:GetObject",
   "Resource": "arn:aws:s3:::website-name/*"
 } ]
}
Save changes and revisit the properties tab once again to get the website URL from the static website section. Copy and paste the URL into a browser, and you’ll see your static website.
Hosting static sites in the cloud is a more secure and scalable alternative to hosting static websites on Github pages. Especially for sites with heavy multimedia files.
Deploying Static Websites in the Cloud
It’s pretty easy to deploy a static website in the cloud using AWS S3. You should consider getting a custom domain name for a final, production site.
Amazon offers its own domain name service, Route 53. You can also check out other DNS providers to get a domain name of your choice.
The cloud is very cost-effective and easy to use. Consider making it your default choice for static website hosting.