Do you want to automatically move files from one folder to another on your Windows or Mac computer? Well, you can do it pretty easily on both types of computer.
This guide covers how to automate your file transfer tasks on Windows and macOS.
Why Move Files From One Folder to Another Automatically?
There are many reasons you would want to set this up.
It might be that your Downloads folder gets cluttered every few days. In this case, you can set up a task that automatically moves your files to a selected folder. This helps keep the Downloads folder uncluttered.
Another possible reason is that you have a folder where you store files, but you don’t use those files once you’ve finished working on them. You can set up a rule that automatically moves files from that folder to an archive folder on your computer instead.
Automatically Move Files From One Folder to Another on Windows
On Windows, you can create a batch script that automatically moves files from your selected source folder to your target folder. This script can check the age of your files to ensure your files are only moved after certain days or months have passed since they were created.
Don’t worry if you’ve never written a batch script before. In fact, to make a script for this task, all you need to do is copy and paste the code below, specify your folders, and you’re good to go.
Here's how you do that.
Step 1. Write the Script to Automatically Move Files
The first thing to do is to write the script and specify some values in it:
- Open the Start menu, search for Notepad, and launch it.
-
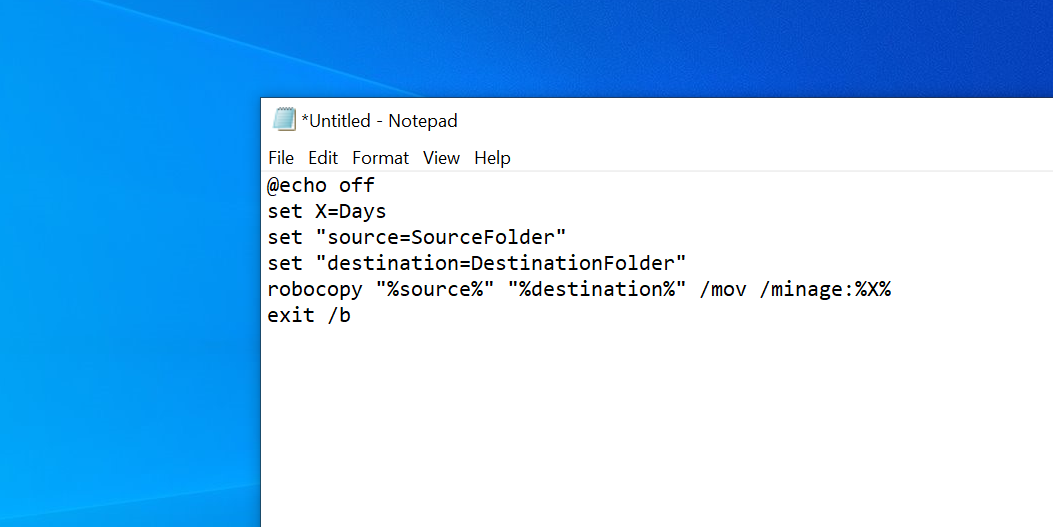
Paste the following script in a new Notepad document.
        @echo off
set X=Days
set "source=SourceFolder"
set "destination=DestinationFolder"
robocopy "%source%" "%destination%" /mov /minage:%X%
exit /b - In the script above, replace Days with the number of days after which the script should move your files (this is the age of your files), replace SourceFolder with the path to where your files are located, and replace DestinationFolder with the path to where your files should be moved to.
- Click the File menu and select Save As.
- Select All Files from the Save as type dropdown menu, enter a name for your file, append .bat at the end in the File name field, and click Save to save the file.
Your batch script is now ready.
Step 2. Schedule the Batch Script to Run Automatically
Double-clicking on your newly created batch file should move all your files from one folder to another. To automate this task, you need to put this file into an automated task.
Task Scheduler is going to help you with that. You can create a task in this utility app, and ask it to run your script according to your chosen schedule.
Here’s how you set up your task in Task Scheduler:
- Open the Start menu, search for Task Scheduler, and open it.
- Click Create Task on the right to configure a new automatic task.
- Enter a name for your task in the Name field.
- Click the Triggers tab at the top, and then click New to add a new trigger.
- On the trigger screen, select how often your batch script should run from the Settings section. You can then specify the time for when the script should launch on the right pane. Then, click OK at the bottom.
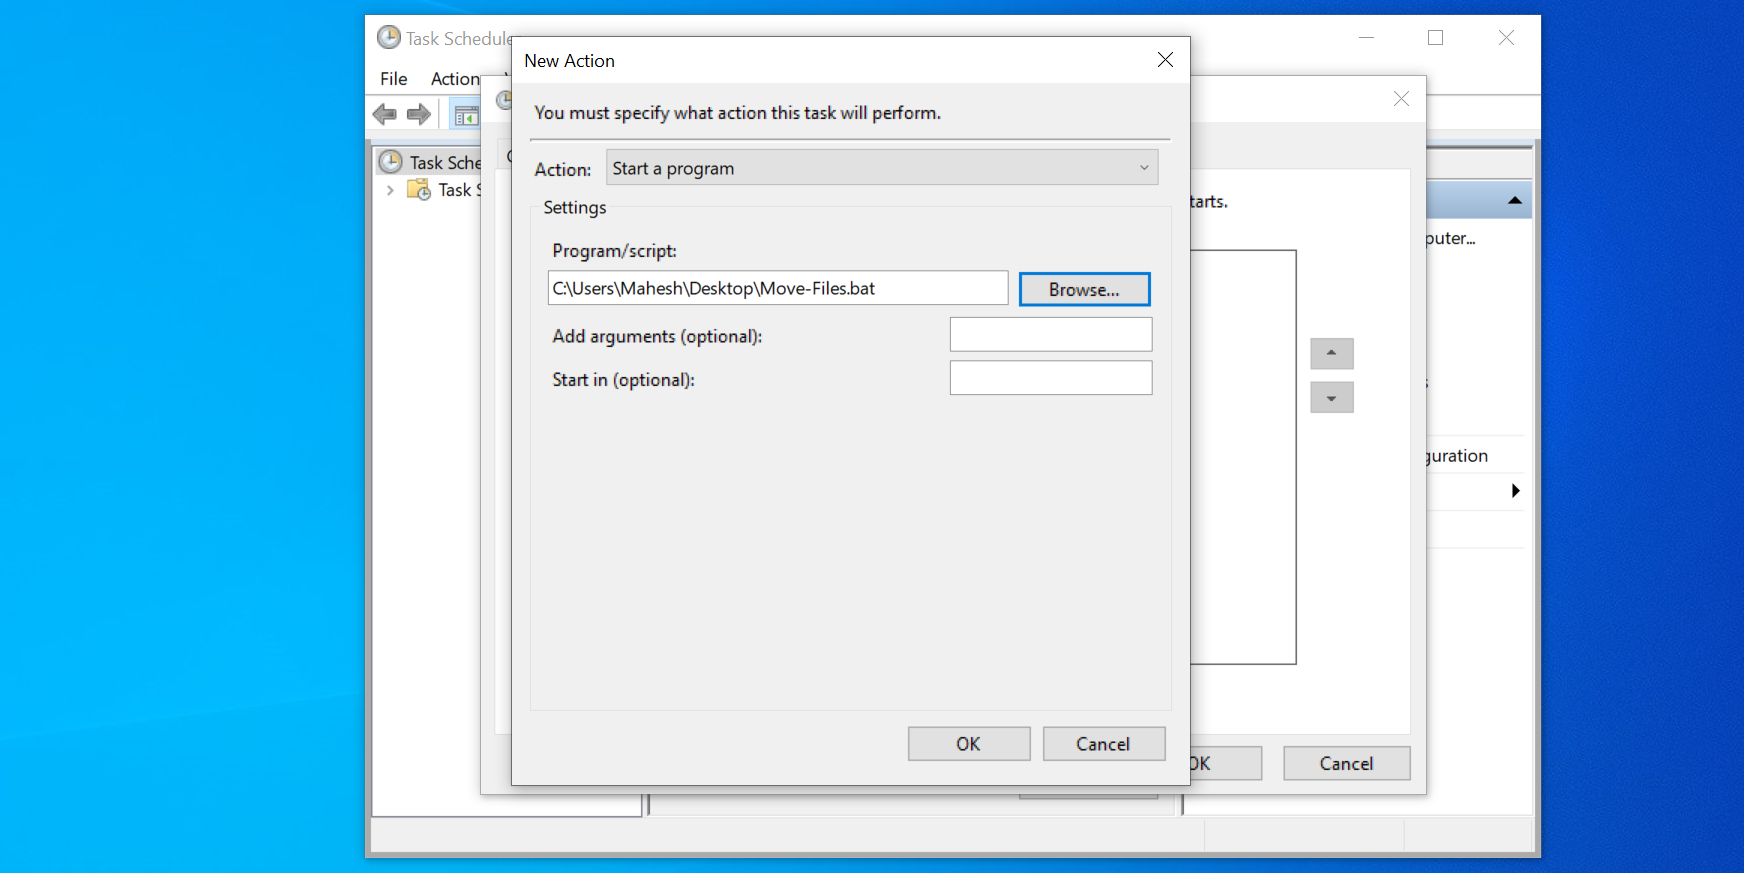
- Select the Actions tab and click New to add a new action.
- Make sure Start a program is selected in the Action dropdown menu. Then, click the Browse button.
- Navigate to where you’ve saved your batch script and select it.
- Click OK and then OK again to save your task.
Task Scheduler will run your batch script at the specified time and frequency. When this happens, the script will start moving files from your source folder over to your destination folder.
If you ever want to disable the automatic move of your files, open Task Scheduler, find your task in the list, and click Delete on the right. This deletes your task and prevents the batch script from automatically running.
Automatically Move Files From One Folder to Another on macOS
Setting up an automatic transfer of files is relatively easy on macOS. This is because you only need to use one app to write as well as schedule your script on a Mac.
We’re talking about the Automator app, which you can use to automate many tasks on your Mac. Using this app, you can create a Folder Action that moves your files from one folder to another without any extra user interaction.
If that sounds interesting to you, here’s how to automate file moves on your Mac:
- Launch Automator on your Mac.
- Click File > New, select Folder Action, and hit Choose to create a new Folder Action in Automator.
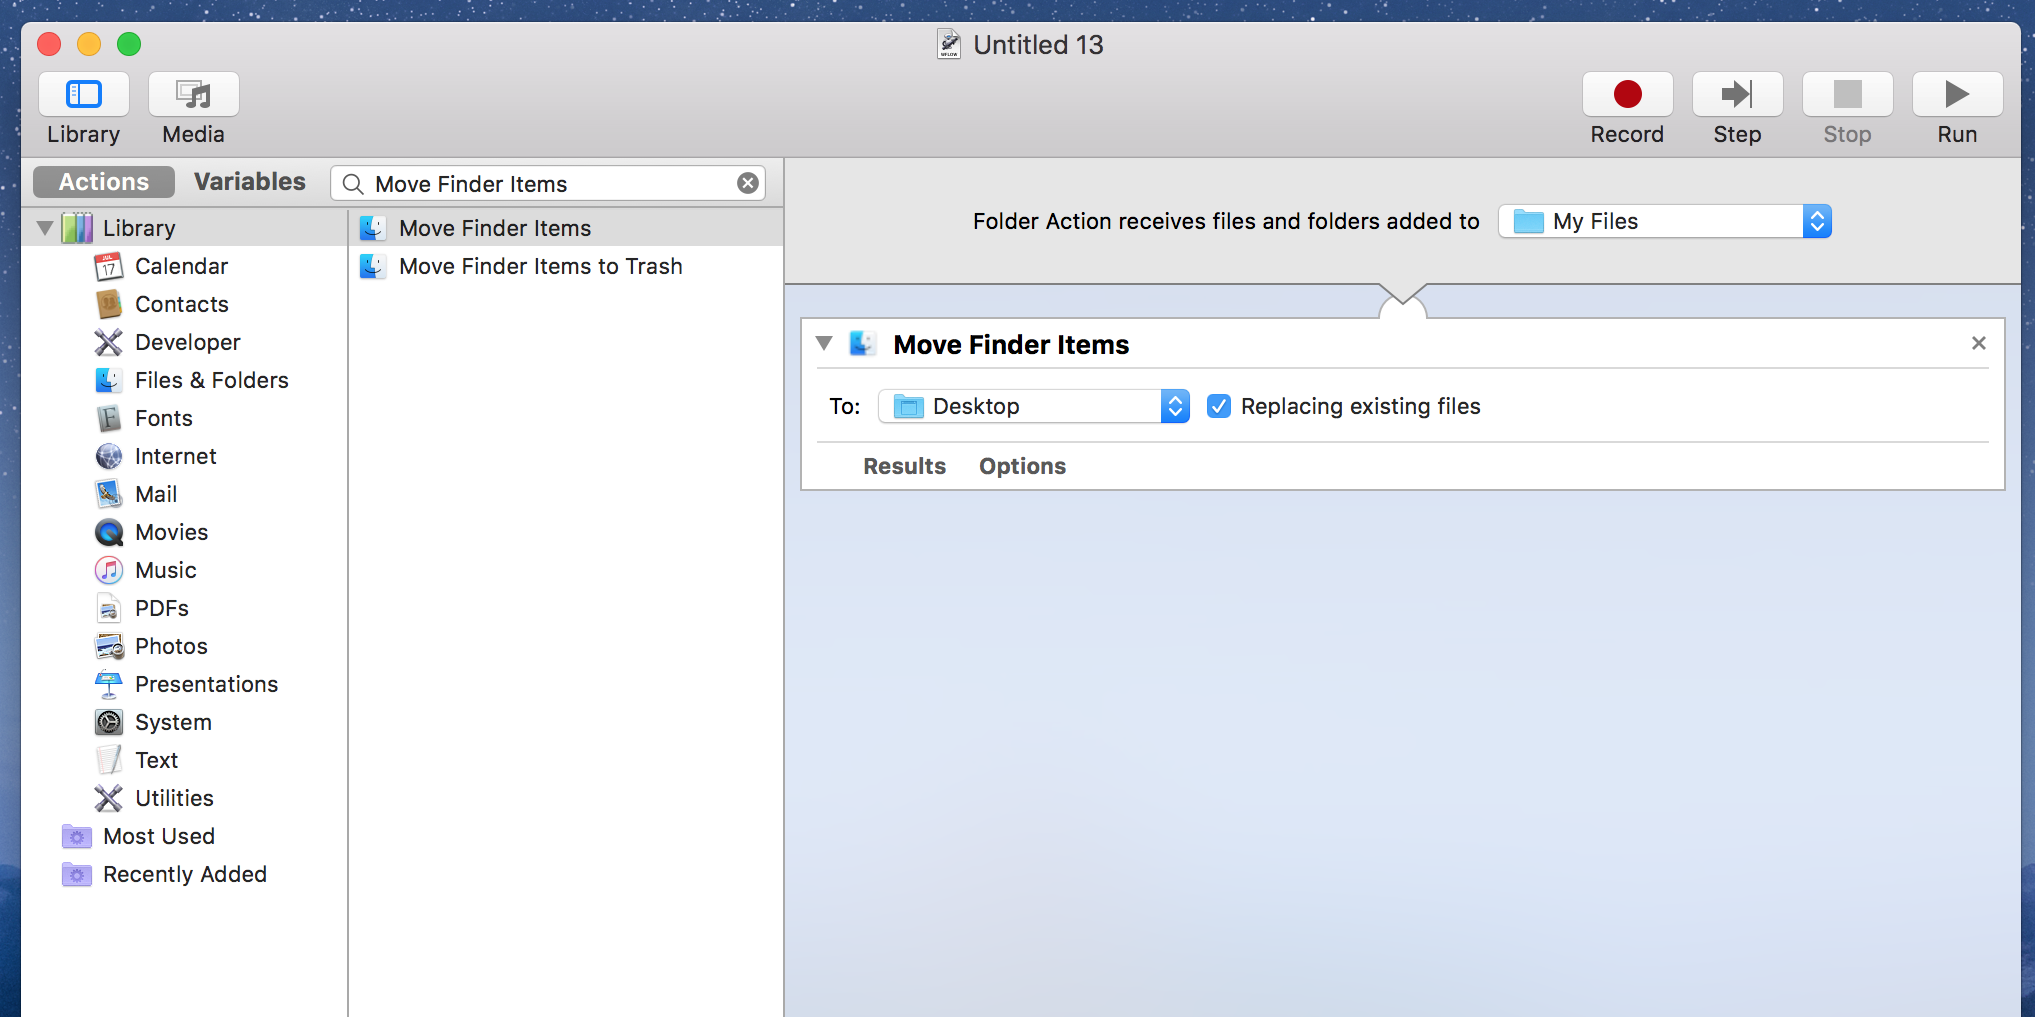
- You’ll see a dropdown menu that says Folder Action receives files and folders added to at the top. Use this dropdown to select the source folder where the files to be moved are located.
- On the left of your screen where it says Actions, search for the action named Move Finder Items and drag and drop it onto the workflow on the right.
- In the Move Finder Items action on the right, select the destination folder from the To dropdown menu. This is where your files will be moved to.
- Tick Replace existing files if you want.
- Press Command + S, enter a name for your Folder Action, and click Save.
- Close Automator.
From now on, whenever you place a file in your source folder, Automator will move the file to the destination folder. You don’t need to press any keys or launch any utilities; it all happens on its own.
While using this Automator task, be careful about your Downloads folder. This is because most browsers tend to store temporary versions of the files that are still being downloaded. Automator will move those half-downloaded files and this can cause your downloads to fail.
A band-aid to that problem is to make your Desktop the default downloads folder for your browsers, if you want.
Moving Files to Appropriate Folders on Windows and Mac
If you tend to follow a certain pattern to move your files around, you can automate that task on both Windows and Mac computers as shown above.
Organizing files has never been easier, but there are now apps that assist you with this task. You can use these apps to better manage and organize your files, so it’s easier for you to find your files when you need them.


