If you have ever set up a virtual machine, you know how it works. You click here and there, click your way some more, and in the end, you have a system set up. But then you still have to install software and configure the VM to your preference.
Now imagine that you want to set up hundreds of VMs. Clicking your way through the installation isn't that effective. Instead, you need to automate the process as much as possible, and that's where cloud-init comes in.
Let's take a look at how you can automate OS installation and virtual machine configuration using cloud-init in Microsoft Azure.
Why Use cloud-init to Automate VM Creation?
cloud-init is a powerful deployment automation tool that Canonical, the company behind Ubuntu, develops.
With cloud-init, you can install and deploy Linux operating systems and configure other aspects of a VM. For example, you can use cloud-init to set up user accounts, install and configure software, add SSH keys, you name it.
At present, the majority of cloud service providers such as Azure, Linode, and Amazon Web Services (AWS) support cloud-init.
Although cloud-init started off on Ubuntu, it now supports all the major Linux distros, such as openSUSE, Debian, Red Hat Enterprise Linux (RHEL), etc.
Apart from deploying software in the cloud, you can also use cloud-init to configure and install software on on-prem servers or virtual environments such as VirtualBox, KVM, and VMware.
We’ll use the Microsoft Azure cloud platform to automate the deployment of an Ubuntu server using cloud-init.
Step 1: Creating a cloud-init Script
cloud-init scripts use modules for configuring different aspects of your system. For example, you’ll use the users module to configure user information and accounts, and the wireguard module for configuring WireGuard, etc. There are tons of other modules that you can use out of the box.
Let’s create a cloud-init script to automate most of the things that you configure when setting up a new virtual machine.
We’ll create a user named "mwiza" and assign it a password. For simplicity, let's use a plain text password, but you can encrypt it if you wish to. In addition, add the user's SSH key to authorized keys. This allows you to disable SSH password logins later for better security.
Apart from creating a new user, the script should do the following:
- Writing a file: Create a simple file and write content to it using the write_files module. The file will be placed in the home directory. You can use the same concepts for creating more complex files in the future.
- Running commands: We’ll run simple commands for configuring the UFW firewall, but it could be any other Linux command. Utilize the runcmd module for running any command of your choice; it's similar to running Linux commands by executing Bash scripts.
- Configuring locales: This sets your preferred locales such as the keyboard layout, preferred language, timezone, etc.
- Install packages: Use your favorite package manager to install packages on your system. For example, on Debian-based systems, you can use APT.
These are just some of the modules you can use from cloud-init; there are several other modules out there to automate all sorts of things.
Here is the full cloud-init script to configure the new user account. Remember to replace the SSH key with the correct one. Also, feel free to change the username and any other details.
        vim: syntax=yaml

# Add system users here
users:
  - name: mwiza
  groups: users, sudo
  shell: /bin/bash
  gecos: mwiza
  plain_text_passwd: Live-laugh-love12345G123
  lock_passwd: false
  ssh_authorized_keys:
    - ssh-ed25519 BSHSDSDS3NzaC1sdfSDGSDSDJ1KSDB:PWELJWEEWeKBrkXWbLJBs;ldfkagfafk===C6li71Ra6i+NKkajdfi userkey@email.com

# Install, update, and upgrade packages
package_upgrade: true
package_update: true
package_reboot_if_require: true

packages:
  - traceroute
  - net-tools
  - fail2ban

# Set locales
locale: en_UK
timezone: Etc/UTC
keyboard:
  layout: nb

write_files:
- path: /etc/salt/minion.d/master_ip_port.conf
content: |
master: salt
master_port: 4506
publish_port: 4505
- path: /home/mwiza/cloud-init.txt
content: |
created by cloud-init in azure

# Running Bash commands to configure software and services
runcmd:
  - ufw enable
  - ufw allow ssh
  - ufw allow 80
  - systemctl enable ufw

# Power off the VM after initialization is finalized
shutdown: poweroff
The cloud-init script uses YAML, so make sure that the indentation is correct otherwise, it won't work as expected.
Step 2: Creating the Virtual Machine Resource
The next step is to create the necessary resource in Azure for the virtual machine. Login to Azure if you already have an account or else create a free trial account by heading over to azure.microsoft.com.
On the Azure portal home page, click on the Create a resource button. From the list of the most popular Azure services, select Virtual Machine.
The next page gives you information for creating VM resources such as hard disk, networking, etc.
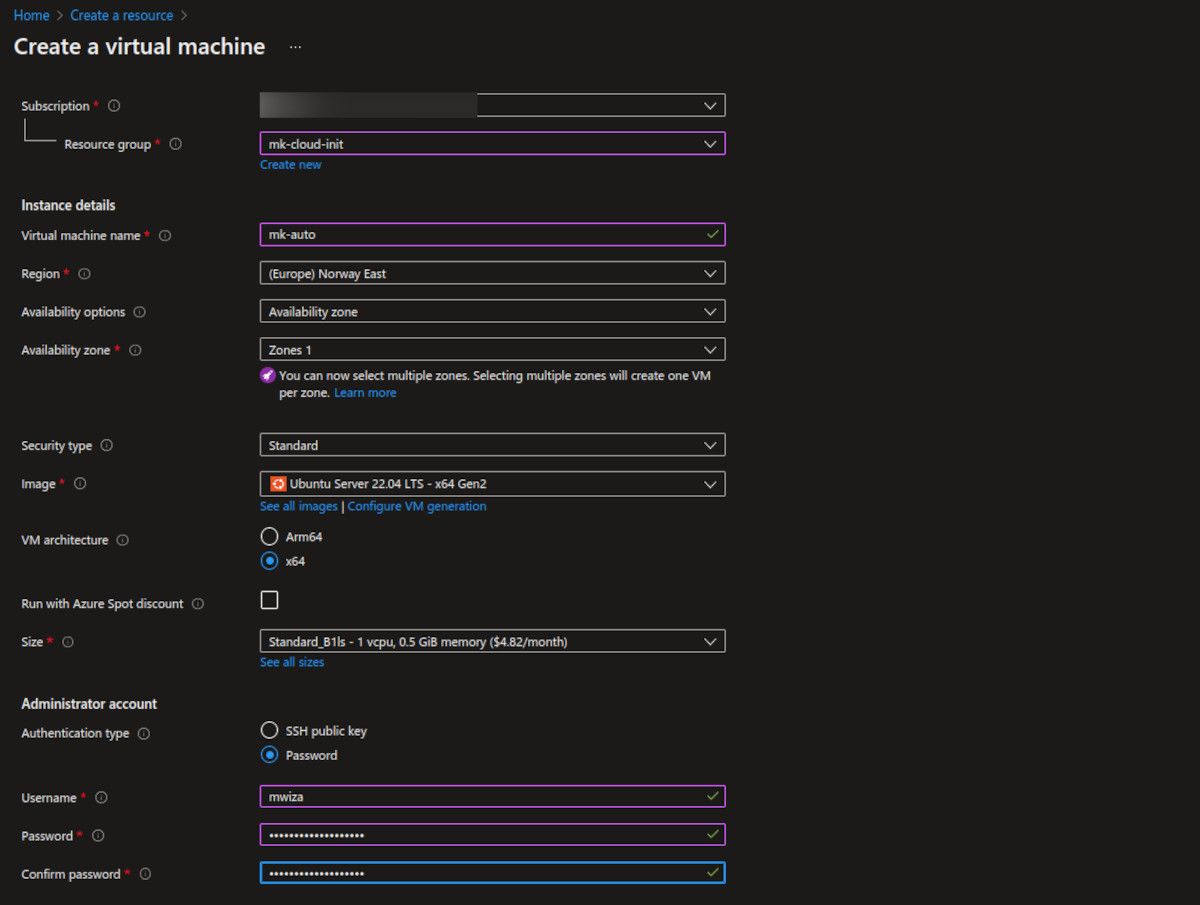
Give your VM a meaningful name and select the deployment region. Also, create a resource group for your VM or use an existing one.
Under the Authentication type, select the Password option and provide your username and strong password.
After you fill out all the fields on this page, your details should be similar to the following.
Step 3: Adding Your cloud-init Script
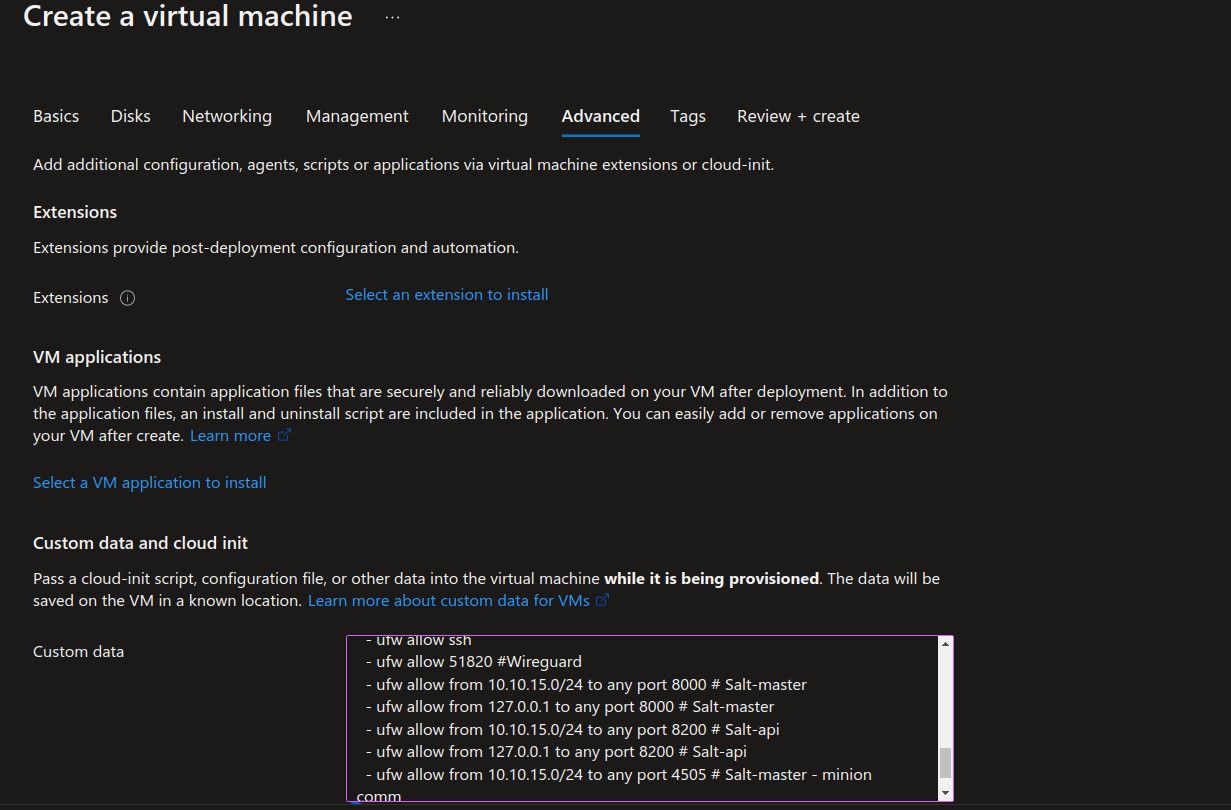
Next, click on the Advanced tab to add the cloud-init script. Copy and paste the cloud-init script from the first step into the custom data field.
Finally, click on the Review + create button. If everything is okay, the test will pass. Otherwise, the Azure VM creator will guide you on the corrections to make.
Step 4: Logging Into Your Virtual Machine
Use the VM overview information to get the public IP address of your virtual machine and login via SSH. If you used the correct SSH key, the system won't prompt you to enter the user password.
Once logged in, you can check that the files you wanted to create via the script are there. Also, look for installed packages with APT and check that the firewall has been configured properly using the sudo ufw status command.
cloud-init also logs important information in the /var/log/cloud-init.log file. It contains verbose messages of all events that happened during the cloud-init initialization. You can check out this file using the cat command as follows:
cat /var/log/cloud-init.log
Automate Virtual Machine Creation With cloud-init
cloud-init is a powerful tool that helps you automate Linux installation and setup. You can use it in the cloud and on on-prem servers. Whether you just want to automate your virtual machine deployment or need to deploy Linux servers on a large scale, cloud-init is a great choice.
On a related note, always secure your SSH logins for your cloud-based virtual machines to avoid security breaches.


