Sometimes it can be overwhelming to navigate through your Gmail inbox stuffed with junk mail and newsletters to delete unwanted emails one by one.
In Gmail, once you delete or archive an email it'll navigate you back to the inbox and makes you go over the whole process again for the next email. This can be very annoying and exhausting for people who receive hundreds of emails per day, but Gmail's Auto-advance feature can provide a solution to that.
What Is the Auto-Advance Feature?
Gmail's auto-advance feature lets you move directly to the next email (older or newer) in the list after you delete, archive, mute an email.
Steps to Enable Auto-Advance Feature From Web
- From your inbox, go to Settings (gear icon).
- Click See all settings.
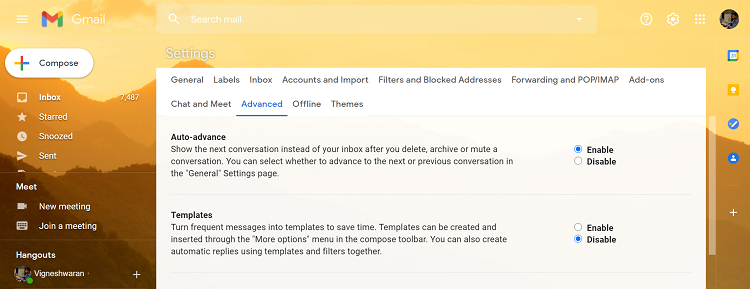
- Click the Advanced tab.
- Select the Enable radio button across the Auto-advance feature.
- Scroll down and hit Save Changes.
Configure Auto-Advance Options
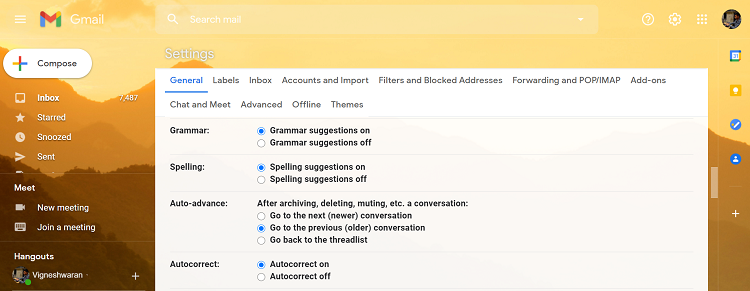
After you enable the auto-advance feature, the General tab in the Settings screen will show three options for configuring the auto-advance feature. You can select only one option to set the behavior of the auto-advance.
- Go to the next (newer) conversation - Select this option if you want to be taken to the newer conversation in the list after you delete, archive the current email.
- Go to the previous (older) conversation - Select this option if you want to be taken to the older conversation in the list after you delete, archive the current email.
- Go back to the threadlist - Selecting this option will negate the effect of auto-advance and resets to the default Gmail behavior.
Enabling Auto-Advance in Gmail Mobile App
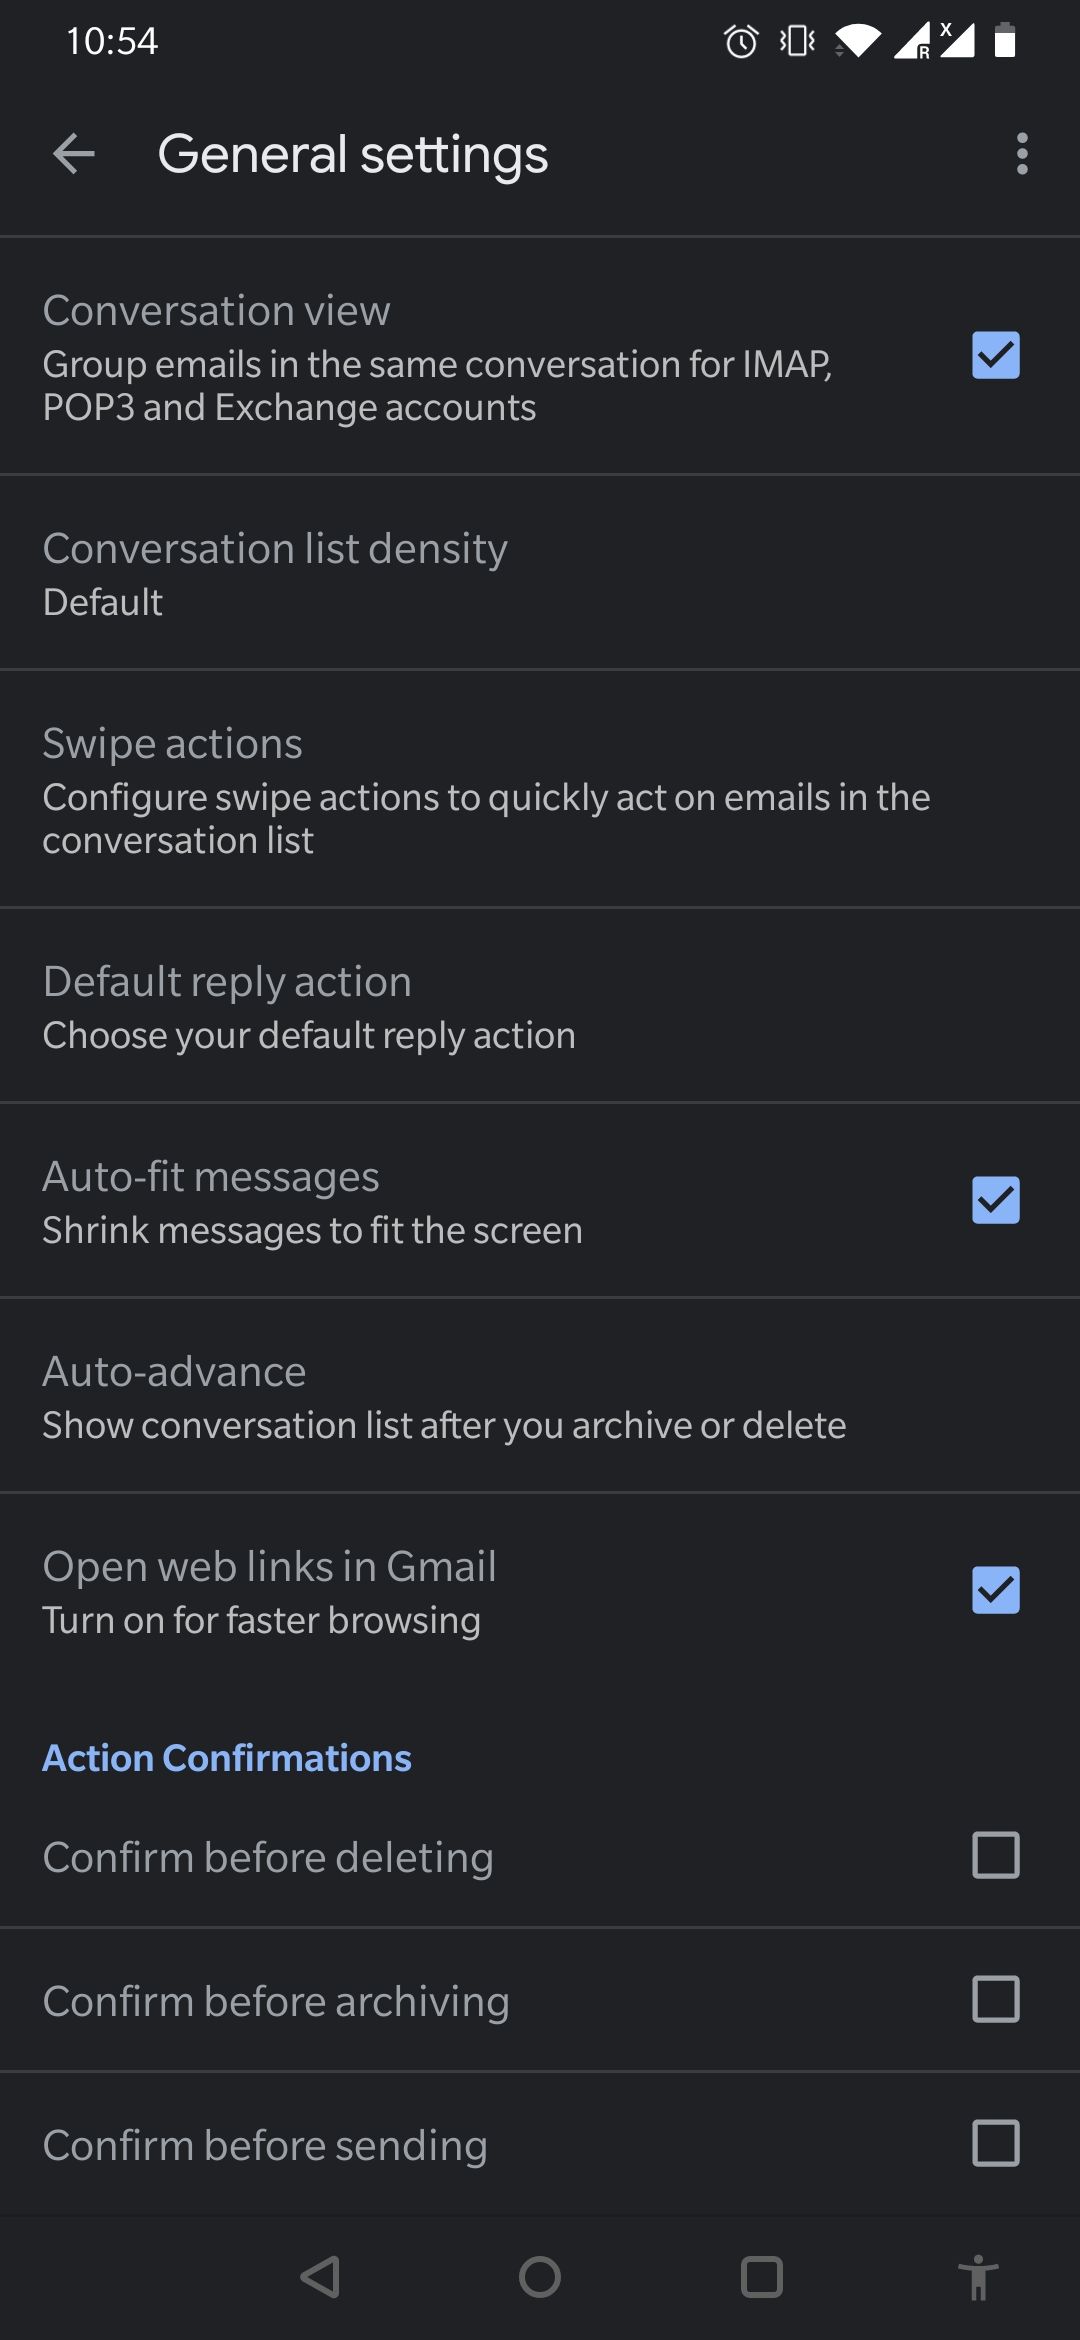
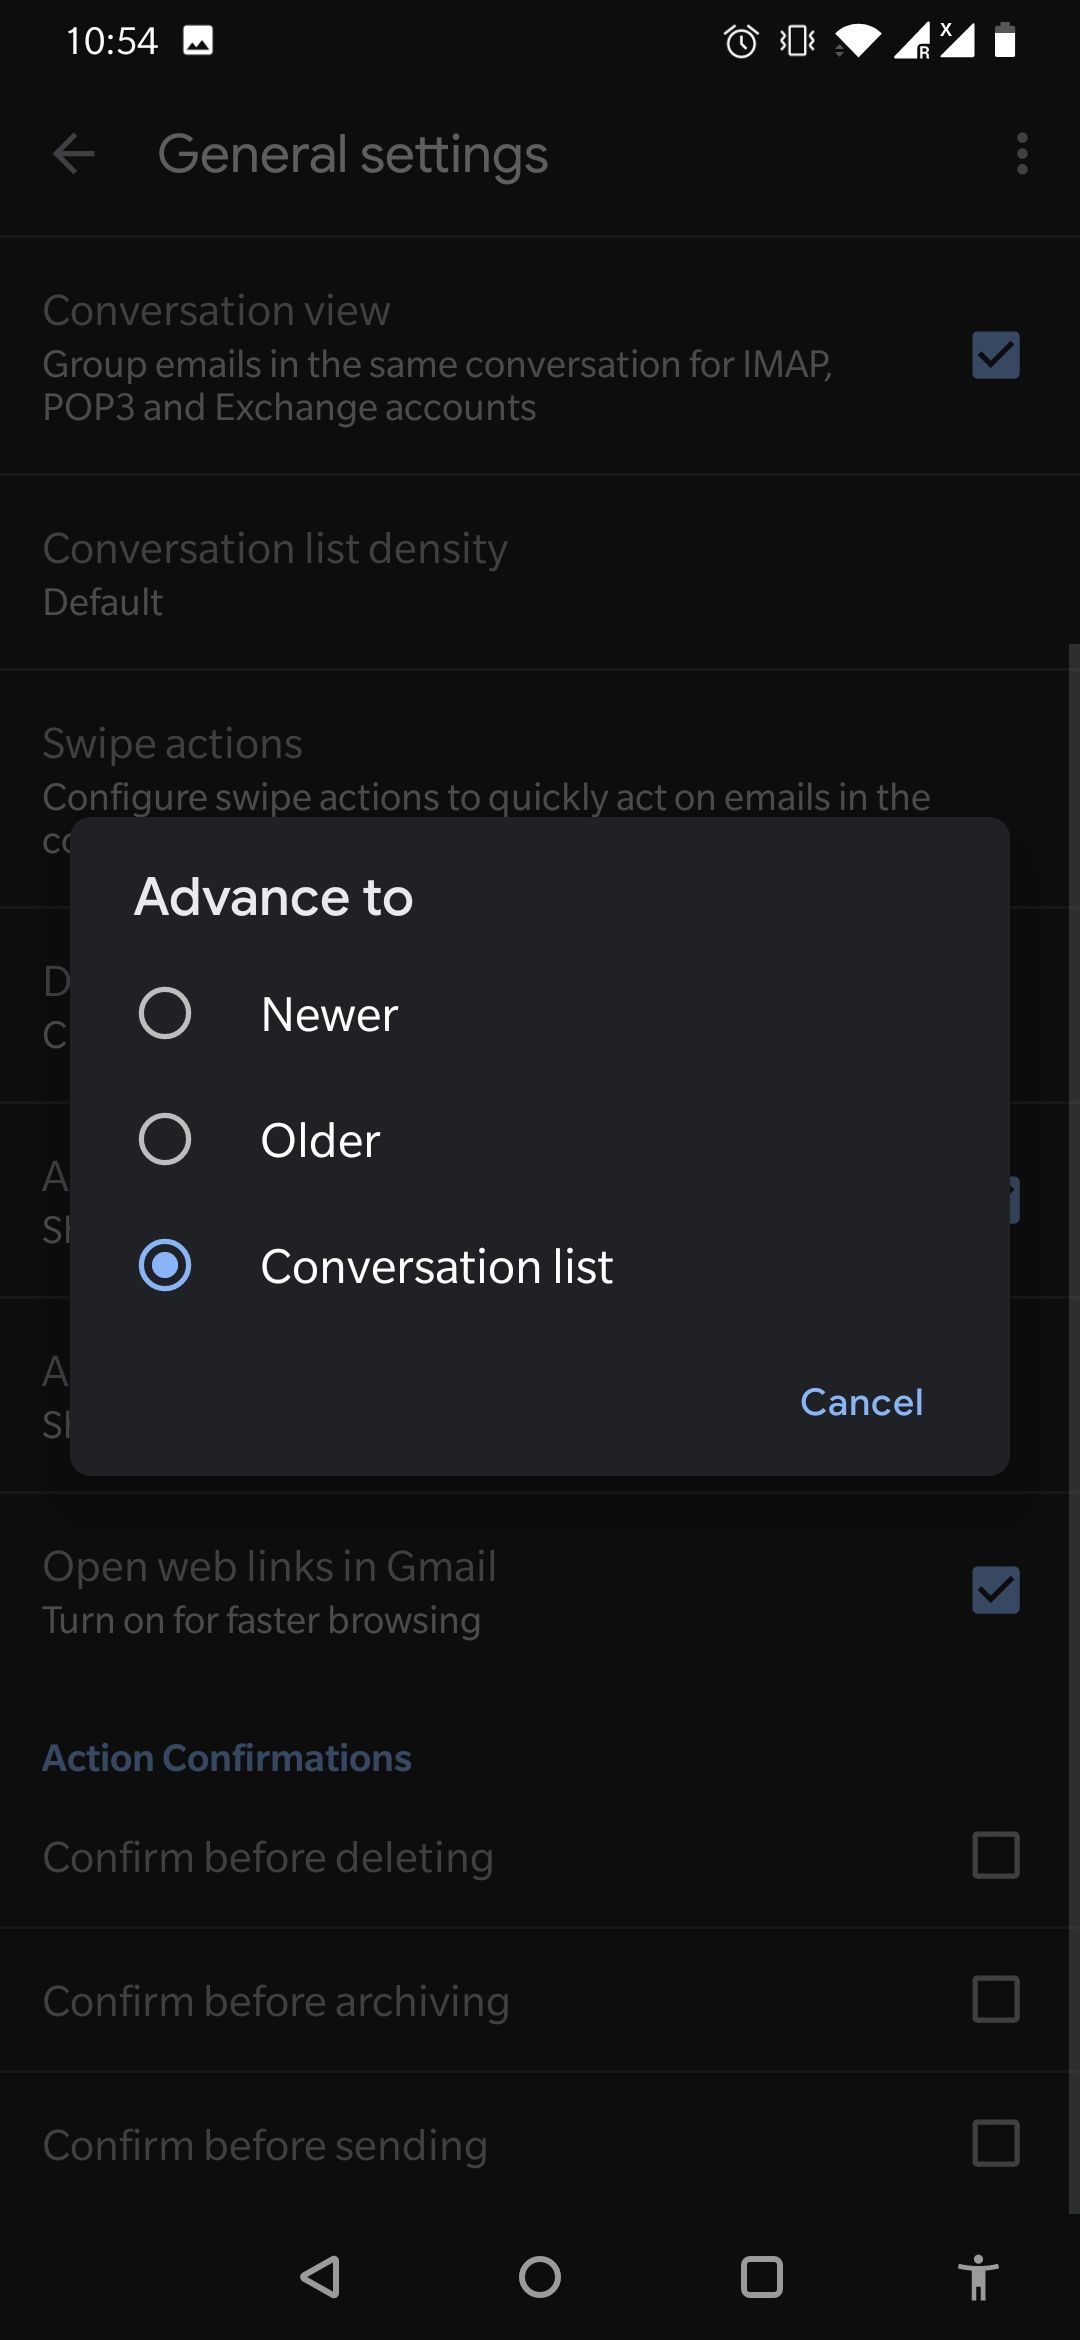
If you are using the Android version of the Gmail app, you can enable the auto-advance feature from Settings > General Settings > Auto-advance.


Unlike the web version, there's no separate option to customize auto-advance in Android. You can directly select one of the Advance to options and change the behavior of auto-advance.
Unfortunately, this option is not available for the iOS version of the Gmail app.
Time Saver
It may seem like a simple feature at first, but once you enable and start using it, you will discover yourself saving a lot of time every time you use Gmail.


