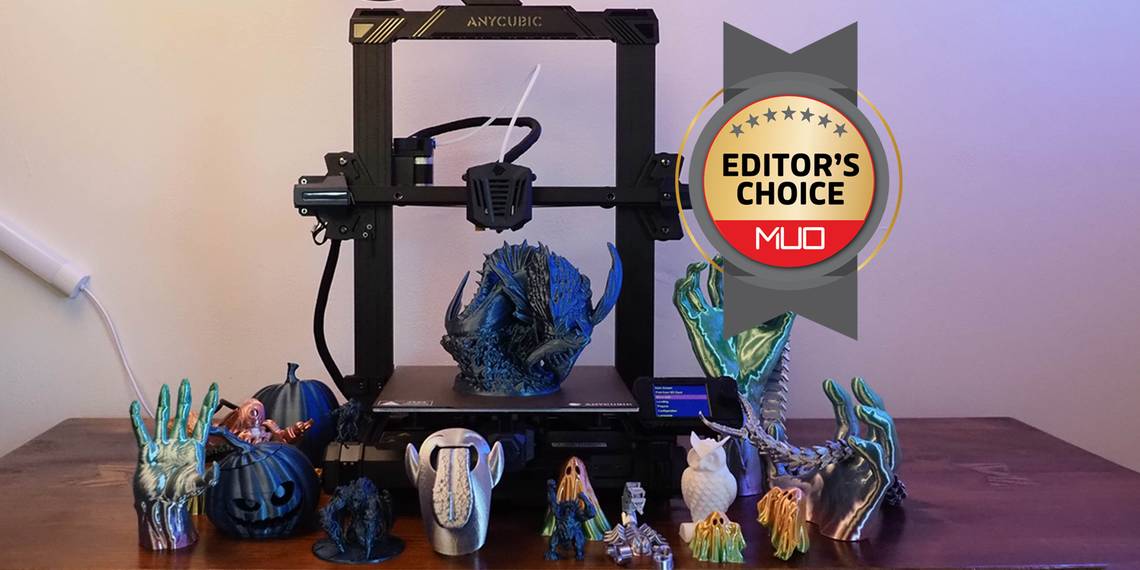
Anycubic Kobra Go


If you're after an informative and affordable entry point to 3D printing, the Anycubic Kobra Go is an excellent choice. While offering some of the best functional elements of filament printing, its trade-offs are limited. If you're wanting to learn and enjoy rewarding DIY projects, it's a great investment.
- Prints PLA / ABS / PETG / TPU
- Easy knob belt adjustment
- Bowden extruder
- 25-point auto-leveling
- Brand: Anycubic
- Build Volume: 8.66 x 8.66 x 9.84 inches (220 x 220 x 250 mm)
- Printing Accuracy: ± 0.1 mm
- Connectivity: MicroSD card / USB-C
- Heated Build Plate: Yes (≤ 230 °F / 110 °C)
- Feed Type: Separated bowden extruder
- Dimensions: 19.3 x 17.5 x 17.4 inches (490 x 445 x 443 mm
- Weight: 7 kg (~15.4 pounds)
- Compact printer with larger than expected build volume
- DIY assembly familiarizes you with major printer components and functionality
- Easy filament loading and removal
- Spring steel magnetic build plate is simple to use
- One button auto-leveling
- Small LCD screen
- Some assembly steps prove difficult without a smaller set of hands
- Needs mindful adjustment to reduce wear and debris from pom wheels (bearing pulley)
The Anycubic Kobra Go provides an educational introduction to 3D printing. With a focus on its DIY assembly and accessibility, users are encouraged to slow down from rushing into printing and garner a deeper understanding of the machine itself.
Setting Up the Anycubic Kobra Go

Upon glancing at the Anycubic Kobra Go's packing list, there's quite a bit to take in. As with most assemblies, it's advised to make sure every part is accounted for and to ensure no wires have been damaged during transit. While some parts are more easily exchangeable than others, it's better to have everything accounted for rather than risk a disruption mid-assembly.
For those already versed in laser engraver or 3D printer assembly, the process shouldn't be too unfamiliar. However, if this is your first time putting together a printer, you'll want to take your time to ensure you absorb each direction. While the written assembly instructions do provide a useful reference point, it's advisable to check the Anycubic Support installation video as a cross-reference.

Beyond trying to ensure proper piece fitting, only certain steps hold more difficulty. These usually involve a tight-fitting situation, so if you have a larger set of hands there can be some slowdown. Additionally, I felt the wires could have been labeled more precisely for faster installation and less visual double-checking.
Regardless of your skill level, these steps provide an intuitive look at the functionality of the Kobra Go. When finished, you'll calibrate the Kobra Go and make adjustments to the likes of the eccentric nuts. These steps are quite crucial; you'll want to minimize wear and tear on your printer's wheels.
Anycubic Kobra Go Technical Specifications

If you're not after a DIY discovery process into 3D printing, the Kobra Go still provides many of the essential features that users want in a 3D printer.
For instance, the printer has a smaller footprint of 19.3 x 17.5 x 17.4 inches while offering a build volume of 8.66 x 8.66 x 9.84 inches. To simply ease of use and get you printing without encumbered, there's also automatic leveling (25-point Anycubic LeviQ auto-leveling, no less) and a spring steel magnetic build plate. Similarly, you can make belt adjustments via a knob, allowing for easier fine-tuning after set-up.
As a trade-off for some more functional elements, the Anycubic Kobra Go comes with a smaller 2.4" LCD. Similarly, it features a separated Bowden tube to the extruder, which some might consider inferior to direct drive extrusion (but isn't necessarily).
Exploring the Anycubic Kobra Go's Screen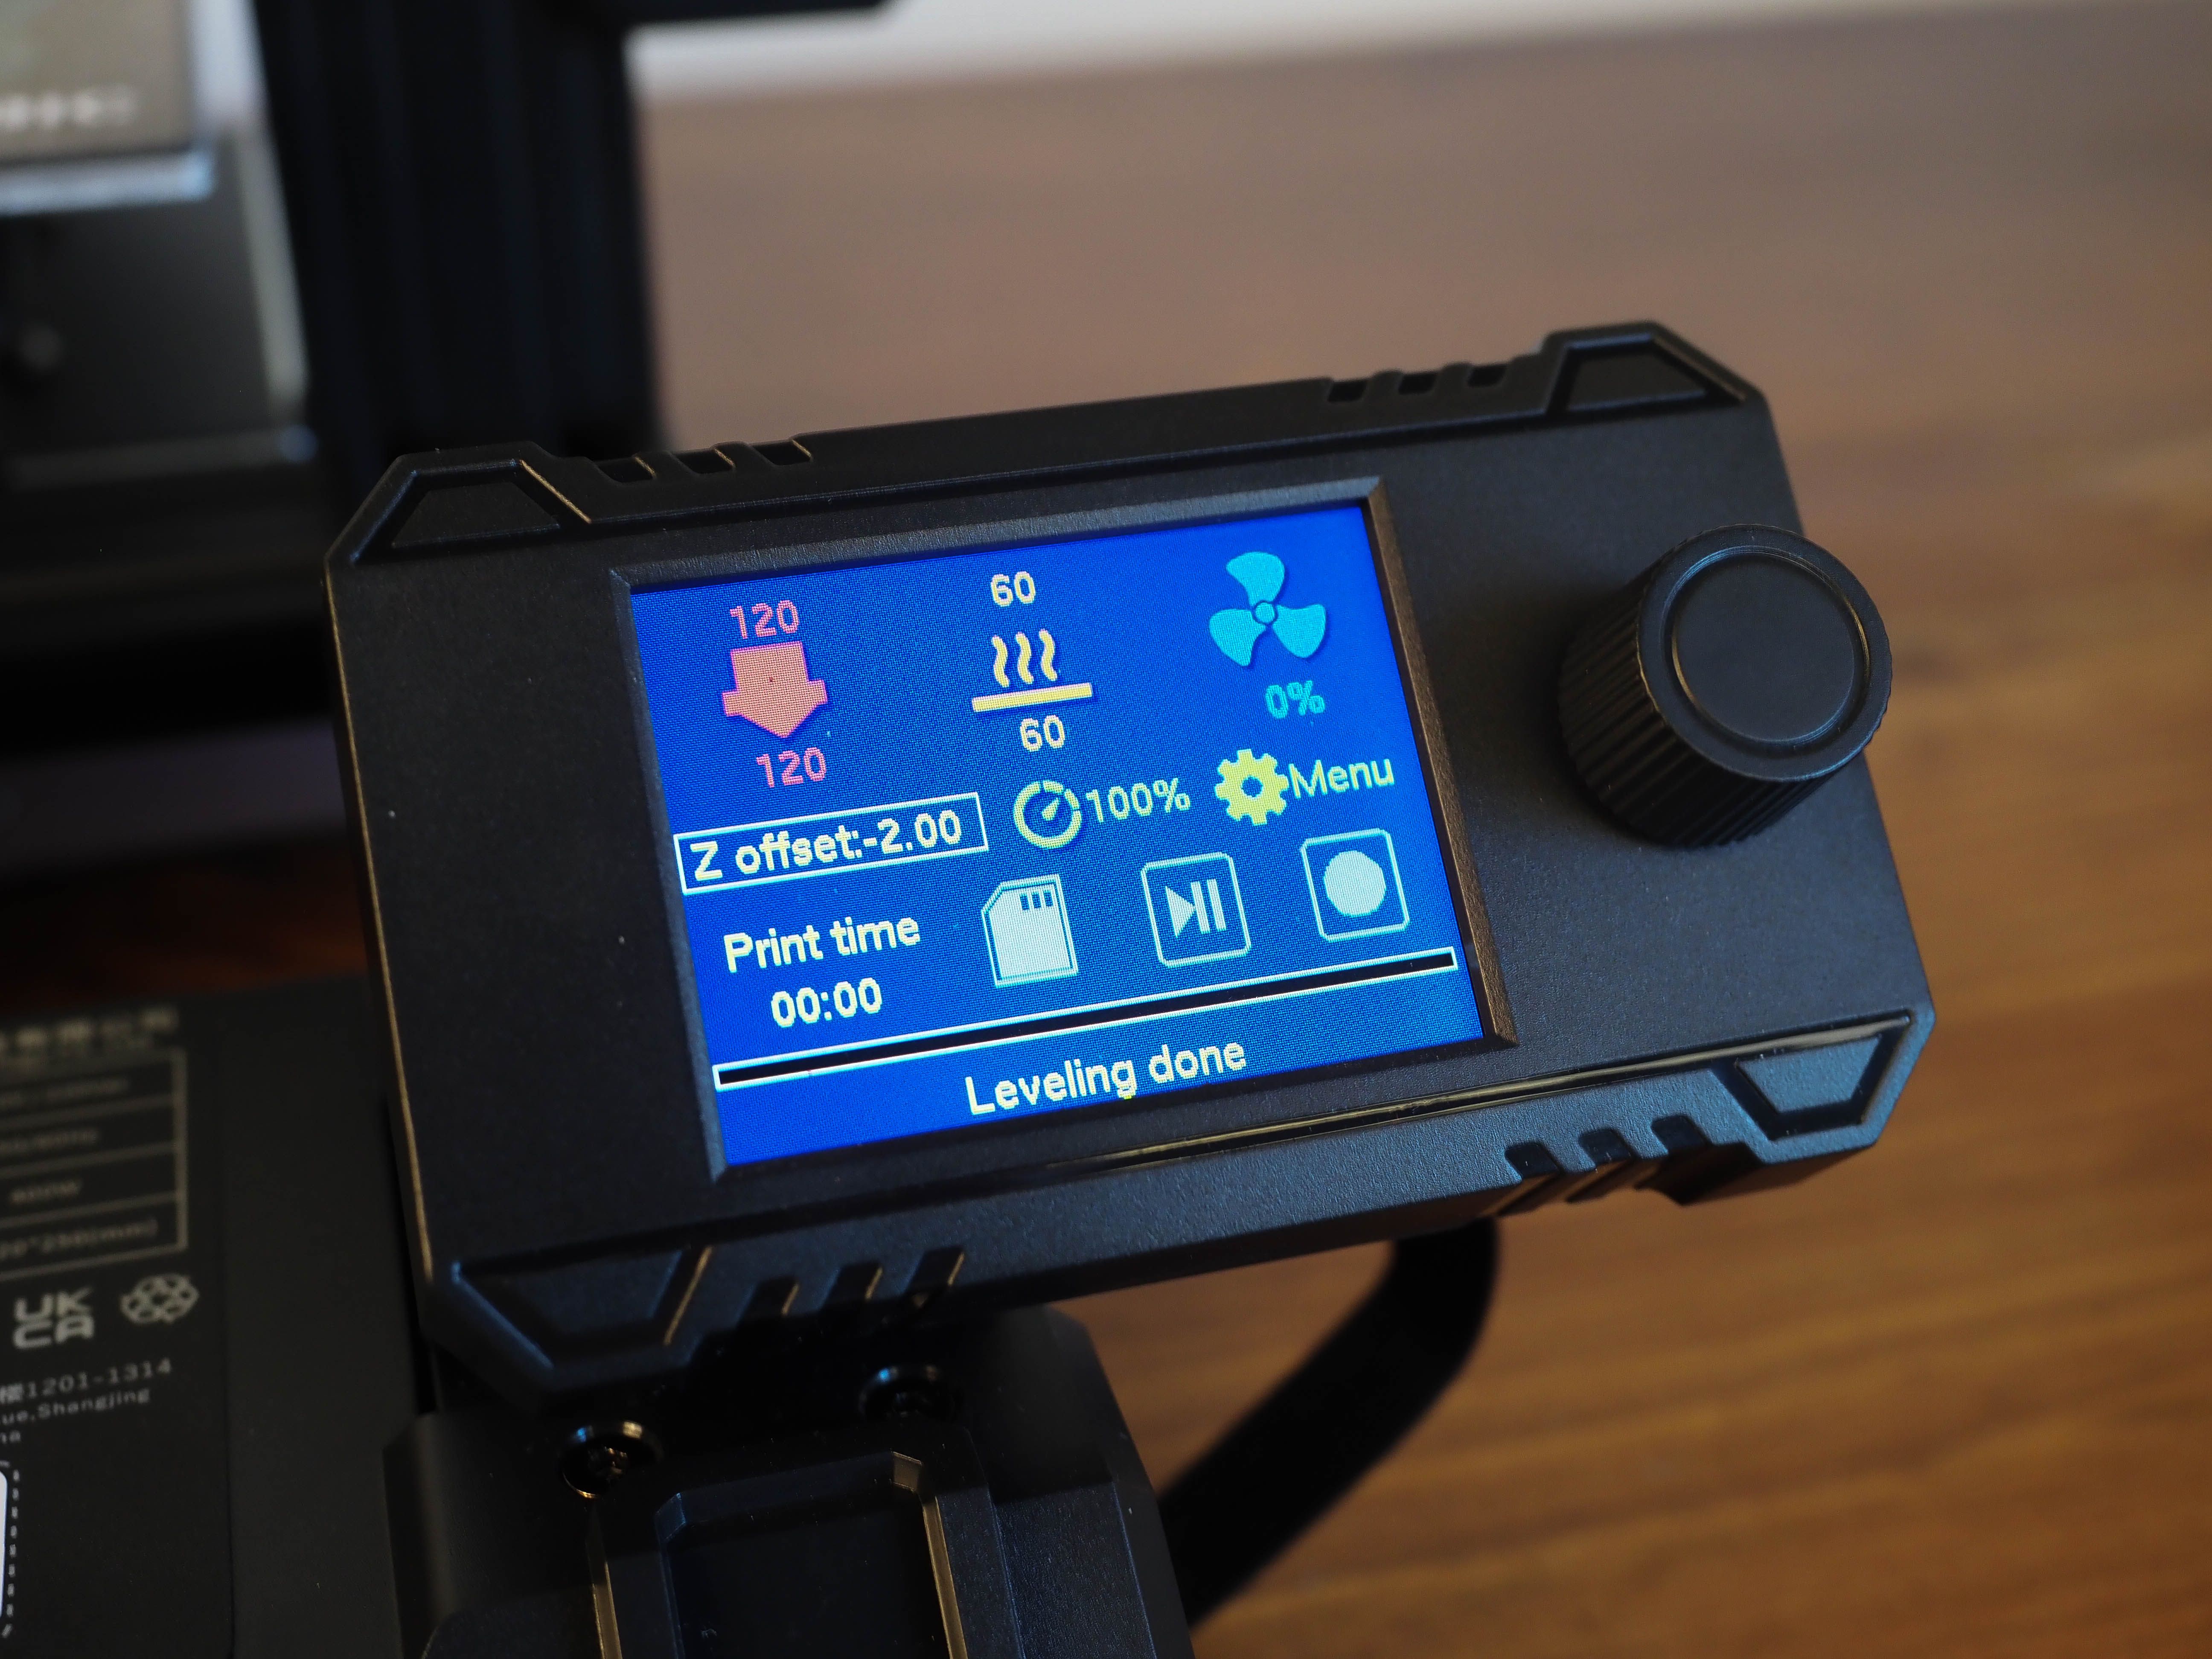
When compared to the base model Anycubic Kobra, the Kobra Go's screen measures 2.4 inches, compared to the 4.3-inch on the standard Kobra. However, it isn't a touchscreen; instead, the Go utilizes the knob control exclusively. While the sizing down won't be popular with all, it does complement the compact design overall.
The control dial is responsive; there's not an endless amount of menus to scroll through.
If you need to stop a print and make adjustments to the likes of the Z-offset, it's an overall smooth procedure. For its limitations, they mostly serve as minor inconveniences in exchange for a lower price point.
Utilizing Cura for Your Prints

If you're unfamiliar with Ultimaker Cura, Anycubic does a good job at introducing new users to the software. By following Anycubic's instructions, you'll set up a custom machine profile for the Kobra Go. For further ease of use, Anycubic also provides printing parameter files for different filament types to get you started.
As with most pre-defined settings, these are a good baseline to start learning on; they also veer on the safer side of printing. With different models, these can result in less ideal print results, so it's a good idea to do some benchmark printing to check for areas in need of adjustment. For instance, with models that need supporting, Anycubic's default parameters tend to be tricky to remove, so you'll want to tweak those.

When printing, the Anycubic Kobra Go supports both offline and connected printing. For most users, the option to save your GCode files to a memory card and insert them into the printer provides the most fluid experience.
For online printing, you must first install the CH340 driver file from the included microSD card. From here, you can connect the Kobra Go to your computer via a USB-C cable and choose to print via USB within Cura. While not advisable, if you want more operational control of the printer during the print process it's an alternative option.
Printing With the Anycubic Kobra Go

Regardless of how you utilize Cura to begin printing, there are a few details to keep in mind. You'll want to take advantage of the Kobra Go's and be sure to clean the build plate after a few prints to ensure continued proper adhesion. The Kobra Go typically has a print speed of 60mm/s with a potential maximum print speed of 100mm/s, so you'll see some variation in print speed tests.
As one would expect, smaller, less complex models usually only take a few hours. Whereas larger or multi-print models with increased travel time between placements can easily pass a day in print time. You'll also want to adjust the Z-offset of the printer after leveling to prevent any spaghetti-like results from your prints.
Once you've made your adjustments in Cura and ensured a proper Z-offset, it's a simple matter of letting the Kobra Go print away. After a print's completion, the magnetic spring build plate greatly simplifies model removal. Heavier prints or a full build area can slow the initial removal of the magnetic plate from the printer; the option to bend and pop off most models is welcome.
For more delicate prints, such as functional parts, you may wish to utilize a tool for cleaner removal.
When it's time to change the filament, it's a simple matter of selecting the load or unload option from the Kobra Go's LCD screen. After heating the filament appropriately, the process takes a simple bit of insertion or removal, so you can focus on your next step in printing.
Maximizing Print Potential of the Anycubic Kobra Go

As more of a beginner-friendly FDM printer, there may be some initial hesitation when moving on to more complex prospects. Whether you're wanting to maximize the entire print bed or scale-up models, the Kobra Go delivers the same quality results. For the period of testing, I used three varieties of Anycubic's own 1.75mm Silk PLA filament.
Each of these were quite adaptable to different infill settings and provided durable model results. While there are more durable or flexible varieties, these were able to handle more hollowed Halloween decorations while also providing functional toy parts for assembly.
Depending on your intentions for the Kobra Go, it's an inexpensive method to explore many kinds of fun and practical projects. Despite utilizing a Bowden extruder, I experienced no clogs or serious issues after continual back-to-back prints. If you're careful in your settings and printer maintenance, it's a pretty smooth process regardless of the difficulty thrown at it.
While you'll still be somewhat limited in volume due to the compact sizing of the printer, you can still get results very similar to mid-size resin printers.

Cleaning Up Your Anycubic Kobra Go Prints

With filament printing, clean-up of the models is an important follow-up to the process. Careful use of settings can remove an excessive need to sand or cut away overly hardened supports. Anycubic does provide some cutters to help with the initial assembly of the Kobra Go, but you'll want to consider investing in your own sandpaper and potentially some filing tools for smaller models.
While cleaning up models printed with Anycubic's Silk PLA, models tolerated both sandpaper blocks and filing tools equally. As I typically printed with the draft profile within Cura, I anticipated more clean-up into painting. But depending on your available printing time and concern with layer lines, there's a trade-off to be weighed.
Should You Buy the Anycubic Kobra Go?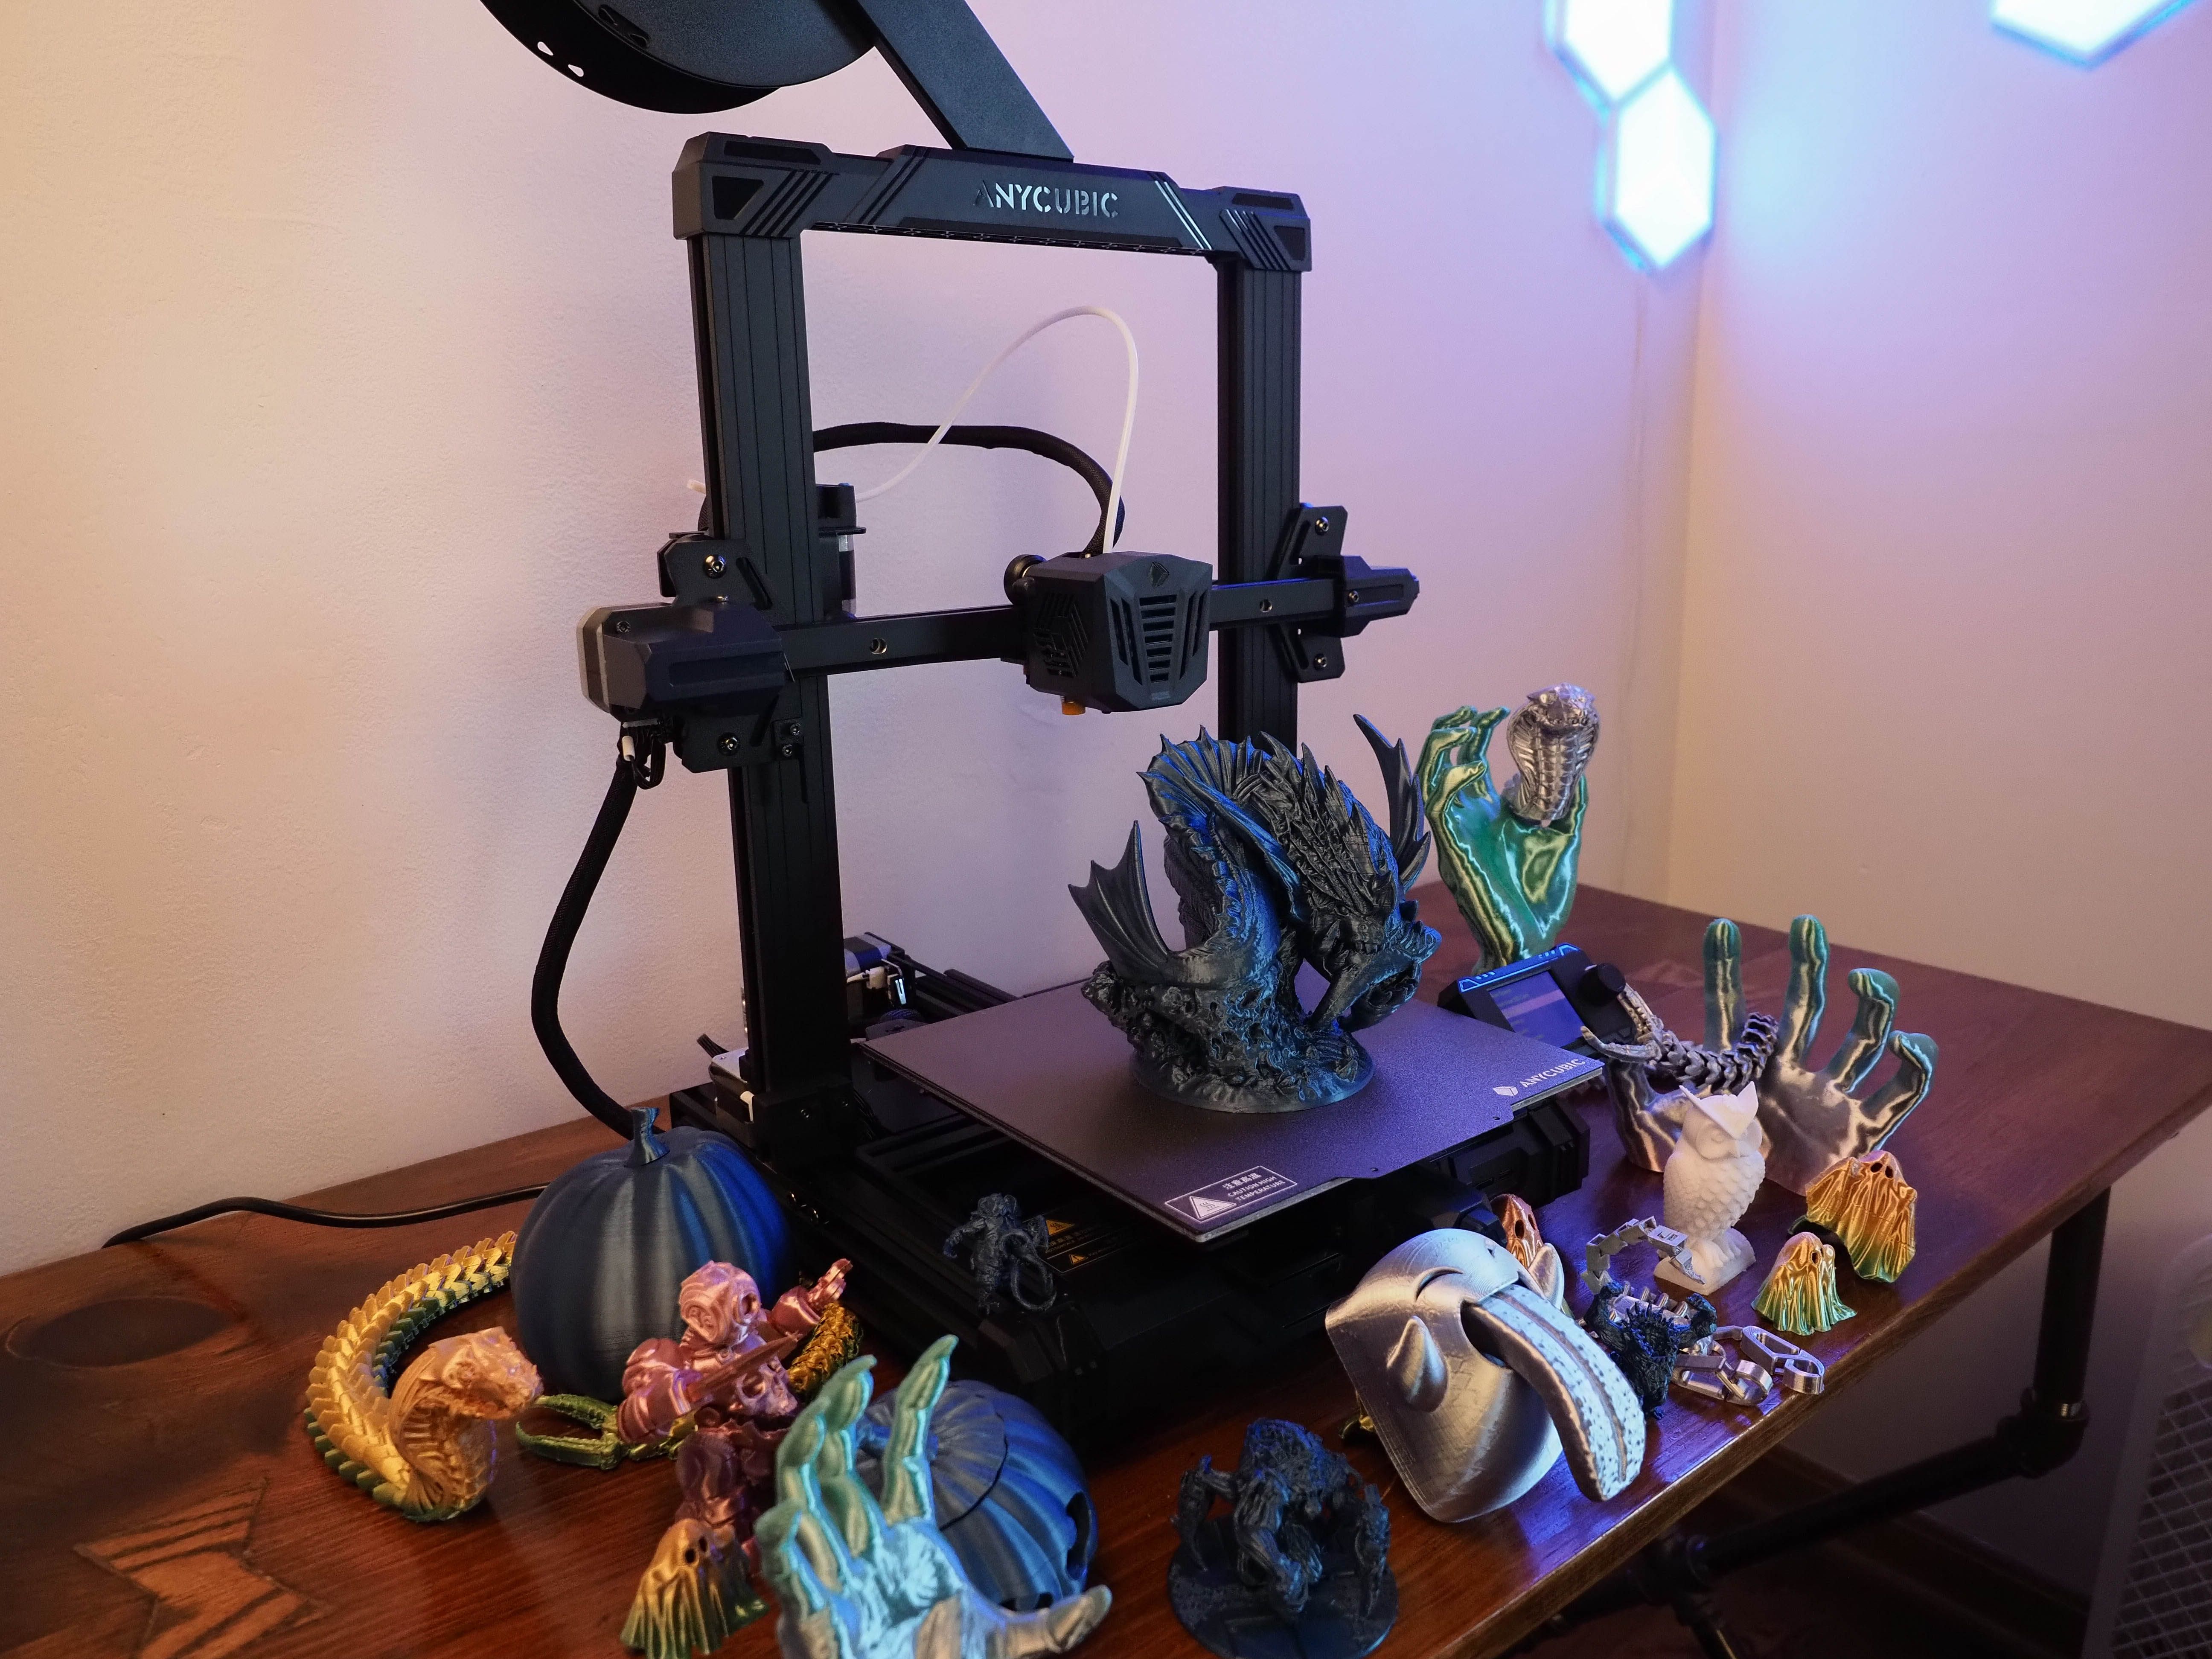
If you've been waiting for a 3D printer, the Anycubic Kobra Go provides an excellent budget entry point to get you familiar with the process. Beyond its forgiving price, it tries to offer the essentials without degradation in experience. Similarly, it's an excellent option for those with limited space.
But if you're not a fan of assembling the vast majority of your printer, you may wish to look at some of Anycubic's more premium options. The Kobra line itself attempts to cover a wide range of uses; the Kobra Go fulfills a competitive price point relative to the likes of the Ender series.
While no one 3D printer will fit everyone, the Kobra Go provides an excellent DIY option that makes 3D printing more accessible. If you're willing to explore and learn a little, it's a great option that results in both practical and imaginative results.