Internet Explorer, the web's favorite punching bag, has been relegated to an afterthought for most users. While it's still included in Windows 10 for legacy enterprise purposes, Microsoft now includes Edge as the default Windows browser.
Despite this, you may still wonder how to disable Internet Explorer (IE). Maybe you don't want other users on your system working in the clunky browser, or just hate it and want to block Internet Explorer from your system.
1. How to Block Internet Explorer From Accessing the Internet Through Windows Firewall
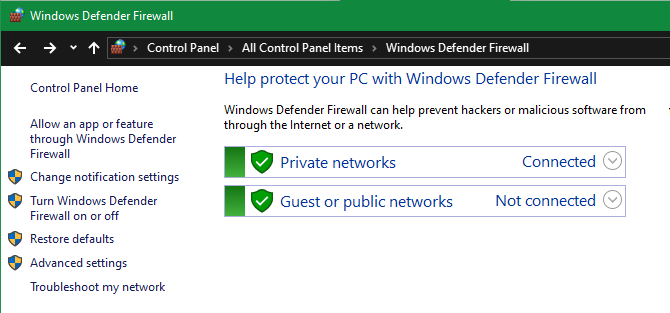
Windows includes a built-in firewall that allows you to control how programs communicate with the internet. You can set up a new rule here to block all connections through Internet Explorer.
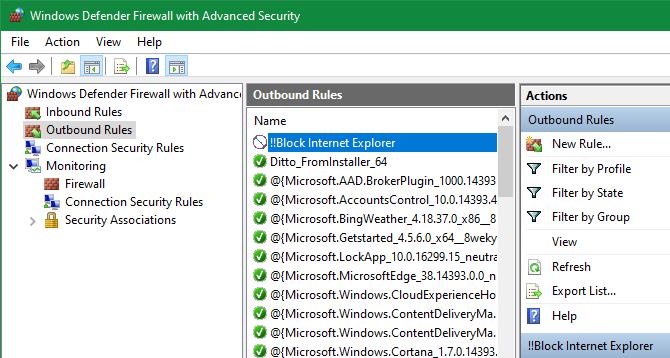
To start, search for Windows firewall and open Windows Defender Firewall with Advanced Security. Click Outbound rules on the left panel, then select New Rule from the right side.
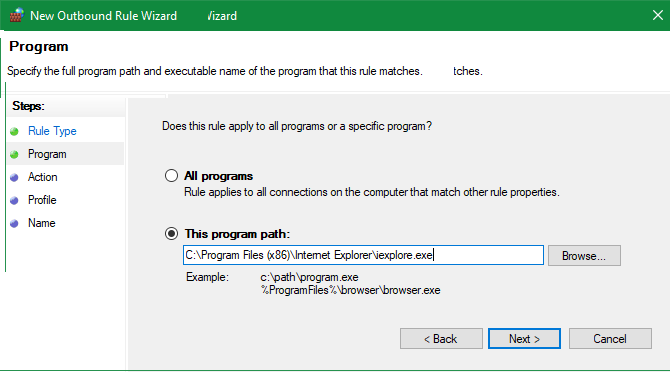
On the resulting Rule Type window, choose Program and hit Next. You'll then need to browse to the executable file for Internet Explorer.
On a 64-bit installation of Windows 10, you'll find folders for Internet Explorer in both the Program Files and Program Files (x86) folders. In our testing, blocking the version of IE inside Program Files had no effect, yet blocking the file inside Program Files (x86) blocked both executables from running.
As a result, you should block the following file if you're on 64-bit Windows:
C:\Program Files (x86)\Internet Explorer\iexplore.exe
If you're using 32-bit Windows, this will be in the following location:
C:\Program Files\Internet Explorer\iexplore.exe
Moving on, choose to Block the connection and set it to apply to all three of the available location types. Finally, give it a descriptive Name like Block Internet Explorer. You can also set a description if you want.
Once you confirm this, Internet Explorer won't be able to access anything on the internet.
2. How to Completely Disable Internet Explorer
In case just blocking Internet Explorer from accessing the internet isn't enough, let's cover the nuclear option. You can completely disable Internet Explorer on your system, preventing anyone from using it.
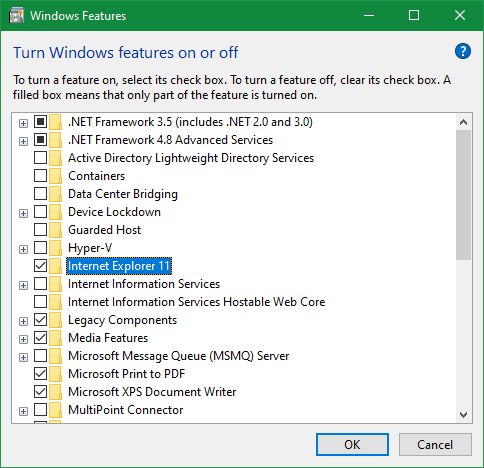
As it turns out, you can't uninstall Windows Internet Explorer like a normal program, since it's considered part of Windows. Instead, you'll have to turn it off from the Windows Features menu.
Search for Windows features in the Start menu and select the Turn Windows features on or off entry. This will bring you to a panel with a list of optional features in Windows. Here, uncheck the box for Internet Explorer 11 and click OK.
Windows will take a moment to remove Internet Explorer, then it will prompt you to restart your computer to complete the process. After a reboot, you won't see any trace of Internet Explorer on your system.
If you ever need to access IE again, simply repeat this process and check the box for Internet Explorer 11 to re-enable it.
3. Block Internet Explorer Using a Fake Proxy
This is the "classic" method of blocking internet access for Internet Explorer. Windows supports the use of a proxy server to connect to the internet. You can take advantage of this to block all network traffic by pointing your computer to a dummy proxy server.
Unfortunately, this trick has a major drawback. Nearly all other browsers (including Chrome and Firefox) use the proxy settings you've chosen for Internet Explorer, meaning that doing this will prevent you from getting online with other browsers too. It's thus almost too effective, as you'll need to remove the setting when you want to get online.
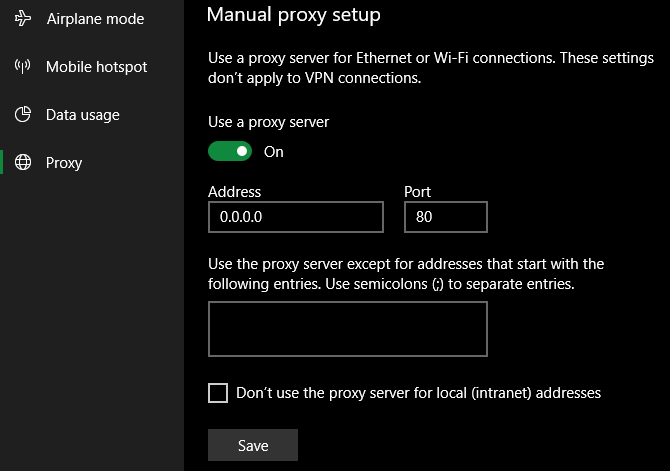
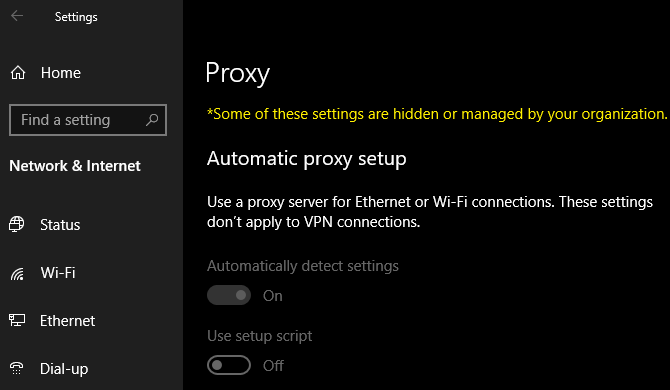
To change your proxy settings in Windows 10, head to Settings > Network & Internet > Proxy. Here, disable the Automatically detect settings slider at the top of the page.
Next, go to the bottom and enable Use a proxy server. Set the Address to a dummy value; 0.0.0.0 will work fine. Leave the Port as 80 and click Save.
After saving, these changes should take effect immediately. To reverse them so you can get back online, just disable the Use a proxy server slider.
Prevent Others From Changing the Proxy
It would be an issue if someone could jump into the Settings app and disable the proxy options you've set up. To prevent this, you can block access to these settings.
If you're using Windows 10 Pro, you can do this using the Group Policy Editor. Type gpedit.msc into the Start menu to open it, then browse to the following object:
User Configuration > Administrative Templates > Windows Components > Internet Explorer > Prevent changing proxy settings
Set this to Enabled and it will block access to the Settings page used above, as well as the proxy settings in the old-school Internet Options section of the Control Panel.
Those without Windows 10 Pro should look at how to access the Group Policy Editor in Windows Home. While you can make similar changes via Registry edits instead, they're a bit clunky for this due to the proxy settings being available in both the Control Panel and Settings app.
4. Use Windows 10's Family Parental Controls
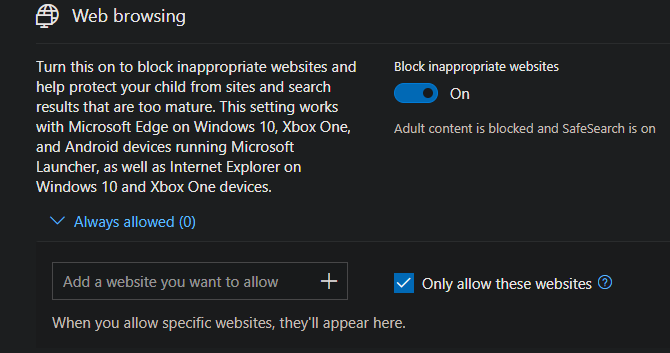
Windows 10 includes parental control options under the umbrella of "family." This allows you to restrict what your children can do on the computer. One of the tools it provides is the ability to whitelist and blacklist certain websites using Internet Explorer and Edge.
If you check the Only allows these websites box, you can restrict them to only browsing those pages. Combine this with a blank list, and you're effectively blocked Internet Explorer from accessing the internet. Of course, this only works for the child's account, but it's still useful.
See our guide to Windows 10's parental controls to get started with setting up a family.
Setting Up the Right User Account
The above methods are the main ways to disable Internet Explorer and prevent it from getting online. Once you've set one of them up, it's important to make sure the users that you don't want accessing Internet Explorer can't change these settings and get right in.
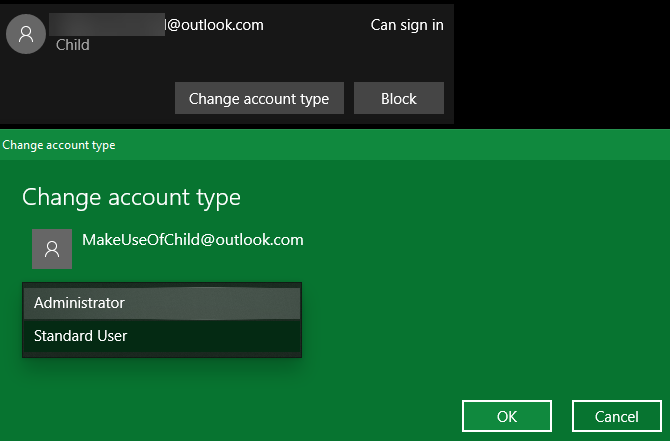
To do that, you'll want to make sure those account are set up as Standard users, not administrators. Head to Settings > Accounts > Family & other users to review the user accounts on your system and make sure they're set as Standard accounts.
Make sure you also understand User Account Control on Windows. With UAC, admin accounts only run programs as an administrator when necessary. Standard users can't make system-level changes (such as adjusting firewall rules) without providing administrator credentials.
You'll know a feature is restricted by UAC when you see the blue and yellow shield next to it. Unfortunately, these aren't really present in the Settings app, as they mostly appear in the aging Control Panel.
With the proper methods set up and the right restrictions on user accounts, you'll have Internet Explorer fully blocked. And there won't be an easy way for someone else to undo your changes. See our guide to locking down Windows user accounts for more ideas.
Blocking Internet Explorer: Success!
We've looked at how to block Internet Explorer from accessing the internet. The firewall method is the best choice for most people, while outright removing it from Windows works too. Whatever you choose, make sure you have the accounts locked down that you don't want accessing IE in the first place.
Remember that most of these tips are pretty narrow in focus. You may want to review our full guide to parental controls for protection on other platforms.


