Markdown is a popular format for writing web content. Its compromise between HTML and plain English allows writers to use a more familiar syntax. It can greatly help ease the day-to-day running of multi-author blogs and similar sites.
Markdown can be particularly useful if you would like to create a blog or have multiple web pages with content. Using Markdown files allows you to focus more on the content, rather than the code around that content.
You can integrate Markdown with Angular using the ngx-markdown node package, and by configuring it to work within a component.
Setting Up an Angular Application
If you do not already have an Angular application, you can download this sample Angular application from GitHub.
-
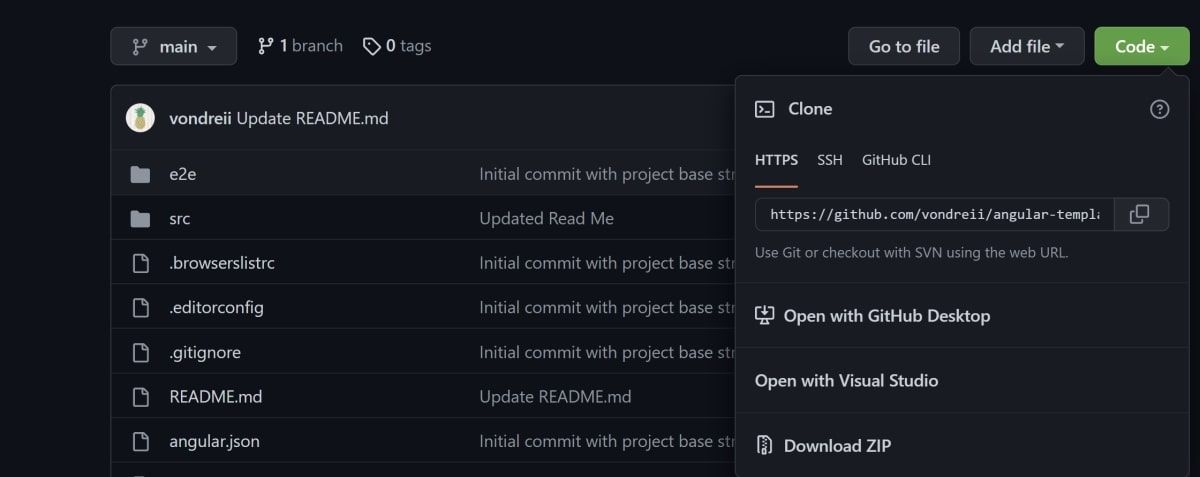
On the project page on GitHub, click on the Code button. Select Download ZIP.
- Unzip the folder onto your local computer.
- Open the project using an IDE, such as Visual Code, Notepad++, or Sublime Text. If you are using an IDE, you can use a built-in terminal to execute any necessary commands.
-
Navigate to the root folder of the project using a terminal. The root folder’s name is muo-sample-angular-app-main, and it contains the e2e and src folders. For example, if your project is in the "Downloads" folder, run the following command to navigate to the folder.
cd C:\Users\Sharl\Downloads\muo-sample-angular-app-main -
Install node modules into the project. If you cannot run node commands, you may need to install Node.js onto your computer.
npm install -
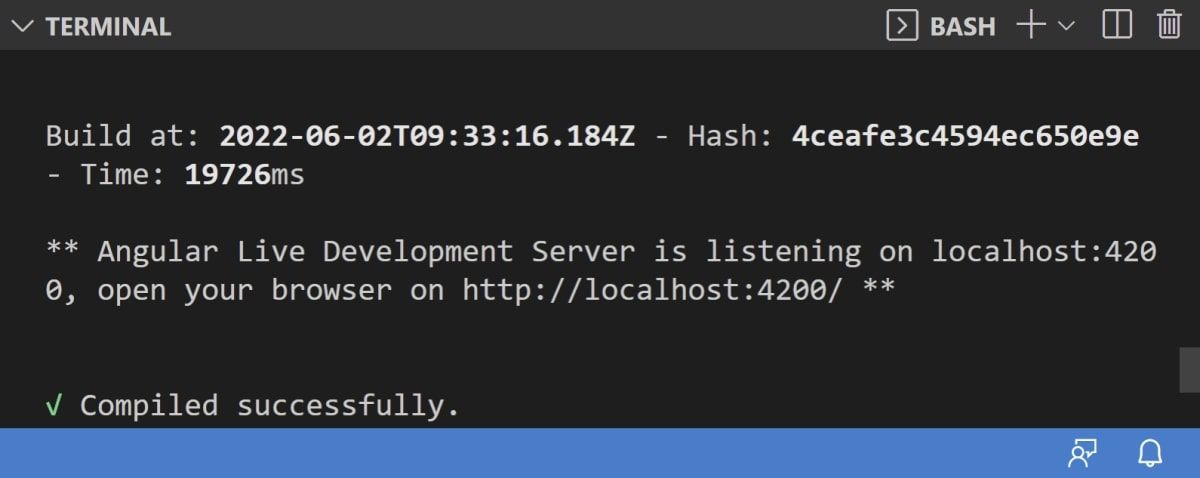
You can now launch the Angular application. Run the following command in the root folder of the project.
ng serve -
After running the ng serve command, wait for the project to finish compiling. Once it has finished, the command line will output the local address that your Angular app will run on. Usually, this is on http://localhost:4200/.
-
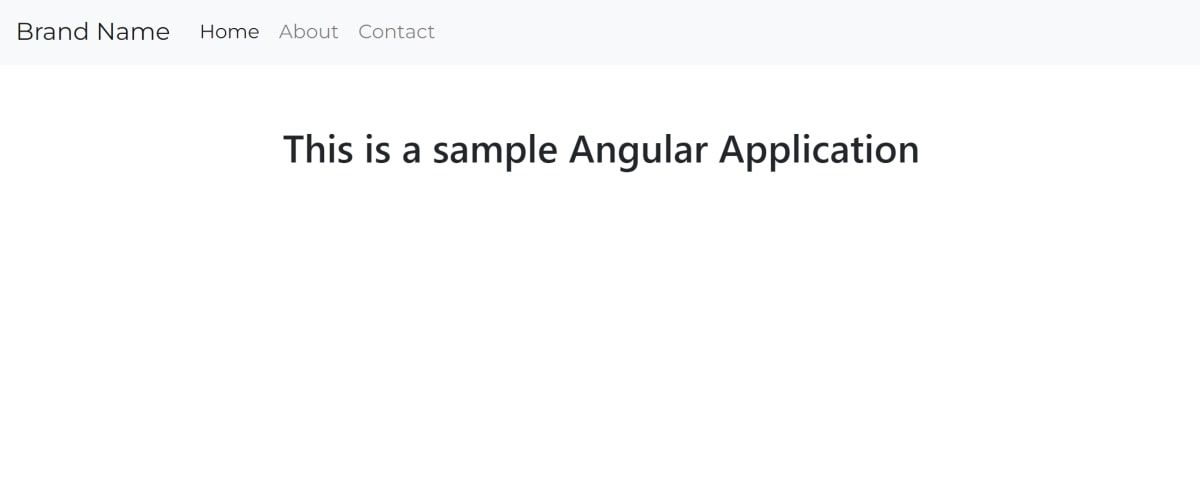
Open a web browser and enter the address that is hosting your site, for example, http://localhost:4200/. Once the page has loaded, you should be able to see the home page for the sample angular application.


How to Install Ngx-Markdown in Your Angular Application
To be able to use Markdown files in your Angular application, you will need to install the ngx-markdown package.
-
In the root folder of your project, run the following command in the terminal. Make sure the ngx-markdown package version is compatible with your Angular version.
npm install ngx-markdown@^10.1.1 --save - Open the file app.module.ts. This file is under the project/src/app folder.
-
Configure the new Markdown module. Import the following packages:
        import { SecurityContext } from '@angular/core';
import { MarkdownModule } from 'ngx-markdown';
import { HttpClientModule, HttpClient } from '@angular/common/http'; -
Add the Markdown module to the imports array.
        imports: [
    ...
    HttpClientModule,
    MarkdownModule.forRoot({ loader: HttpClient, sanitize: SecurityContext.NONE })
],
How to Create Your Markdown Files
Each Markdown file will represent a page of content for your website. You will need to create a folder to store your Markdown files in and populate your Markdown files with content.
- Navigate to the assets folder, which is under the project/src folder.
- Create a new folder called posts.
-
Create multiple Markdown files. Markdown files use a .md extension.
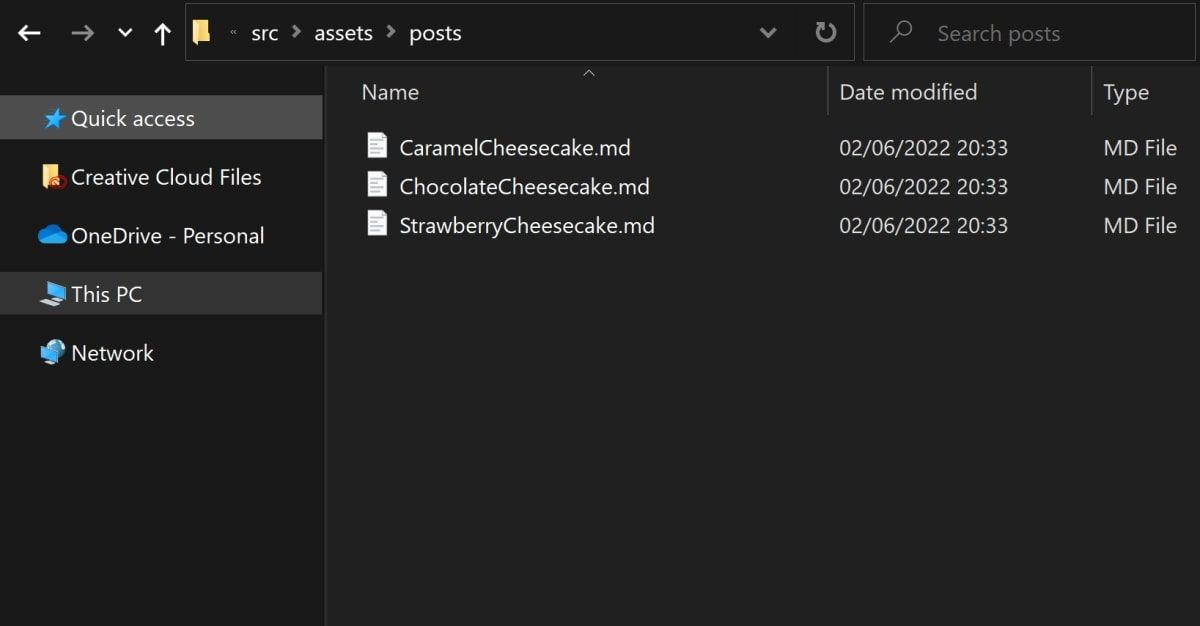
-
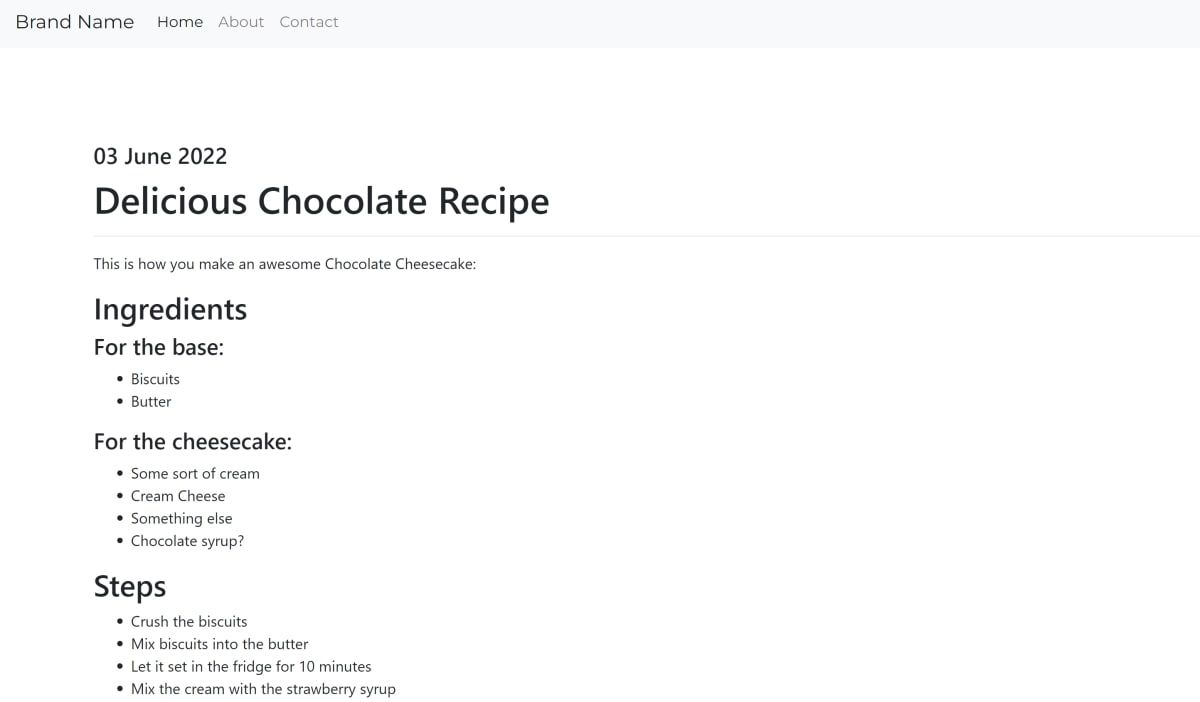
Populate the .md files with some content formatted in Markdown syntax. Here’s some sample content you can use:
        #### 03 June 2022
# Delicious Chocolate Recipe
___
This is how you make an awesome Chocolate Cheesecake:
* Crush the biscuits, mix with butter.
* Let it set in the fridge for 10 minutes.
* Mix some cream with syrup.
* Put it on top of the biscuits then put it back in the fridge.

How to Render the Markdown File in a Component
You will need to list each of these files on the home page of the application, so you can navigate to them.
- Open home.component.html file. This file is under the project/src/app/home folder.
-
Add links to your new Markdown pages. You should construct your links according to the name of your Markdown files. For example, if you had a Markdown file called "Recipe.md", then the page’s URL will be "/posts/post/Recipe".
        <div class="links">
    <a routerLink="/posts/post/ChocolateCheesecakeRecipe" style="margin-bottom:24px">Chocolate Cheesecake Recipe >></a>


    <a routerLink="/posts/post/StrawberryCheesecakeRecipe" style="margin-bottom:24px">Strawberry Cheesecake Recipe
        >></a>


    <a routerLink="/posts/post/CaramelCheesecakeRecipe" style="margin-bottom:24px">Caramel Cheesecake Recipe >></a>
</div> -
Add some styling to the links:
        .links {
  padding: 72px;
  text-align: center;
} -
Create another component that you can use as a separate page. This page should be able to render any given Markdown file. In the terminal, run the following ng generate command to create a new component:
ng g c home/posts - There should now be four new files generated inside the new "posts" folder. This includes "posts.component.html", "posts.component.css", "posts.component.ts" and "posts.component.spec.ts".
-
Open the posts.component.html file, and add the HTML code to render the Markdown files.
<div style="padding:100px" markdown [src]="post"></div> -
Open the posts.component.ts file. Add the Routing import.
import { ActivatedRoute } from '@angular/router'; -
Replace the constructor and ngOnInit() functions with the TypeScript code to render the Markdown files. This will take the name of the article in the url link, and route to the corresponding Markdown file stored in the assets folder.
        post: string;
href: string;
constructor(private route: ActivatedRoute) { }
ngOnInit(): void {
    let articleName = this.route.snapshot.paramMap.get('article');
    this.href = window.location.href;
    this.post = './assets/posts/' +  articleName + '.md';
} - Open the app-routing.module.ts file. This file is under the project/src/app folder.
-
Import the new post component and add it to the routes array.
        import { PostsComponent } from './home/posts/posts.component';
const routes: Routes = [
  // ...
  { path: 'posts/post/:article', component: PostsComponent },
]; -
You can now launch the Angular application again.
ng serve - Visit http://localhost:4200 or whichever address is hosting your site.
-
Click on one of the page links. You should now see the Markdown content render on a separate page.
- You can download a working example from the GitHub project page. You can follow the instructions in the README file to download and run the project.

Using Markdown in Your Angular Application
Using Markdown files on your website allows you to focus more on your content. This can be very useful for blogging websites. If you have an Angular application, you can use Markdown files for your web pages by using the ngx-markdown node package.
You can learn more about other tech stacks that can be useful for setting up a blogging website. One of those is Hugo, a static site generator that also renders Markdown files as webpages.