Deploying Angular applications to GitHub pages is a great way to host them for free. Angular is a popular JavaScript framework for building single-page applications.
Angular has a comprehensive command-line interface that supports quick build and set-up of JavaScript applications. The Angular CLI has several commands to create, build, serve, and generate application components.
You can also use the CLI to deploy Angular applications to various targets, including GitHub pages.
What You Need
To make the most of this guide, you need to have the following skills and tools:
- You should be familiar with the basics of Angular, such as the concept of apps, settings, URLs, etc.
- You are familiar with the basics of GitHub and Git, like creating a GitHub account, creating a git repository (repo), and GitHub pages (GH-pages).
- You have an Angular application ready to deploy.
- Your base URL is on the correct path. Deployments to GH-pages fail because of setting the wrong base-href (base-url).
- A GitHub account.
- A GitHub repository (repo) with application code.
Now that you have all these in place let’s start the deployment process.
Deployment Process
To begin, you should have created a GitHub repository for your project and pushed the code to the main/master branch.
Next, create a GH-pages branch.
1. Create a GH-pages Branch
This is a hack that will help you get the GH-pages link to help to set the base-href.
First, create GH-pages in your local repository with the following command:
git branch gh-pages
Next, check out from the main branch to GH-pages to transfer all code.
git checkout gh-pages
Then, push GH-pages to GitHub to create a remote GH-pages branch.
git push origin gh-pages
2. Get the Repo Link
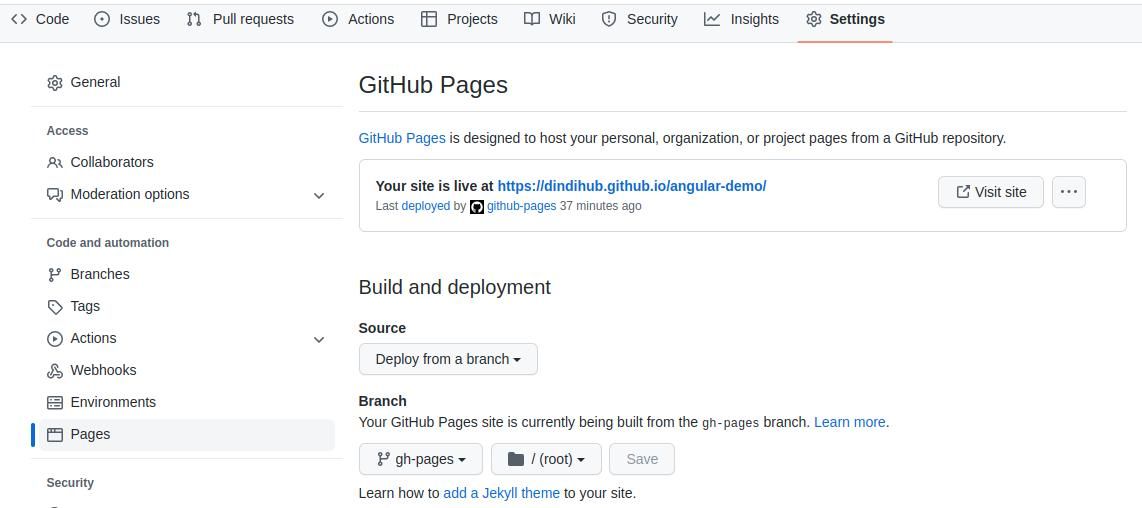
On the toolbar under the repo name, click Settings > Pages.
Under Build and deployment, select Deploy from a branch. Next, select gh-pages as the name of the branch, then click Save. This will create a GH-pages link at the top right under the GH-pages label.
Next, copy this link to the published site as illustrated below. You will use the link to set up the base-ref during deployment.
3. Install Angular-CLI-GHpages
The angular-cli-ghpages package is a tool that the Angular CLI uses for deployment purposes.
Navigate back to your local project repository. Then install and run angular-cli-ghpages with this command:
ng add angular-cli-ghpages
4. Deploy the App
To build the app in production, you must connect it to a remote server on GitHub.
Configure your app to a remote server by running the following command:
ng deploy --base-href=https://GithubUserName.github.io/GithubRepoName/
Remember to replace the above link with the live link from GH pages
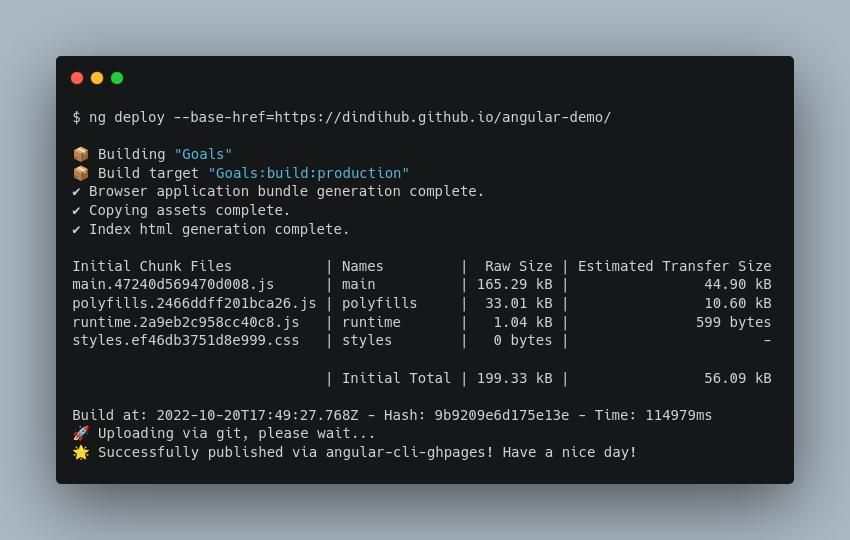
A successful build will look like the illustration below:
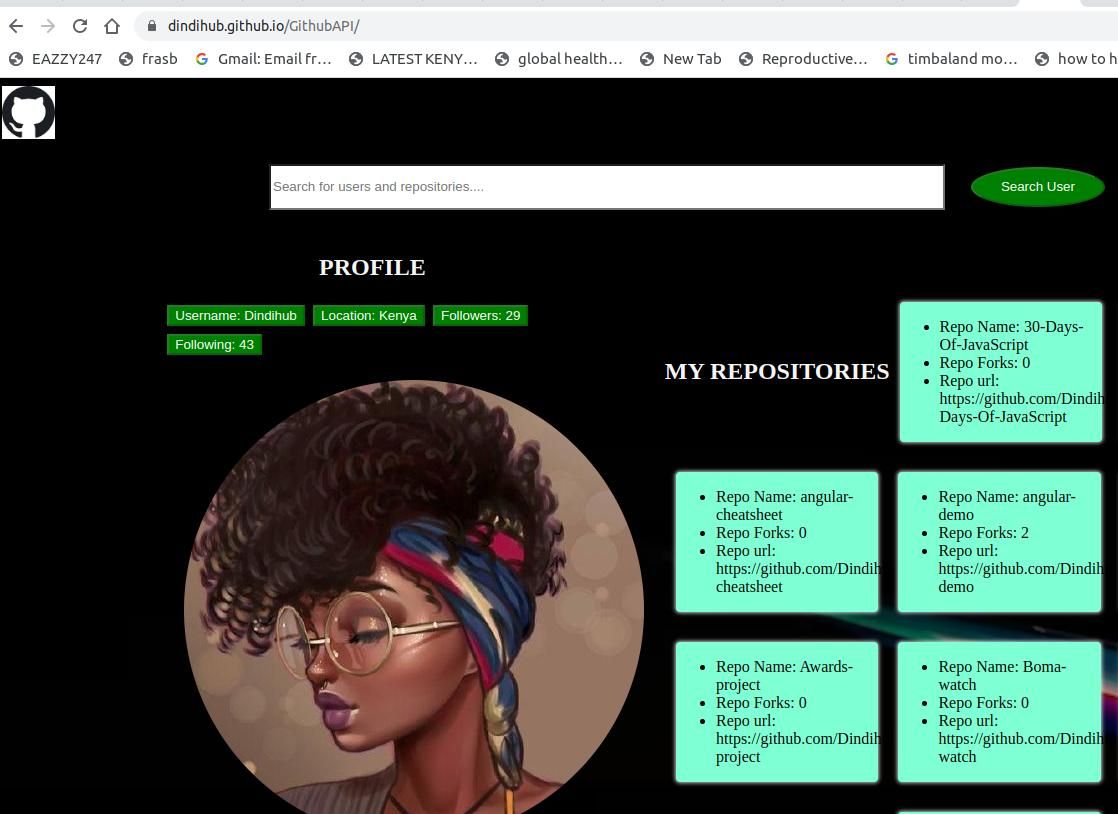
Next, navigate to GitHub and click on the GH-pages link to see your deployed project.
Congratulations, you have deployed your Angular App!
If the link displays only the README file, please go back to GitHub GH-pages settings. Ensure the selected branch is gh-pages and not the main or master branch. Then give it five minutes and reload. Sometimes GitHub takes time to reflect changes.
To learn more about how you can use Angular CLI in deployment, visit the Angular documentation.
How to Deploy an Angular App to GitHub Pages
There are several ways to deploy Angular apps to GH-pages, but this method is the easiest. You set up your GH-pages repo link and use it with the Angular-CLI to deploy your app to GitHub pages.
There's a lot more you can do with Angular and Angular CLI. Feel free to explore. Use the CLI to deploy apps to GH-pages for free visibility and hosting for your applications.


