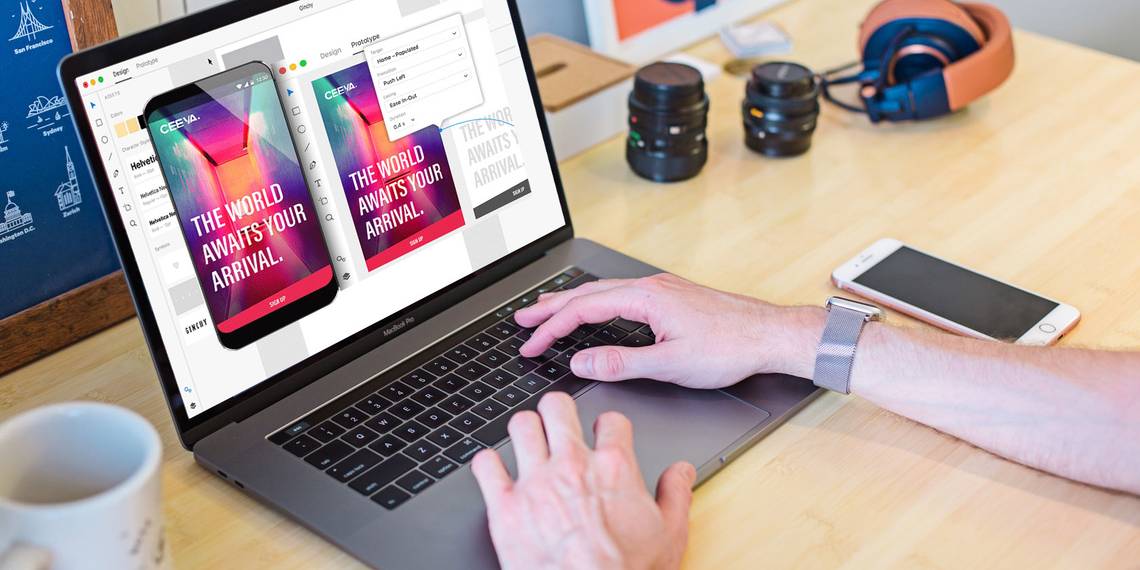
Adobe XD is a powerful tool that allows you to create UI/UX designs for software, apps, websites, and more. This also includes creating mockups, prototypes, and custom UI components for an interface. You can create both simple and complex designs using Adobe XD.
Here, we will outline how to add simple graphics including shapes, images, and text to a new Adobe XD project. This will be followed by a guide on how to convert a group of shapes into components, and how to reuse those components on the page. Finally, the article will also cover how to export your graphics. Let's jump right in.
Creating an Adobe XD Project
When you create a new Adobe XD project, you should select a layout size for your project. It provides a few templates for you to choose from based on some popular devices.
A few examples of this include the iPhone X/XS/11 Pro (375px by 812px), iPad (768px by 1024px), or Web 1920 (1920px by 1080px). Alternatively, you also have the option to select a custom width and height for your project.

Once you have created a new project, Adobe XD will open a blank page. This is where you can start adding images, shapes, text, or other design elements. Depending on which Adobe XD version you have, you might be able to explore some of the new features that Adobe XD offers.
The top-level design element is the canvas page itself. If you highlight it, you can use the right-hand pane to change some of its properties directly, such as the width or height of the canvas.

How to Add Images
There are multiple ways you can add images to your Adobe XD project.
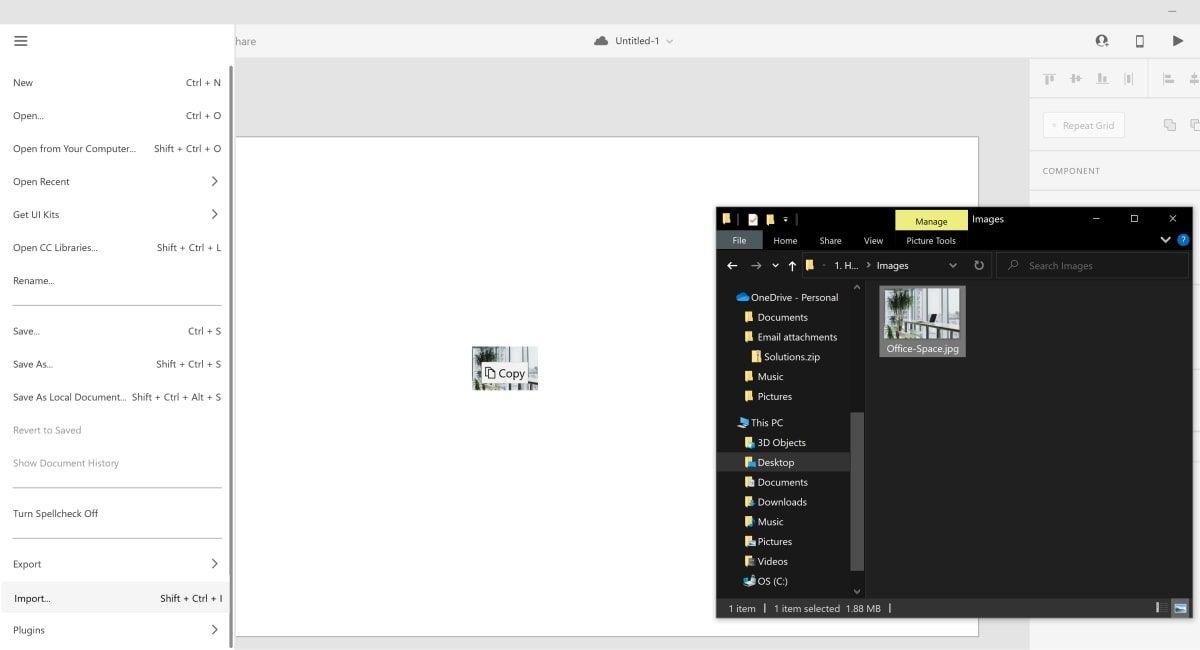
- The first option is to click on the hamburger menu icon at the top of the left-hand column. Click on Import, and open the file you want to add.
- Another option is to navigate to your image in the file explorer and drag the file directly into Adobe XD.
-
A third option is to copy and paste your image if you have it open in another software, such as Microsoft Word.

How to Resize and Reposition an Image
You can reposition and resize an image either directly on the canvas or by changing its properties.
- Highlight the image. When you highlight a design element on the canvas, you will be able to see its properties in the right-hand pane.
- Change the width and height of the image. These are represented by the W and H fields.
-
You can also change the X and Y coordinates of where the top-left of the image starts.

- To move the image around, click and drag the image around on the canvas.
- To resize, drag the points located at the edges of the image.

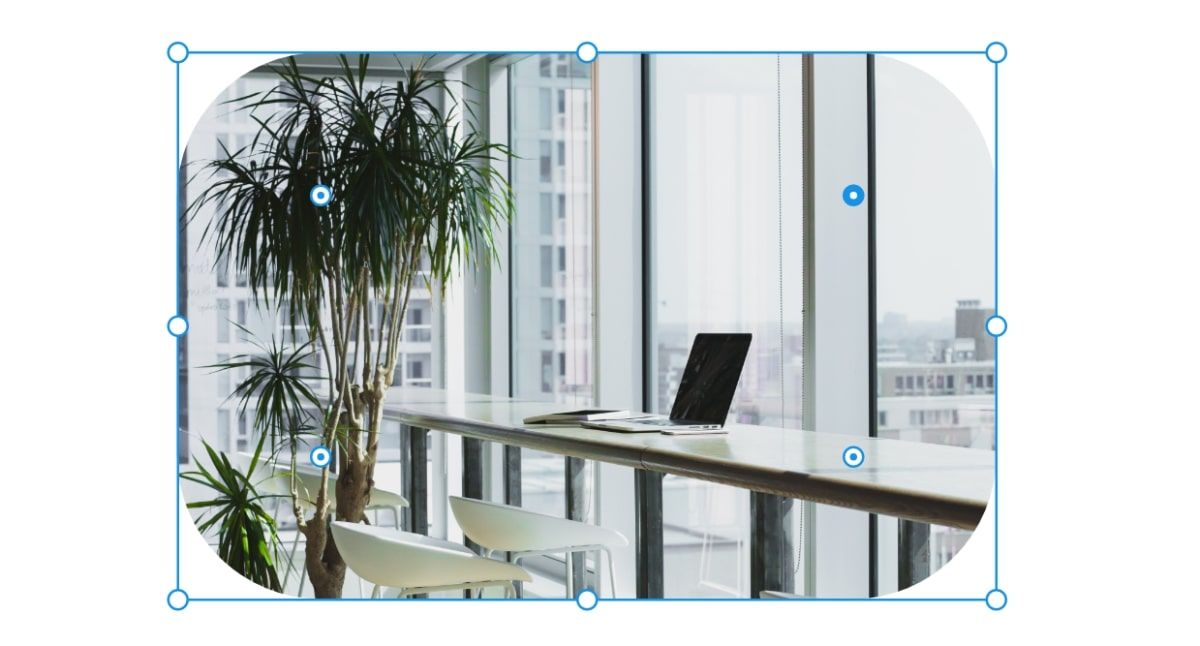
How to Adjust the Edges of an Image
You can adjust the corners of the image to change its shape.
- Highlight the image.
- You will see some points located around the image. Additionally, there are also some points located inside the corners of the image.
-
Click and drag on a point located inside the image. This will slowly reshape the image into a different shape.

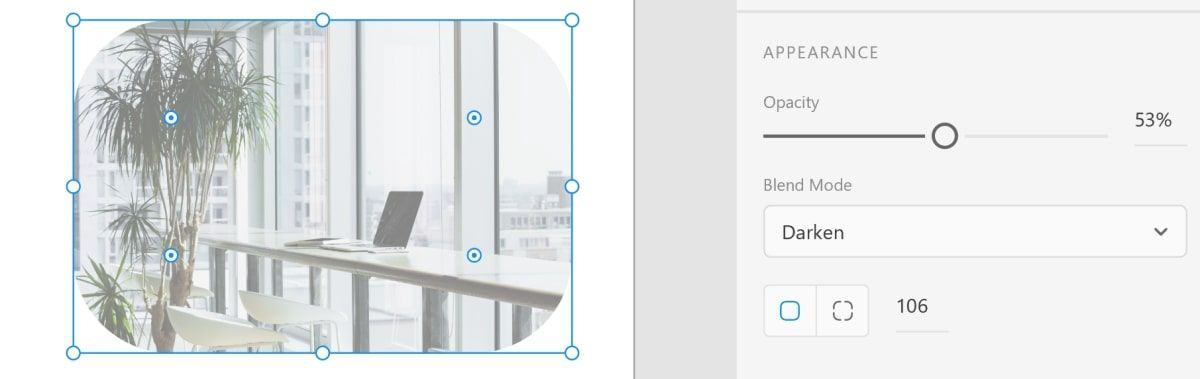
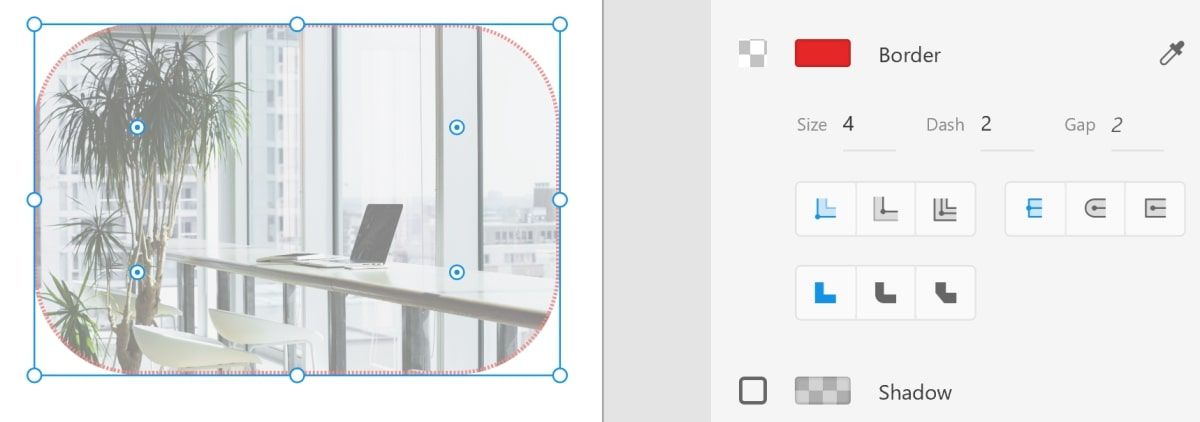
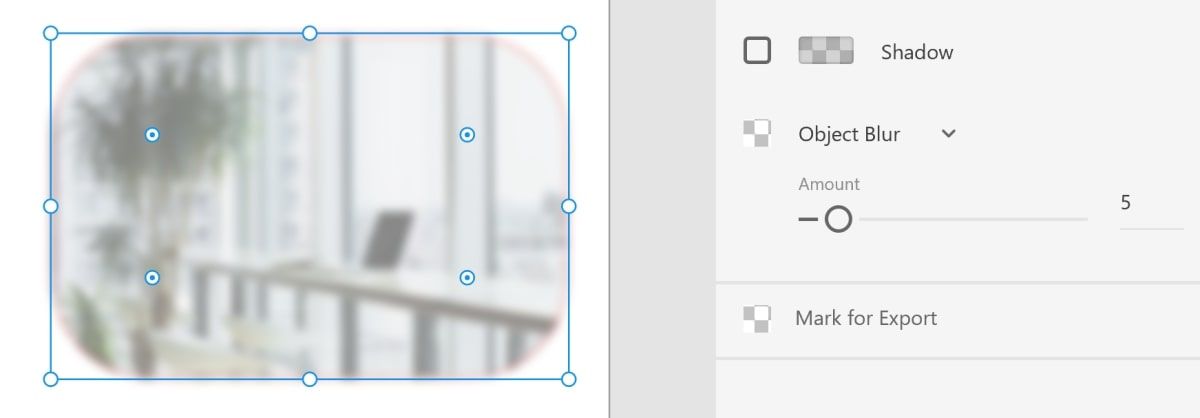
How to Add Other Effects to the Image
You can manipulate the image further by adding effects. This includes opacity, borders, blur effects, and more.
-
Highlight the image and change the Opacity in the right-hand pane.
-
While still in the right-hand pane, change the color of the Border. Here, you can also change the thickness, dash style, and corner style of the border.
-
Add a blur effect to the image, and change the Object Blur Amount to increase or decrease the blur intensity.


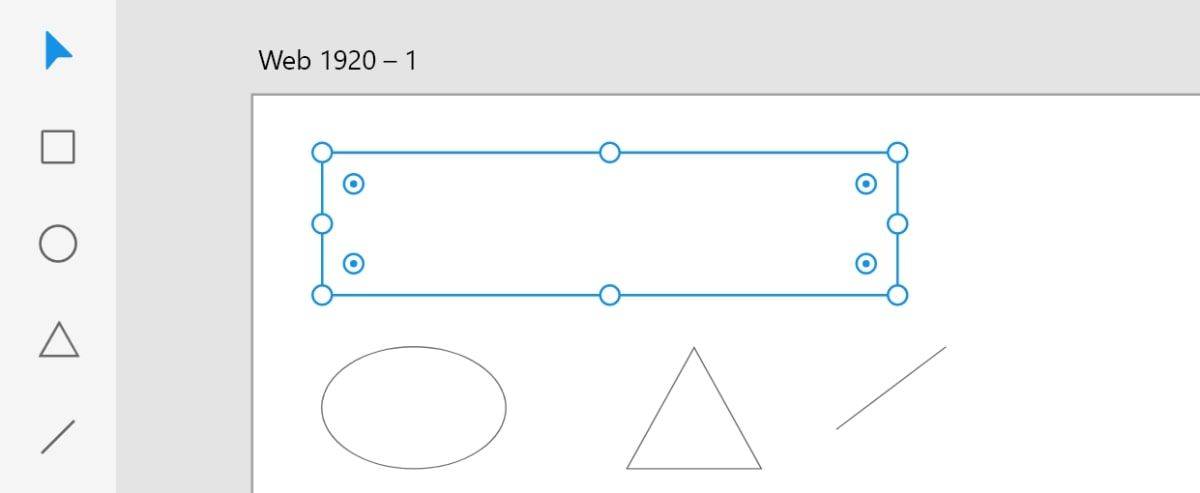
How to Add Shapes
You can add shapes in Adobe XD via the left-hand pane.
- In the left-hand pane, you can choose to create multiple basic shapes including a rectangle, circle, triangle, and line. Select the shape you want to draw.
-
Click on any point on the canvas and drag the cursor to start creating the shape.

How to Add Custom Shapes
You can use the custom shape tool to create your own shape.
- In the left-hand pane, select the pen icon.
-
Click anywhere on the canvas to add your first point, or "corner", for the shape. For every point of the shape, click on the canvas on the area where you would like it to be.

- When you have finished creating the shape, press the Esc key on your keyboard.

How to Change the Color of a Shape
You can change the color of the shape using the right-hand pane.
- Highlight the shape.
-
In the right-hand pane, change the Fill.
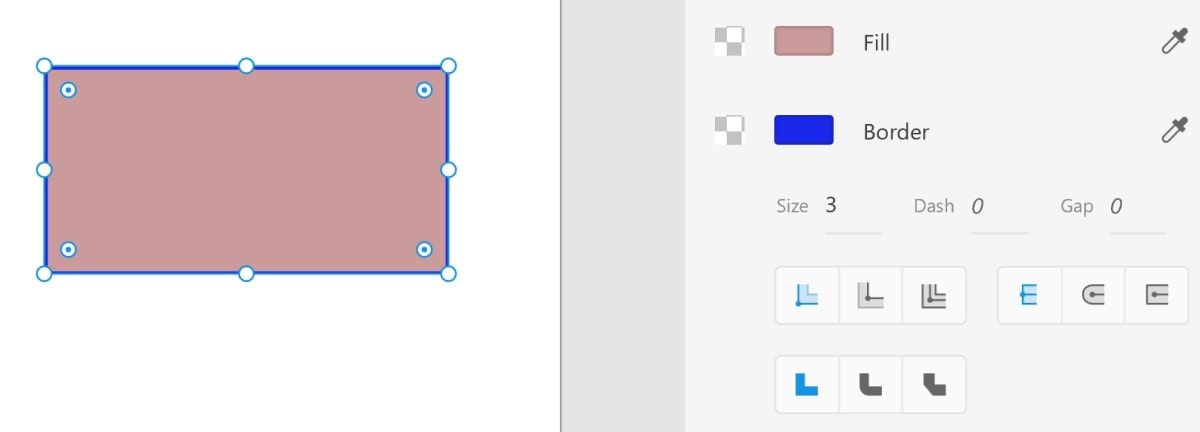
- Additionally, you can also add borders, blur effects, and change the opacity of the shape in the same way as images.

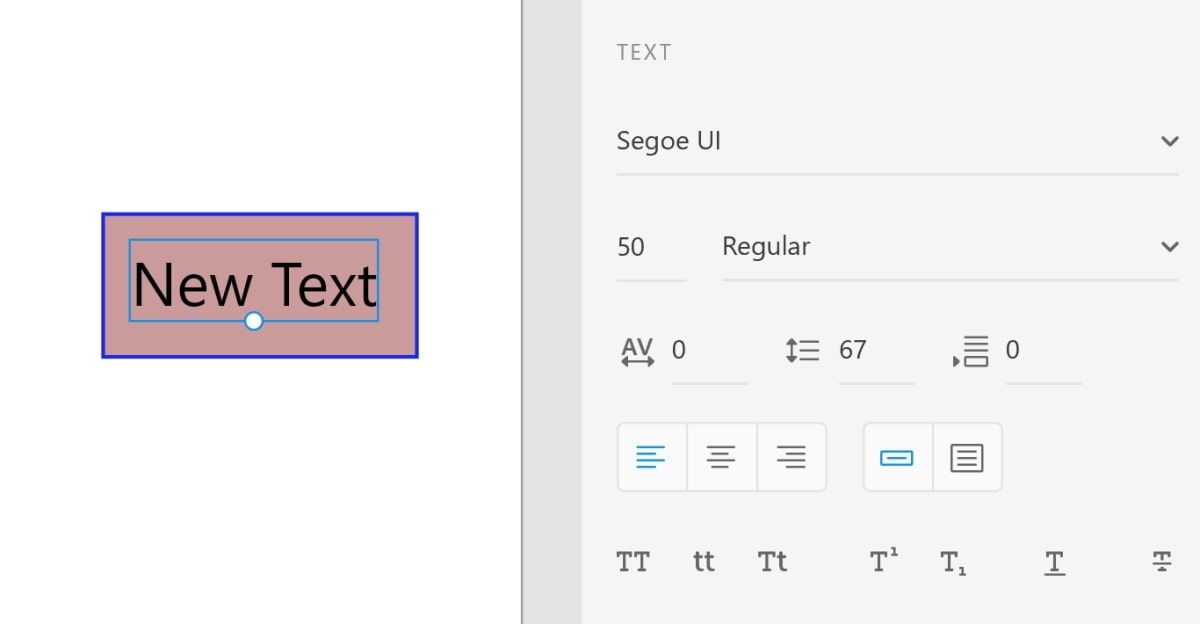
How to Add Text
You can also add and edit text in the same way that you add shapes.
- Click on the Text icon in the left-hand pane.
- Click anywhere on the canvas to add a new text box. Type your desired text into the text box.
-
Use the right-hand pane to edit the size, font family, and alignment fields.

How to Create Components
A component is a group of design elements that can be reused. To create and use a component, you first need to have a group of shapes or other design objects.
-
Highlight the group of shapes in the canvas. Right-click on the group and select Make Component.

-
At the bottom of the left-hand pane, click on Assets. A new menu will open listing any assets you have, including the component you have just added.
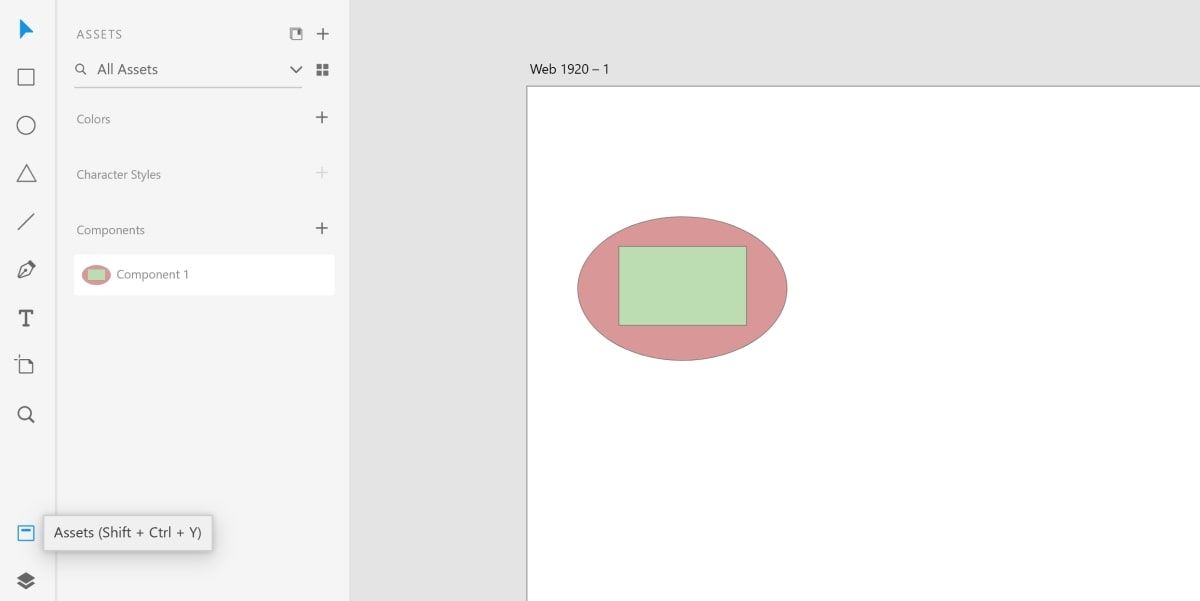
- Click and drag the component from the list of components to the canvas. Doing so will create the exact same group of elements.


How to Export Items
You can export individual items as well as the entire page.
- If you want to export a single item, highlight the item you want to export.
- Click on the hamburger menu icon at the top of the left-hand column.
- Select Export, then click on Selected.
-
If you want to export the entire page (or all pages), select All Artboards instead.
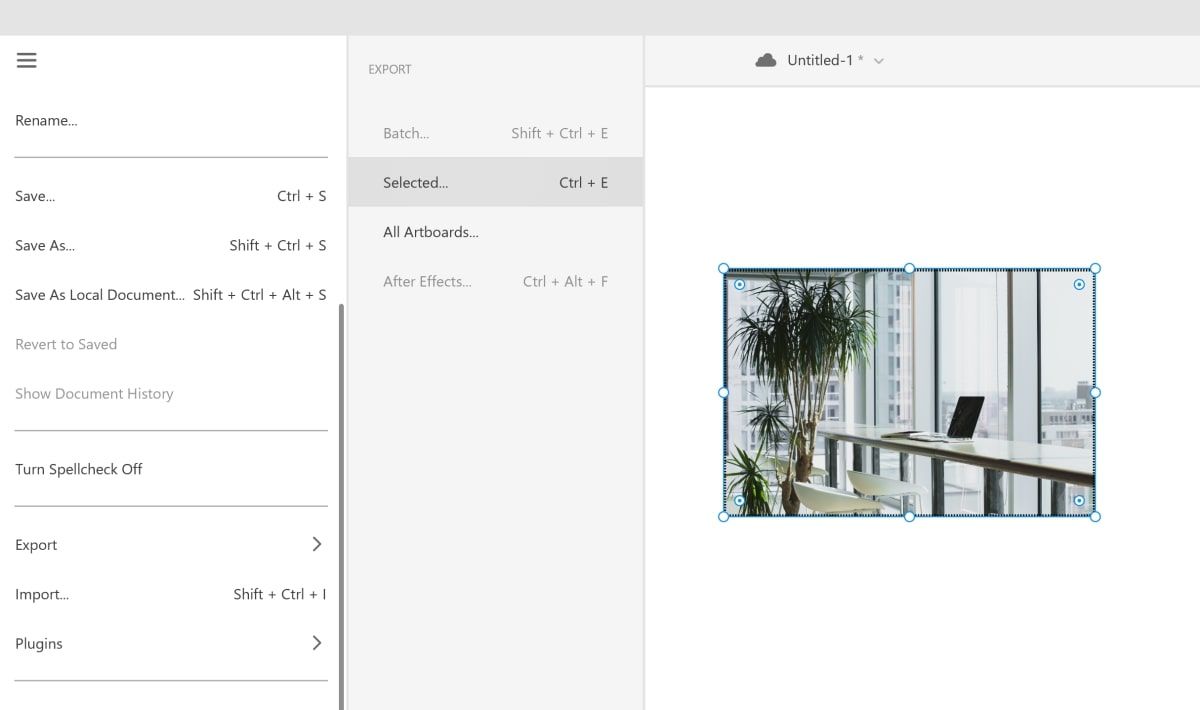
- You can specify the file format (PNG, JPG, SVG, or PDF), what the exported item will be for (such as Web or iOS), and where you would like to save your file.

Get Skilled in Adobe XD
These are just the basics. Some other features include the ability to add hyperlinks, symbols, app integrations, and UI Kits. Adobe XD also puts out new features every now and then to help improve and streamline the creation of your mockups and custom UI designs.
There are multiple courses available online to help take your new design skills to the next level.