Many editors employ strategies to make their videos more visually appealing. One such method is to add subtle motion, like a shaky camera effect. Here’s how to create a shaky camera effect in Adobe Premiere Pro and make it a preset for repeat usage.
How to Create a Shaky Cam Effect in Premiere Pro
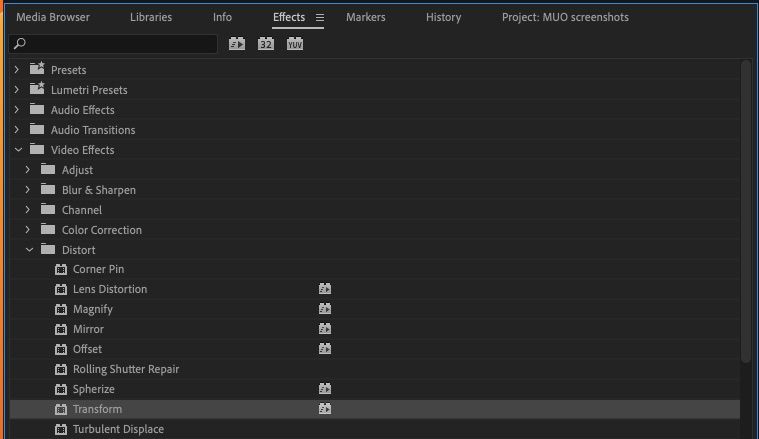
In the Effects list, go to Video Effects, open the Distort folder, and select Transform.
Apply the Transform effect to a clip. If you plan to make a preset, use a clip that's around 5 to 10 seconds in length.
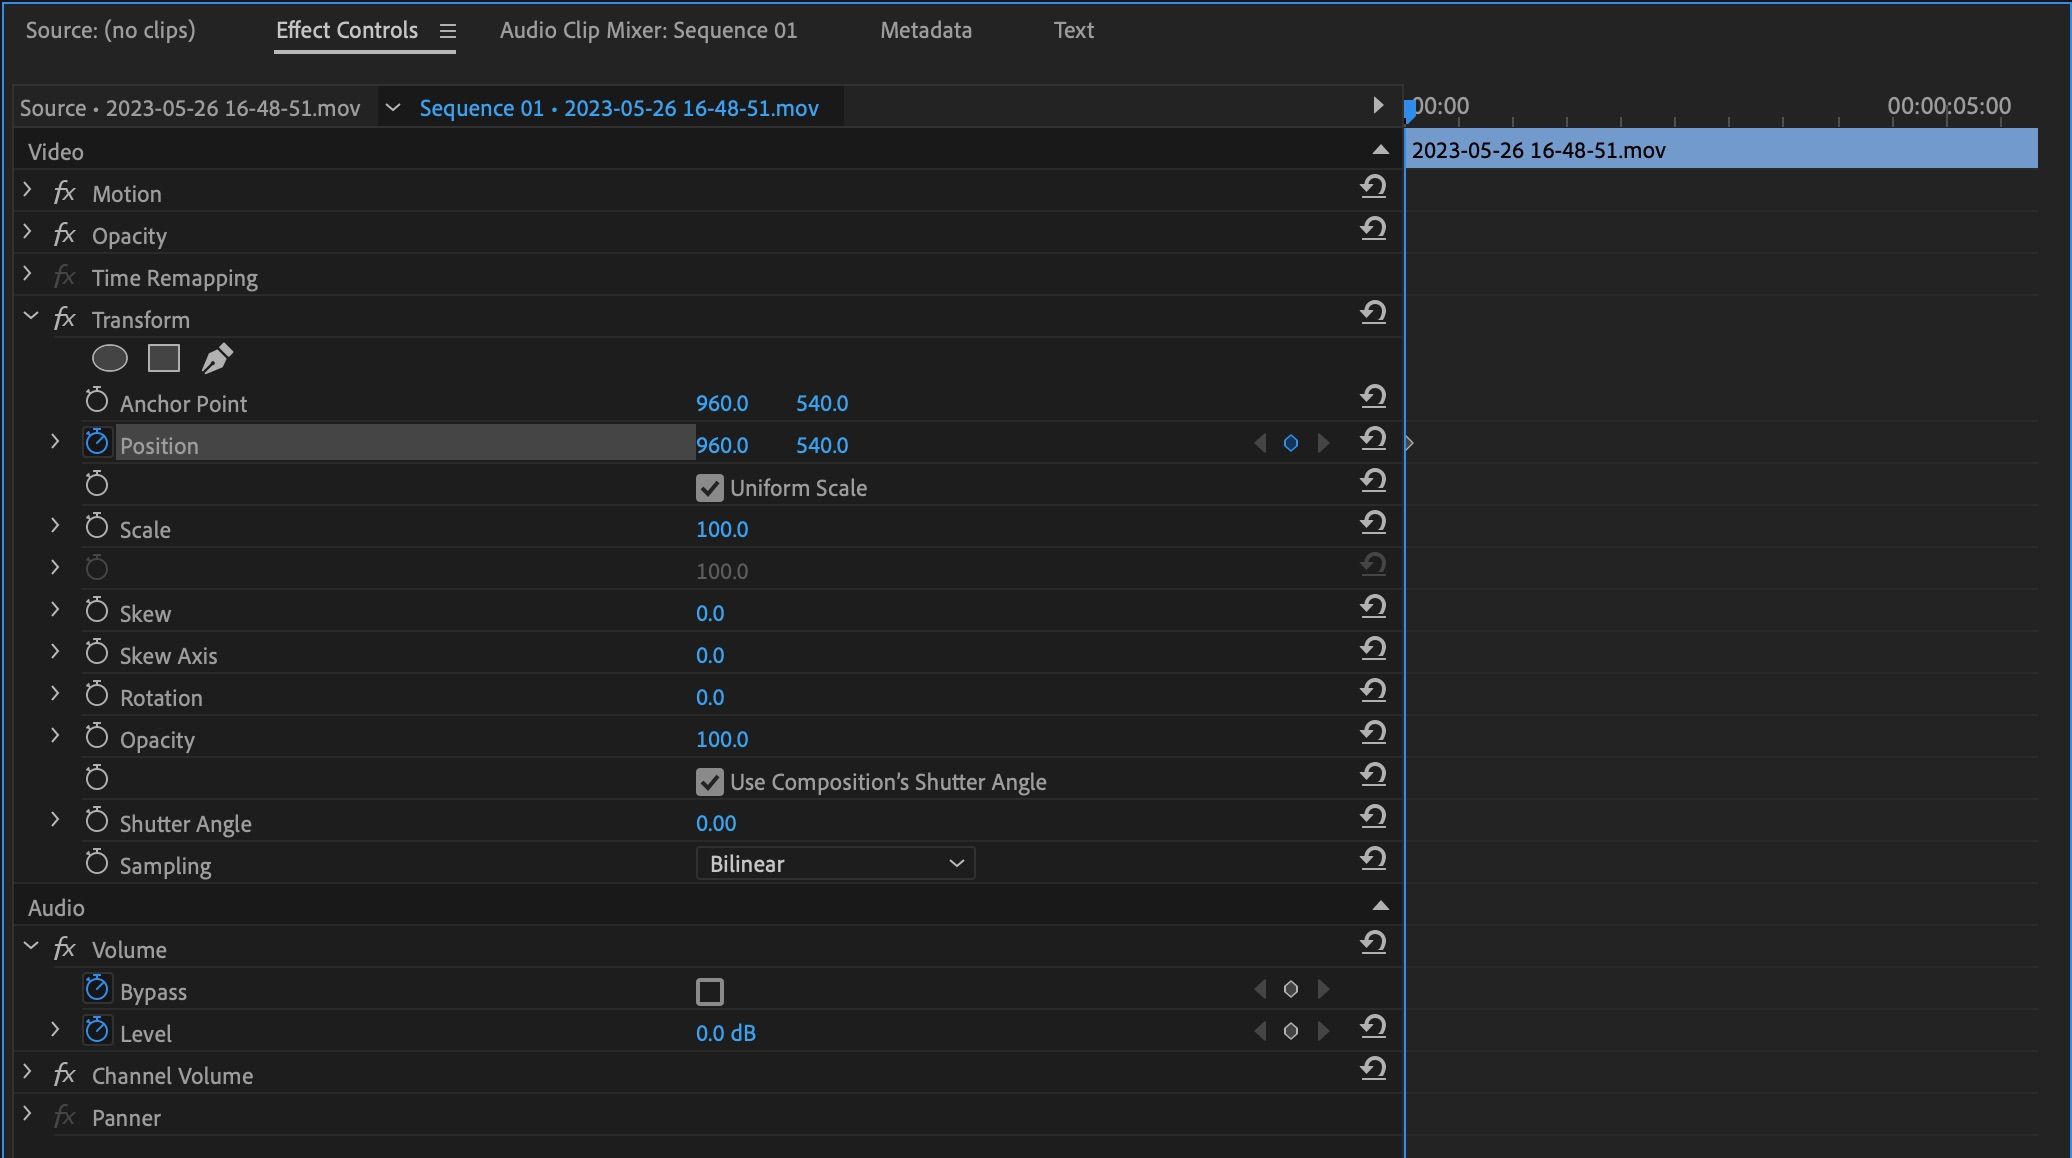
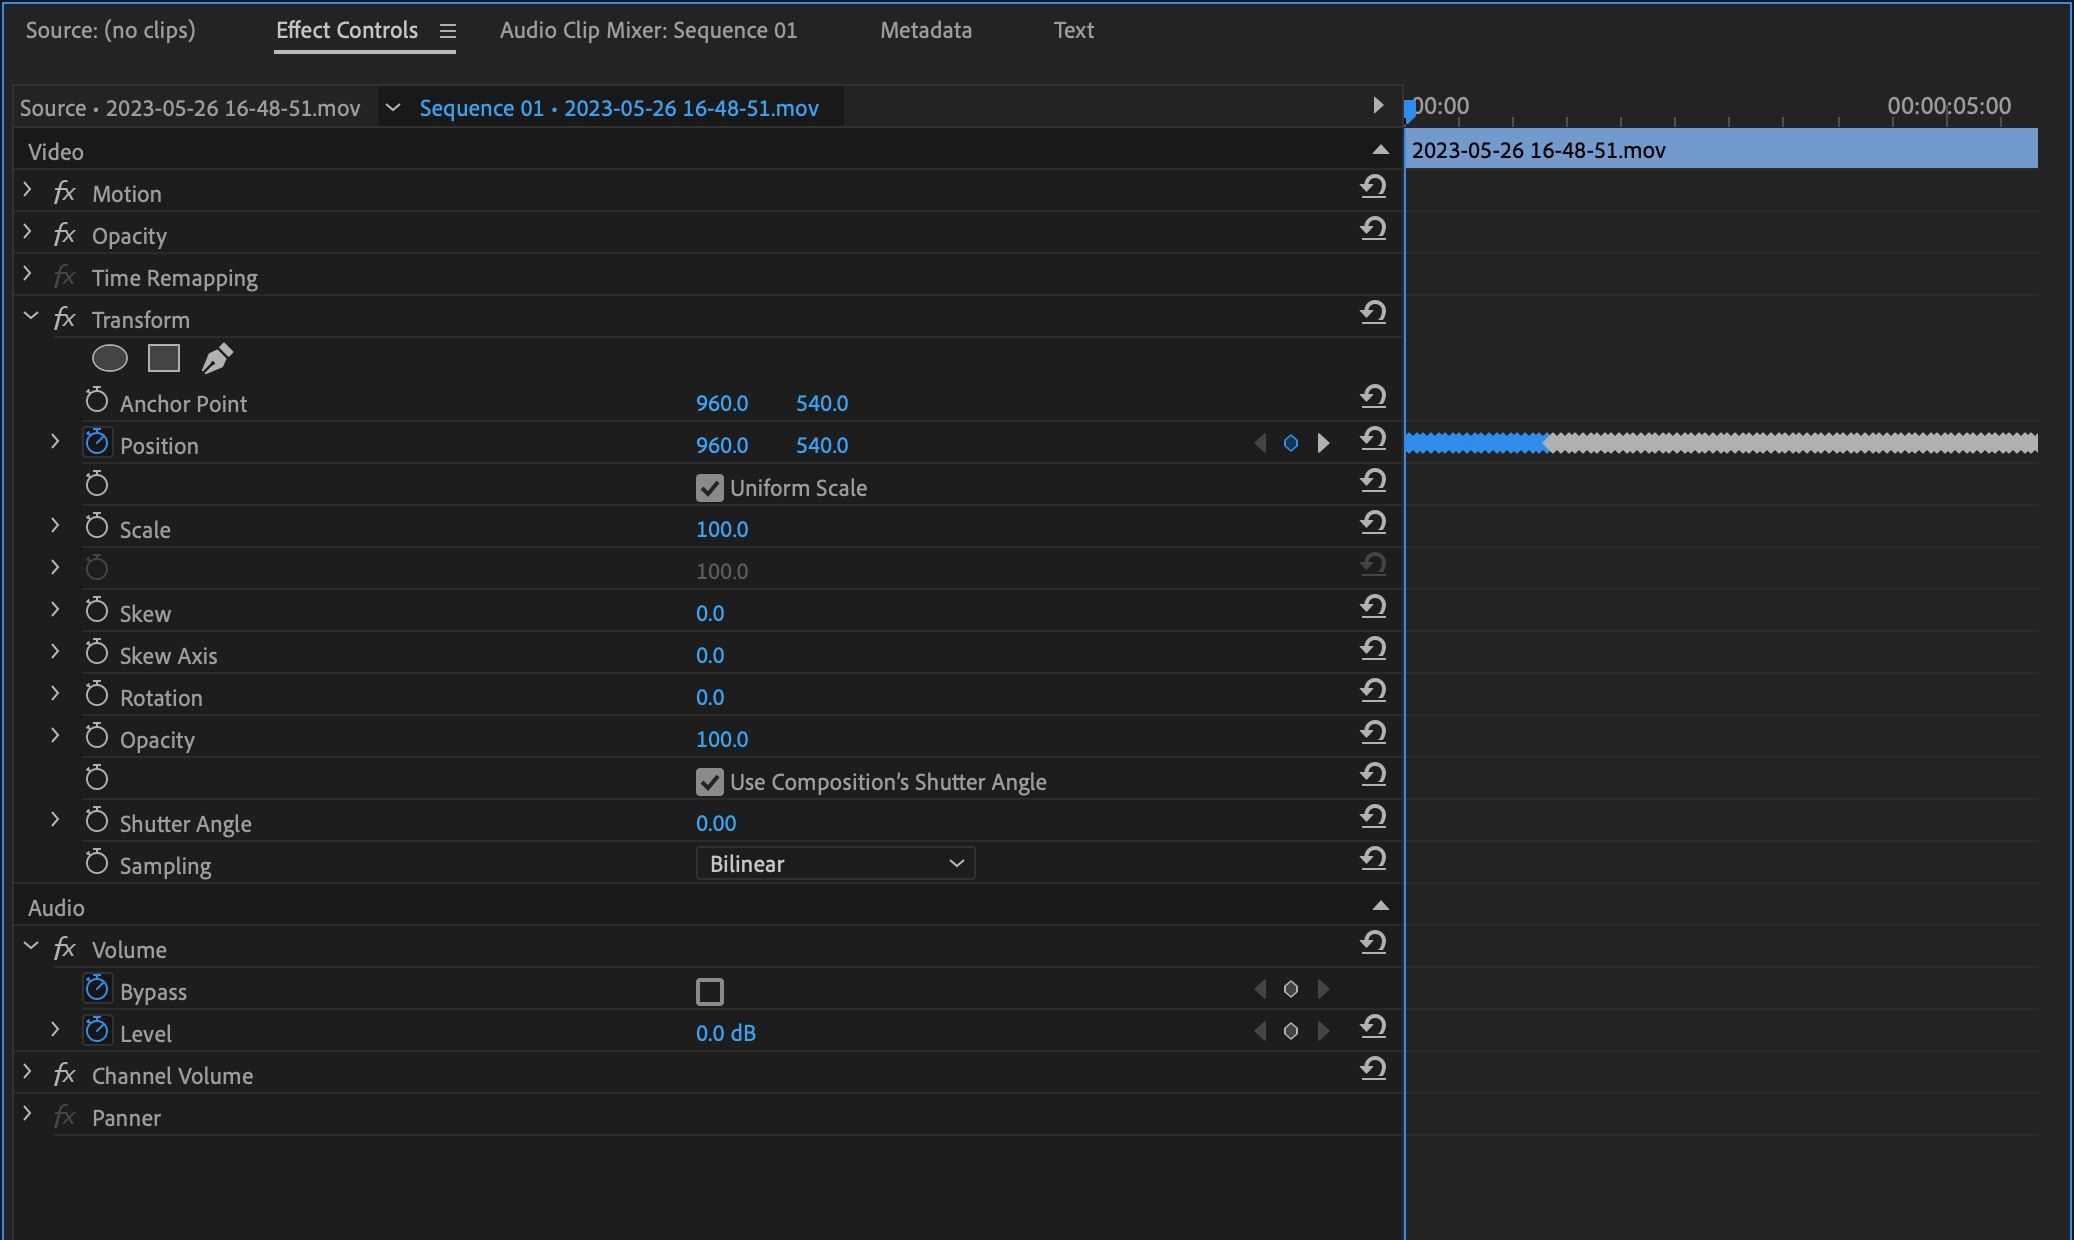
Select the Effects Controls tab for your video clip. Scroll down to the Transform effect’s settings, and go to Position. Make sure you’re at the beginning of your clip in the timeline—you can press up on your arrow keys to do so automatically—then click the clock icon next to the Position setting to toggle animation and enable keyframes.
Next, advance your clip forward around two or three frames using the right arrow key, then adjust your position by around five to 15 pixels, mixing horizontal, vertical, and diagonal motion.
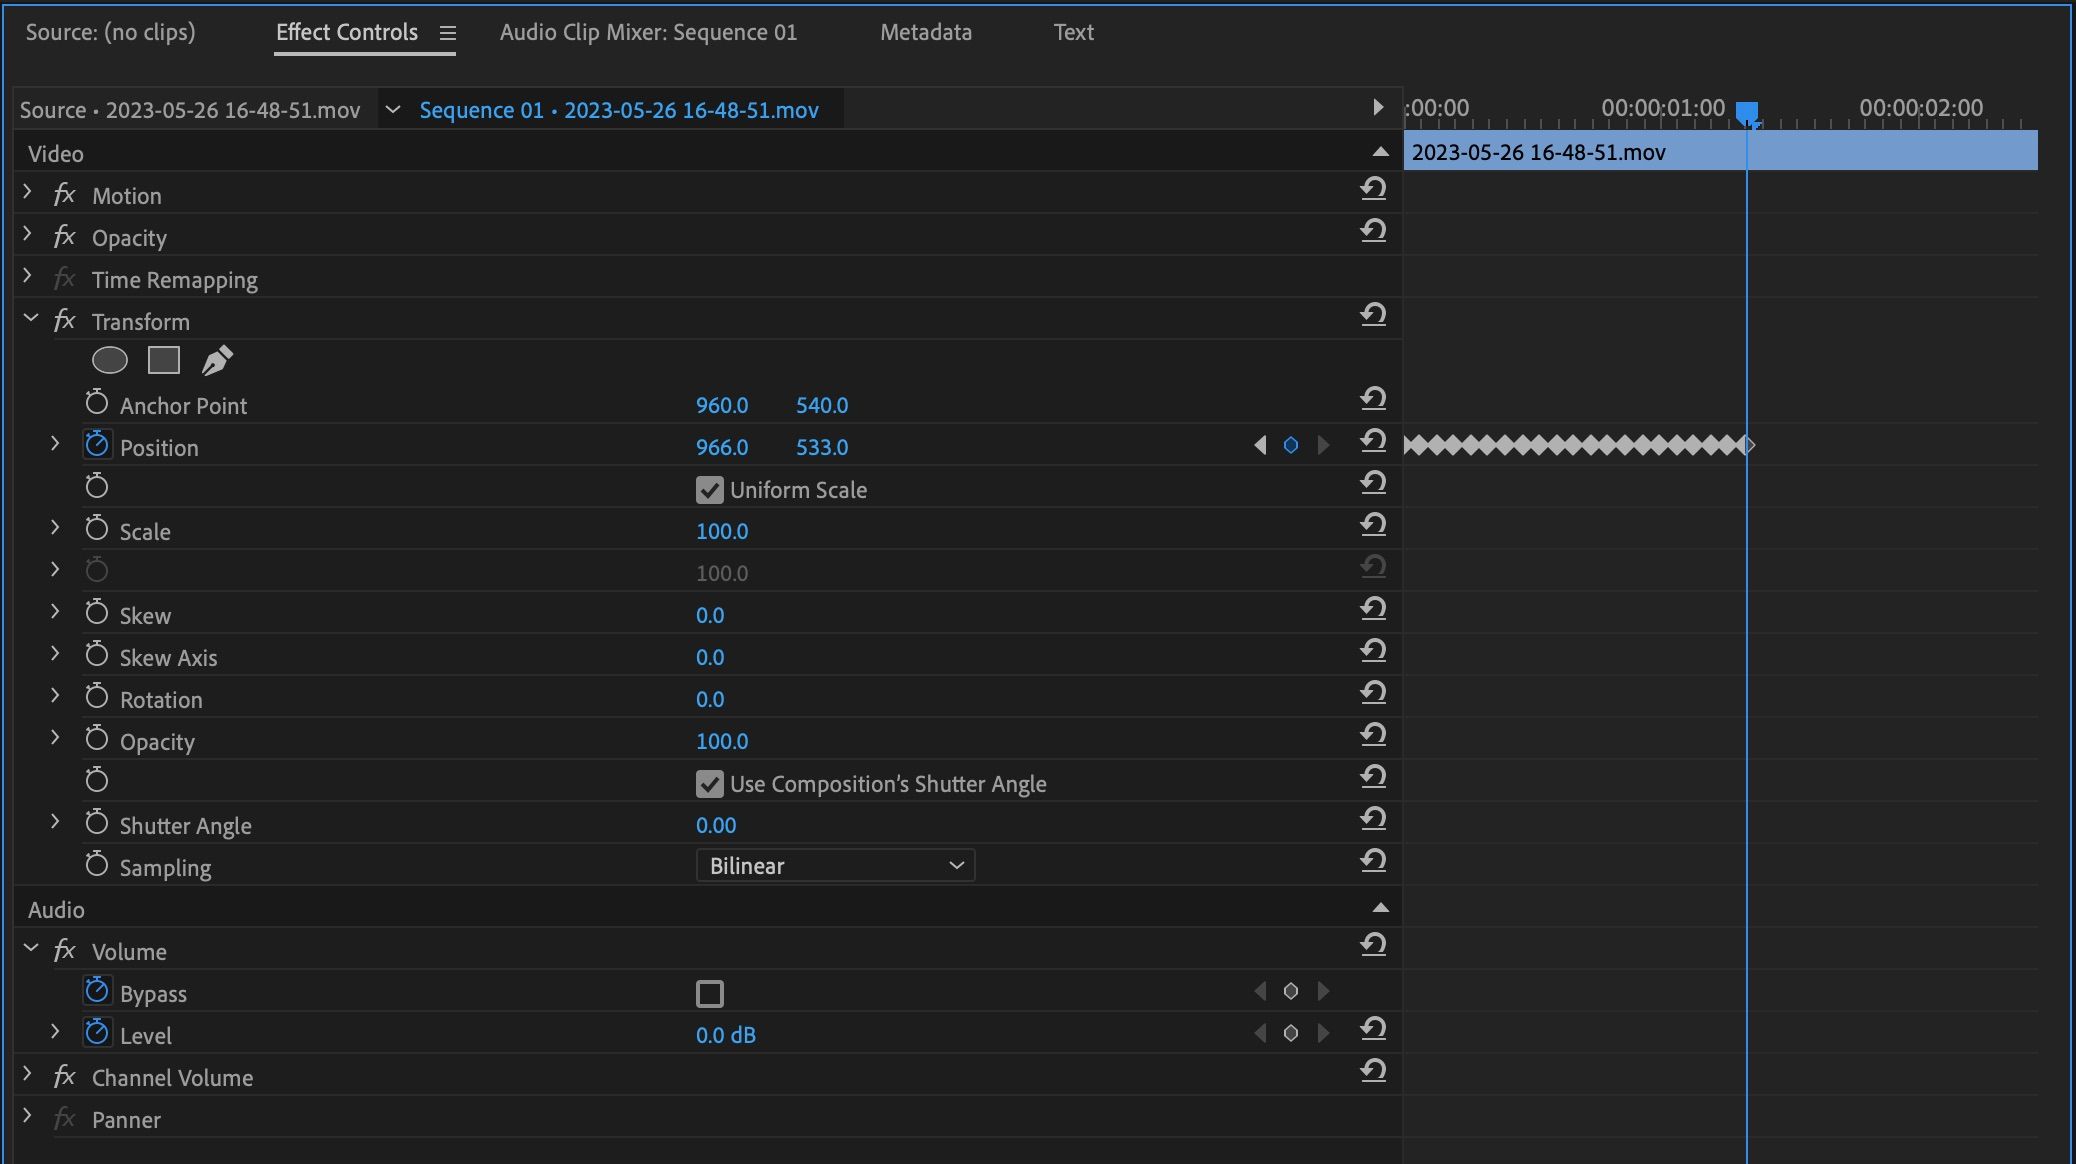
If you’ve enabled animation, every adjustment will automatically make a keyframe. In our example, we start at the center for a 1920x1080 clip at X:960 by Y:540, then X:955 by Y:540, X:961 by Y:542, and so on. Continue until you have around 15-20 manual keyframes.
Play your clip to see if the shake looks how you want it. If so, drag to select all your keyframes, then copy them several times subsequently so that it lasts the full duration of your clip.
Additionally, you’ll see that when shaking, the video doesn’t fully fit into the frame. Consider setting the Scale setting in your Transform effect to around 102 to 103 to alleviate this.
Save Your Shake as a Preset
The setting is done! If you’d like to re-use this effect whenever you want, save it as a preset in Premiere.
Go to the Effect Controls tab, right-click the Transform effect, and select Save Preset. Name it something like "Camera Shake" or "Jitter," and it will forever be in the Preset folder of your Effects tab for future use.
When to Apply a Camera Shake
Many YouTube and TikTok creators use this kind of effect in their content, so here are scenarios you can try. You can add a sense of action to static video shots, which is useful for increasing retention in TikToks and YouTube video intros by making your video more visually stimulating.
This preset will also make on-screen graphics more visually interesting—you can apply this effect to text and images in addition to video.
Add Interest to Your Videos With a Shake Effect
Creating effects like this can be tedious, but they certainly can improve your content. However, using presets for these tedious effects can save you a lot of time, freeing up your energy for creativity and improving your skills.

