Video editing is an increasingly mobile process. A task often confined to dark, dingy edit suites can now be undertaken on a laptop on the beach. There is a catch to this brave new world—while systems are more mobile, the size of footage is increasing, especially with the onset of 4K video.
This presents a problem—older and less powerful machines will struggle to work with your footage. As a result, you may experience slowdowns or crashes during playback. Thankfully, there are features in Premiere Pro that can optimize the process, and keep slowdowns at bay. Let's take a look!
1. Adjust Playback Quality
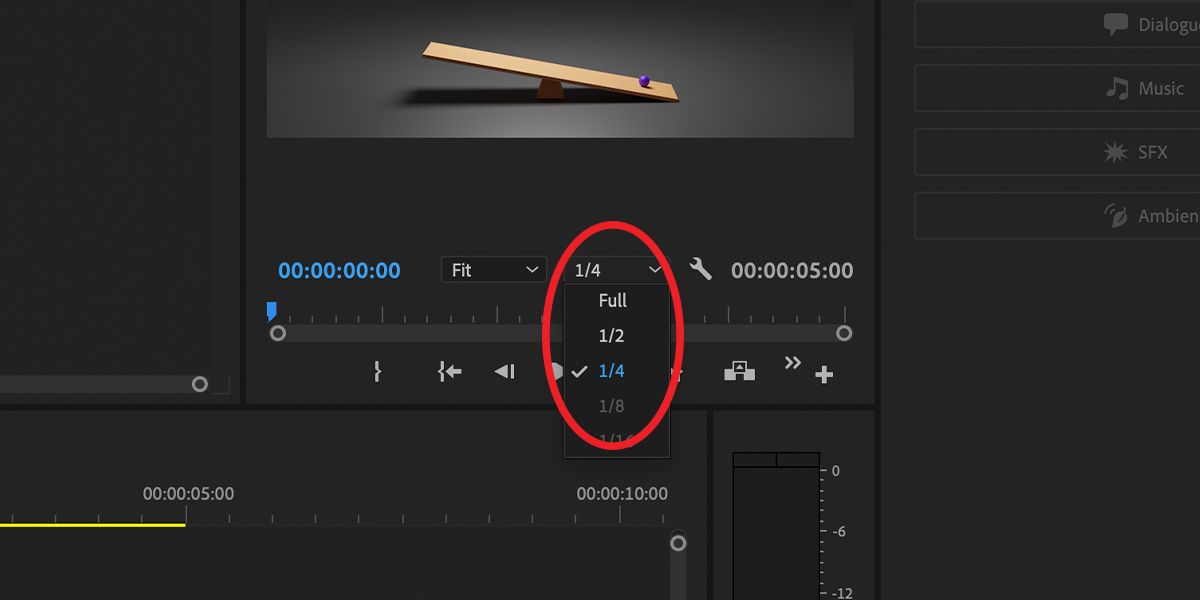
Quite a simple feature, but something that you can easily miss—Premiere Pro allows you to adjust the quality of the playback in your video Timeline and Source Monitors, from Full to 1/2, and 1/4 resolution.
If you're having playback issues, this is often the first thing to consider adjusting, especially if you're using high-resolution footage.
2. Render Your Timeline
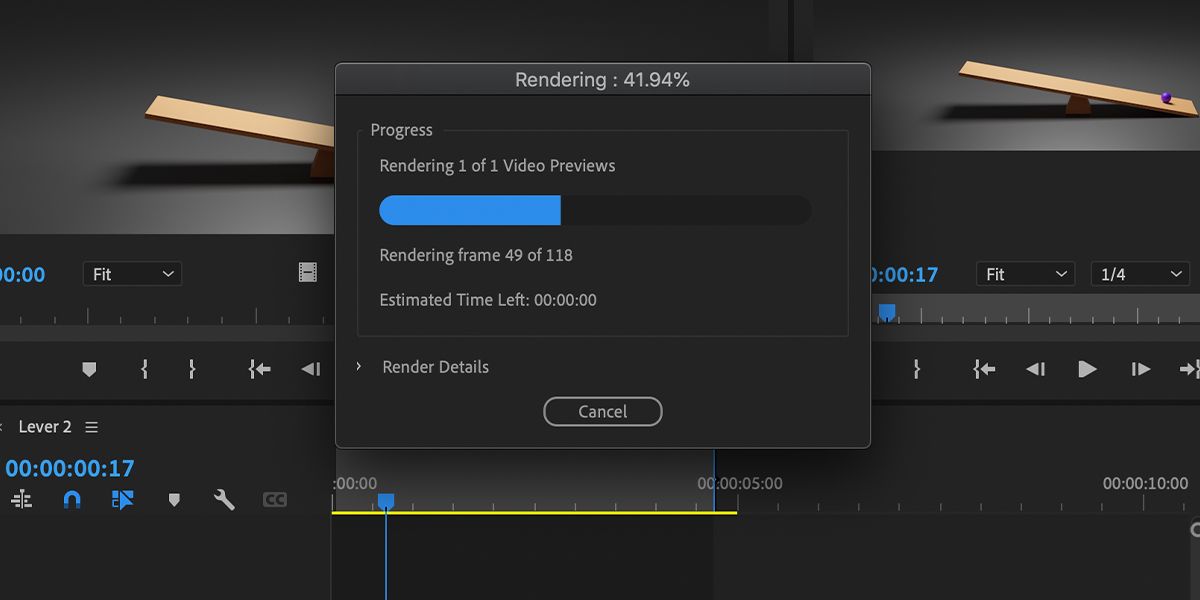
If you're experiencing slowdowns in Premiere during playback, you might want to consider rendering your timeline. Simply put, Premiere will look at everything laid out in your timeline, and will take the time to render out a preview video file.
To do this, mark an In and an Out in your timeline, as you would when making a three-point edit, and select Sequence > Render In To Out. You should see a Rendering progress dialog box.
Rendered parts of your timeline will be marked by a green bar. Premiere should have no difficulty in playing back your pre-rendered video.
Don't forget that you can use the In and Out functions to select, isolate, and render particularly difficult sections of your timeline, where complex effects or footage size might be slowing down playback.
3. Check Your Media Cache
Premiere Pro will store various render files and other data in a Cache folder. If you allow it to build up, your hard drive will become filled with gigabytes worth of old or unused data.
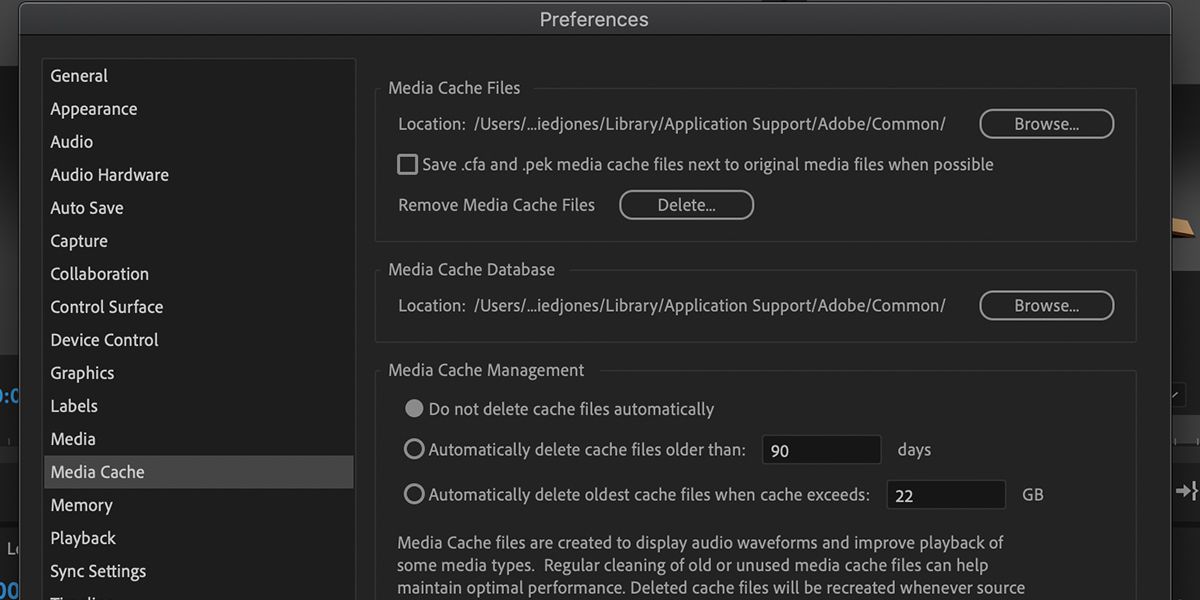
Low storage can affect the performance of applications, including Premiere Pro, so cleaning up your cache database can help reduce performance issues. To empty your cache, navigate to Preferences, and then select Media Cache from the left menu bar.
Select Delete, and choose whether to delete unused media cache files, or the entirety of the cache. Then, hit OK to remove your Media Cache files.
Additionally, with the Media Cache settings, you can toggle on an option that automatically removes your cached files after a period of time, or when the cache becomes a certain size.
4. Work Locally
Remember that working off of a drive or a server can limit the data rate at which Premiere Pro can read files. If working with high bitrate files, particularly those at resolutions like 4K, Premiere may not be able to playback these files smoothly.
To optimize your editing, opt to store your files locally on your computer for editing, or access them from a high-speed drive or server.
If you're already deep into an edit and experiencing slowdowns, don't forget that you can use the Project Manager to migrate all files used by your timeline to another location.
5. Proxy Your Footage
One of the most elegant solutions to overcome the issues of working with large footage files with less powerful hardware is through the use of Proxies. Premiere Pro's updates in recent years have added a proxy system that is reasonably easy to use.
So, what is a proxy? Simply put, a proxy is a smaller copy of your master footage file that is linked to the original.
Any timelines using proxy files, and any effects you apply to your process, can swap out the proxies for the master file in the export. Think of them as body doubles for your footage, only they are smaller and more compressed.
If a 4K file is brought into Premiere Pro, a proxy file can be made at a quarter of the size, which will playback much faster on slower or outdated hardware.
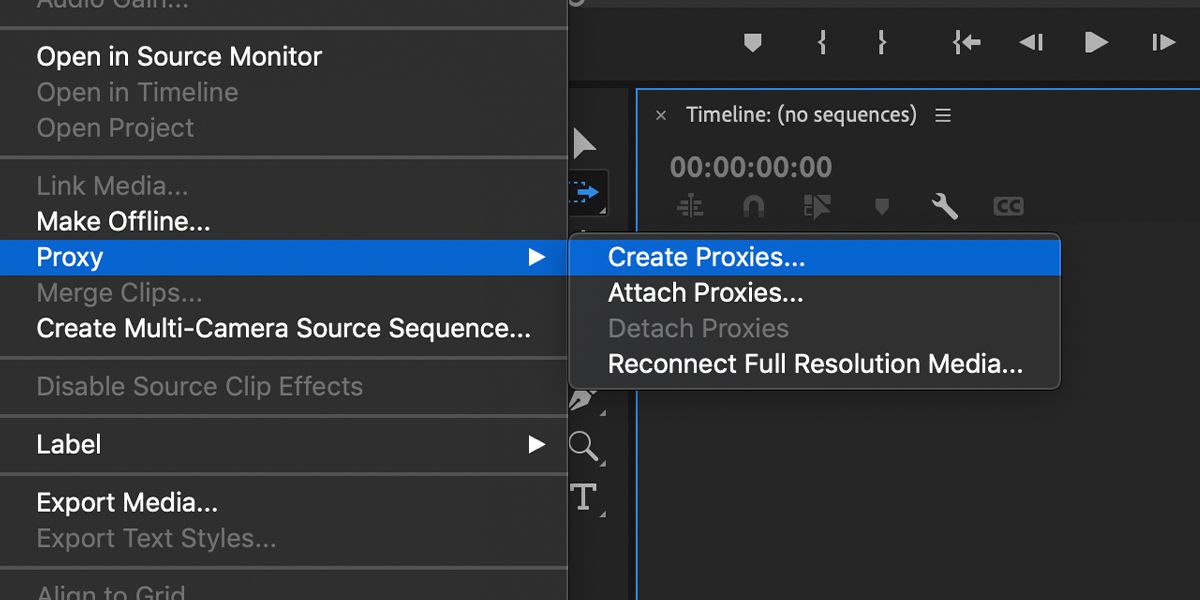
Navigate to your footage in your project window, and right-click the files you want to create proxies of. Then, select Proxy > Create Proxies.
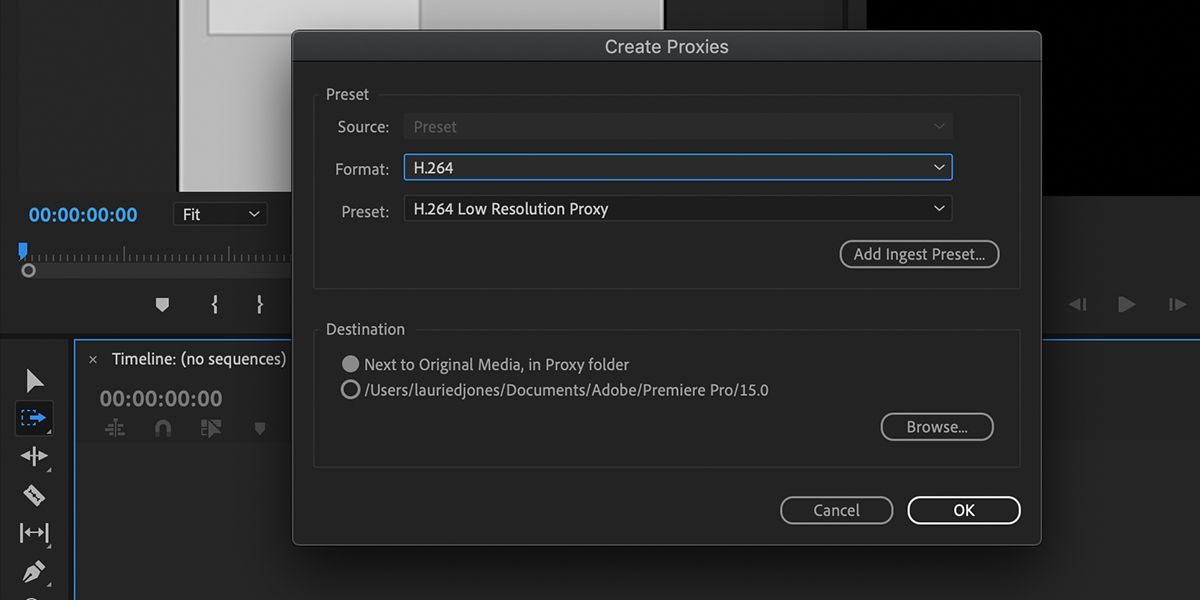
Doing this will open up a new settings box with additional options for your proxy files. By default, proxies will be created as low-resolution h.264 MP4 files. However, you can also choose to encode them as MOV files with ProRes, Cineform, or DNX codecs.
After you select your settings, as well as the folder where your proxies will be placed, hit OK.
This will open up Adobe Media Encoder, which will run the export process to generate the proxy file. Once the process is complete within Adobe Media Encoder, Premiere should automatically link your proxies to the original footage.
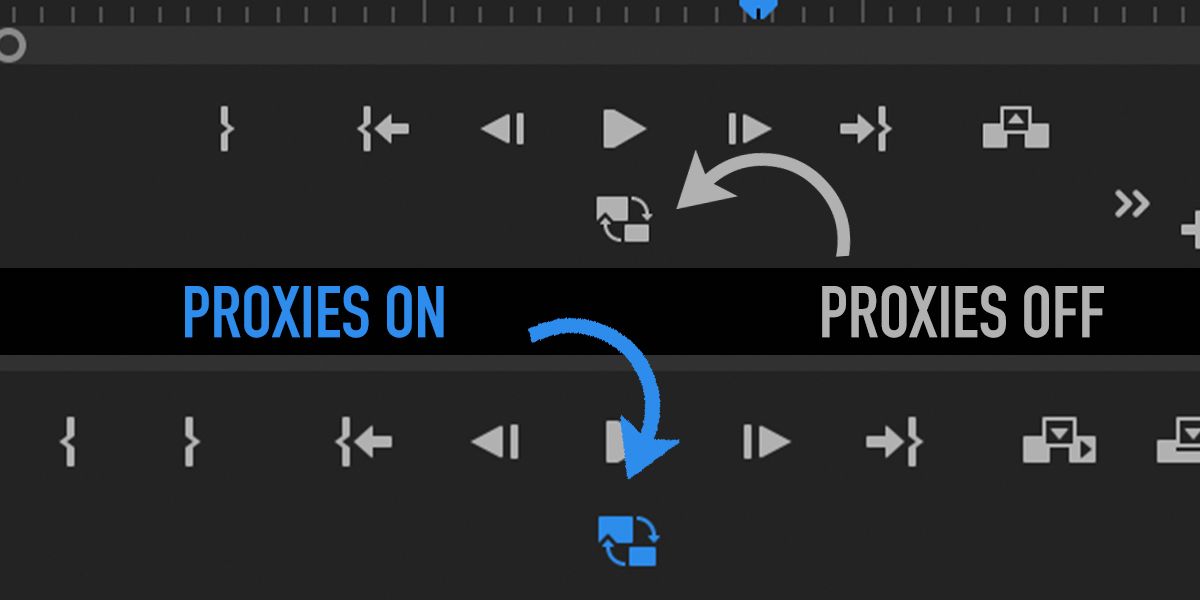
You can toggle proxies on and off in both the Timeline and Source Monitor, by clicking the Proxies icon underneath the viewing window. When the icon is blue, the proxies are enabled. When it is gray, you are viewing the original footage.
Proxies, as smaller files, should run much faster without lag or slowdown—this is perfect if you are working with huge video files or on slower or outdated hardware.
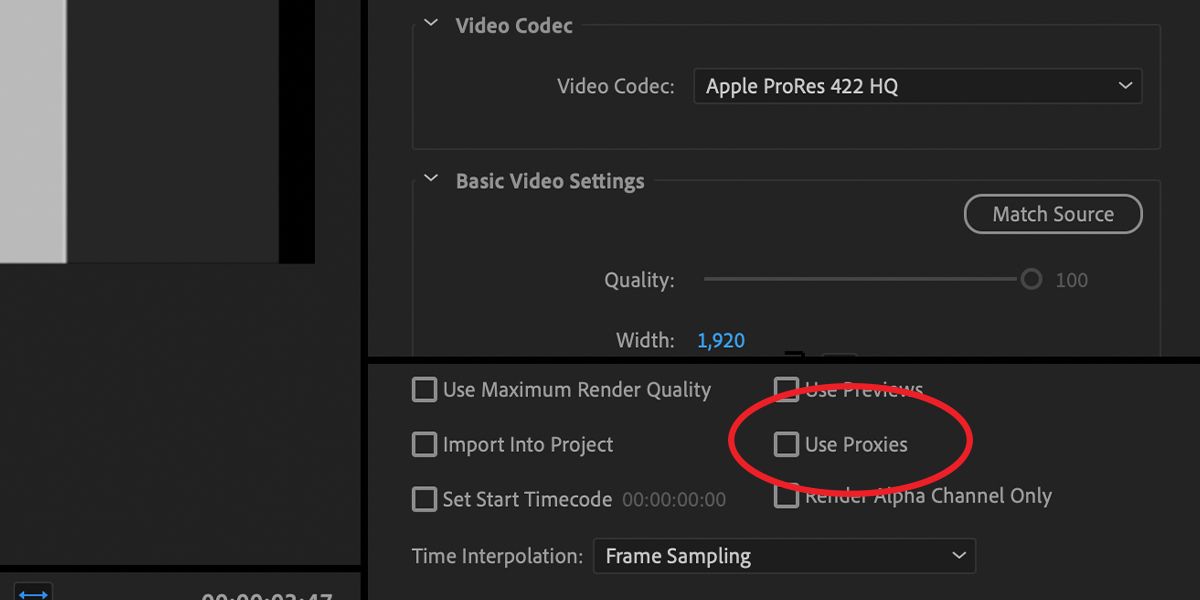
When it comes to exporting your footage, by default, Premiere will render your timeline using the original footage. However, if you want to use proxies in the export for a low-resolution viewing version, you can toggle the Use Proxies checkbox.
Using the proxies system is a great way to handle more intensive editing workflows, as well as high-resolution footage on less powerful hardware.
Get Premiere Pro Running Smoothly
If you've been experiencing slowdowns and playback issues with Premiere Pro, these tips should help speed things up.
Ultimately, there may come a time with any older machine when it can no longer edit larger footage, or even run Premiere Pro. The processes described above should at least allow you to get the most out of your current hardware.

