Nowadays, Lens Correction is often an obligatory step for even the most seasoned photographers. It can give your photograph that extra refinement that takes it from fantastic to extraordinary. But not all images need lens correction, so how do you know whether to apply it or not?
In this article, we'll tell you what Lens Correction is in Adobe Lightroom, how to use it, and when to use it.
What Is Lens Correction in Adobe Lightroom?
Lenses are unique: the different types of lenses, camera models, and camera settings all contribute to the outcome of a photograph. While it's always recommended to make sure you're shooting with the right lens, sometimes mistakes are made, or you only notice an error once your image is uploaded to your PC; that's where Adobe Lightroom comes in.
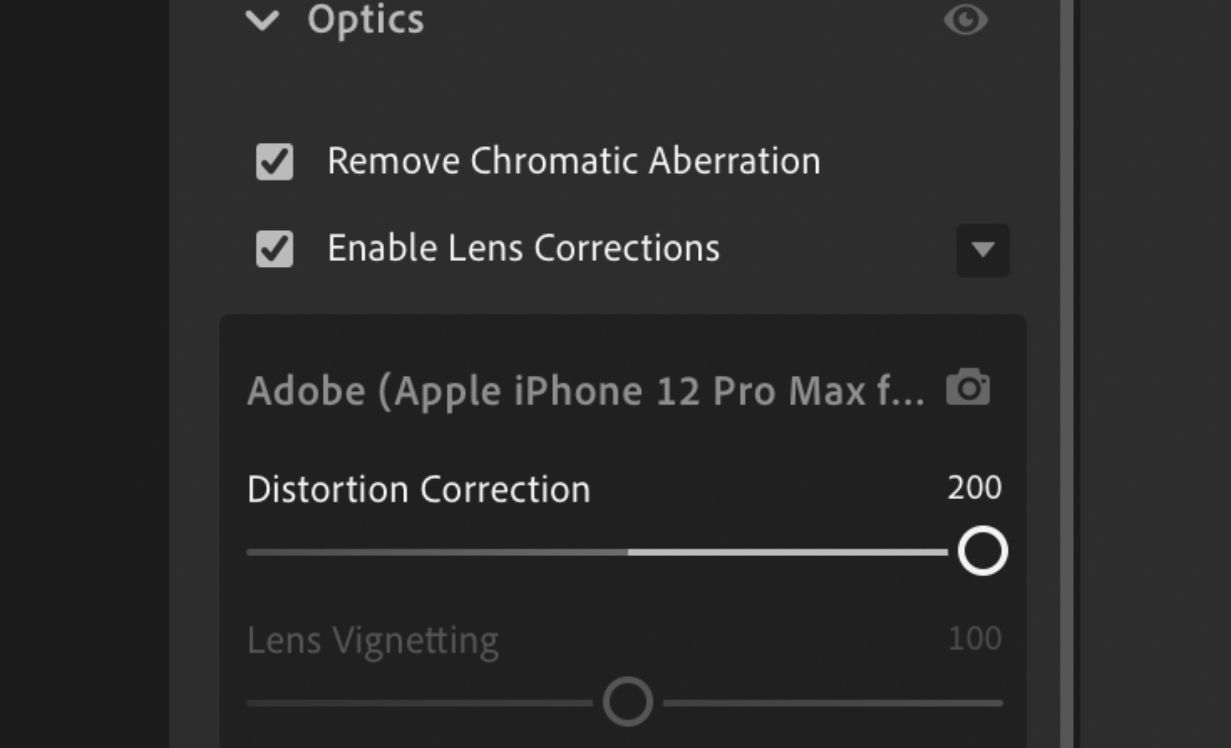
Lightroom can help correct the most common photography mistakes. When enabling Lens Correction, Lightroom detects the make and model of the camera you used for the picture you're editing, and based on the information it knows about the lens and camera, it will make automatic adjustments. But if for some reason it inputs the wrong info, you can always manually change it.
How to Change the Lens Profile in Lightroom
If you need to change the lens profile, all you need to do is this:
- Click on Edit in the right sidebar.
- Scroll down to Optics and click the arrow down icon.
- Click the box next to Enable Lens Corrections, and additional settings will appear directly under.
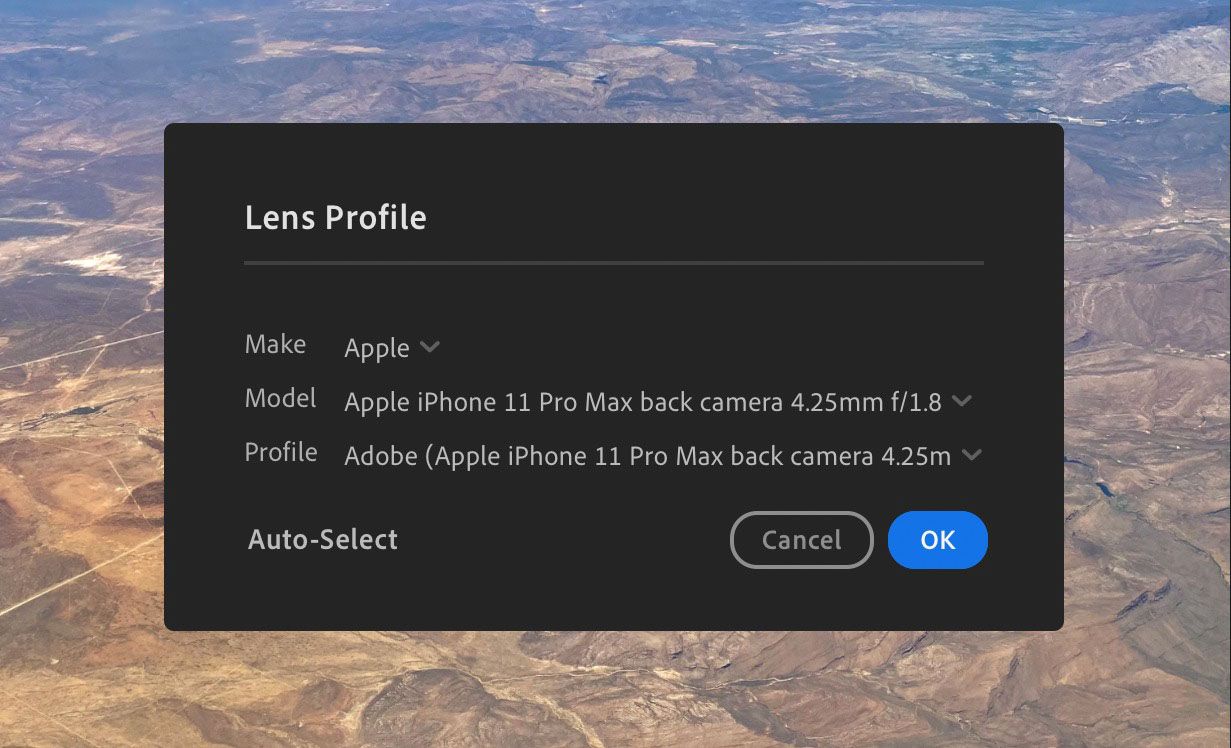
- Click on the camera icon in the upper right corner and the Lens Profile menu will pop up in the center of the screen.
- Select the arrow next to Make, Model, and/or Profile, and choose the ones that apply.
How and When to Use Lens Correction in Lightroom
Adobe Lightroom's Lens Correction tool predominantly targets vignetting and distortion, but it also works collectively with the Remove Chromatic Aberration tool. Lens Correction can be applied with just a few clicks, but there are additional actions you can take in Lightroom to correct your photography mistakes.
Vignetting
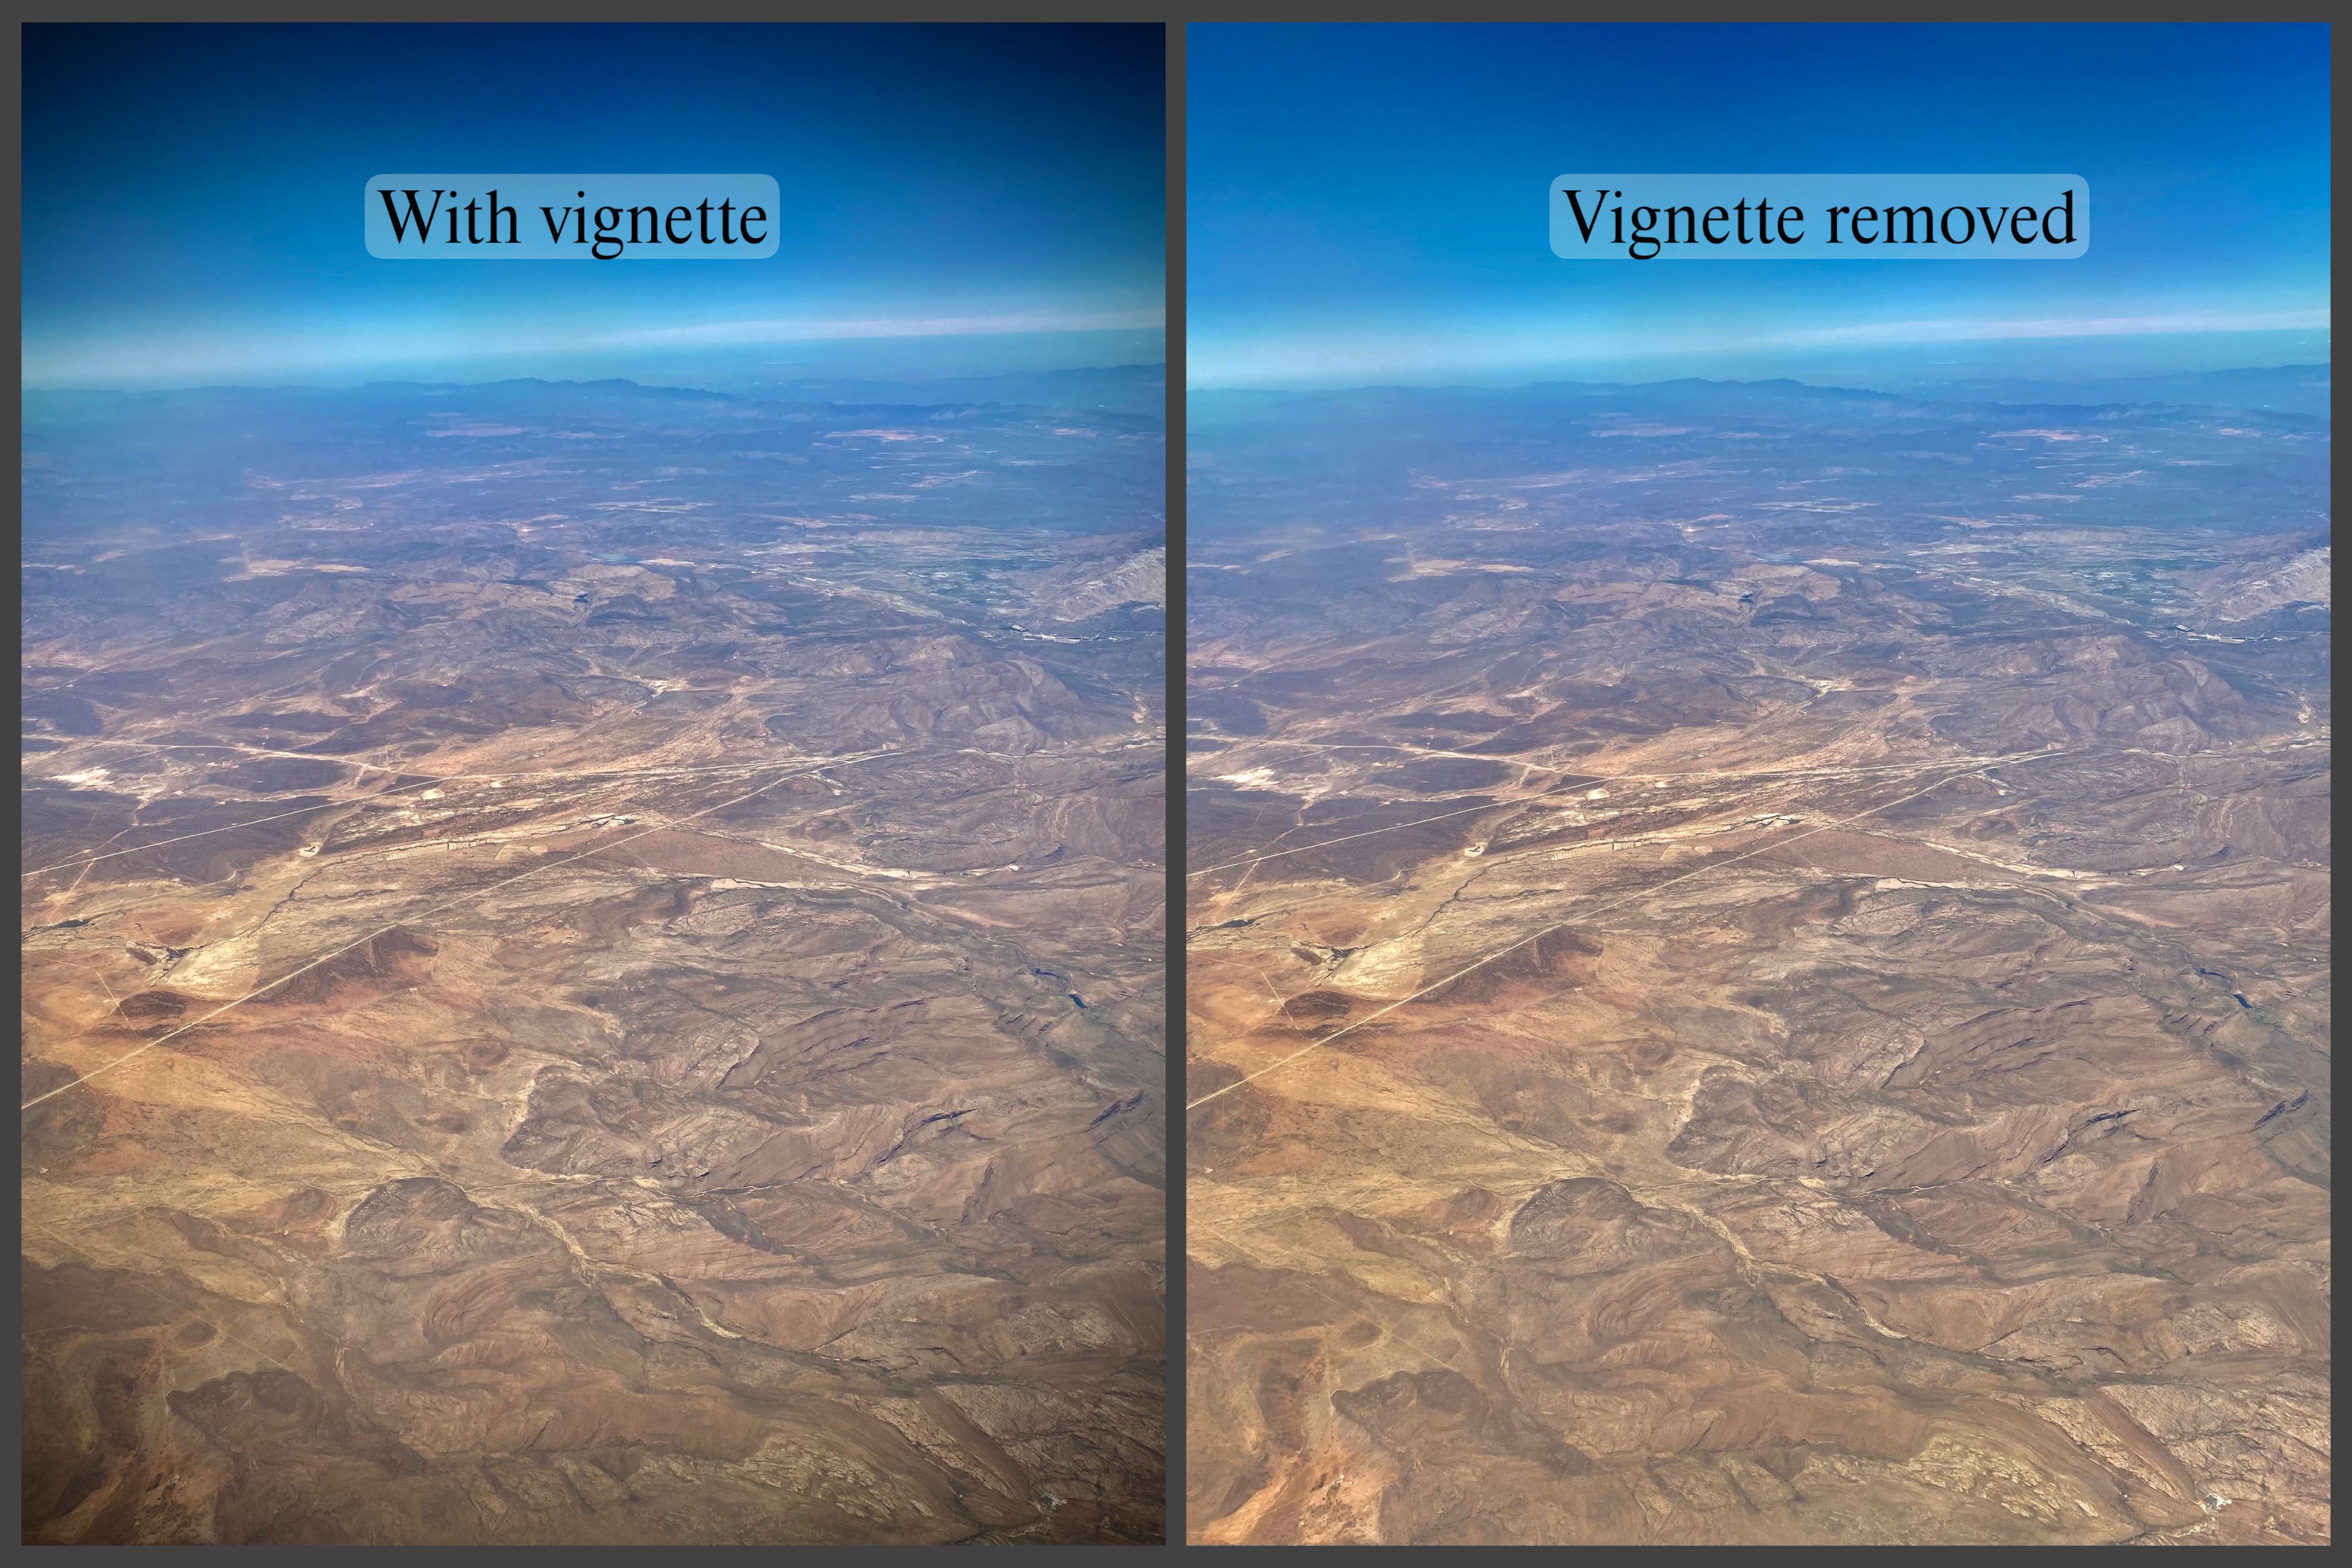
Vignetting is the dark haze that sometimes shadows an image's periphery. It occurs when the light or saturation depletes along the edges, bypassing the center. Slight vignetting usually goes unnoticed, but sometimes it can be severe enough to require fixing. If the vignetting is misrepresenting your image—affecting the tone, quality, or concept—you'll want to remove it.
Removing vignetting is easy with these simple steps:
- When your image is open in Adobe Lightroom, click the Edit icon (it looks like three slider bars) in the top right corner.
- Scroll down to Optics.
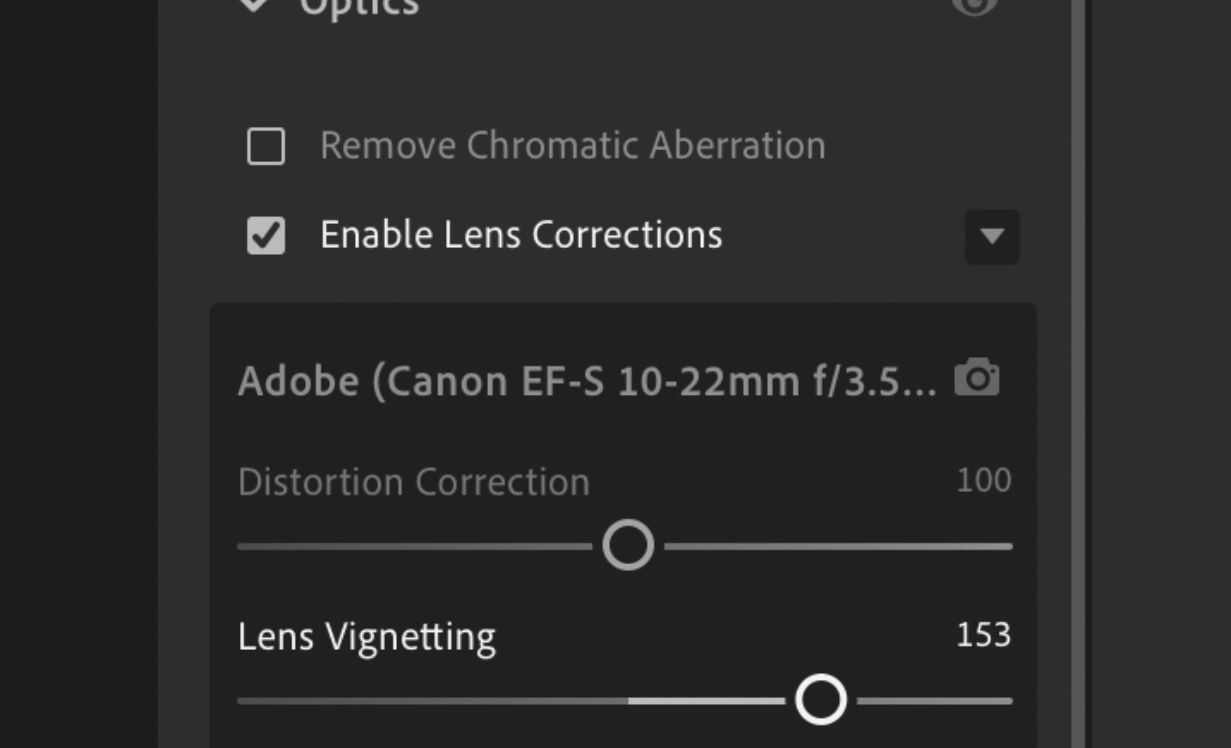
- Once clicked, two boxes will appear. Click the box labeled Enable Lens Corrections.
Adobe Lightroom should pick up any vignetting issues. Once it does, the software will automatically adjust the vignette under Lens Vignetting. However, you can alter it further, or decrease the intensity by using the slider bar.
Additionally, you can also fine-tune the vignetting by scrolling up to Effects and manually moving the Vignette slider left and right for less or more vignetting.
While you're at it, why not try comparing your edited image to the original to see how much of a difference small changes can make? If you're not sure how to do that, you can read our guide on how to compare Lightroom edits to the original image.
Distortion
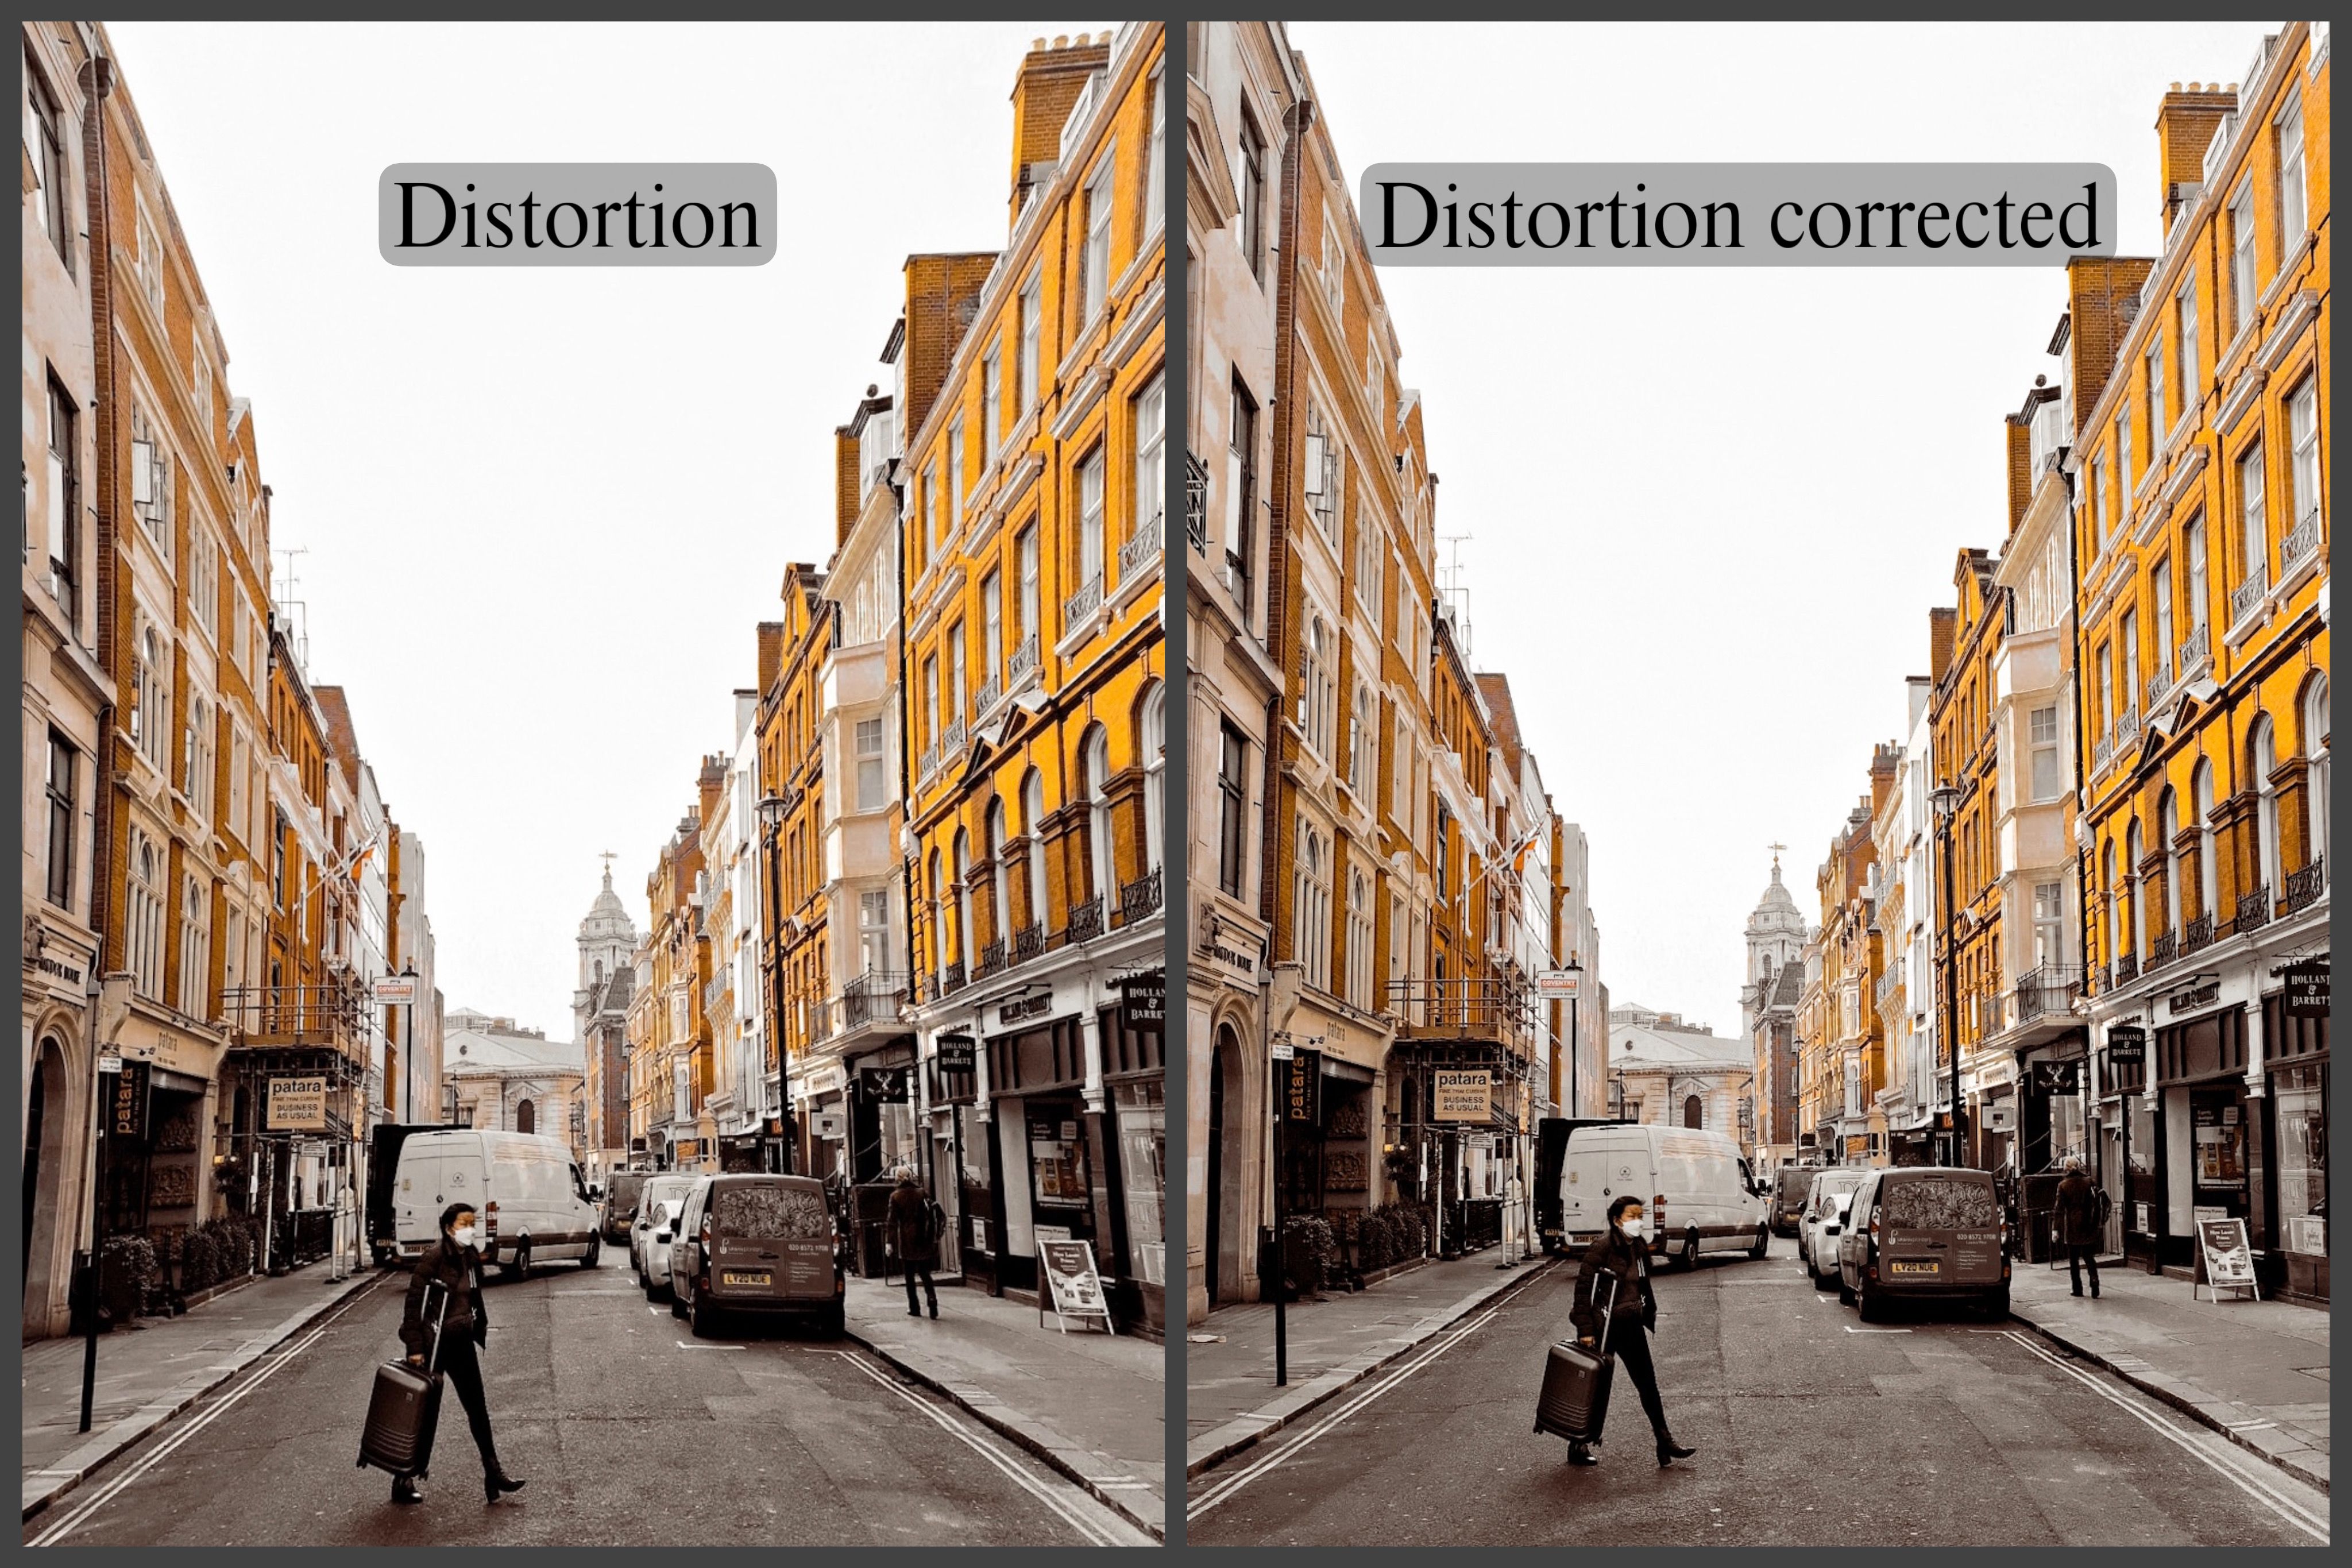
In photography, distortion is a type of optical aberration that happens when rectilinear projection (the appearance of straight features) becomes enlarged or stretched, resulting in an image with a distorted perspective. It's most common in photographs that use wide-angle lenses. You'll notice that an image is distorted if straight-line objects, such as buildings or flat surfaces on the ground, appear curved.
Distorted images don't look great unless they serve an artistic purpose, like fish-eye lenses. So unless your intention is to exhibit something abstract and creative, it's better to fix distortion for a more authentic perspective. You can do this by following these steps:
- Open the image you want to edit in Adobe Lightroom, and on the menu bar on the right, click the Edit icon underneath the cloud icon.
- Scroll down to Optics and click the arrow.
- Next, tick the box that says Enable Lens Corrections.
- Another menu box will pop up, and Adobe will automatically adjust the slider labeled Distortion Correction, but you can also modify it if you're unhappy with the adjustments.
Like vignetting, you can also manually fine-tune distortion under the Geometry header, which contains a multitude of settings that adjust the image's perspective. These include:
- Distortion
- Vertical
- Horizontal
- Rotate
- Aspect
- Scale
- X Offset
- Y Offset
Once you are happy with your perspective changes, you can click the Constrain Crop box and the edges will be cropped.
Chromatic Aberration
Chromatic aberration is another feature under Optics that goes hand-in-hand with Lens Correction; it is the color fringing that outlines and distorts objects in an image.
Enabling Lens Correction can assist chromatic aberration with some minor adjustments to the color and brightness of the image, but if the color fringing is severe, it is better to take that extra step in removing it.
Removing chromatic aberration can be done with one or two clicks, but sometimes Lightroom needs a little extra help fine-tuning the image. If you want to know how to correct the color fringing on your images and how to avoid it from the start, check out our guides on how to fix chromatic aberration in Adobe Lightroom, and how to avoid chromatic aberration.
Fix Your Mistakes With Lightroom's Lens Correction
Sometimes the lenses don't need correcting, but as we mentioned above, it's always a good idea to compare your image before and after enabling the feature. Luckily, if you decide not to use the lens corrector after all, you can quickly undo it by unticking the box.
You can also play around with other settings that might be better for your image than Lens Correction; don't be afraid to experiment and see where the software takes you.


