
Whether you’re a beginner photographer or a seasoned pro, you’ve probably heard of Adobe Lightroom. For many picture-takers, it’s the go-to photo editing software. And if you’ve found annoyances in the images you took in real life, you can often get rid of them through the app.
Lightroom lets you fix technical problems with your camera, but you can also eliminate unwanted objects and distractions in a picture. And if you want a little more guidance on what you can remove, you’re in the right place.
This article will show you eight things you can remove from your photos in Lightroom.
1. Grain
In some instances, you might want grain in your images. For example, you might try to create a vintage look in your photos. But unless you’re aiming for a specific style, you will often find that it’s a distraction.
Your images can become grainy for several reasons. It could be because your ISO is too high, and you might also notice grain if your picture is underexposed. While you sometimes can’t remove grain without negatively affecting the rest of your photo, it is possible in less serious circumstances.
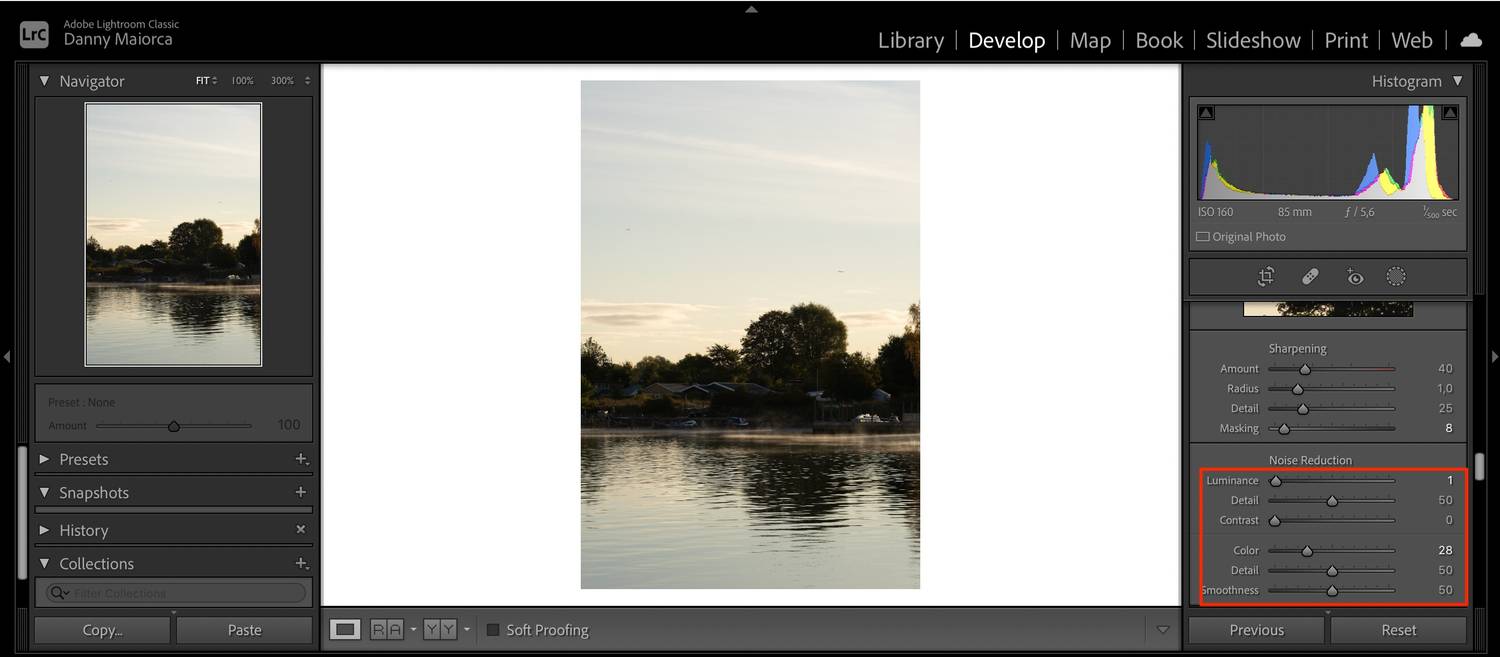
If you want to remove grain from your photos in Lightroom, go to the Noise Reduction tab. There, you will see sliders for Luminance, Color, Detail, and Smoothness. Start with the Color and Detail tabs; if you need to do more, you can use the Luminance and Smoothness sliders. To look at your effects in action, hold Option + Shift while moving your sliders.
2. Objects in the Sky

Sometimes, objects in the sky—such as birds and planes—can help you tell a better story through your photos. But if they distract the viewer from what they’re supposed to be looking at in your picture, you may wish to remove them.
When using Lightroom, getting rid of objects in the sky is not a difficult task. Go to Spot Removal (the plaster icon) on the right-hand side of your screen and change the size of your brush. Then, click on the object you want to remove.
Another circle will appear; move it until you find the area you want to clone.
3. Spots From the Camera
Spots can appear in your photos for several reasons, and the biggest annoyance is that you often cannot see them when you take a picture. They can happen for several reasons, including when taking photos in harsh lighting.
Luckily, removing spots from your camera is easy in Lightroom. The process is identical to getting rid of objects in the sky using Spot Removal. Change the brush size and click on the area in the picture you want to cover the spot with.
Once you’ve selected the area of your image you’d like to clone, hit the Enter key. If you use Lightroom CC for your smartphone or tablet, you can also remove spots on your camera.
4. Unwanted Objects on the Ground
Do you want to take better landscape photos? If so, the best starting point is to decide on what you don’t want to feature in your pictures. You can do the same for any other style of photography, too.
Even if you take this step, however, you may find that you sometimes capture things you didn’t want to. When you use Lightroom, you can remove these by making basic adjustments.
Examples of unwanted objects in your pictures include trash cans and people you didn’t intend to photograph. And like with objects in the sky, you can use the Spot Removal tool to get rid of them.
Click on the object you want to remove before choosing the part of the picture that you’d like to replace it with. You’ll need to ensure that the entire object is surrounded by the circle. Once you’ve done that, press the Enter key.
5. Car License Number Plates

Taking pictures of cars is popular in product photography. However, you might find that cars become a distraction in other types of photography. For example, you might not want vehicles to feature prominently when you try street photography.
You might also want to blur or remove certain details, such as license number plates. Doing so is pretty simple; again, you will need to use the Spot Removal tool.
When blurring number plates, adjust the spot to ensure that you cover the license plate. Slide the circle along until you’ve selected the entire number; you should see that it becomes blurry afterward. Once you’ve blurred the car license number plate, press Enter on your keyboard.
6. Chromatic Aberration

Some things are difficult to fix when taking pictures from your camera, such as chromatic aberration. And while you can use tools to highlight it manually, that is a much more complex process than is necessary.
Getting rid of chromatic aberration is one of the easiest things to edit in Lightroom. If you scroll down on the right-hand toolbar, you will see a section titled Lens Corrections. At the top, you’ll see a box next to Remove Chromatic Aberration; tick this. See our complete guide to fixing chromatic aberration in Lightroom.
7. Lens Distortion

Depending on the lens you choose, you might notice that your photo doesn’t look as you want it to after uploading it to Lightroom. But while lens distortion happens to most photographers, it’s not a huge issue.
In Lightroom, you have a couple of options for fixing lens distortion. The most common is to go to Lens Corrections > Personal > Enable Profile Corrections. From there, you can select your camera manufacturer.
Once you’ve chosen your camera manufacturer, you can pick your lens model. If the specific lens you have doesn’t show up, you can always select something that looks like something you’d want to use.
Another option is to go to Lens Corrections > Manual. There, you’ll see a slider under Distortion called Amount. Move it to the left or right, depending on how much distortion you want in your picture.
8. Lens Flare
Lens flare is often caused when you take photos in sunny weather. However, it can also occur when you take pictures in other situations with a lot of lighting. The easiest way to minimize the impact is by using a lens hood when taking the picture, but you can also fix the problem in post-production.
To fix lens flare in Lightroom, you can try reducing the overall brightness of your picture. The Spot Removal tool might also work in some situations. Other sliders you might want to adjust to fix lens flare include:
- Highlights
- Contrast
- Shadows
You can also use the tone curve tool to tweak the lighting in your photos.
Removing Unwanted Objects in Lightroom Is Easy
Lightroom is an excellent tool for removing all kinds of unwanted extras in your photos. And while RAW files will give you a little more flexibility, you can also make most of the changes mentioned in this article if you take JPEG photos.
Making basic adjustments is straightforward, but some things—like tweaking lens flare—might take you a little longer. You can also use tools like Photoshop to make further edits.