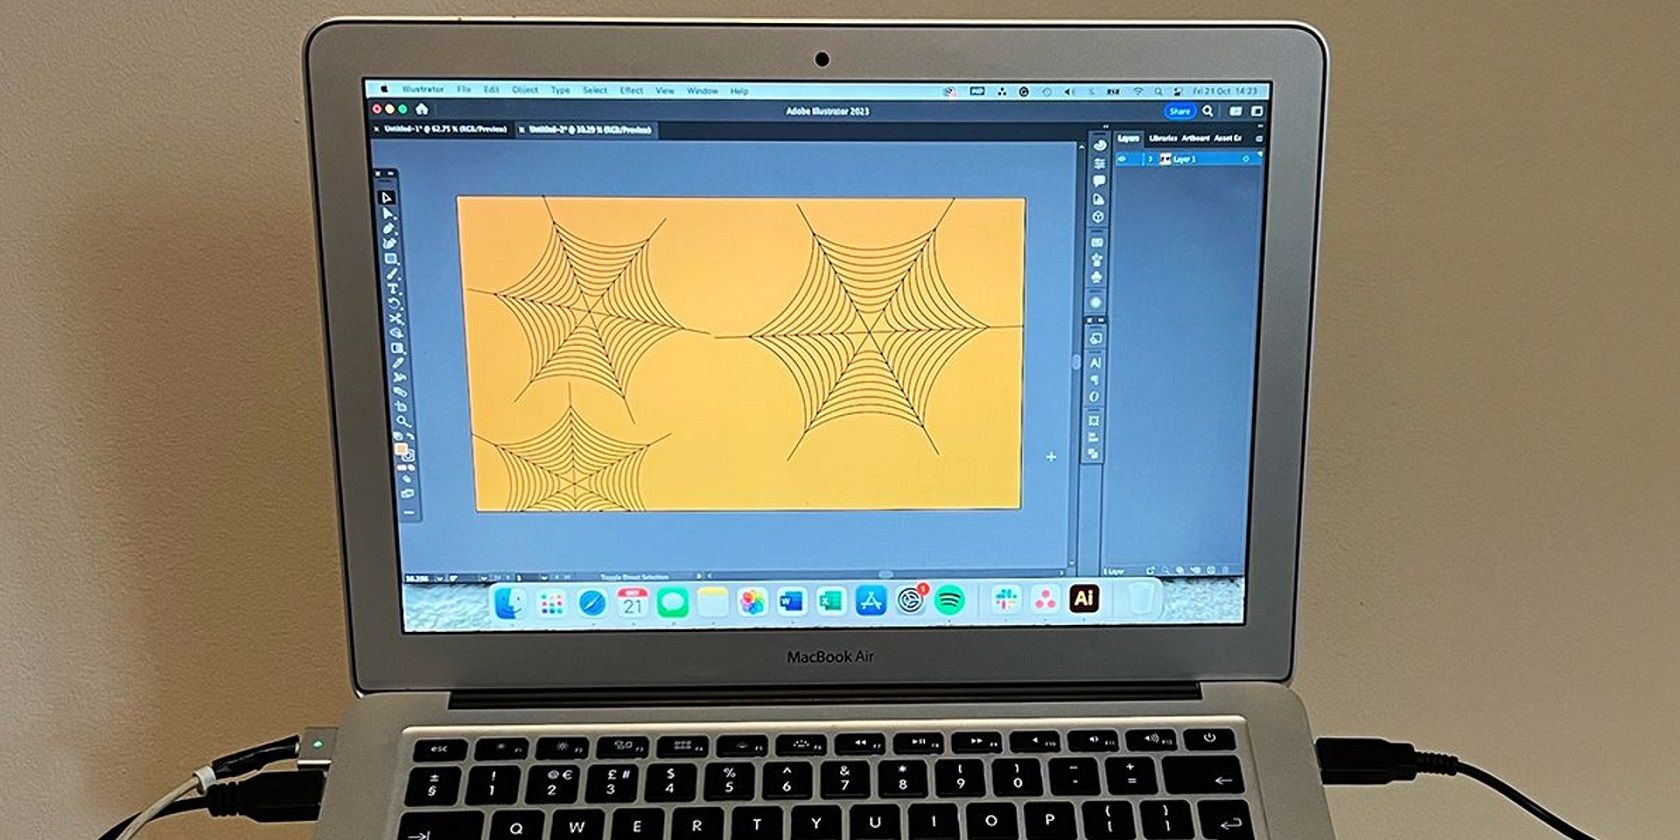
Whether you’re drawing for Halloween’s Spooky Season or learning to add new tricks to your illustration repertoire, a fast and easy way to make a scalable spider web is never a bad thing to learn.
Adobe Illustrator’s shape tools and blend function allow you to spin a web as fast as a real spider, and as accurately, too. In only a few short steps, you can easily create a fun spider web illustration in Illustrator.
Step 1: Draw a Star
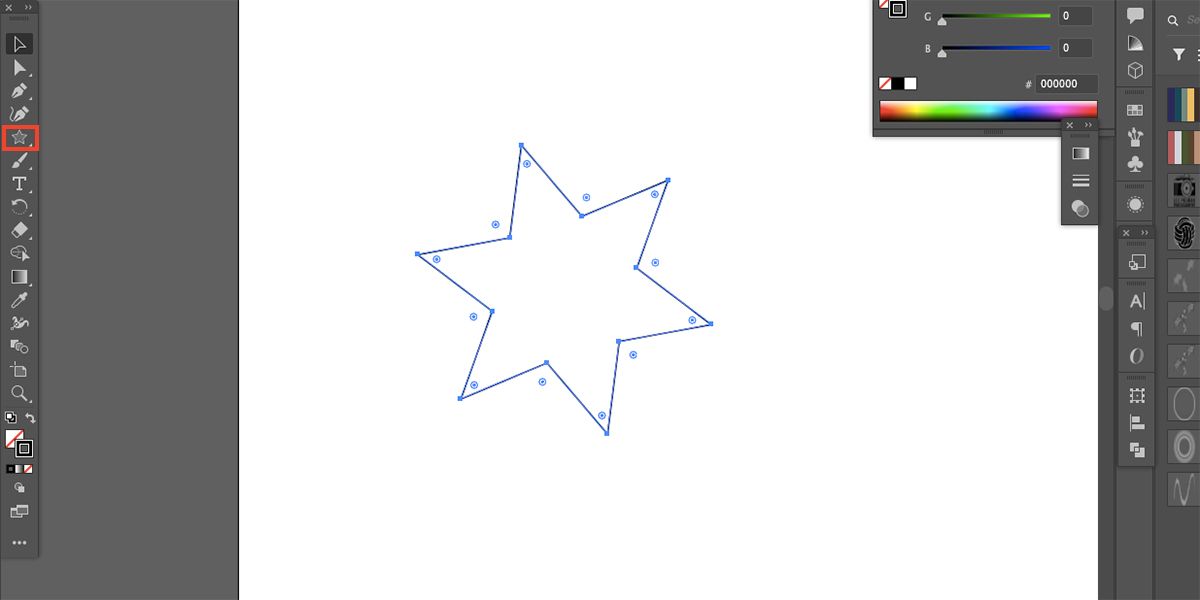
To begin, draw the base shape of the web using the Star tool. To find the Star tool, select and hold the Rectangle tool on the toolbar then select the Star tool.
Click and drag a star on your canvas. Hold Shift while dragging to keep the shape equal and press the Up or Down arrows on your keyboard to add or remove points of the star until there are six to eight points.
Select the shape and set the Fill swatch to None in the toolbar, leaving just the outline. Typically, this will be black in the Stroke swatch, but you can choose another color if you wish.
You can turn your Illustrator illustrations into animations using After Effects. Include other simple shapes for some extra movement.
Step 2: Round the Inner Corners
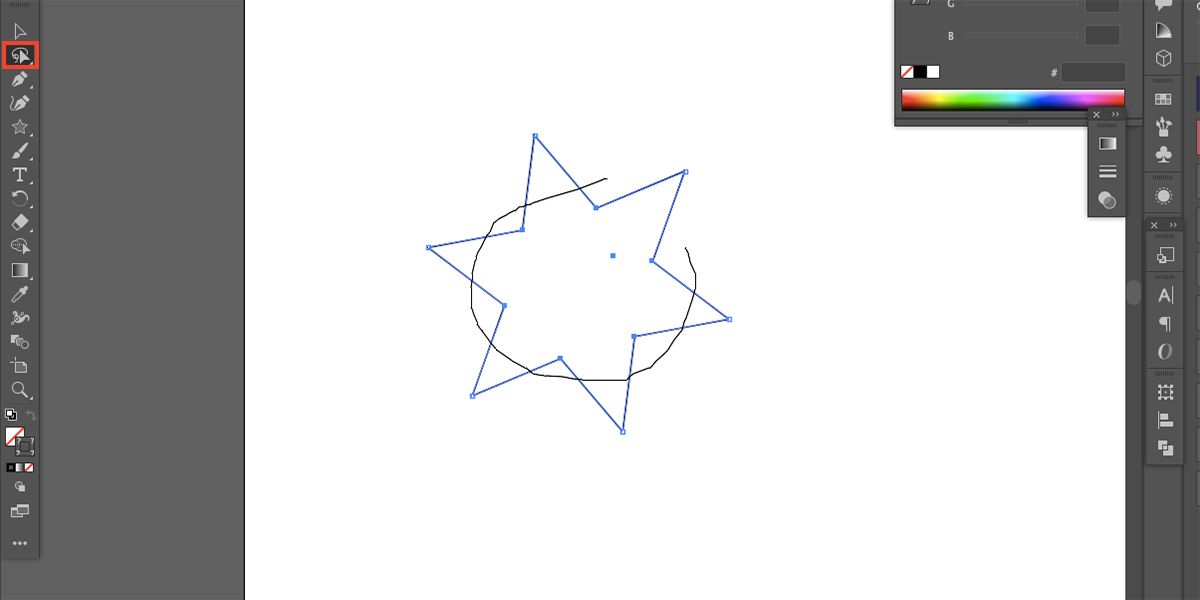
To take your shape from star to web, the inner corners need to be rounded. Select and hold the Direct Selection (A) tool in the toolbar until the other tools appear; select the Lasso tool. Draw a circular selection so all the inner corners are inside the selection, and the outer corners—the outward points of the star—are outside the selection.
You’ll know which corners are selected as their anchor points will be solid blue squares. The unselected anchor points will be blue square outlines.
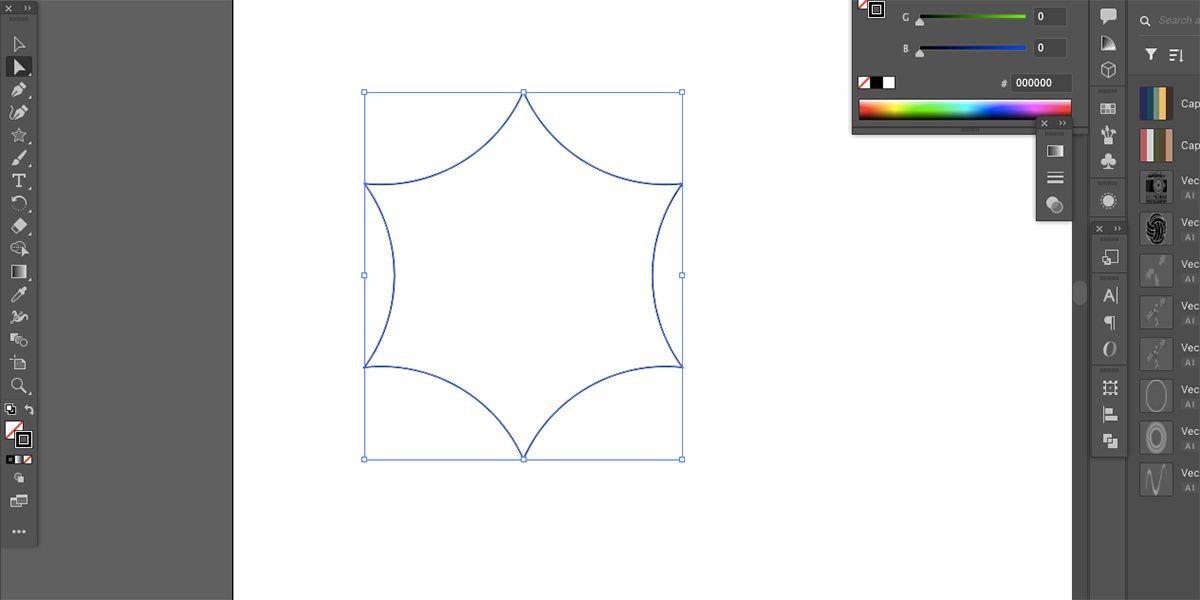
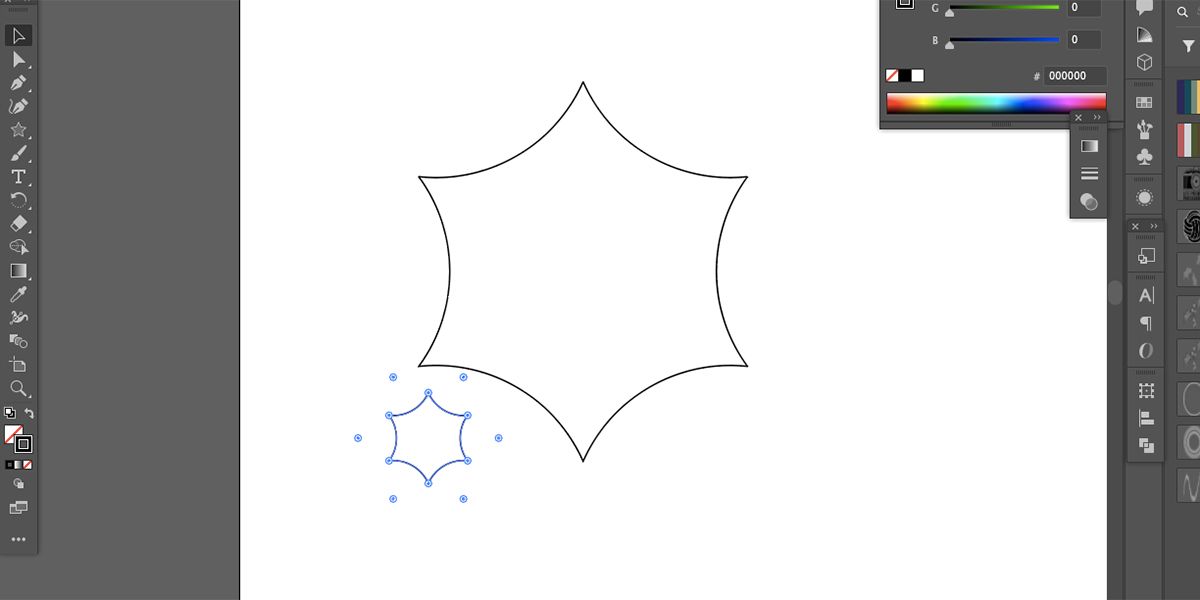
Once selected, select the Direct Selection tool and hover your cursor over one of the selected anchor points until a circle appears. Click and drag the circle outward to round the corners. This gives you a traditional web outline.
Step 3: Duplicate, Resize, and Align
Duplicate your shape by selecting it and copying it (Cmd + C on Mac or Ctrl + C on Windows) and then pasting it (Cmd + V on Mac or Ctrl + V on Windows). Select the duplicated outline. Hold down Shift while clicking and dragging one of the corner anchor points inwards.
Now you have a large outline and a smaller outline of the same shape.
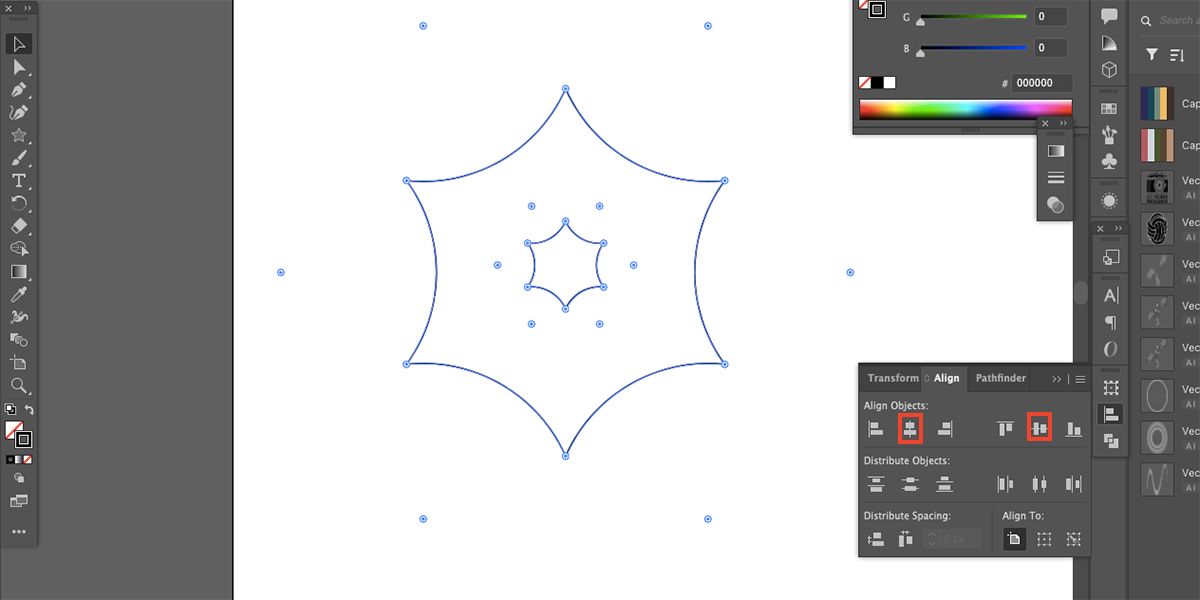
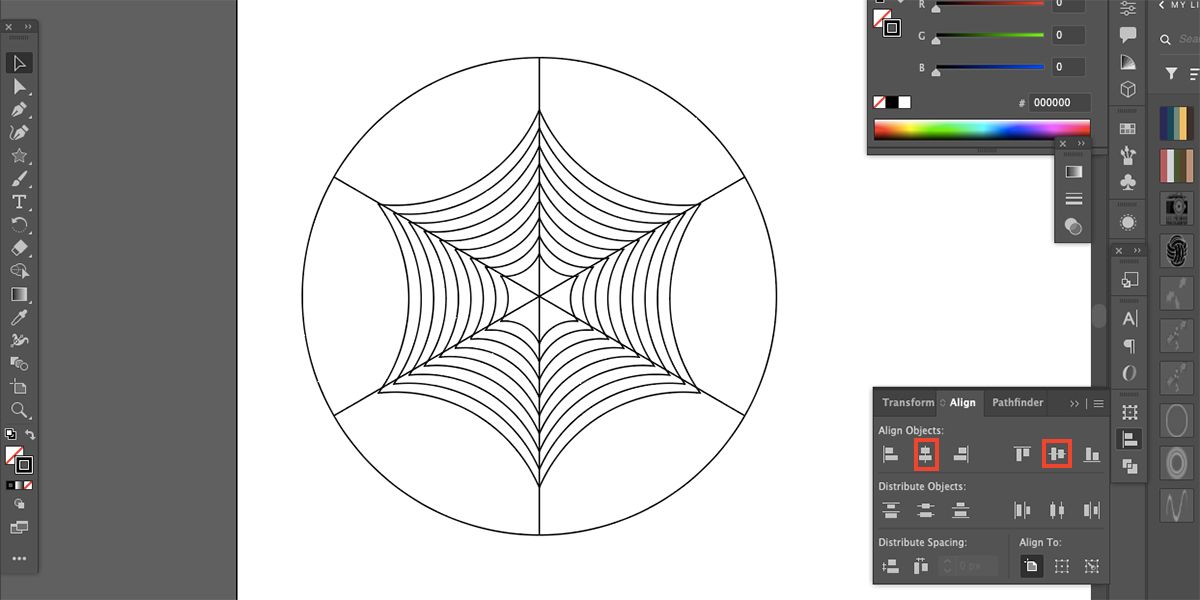
Go to Window > Align to open the alignment features. Select both outlines then select Horizontal Align Center and Vertical Align Center. This will center them on one another.
Step 4: Create the Web Layers
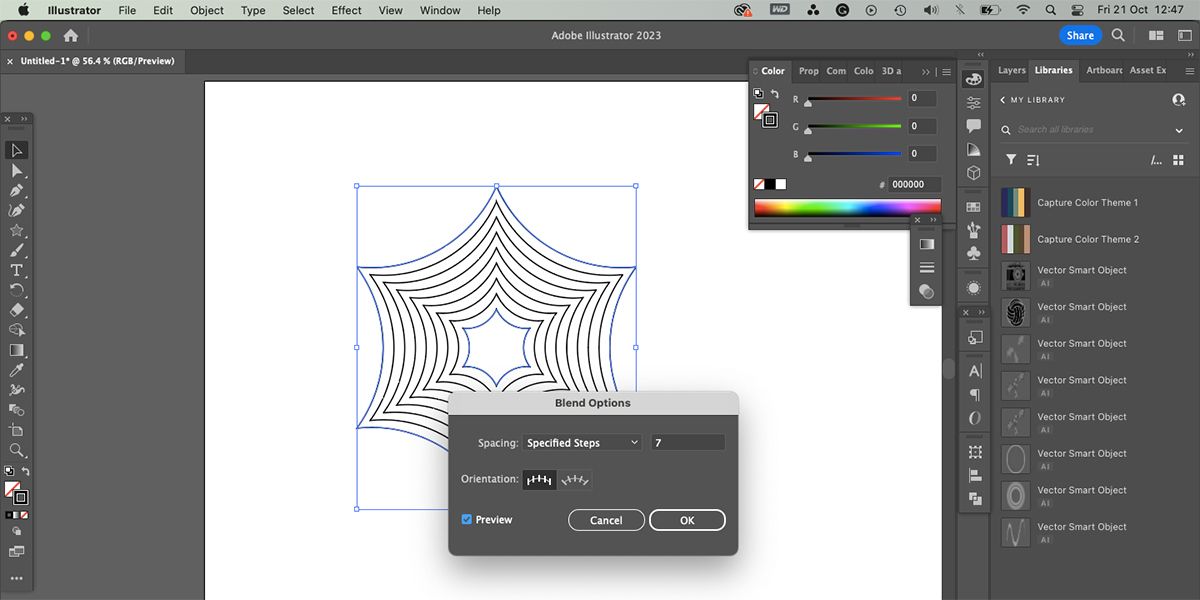
With both outlines selected, go to Object > Blend > Make. Then to Object > Blend > Blend Options. Set the Spacing to Specified Steps and choose somewhere between 6 - 10.
This creates the layers in the spider web. Click Preview to see how it looks and when you’re happy, select OK.
If you're creating this illustration for a Halloween project, check these sites to get into the Halloween spirit, it might help inspire other illustration ideas.
Step 5: Draw a Polar Grid
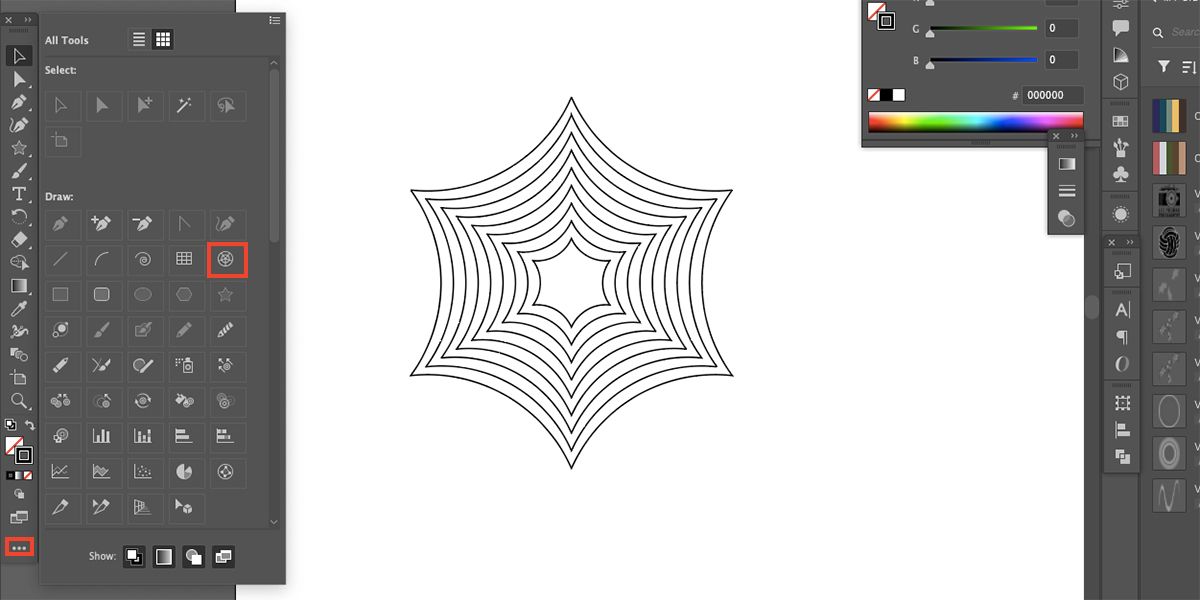
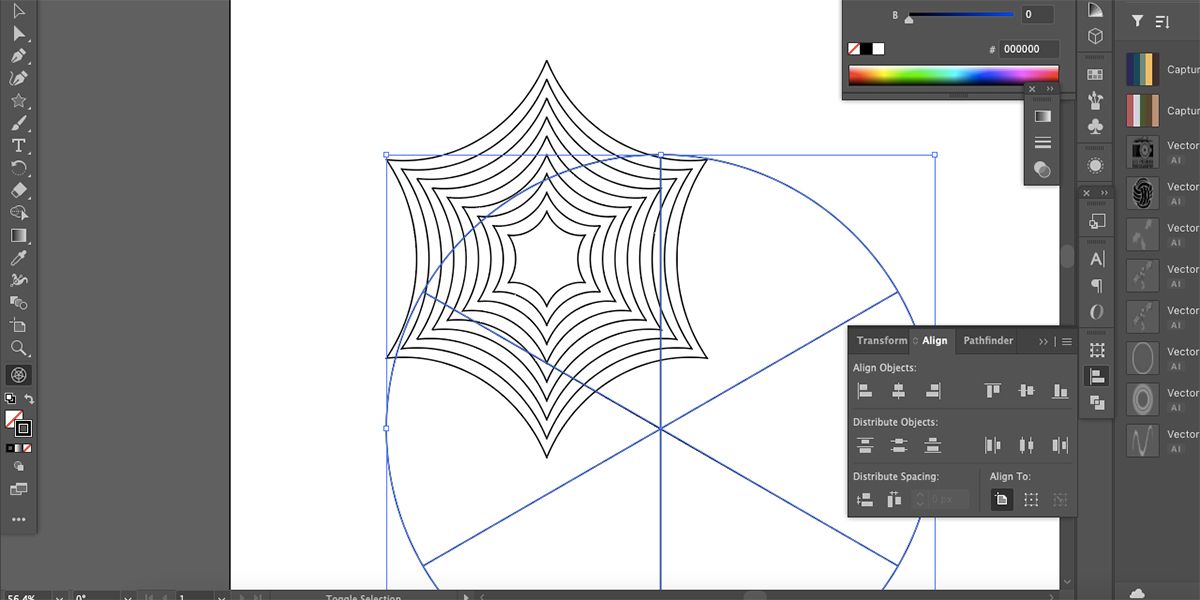
To add the spines to your web, draw a grid using the Polar Grid tool. To find this tool, select the Ellipse at the bottom of the toolbar to reveal a larger toolbar. The icon is a circle with lines from the center to the edge. Select it then exit out of the extra toolbar to use it.
With the Polar Grid tool selected, draw a circle by clicking and dragging over the same space where your spider web is drawn. Hold Shift for an equal circle, press the Down arrow to remove internal circles, and press the Left or Right arrows to add spines. If you made a seven-point star, you should have seven spines in the circle.
Step 6: Align and Clean Up the Lines
Select both the polar grid and the web shape and use the Align tools to center them to one another. If the spines don’t line up exactly with the points of the web shape, you may need to rotate the polar grid or resize it to fit better.
To remove the outer circle, use the Direct Selection tool (A) and select the large circle. Press Delete on your keyboard until the circle has disappeared.
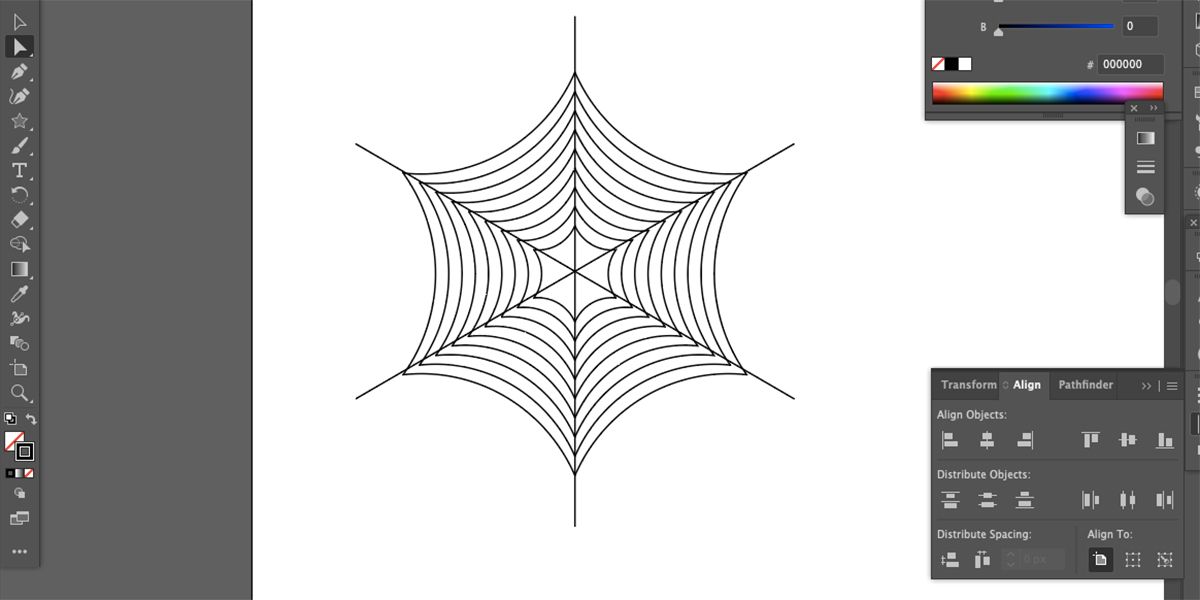
With the Selection tool (V), drag over both shapes to select them. Open Window > Pathfinder and select Unite. Then go to Object > Expand > OK.
Once you've finished the spider web, complete your artwork with it and save your Adobe Illustrator project. You can even sell your illustration or design work online.
Spice Up Your Illustrations With a Spooky Spider Web
The only thing left to do is to use your spider web. You can create spooky scenes or pictures of spiders. This spider web technique saves time and ensures an balanced-looking web that can be edited for any use.
You can add more features to the web, delete parts of it to create a broken web effect, or change the colors. Using Illustrator’s shape tools and blend function saves a lot of time for you to illustrate other elements.

