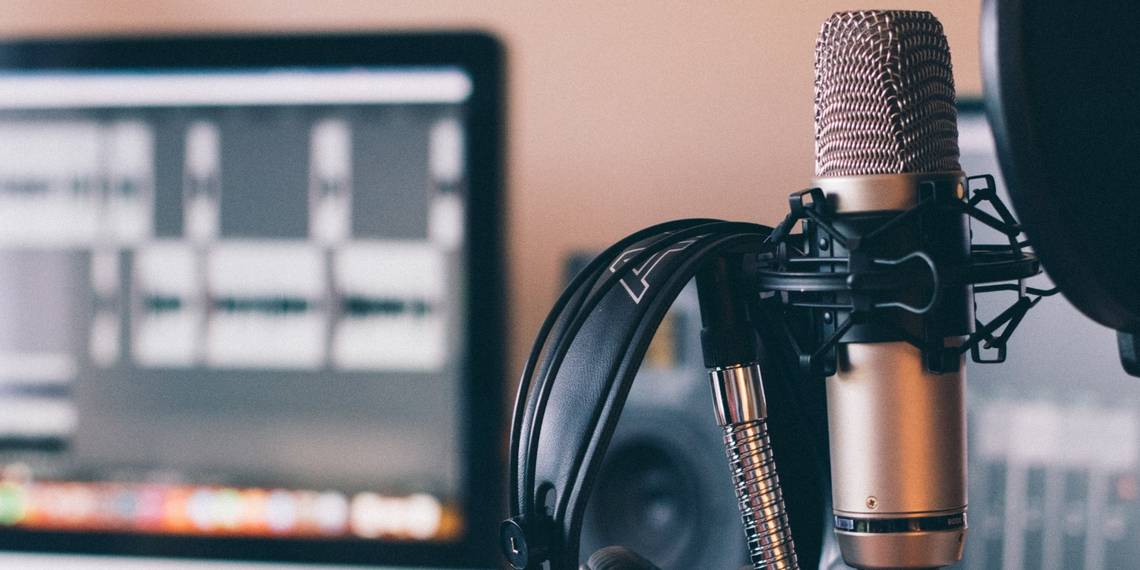
Whether you run a podcast, create voice-overs, or record vocals for music, the condition of your sound can make or break your success. However, PC microphones have limited capabilities, so the best way to guarantee top-quality content is to connect an audio interface to your PC.
If you're after professional-sounding material, read on, and we'll show you how to connect an audio interface in Adobe Audition so that you can produce the highest quality sound.
How to Connect an Audio Interface in Adobe Audition
For this tutorial, we are using a MacBook Pro and Focusrite Scarlett 2i2 interface. Adobe Audition is also available for download on Windows.
Connecting the Interface
To start, connect the interface to your PC with a cable. Most audio interfaces use a USB-C connection, which you can find on the back of the interface. If you're using a 2015 MacBook model or later, you'll need a double-ended USB-C cable (the MacBook charger works perfectly fine for this), while other PCs require a USB to type-C cable.

The PC is what powers the interface, so if it's connected properly, you should see some indication of such. With a Focusrite, the lights in the front of the interface turn on. And if you're an Apple user but you don't have an interface yet, there are plenty of great audio interfaces for Mac that you can buy.

Once you've made sure the interface is connected and powered on, you can go ahead and connect your microphone. You'll likely need to connect the microphone via an XLR cable, and you can use any slot available on the interface, but keep in mind what number input the cable connects to because it will affect your configuration inside Adobe Audition.

If it's your first time using the platform, we recommend familiarizing yourself with these useful Adobe Audition terms to make the most of your experience.
Configuring the Audio Inside Adobe Audition
You want to set up Adobe Audition to record and play back audio, so you need to configure the audio inside the software by following these steps:
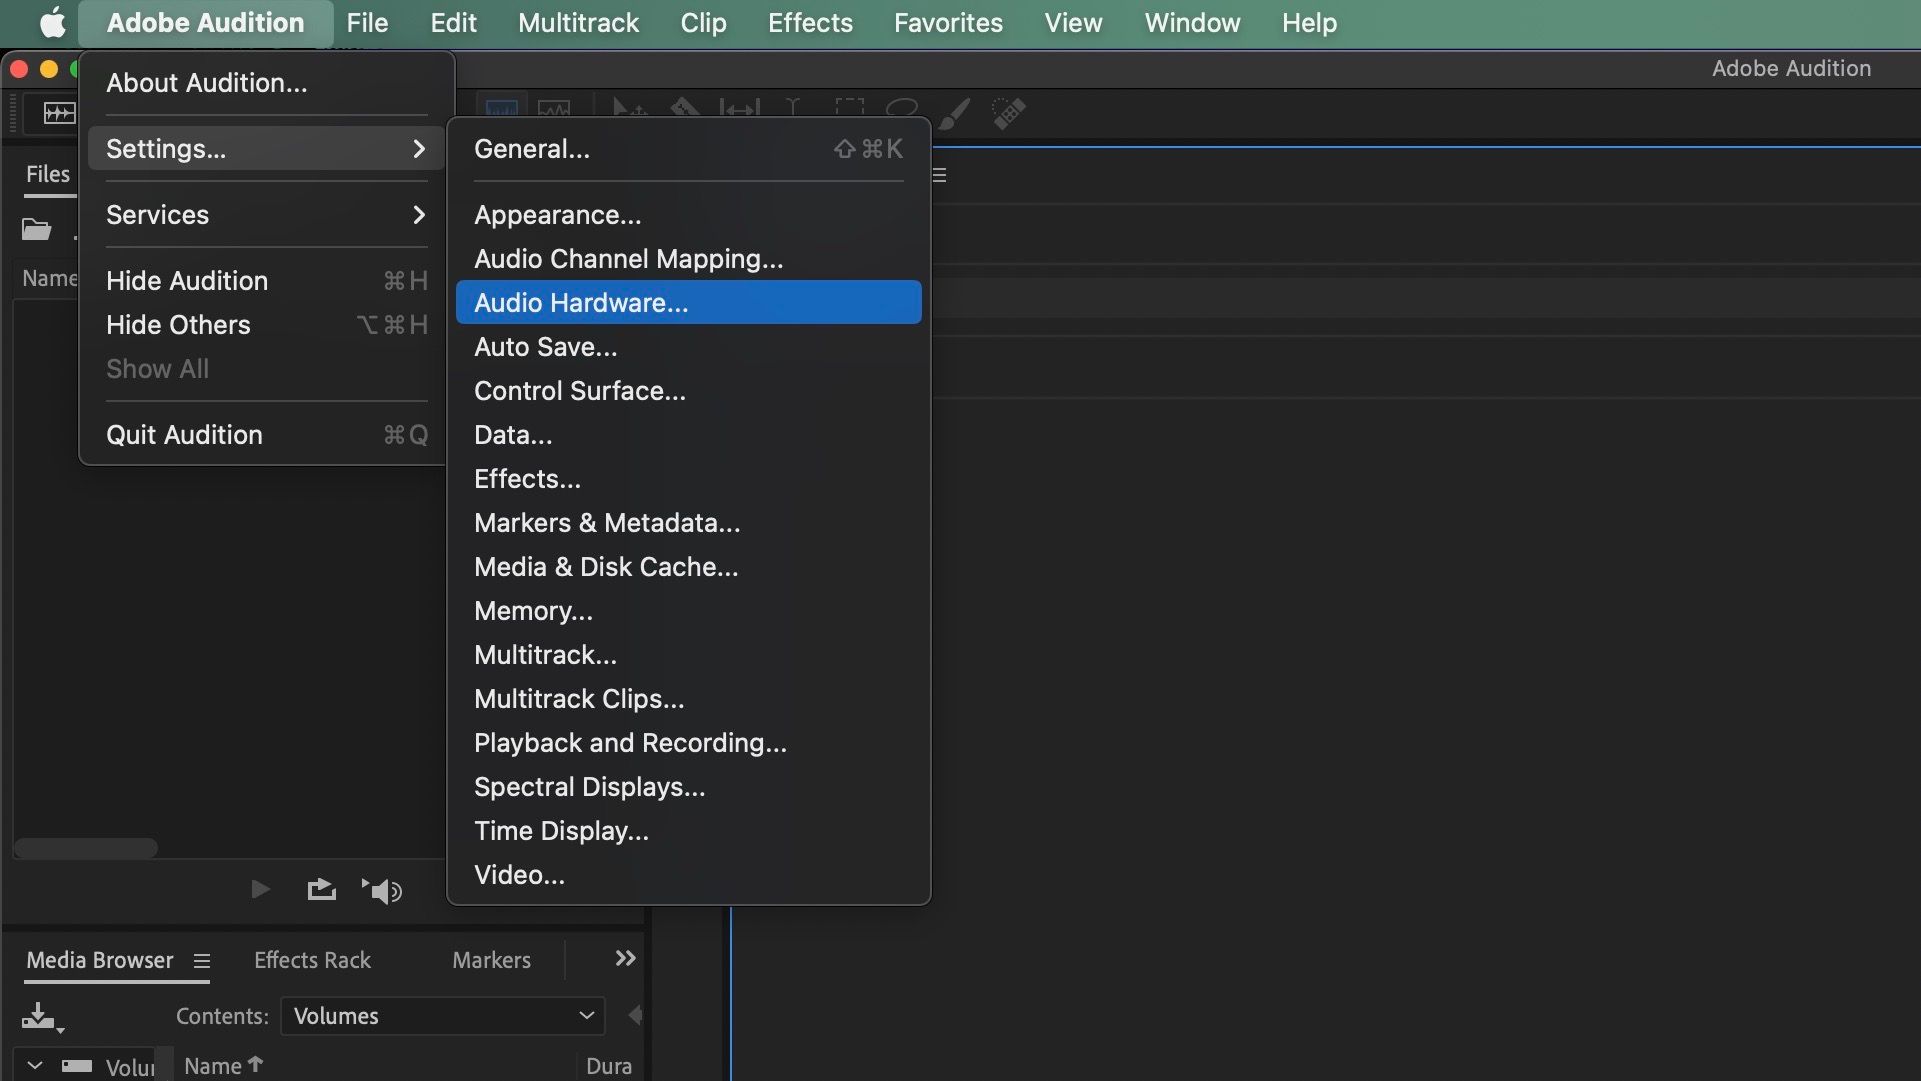
- Click on the Adobe Audition menu in the top right corner on Mac, or the Edit menu on Windows.
-
Scroll down and click on Settings, and then Audio Hardware.
-
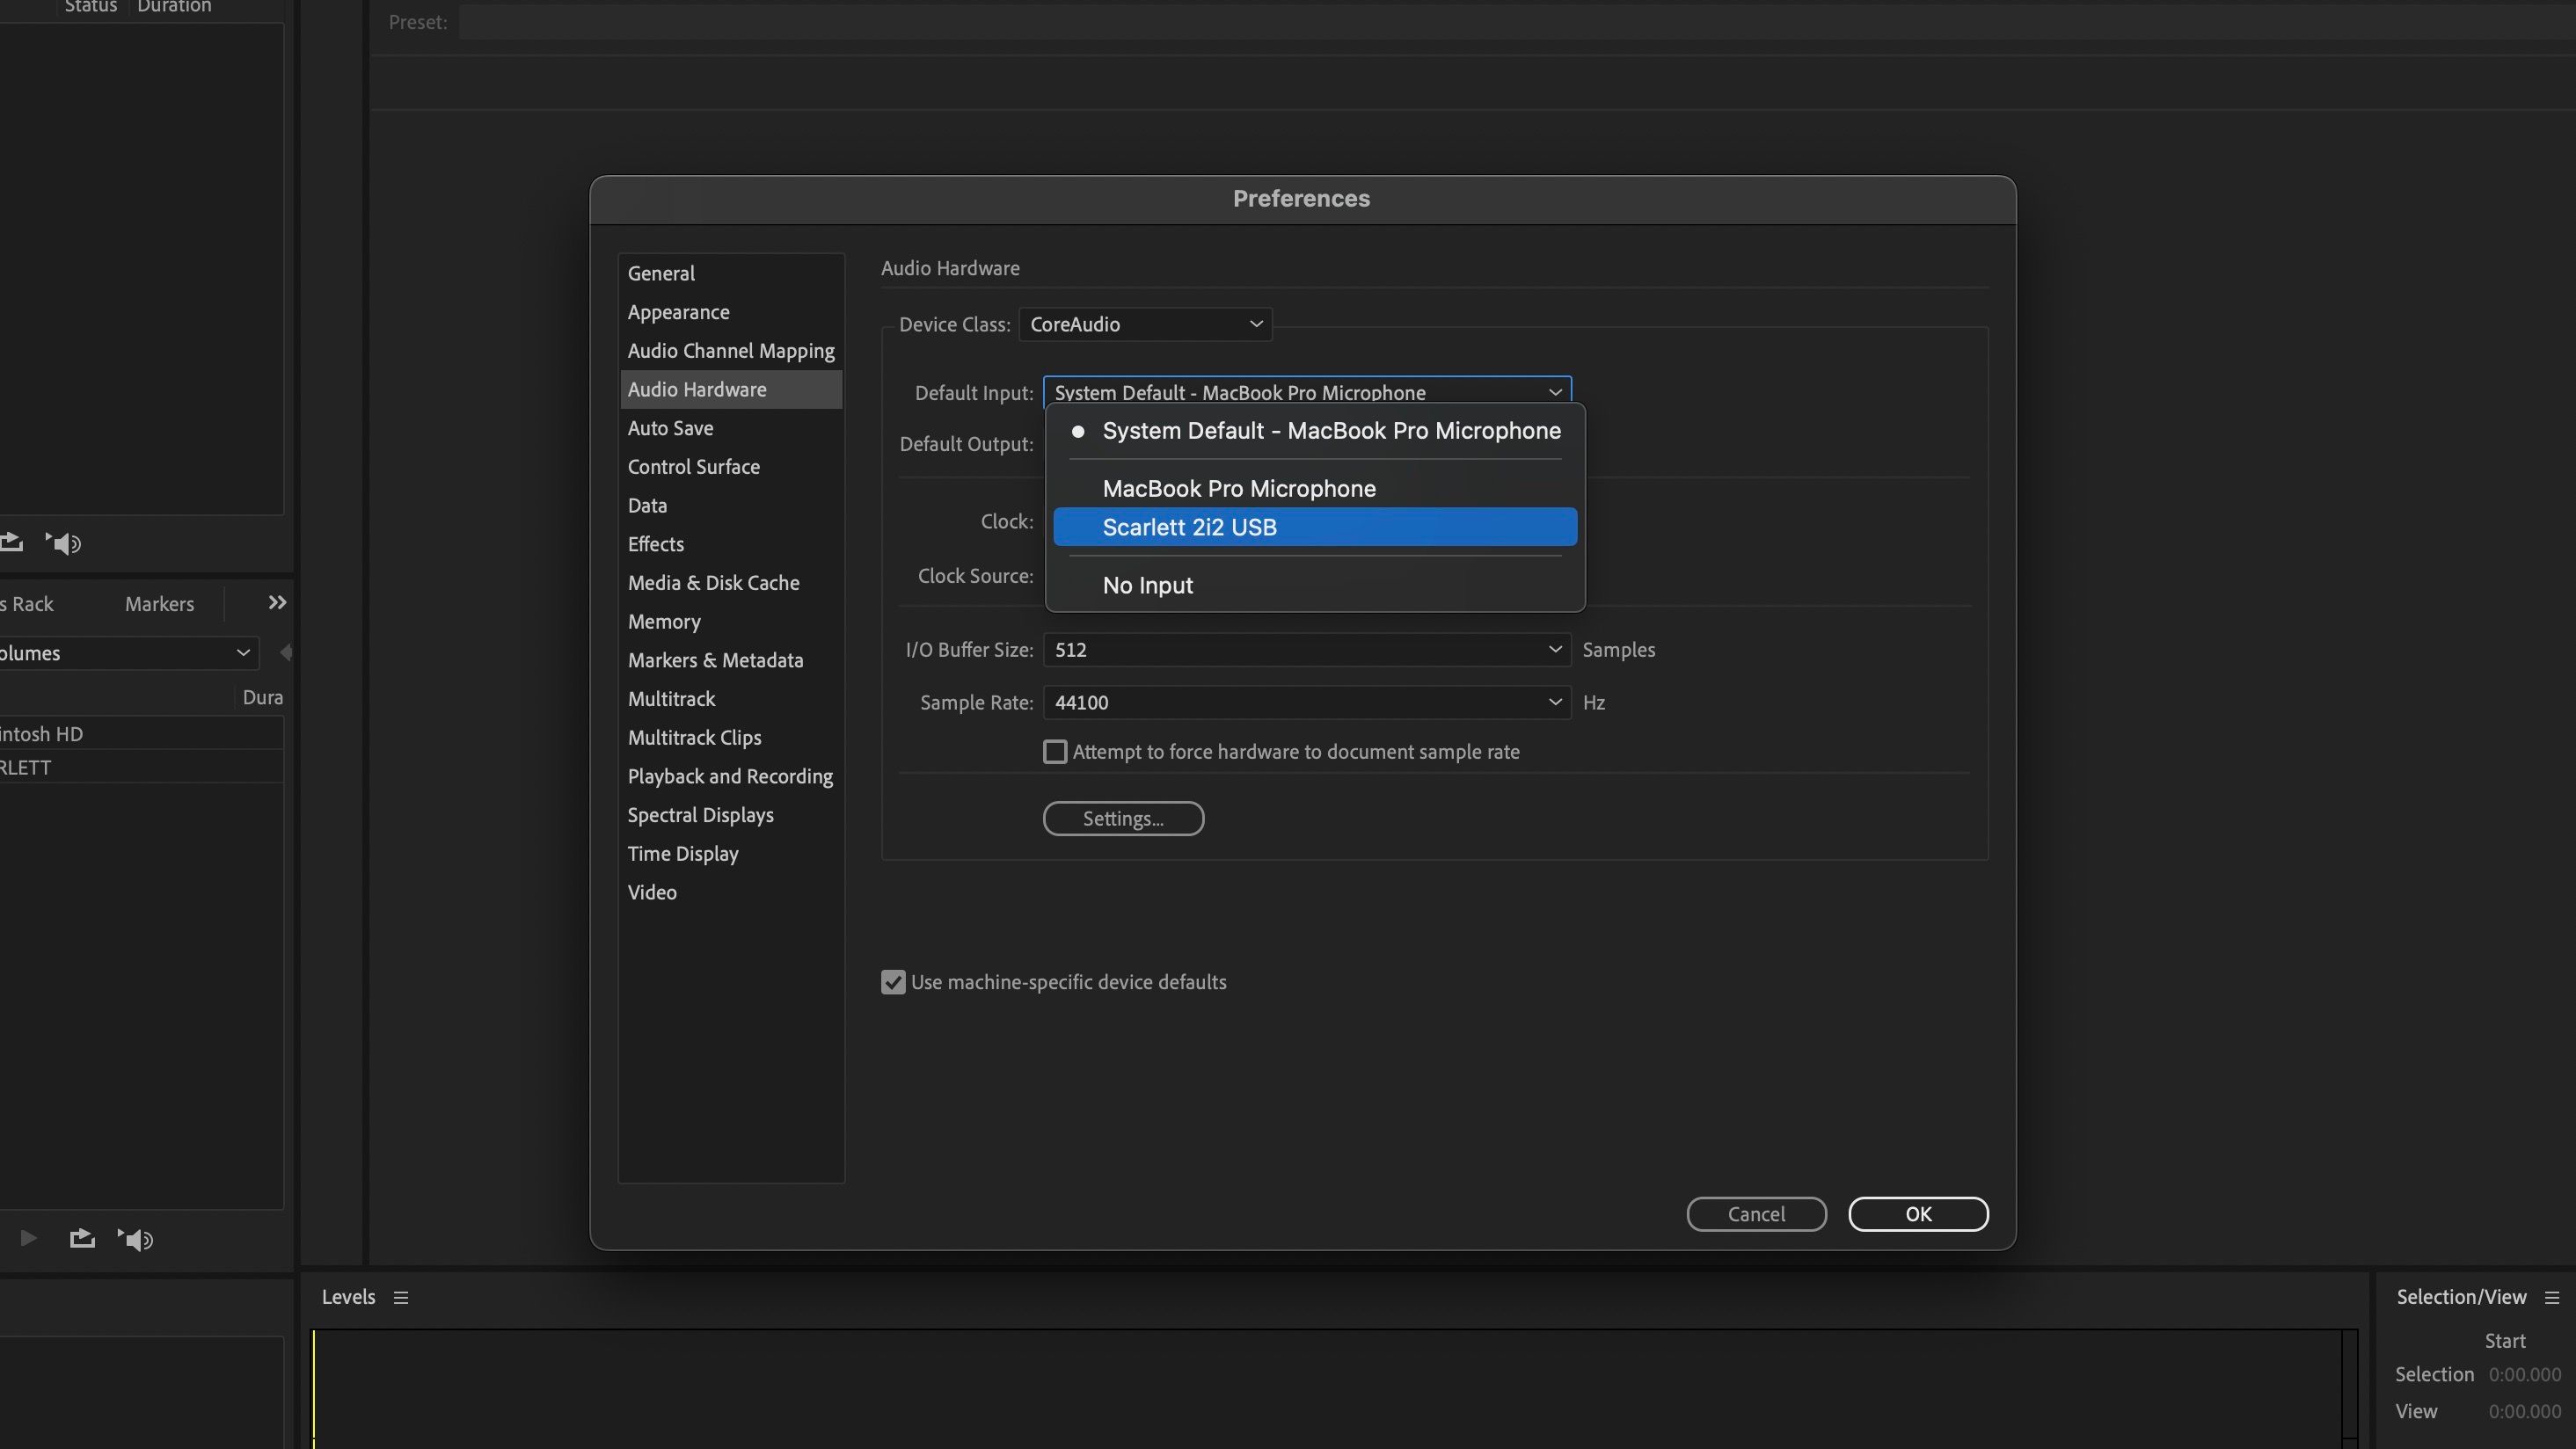
In the Preferences menu, locate Default Input and Default Output under Audio Hardware. Make sure to change both of these to your audio interface. You can do so by clicking on the arrow-down button and selecting the name of your interface.
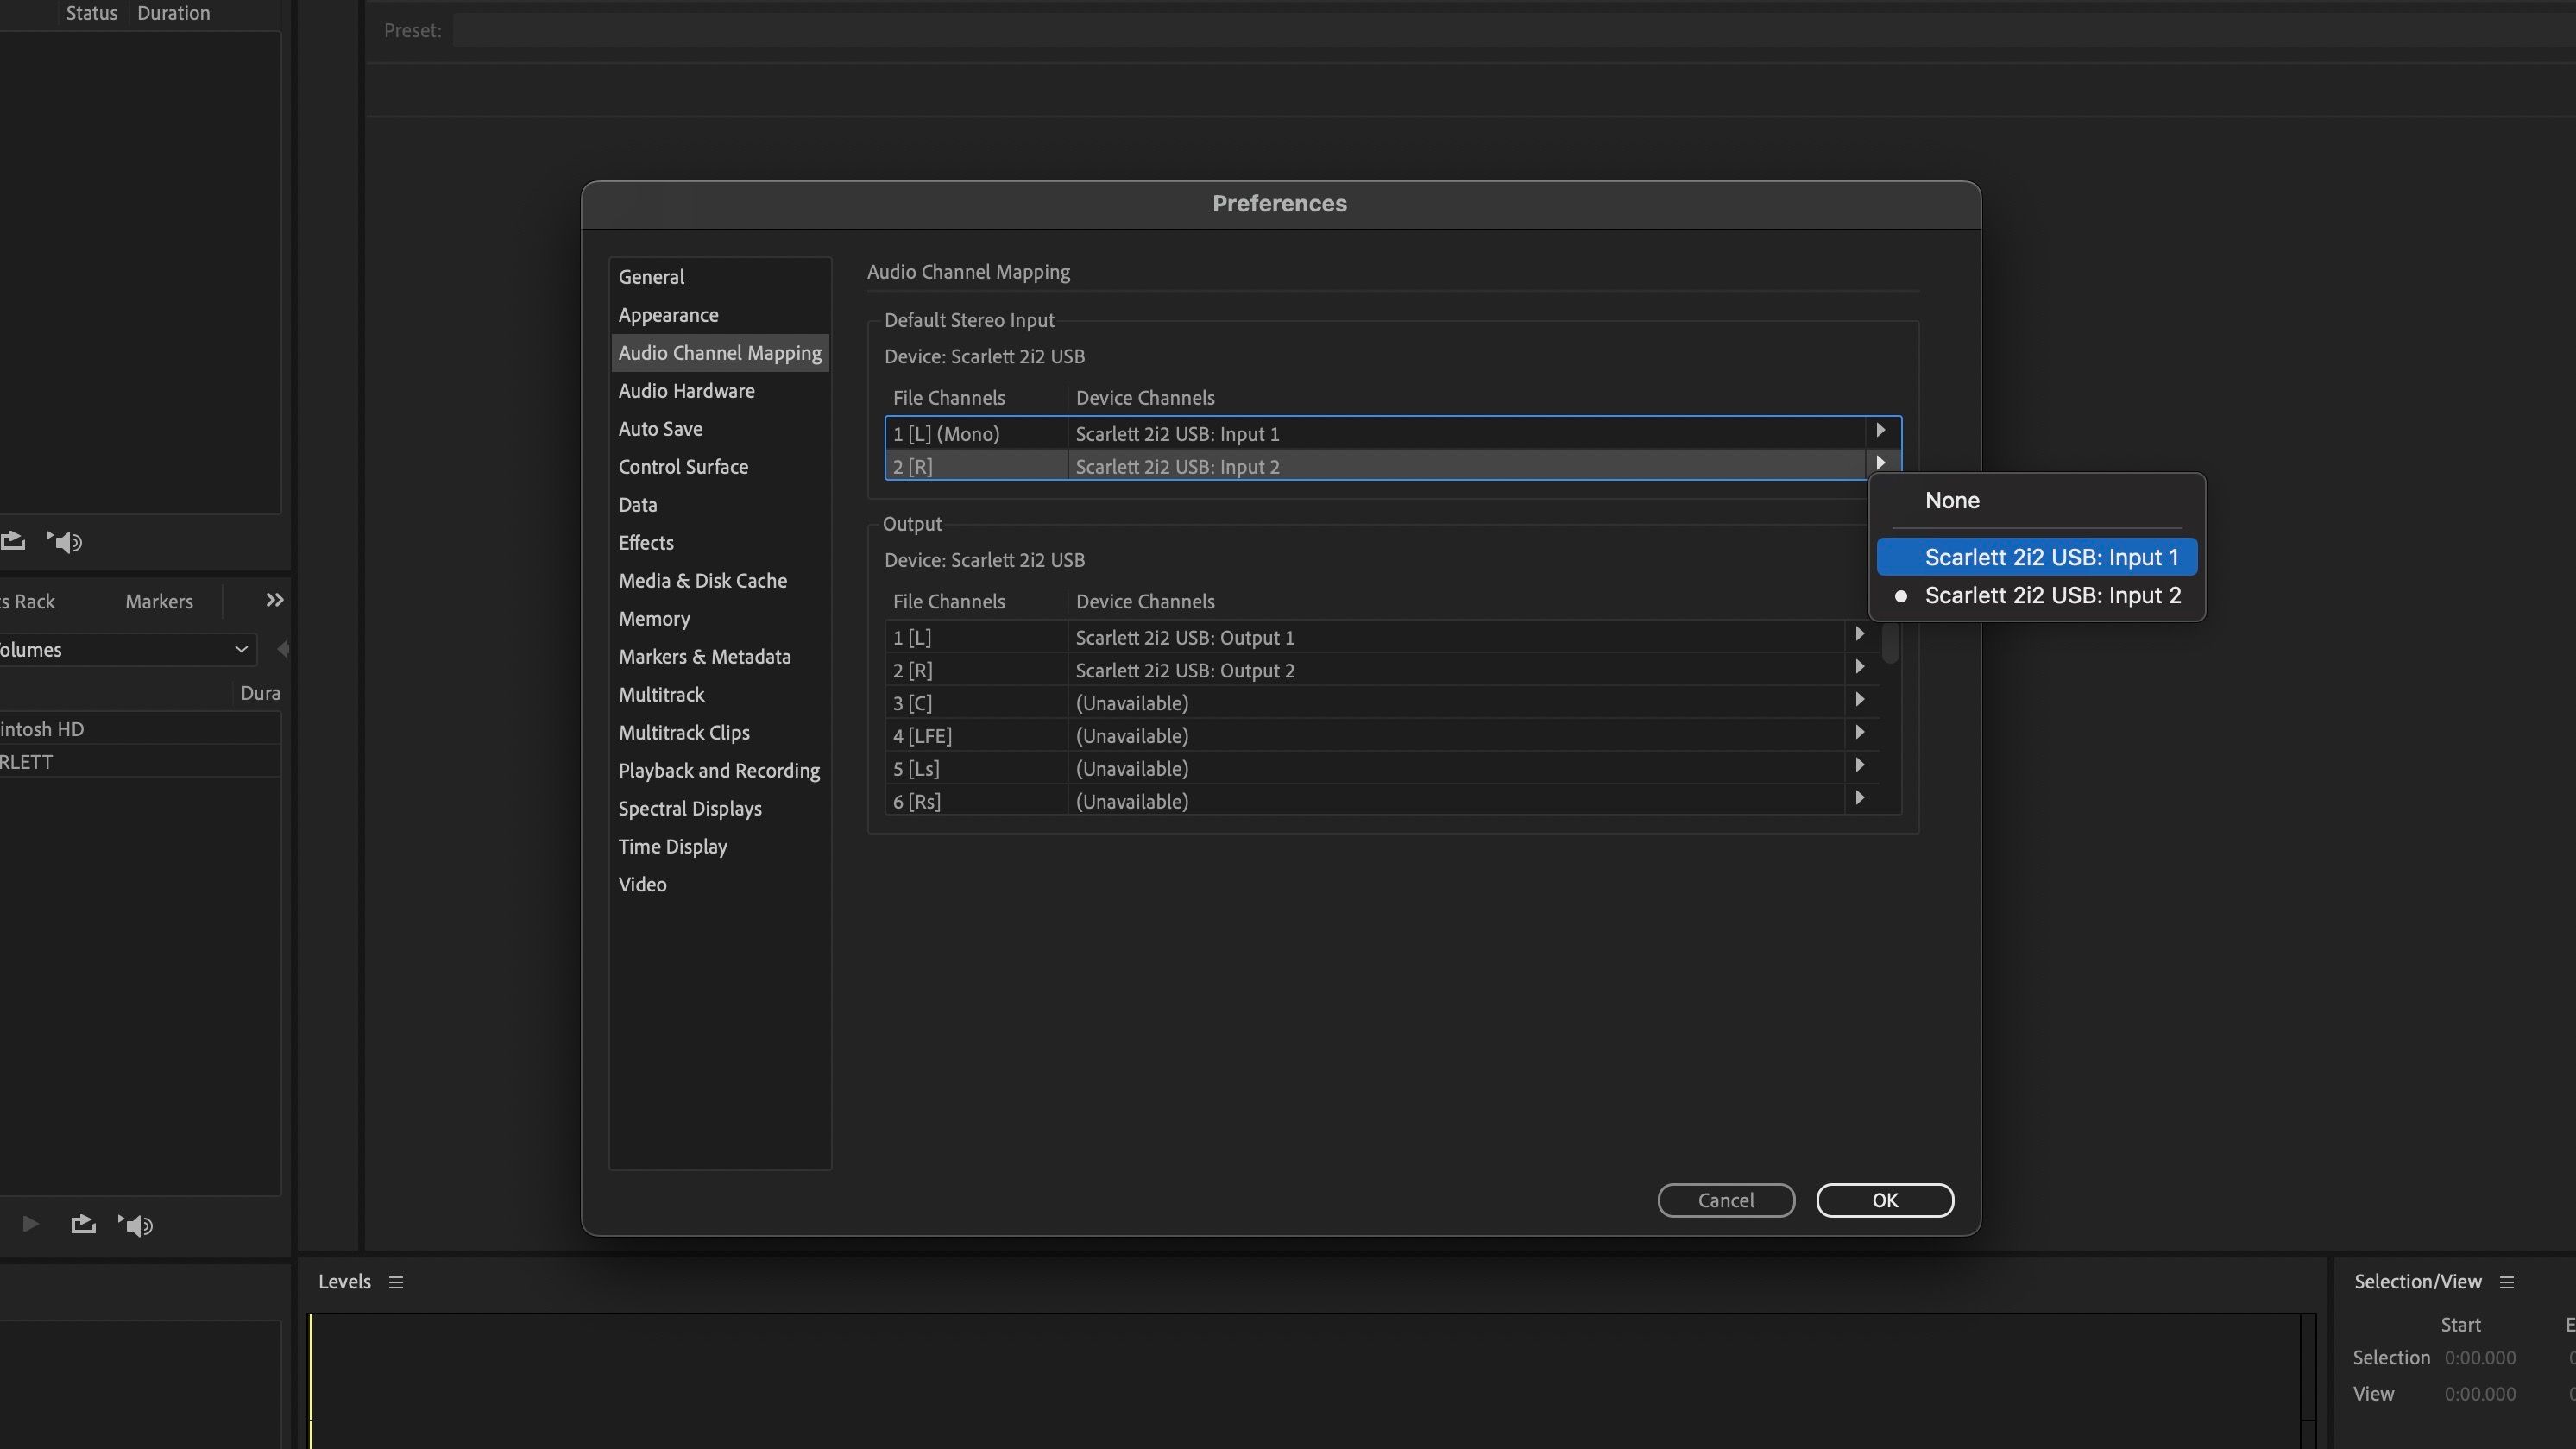
- Before leaving the menu, click on Audio Channel Mapping on the left.
- Now change both Device Channels under Default Stereo Input to Input 1 (if your cable is connected to Input 1) on whatever interface you're using.
-
Lastly, make sure the left output (L) under File Channels is connected to Output 1 of your interface; the right output (R) should be connected to Output 2 of your interface.
- When you're done configuring the audio interface, click OK.


Test the Audio
Now you need to test the audio to make sure your audio interface is configured properly:
-
Click the red record button and a menu will automatically pop up.
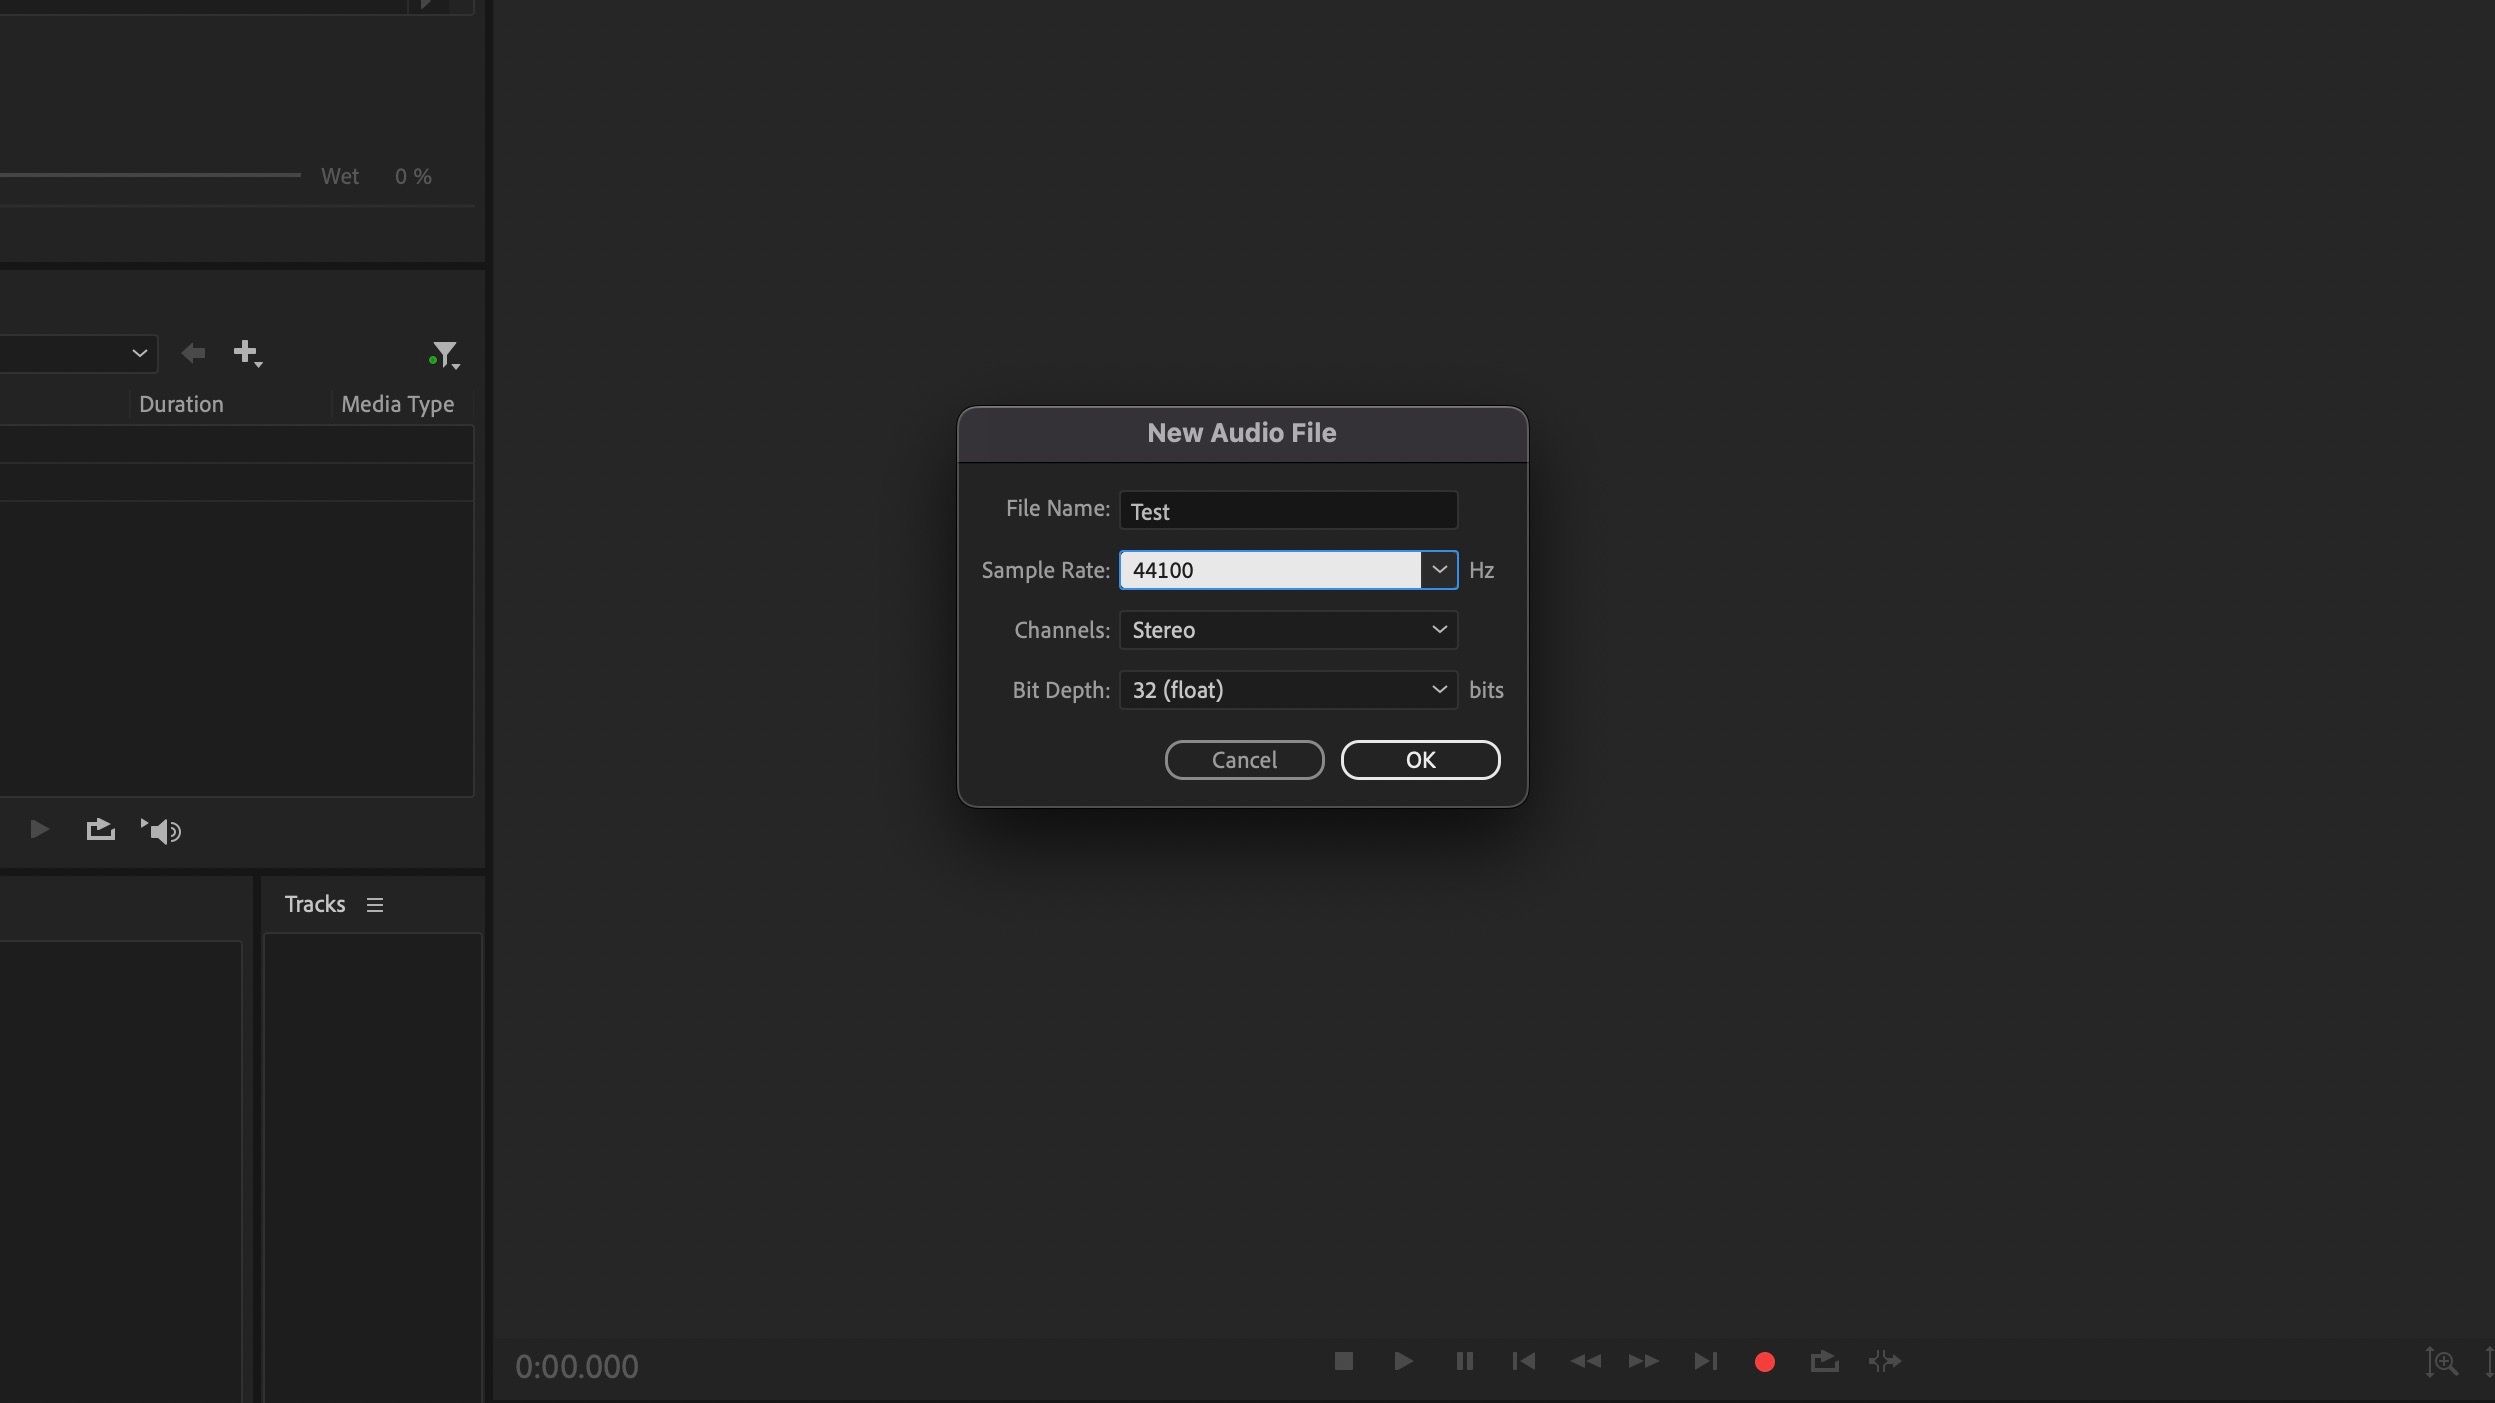
- Give your track a File Name so that it's easier to locate.
- Next, for audio only, change the Sample Rate to 44100, and 48000 for video.
- You can then check that the Channels option is correct; it will likely be Mono if you're narrating, and Stereo if you're recording vocals for a song.
- Lastly, the Bit Depth can typically stay at 32.
- Press OK and the track will immediately begin recording the audio, so be prepared.

You'll know that you've configured the interface accurately if you see the audio waveform.

If all your settings for the interface are configured right but there seems to be no audio during the playback, there are a few ways to fix quiet audio in Audition, so don't feel disheartened just yet.
Record Like a Professional
Connecting an audio interface in Adobe Audition really takes the recorded sound the extra mile. It doesn't matter if you're a seasoned professional or just starting out—the high-quality results will make any listener believe you're experienced.
But there are limits to what the platform can do, so practice your mic technique too, and with an audio interface in Adobe Audition, you'll be recording like a pro in no time.