It’s one of the first tasks any budding Photoshop user wants to know: how can you digitally add someone to your photos? It's a great way to add people to gatherings of family and friends or edit yourself into locations you can't visit right now.
We’ll guide you through the basic steps you need to know to place subjects into your photos.
Selecting Your Subject
Start by opening the image of your subject. Ideally, you want to use a picture with a plain background, as this will be easier to edit. Also, consider the angle of both pictures you’re trying to composite—a subject shot from a high angle against a low-angle background won’t work.
Armed with your subject image, you need to tell Photoshop which part (or parts, if you’re trying to add multiple people) you want. There are several ways to do this:
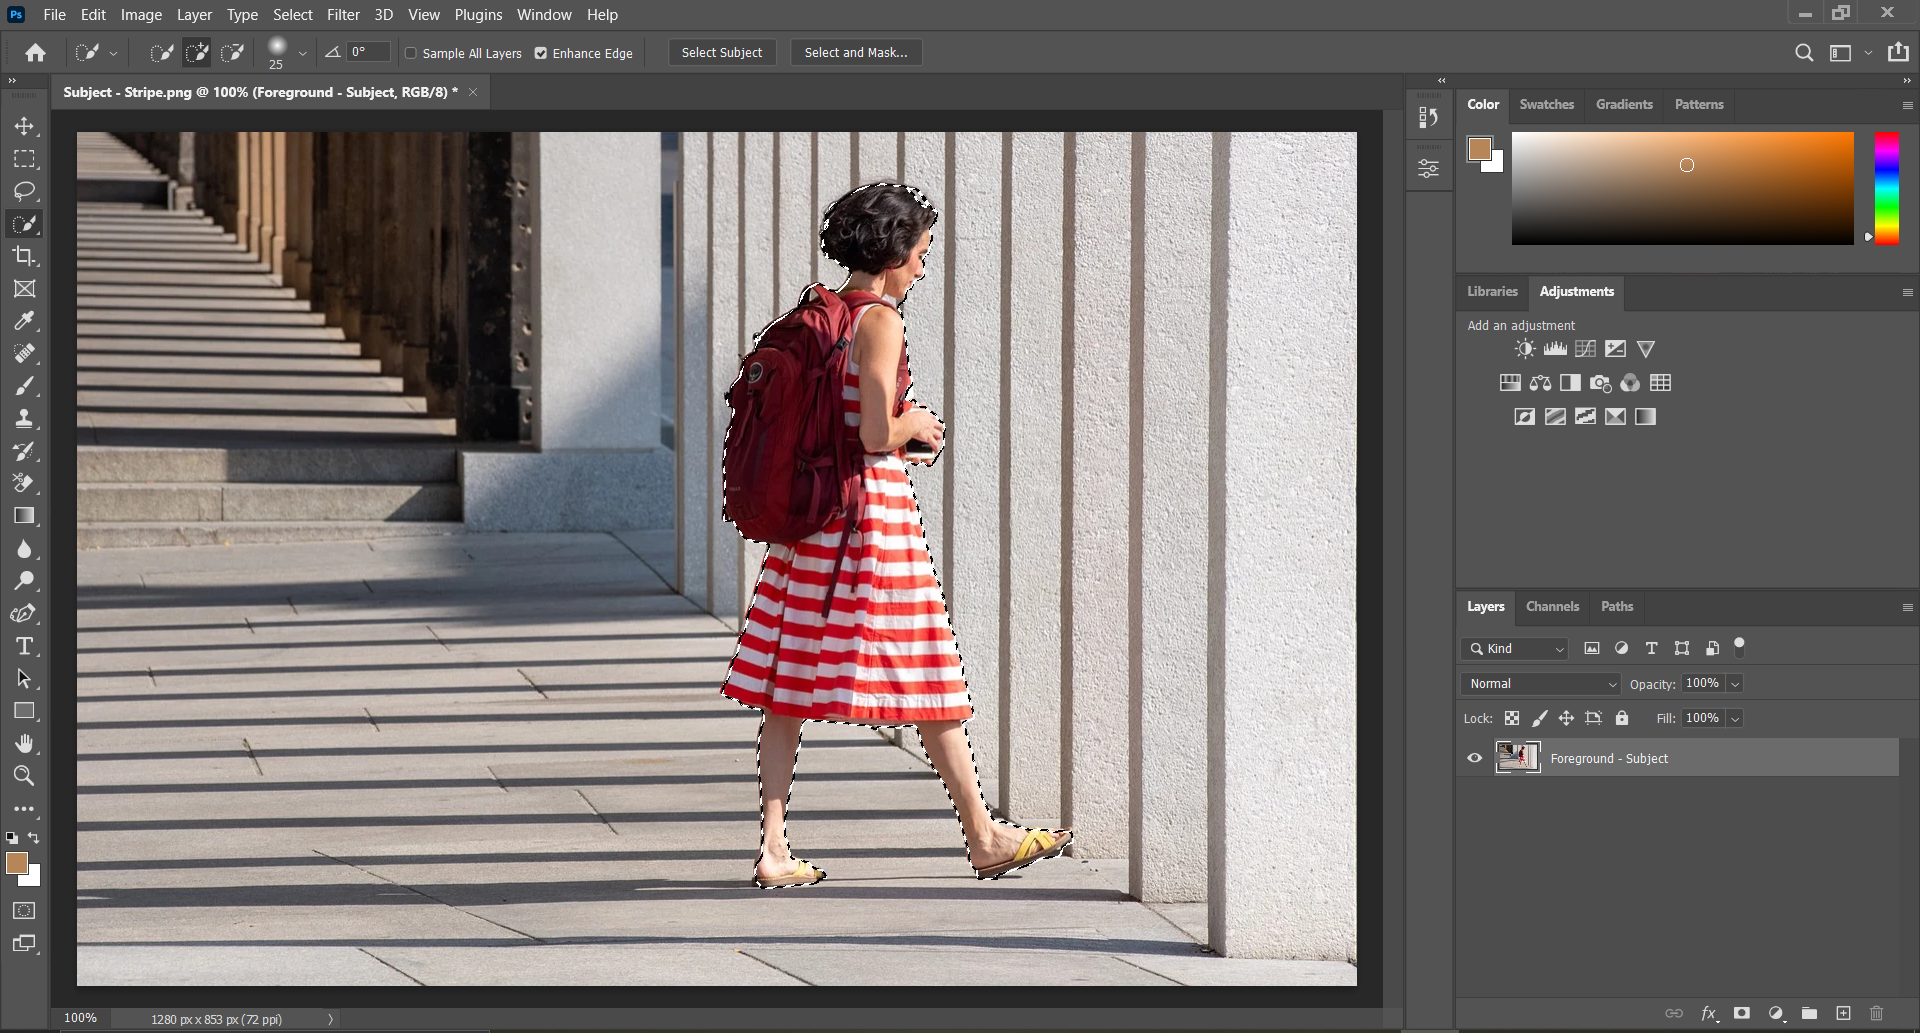
- The easiest way is to use the Quick Selection Tool. Once selected, run the cursor over your subject until the black-and-white line forms around their outline.
- If you’re using the latest version of Photoshop, click Select > Subject. After processing your command, an outline appears around the person.
- Use the Lasso Tool to draw freehand around them.
- For a more precise cutout, use the Pen Tool. Click multiple points to draw around the person you want in your composite image. After creating this, right-click and choose Make Selection.
With your subject selected, choose Select > Select and Mask.
Adjusting Your Selection
Now it’s time to check where your outline needs tweaking. Unless you have the steadiest hand in the world, you won’t have captured every part of your subject.
A good way to check if you’ve accidentally lopped a part of their body or selected an unwanted part of the background is to switch the View Mode from Onion Skin to On Black (or On White if your subject is against a very dark background).
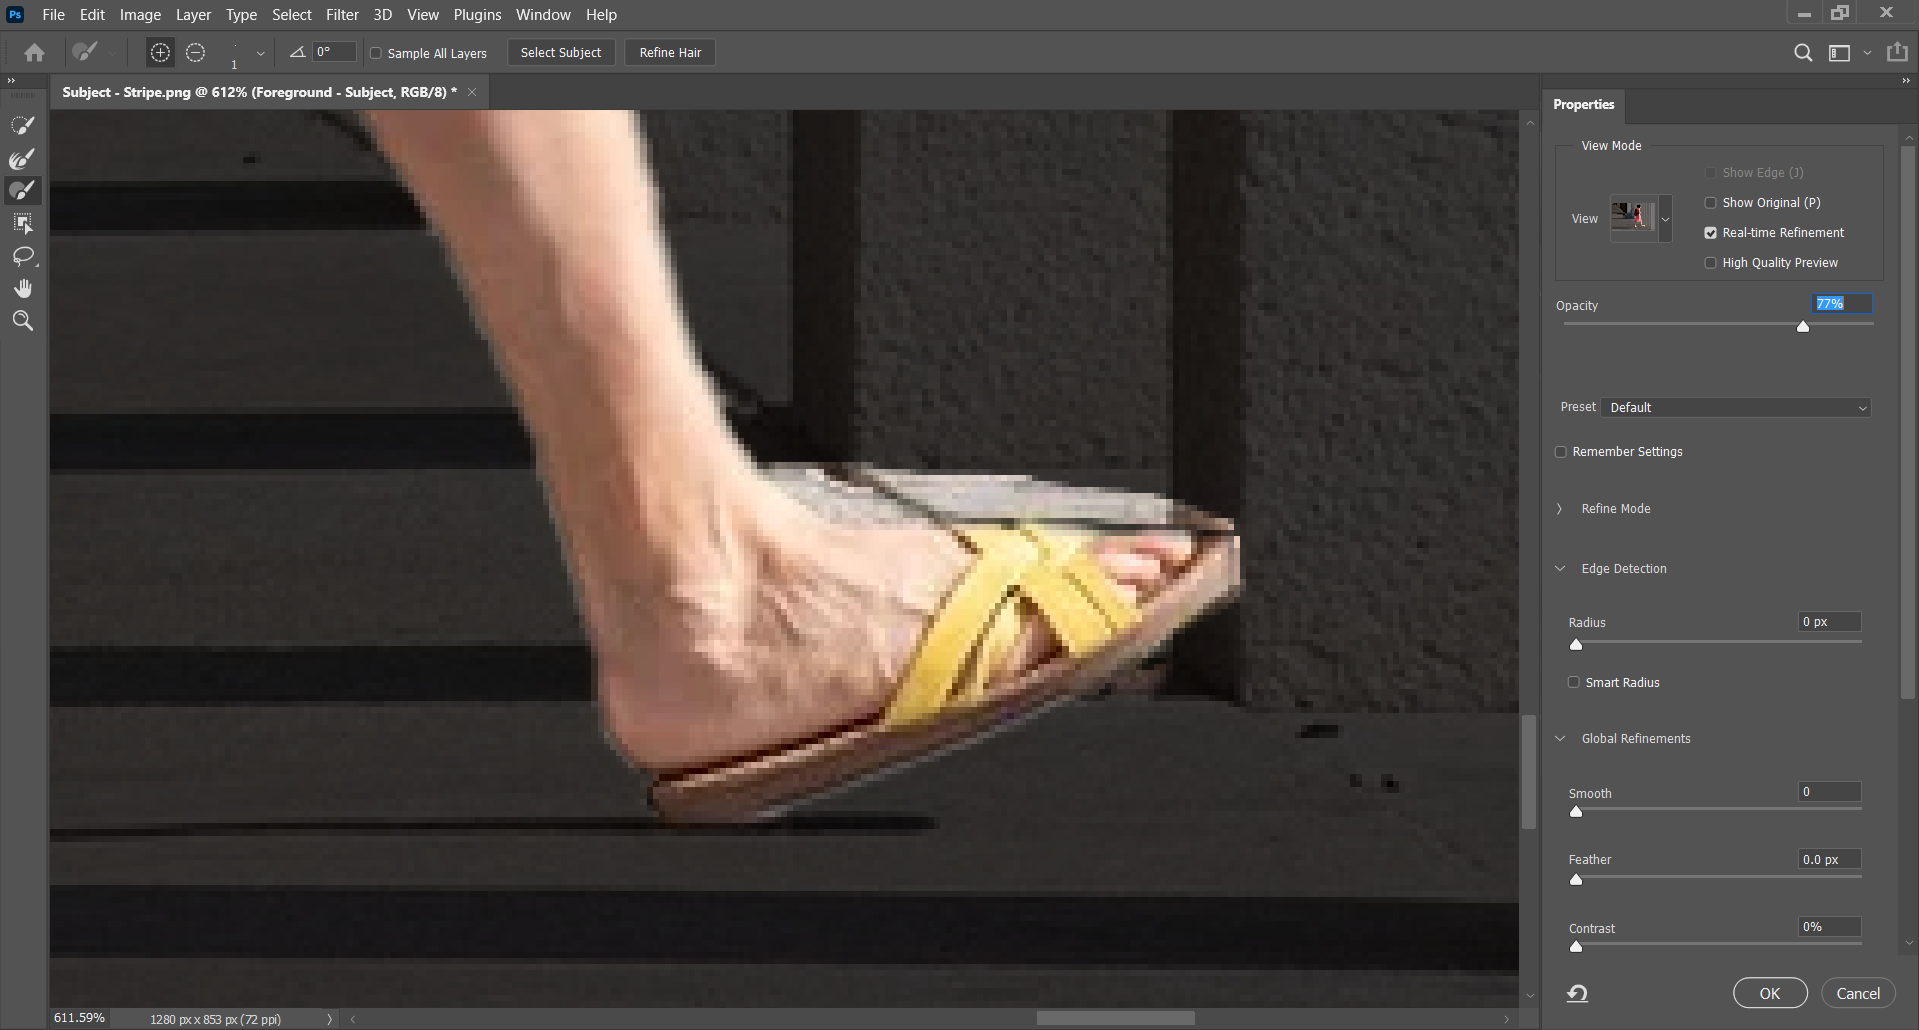
Use the Quick Selection Tool or, for greater accuracy, the Brush Tool to reveal any part of your subject that’s hidden from view.
To remove parts of the outline, regardless of which tool you use, hold down Alt as you move the cursor. Remember, in Photoshop, black hides elements of your image, while white displays it.
This is a finicky step. Take your time sweeping over these edges, changing the pointer size, and zooming in to catch every rogue pixel if necessary.
Refining Your Cutout
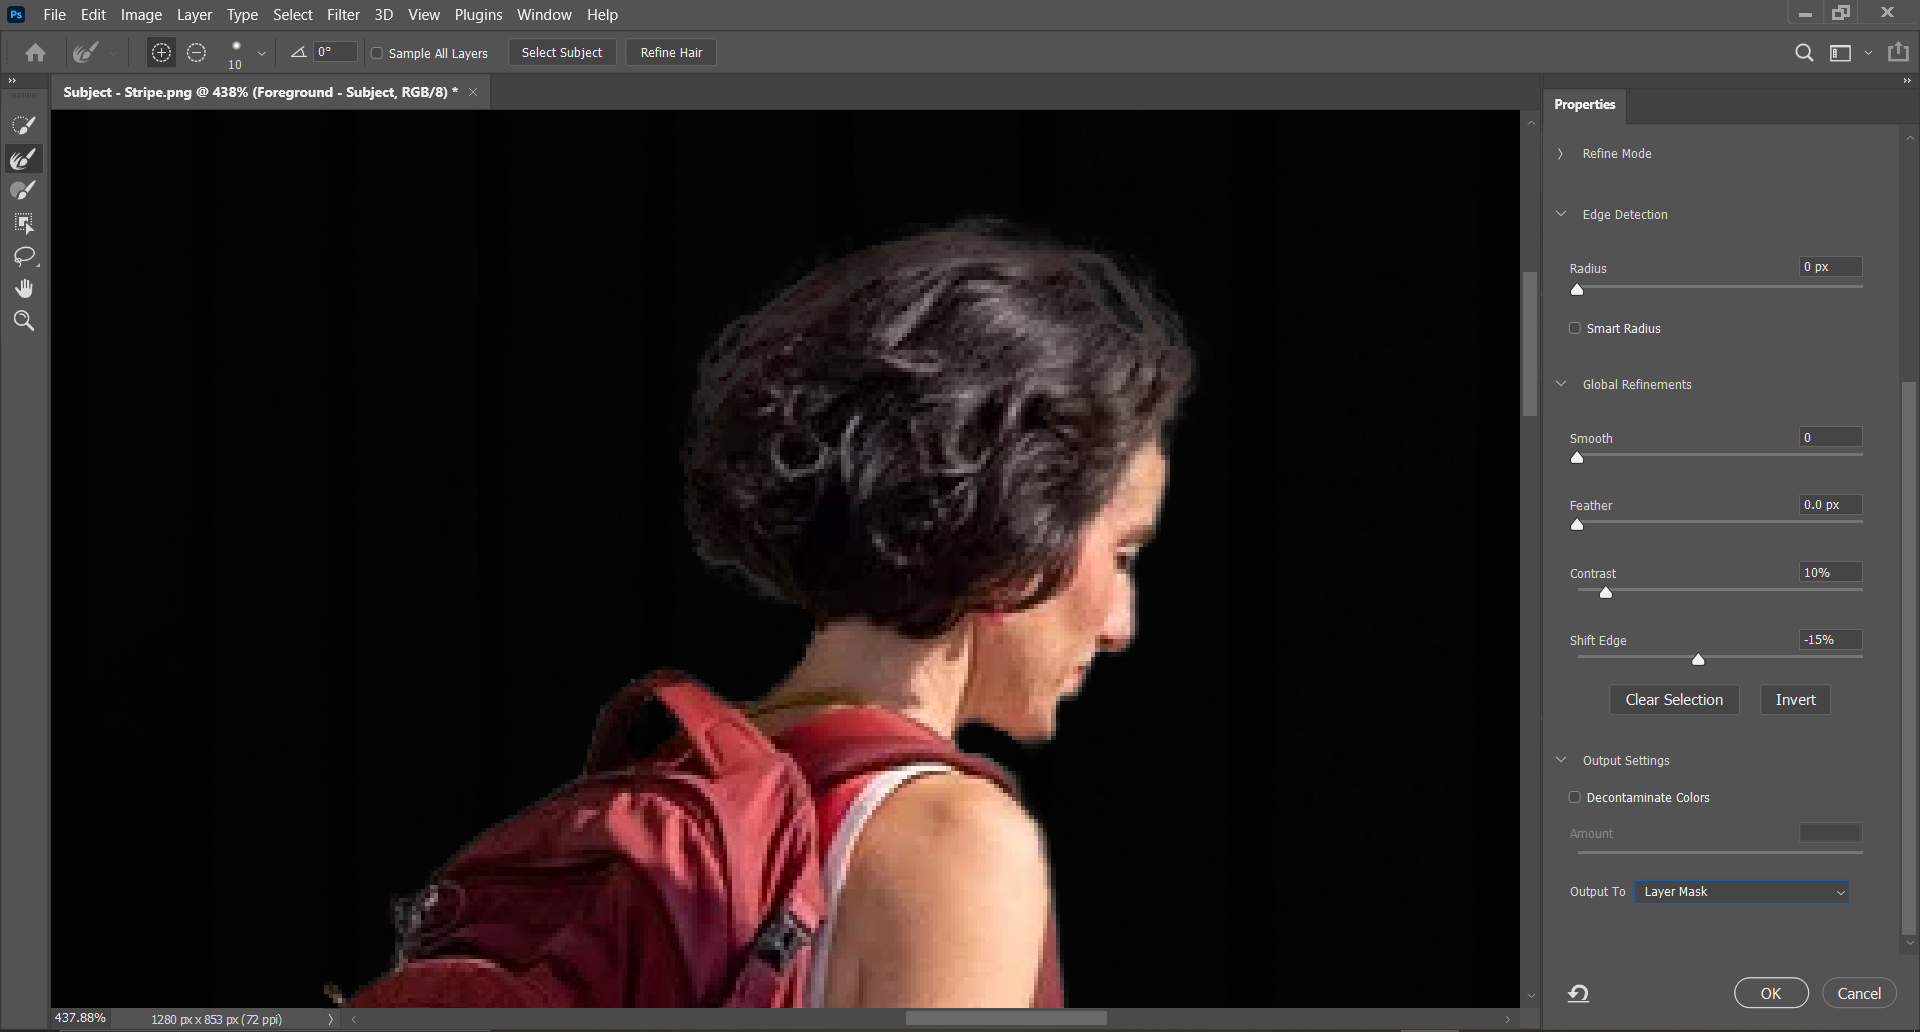
You may find that your subject has wisps of hair that are outside the current selection, making them difficult to capture. This can be one of the trickiest parts of the process, and you’ll need to use the Refine Edge Tool.
Once selected, run the cursor around the edge of your subject, particularly the hair. You may also need to adjust the Edge Detection sliders when doing this.
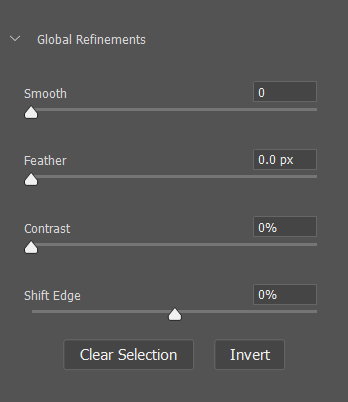
Scroll down the Properties panel to Global Refinements.
As a starting point, move the Contrast slider to 15 percent and set Shift Edge to -10 percent. As with all things on Photoshop, you may want to toy with these further, depending on your image.
Under Output Settings, use the Output To dropdown to select Layer Mask. This lets you further edit the image, without making irreversible changes to the original layer. Click OK when finished.
Bringing in the Background
It’s time to open your background—your image will open in a new tab, so head to it and click Select > All, then Edit > Copy.
Move back to your subject tab. Press Edit > Paste. Your background is now in place. In fact, it’s taking up the whole screen. We can’t have that, so in the sidebar, where it says Layers, drag and drop the background image beneath the foreground image.
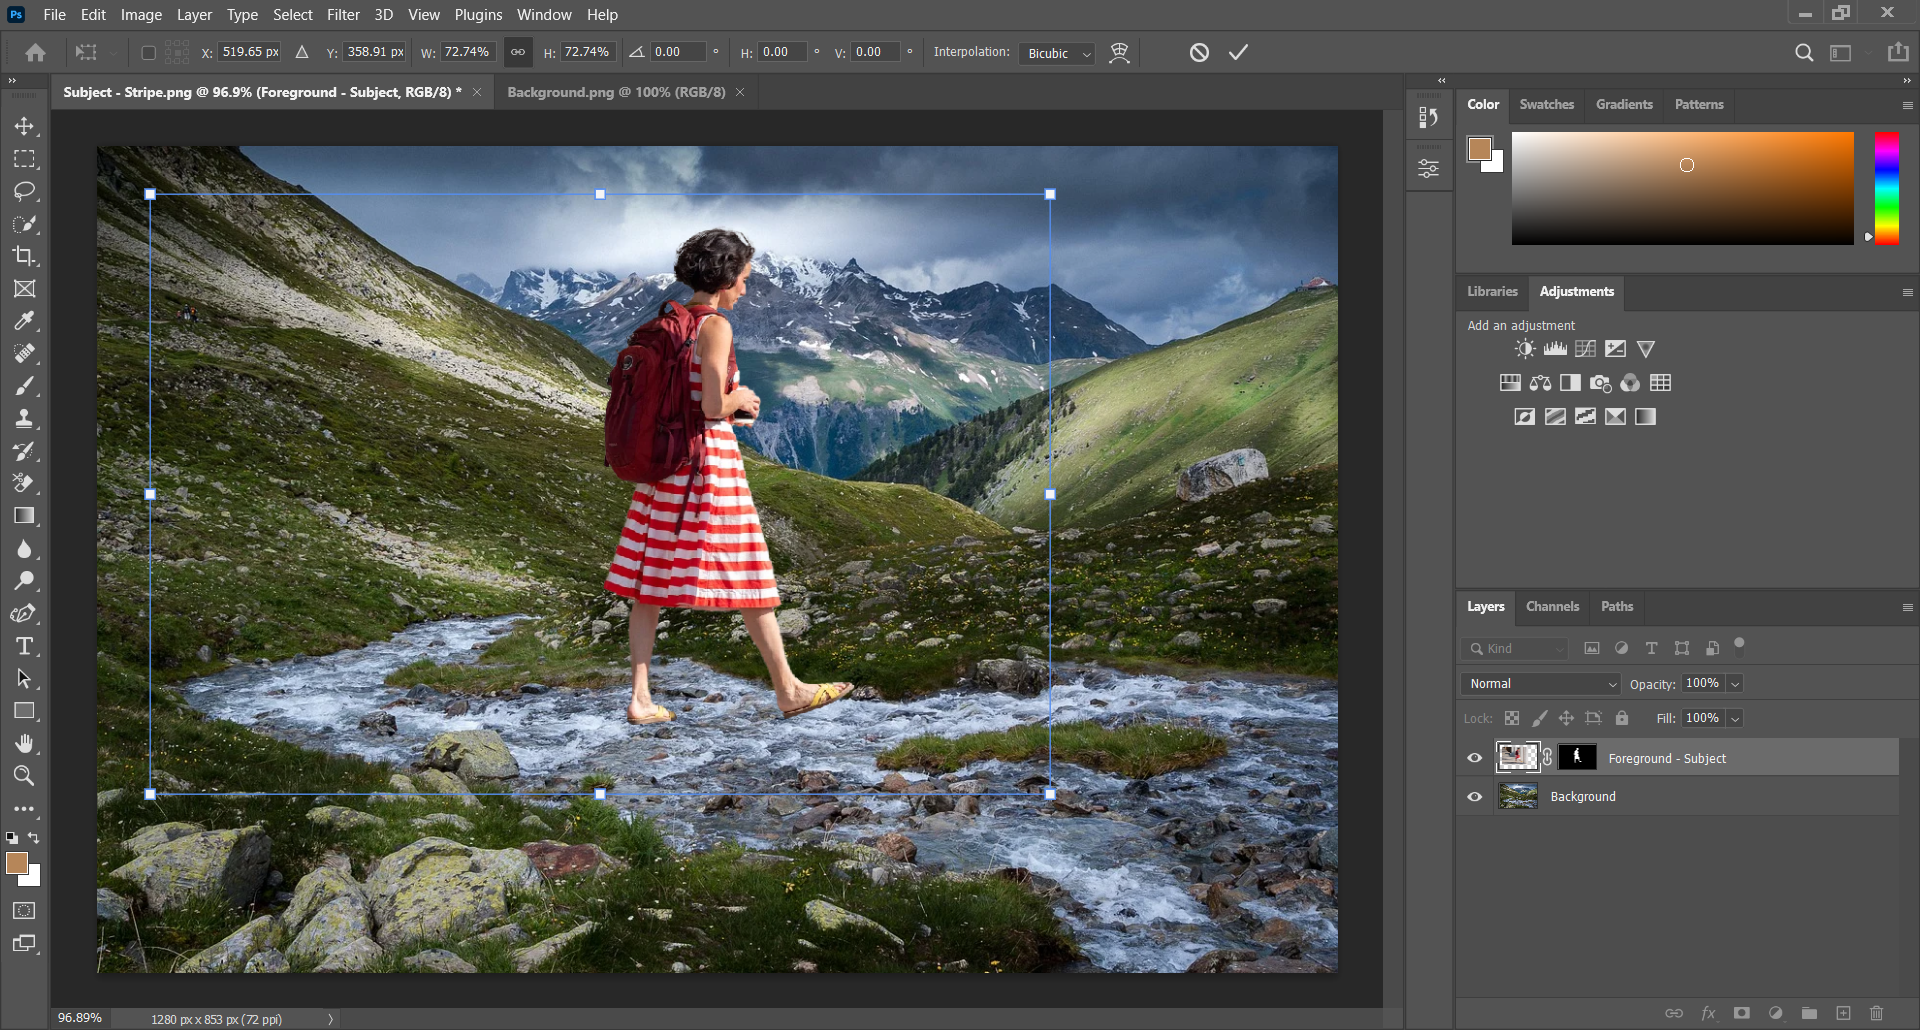
Select your top layer—the one with your subject—and click Edit > Free Transform (or Ctrl + T for Windows and Cmd + T for Mac).
Grab the handles of the Transform box to move and resize your subject. When creating compositions like this, it’s best to make your subject smaller to fit into the background, rather than adjusting the background, as it helps avoid pixelation.
This way, you can always crop after composition to perfect the look you want. At the same time, use background subjects, scenery, and objects to make sure you retain the correct perspectives.
Congratulations! You’ve now added someone into your image with Photoshop.
But we’re not done yet.
Altering the Lighting
Unless your photos were taken at the same time in the same place, you’re now going to need to match the color and lighting, otherwise, it’ll look like what it is—a "shopped" photo.
A good way to test this is to select Layer > New Adjustment Layer and choose Black & White. This makes it clearer to see what needs changing. Should your subject be lighter or darker? Which colors match the scene, and which are hopelessly mismatched?
Once you’re sure, hide this layer by clicking the eye icon. Now, select your foreground layer (the one with your subject).
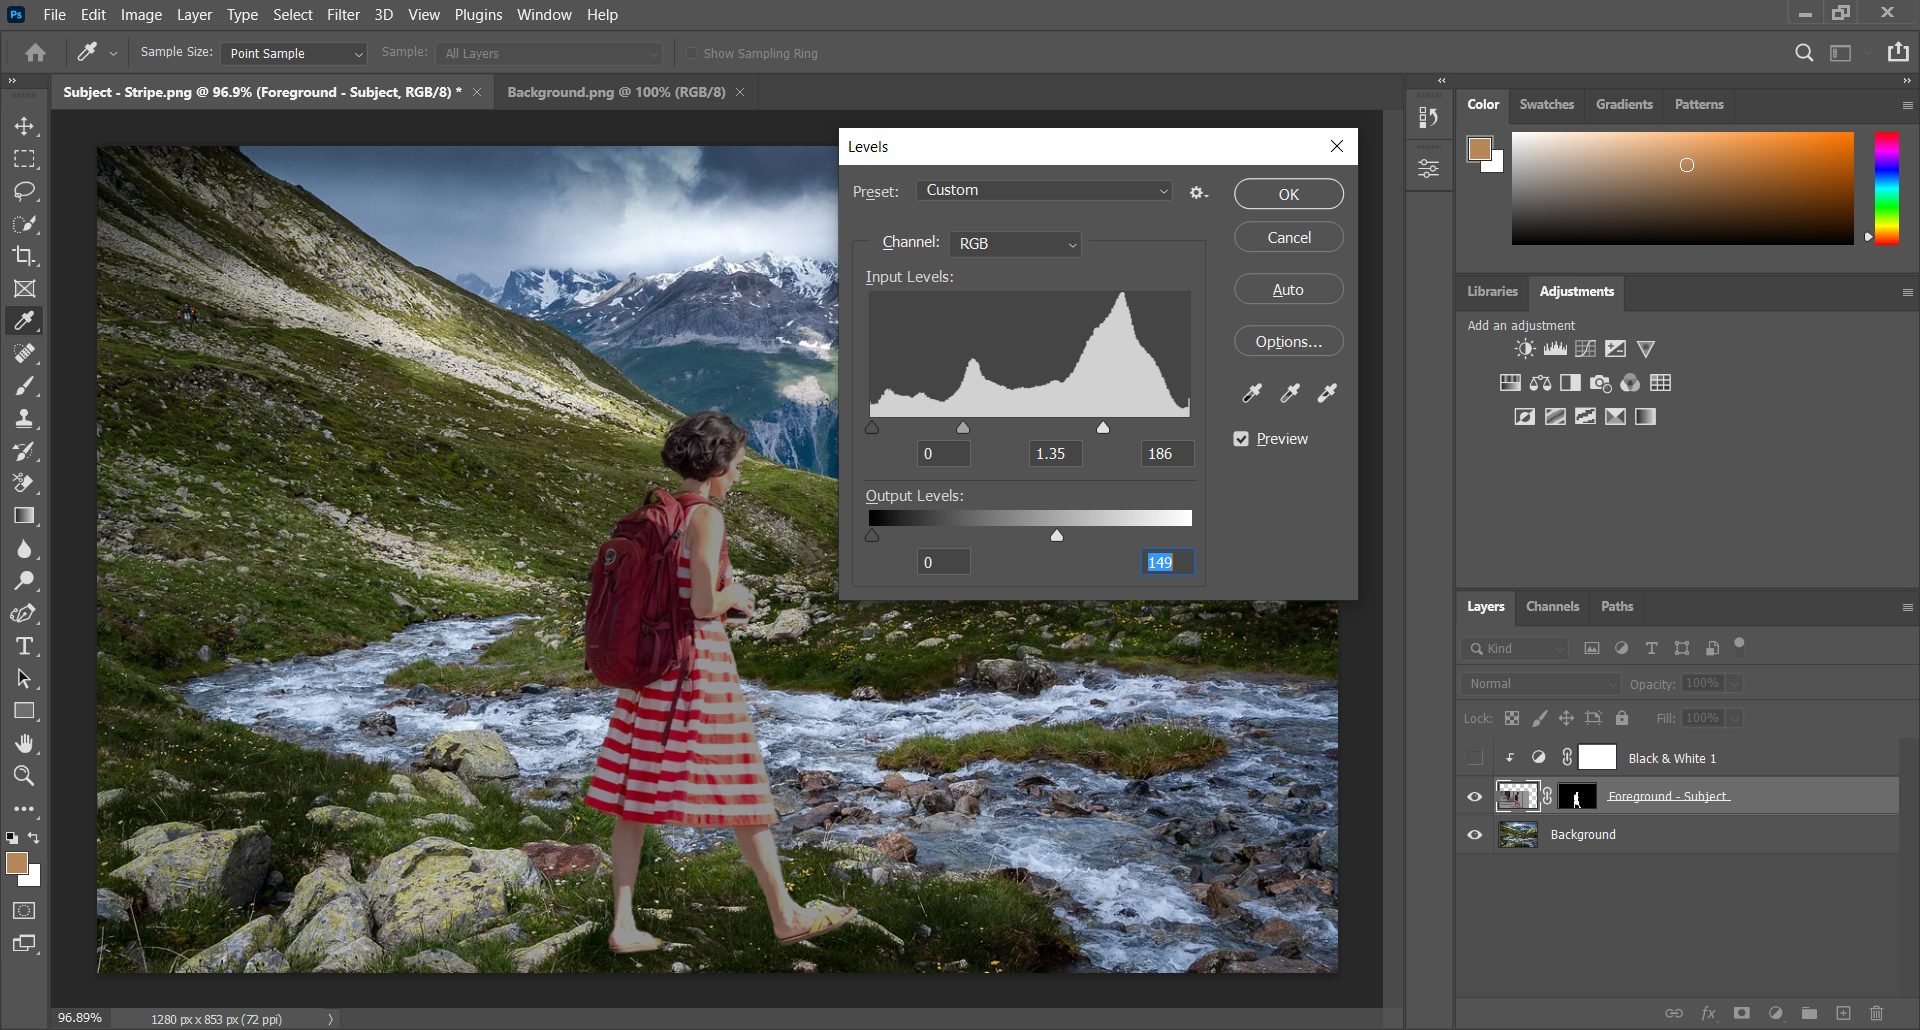
Click on Image > Adjustment > Levels.
Gently slide the Input Levels and Output Levels to adjust the lighting. As with refining your original cutout, this is a delicate job, and you may find it helps to keep revealing and referring to your Black & White layer to ensure a close match. Once you’re happy, hit OK.
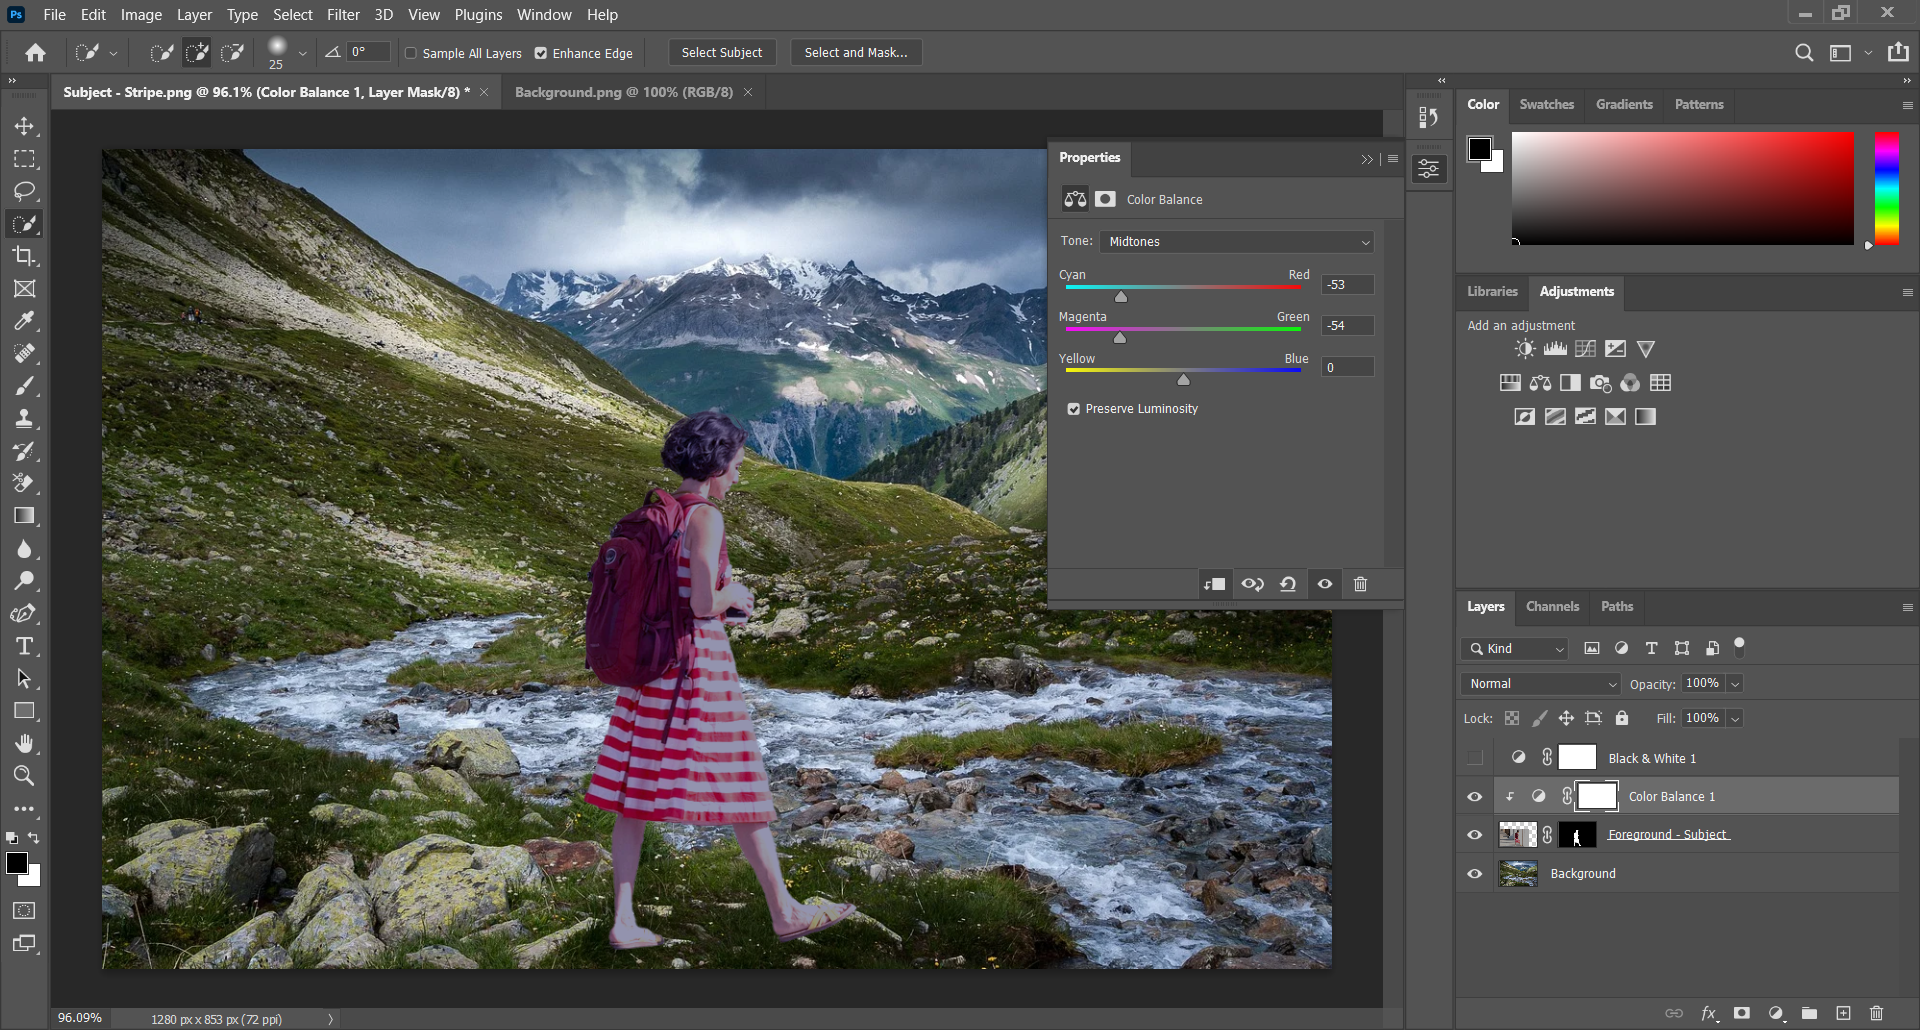
Time to shift the colors, so press the New Fill icon (it’s the half-black, half-white circle at the foot of the Layers panel). Choose Color Balance.
Right-click this new layer and select Create Clipping Mask. Make sure your foreground layer is directly below this one; any adjustments made to the Color Balance layer now only affects the one below it, rather than the whole image.
Use the three colored sliders to change the balance. Start with Midtones, then use the dropdown menu to move on to Shadows and Highlights. As you move these sliders, it will make the photo’s reds, blues, or greens pop (or not).
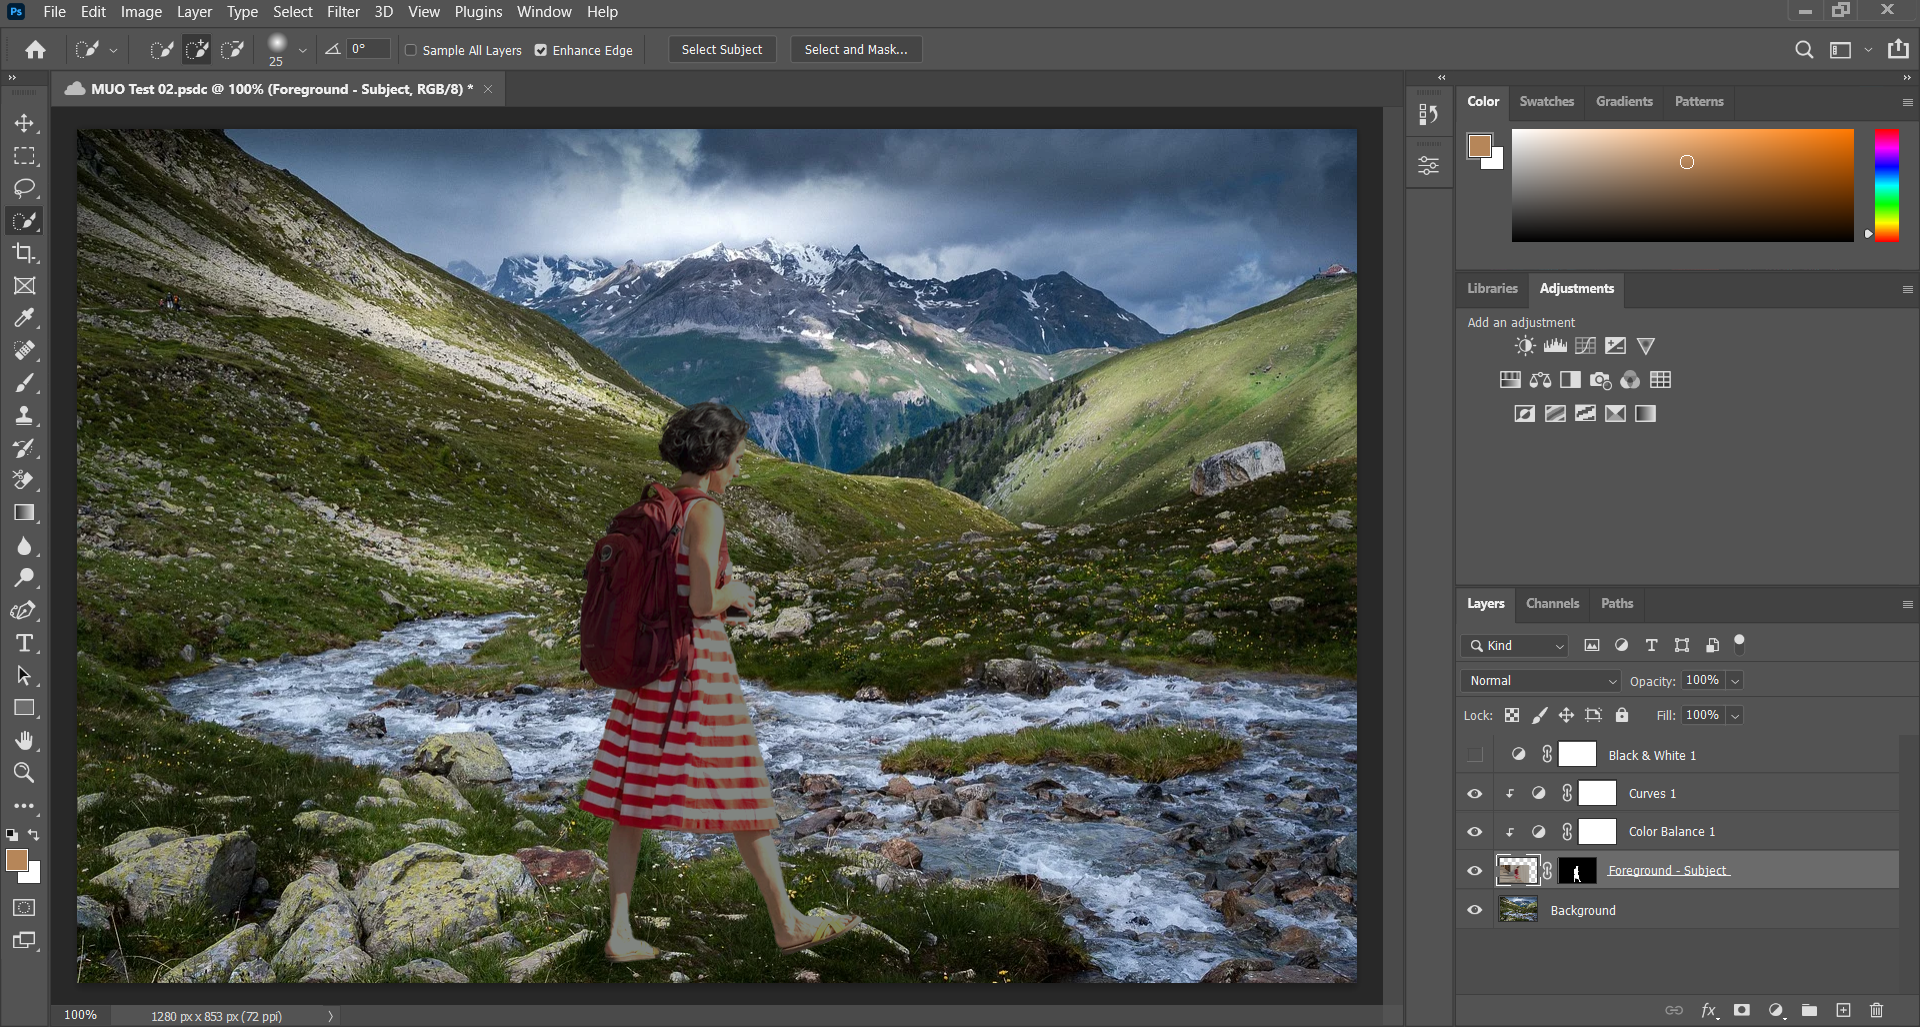
You can take this process even further by creating a Curves layer—this option is also found under the New Fill options. Once again, create a clipping mask for the layer, move it so it’s above your foreground layer, then tug on the diagonal line to create darker or lighter shades.
If you need to modify a specific section of the subject, rather than the whole image, grab the Lasso Tool and circle it.
Select Image > Adjustment > Levels. Any changes with the input and output levels only affect the "lassoed" area.
When you’re all set, save your project. Under File > Export, choose either Quick Export as PNG or Export As with the format of your choice.
Creating the Perfect Composition
You should now have a completed composite image, combining your background image and a subject who was never there in the first place.
The trick is to take your time and don’t be afraid to experiment with the different output settings. Photoshop is excellent at previewing the changes you’re making, so you can create the perfect compositions (and if it all goes wrong, you can always hit Undo).
After all, learning Photoshop is a long process, and trying new things can always further your knowledge and skill.


