Once you have set up an ownCloud server on your Raspberry Pi, you will want to make it accessible via the internet from any location and not just from devices on your local network.
This process involves three stages: enabling SSL, forwarding ports on your router, and (optionally) setting up a dynamic DNS URL that will point to your network’s public IP address.
1. Enable SSL
Although you can access your ownCloud server via HTTP, it’s advisable to use HTTPS. To do so, you’ll need to enable SSL (Secure Sockets Layer) for your server.
On the Raspberry Pi running your ownCloud server, open a Terminal window and enter:
sudo a2enmod ssl
Create a directory for the self-signed SSL certificate:
sudo mkdir /etc/apache2/ssl
You need to create the certificate and the server key that protects it, and then place both of them into the new directory. To do so, enter this command (all on one line):
        sudo openssl req -x509 -nodes -days 365 -newkey rsa:2048 -keyout
/etc/apache2/ssl/owncloud.key -out /etc/apache2/ssl/owncloud.crt
You’ll be asked to enter the two-letter code for your country, e.g. US, CA, or GB. See the SSL country code list for more details. Then input a state or province name, locality/city, and some organisational details (you can leave these blank), plus an email address.
To set up the certificate, you need to alter the configuration file. To open it, enter:
sudo nano /etc/apache2/sites-available/default-ssl.conf
Change the ServerAdmin line email address from webmaster|@localhost to your own. Add the following line underneath, replacing <Your Raspberry Pi IP Address> with its IP address:
ServerName <Your Raspberry Pi IP address>:443
Change the DocumentRoot directory to /var/www/html/owncloud
Change the following lines to point to your SSL certificate and key:
        SSLCertificateFile /etc/apache2/ssl/owncloud.crt
SSLCertificateKeyFile /etc/apache2/ssl/owncloud.key
Press Ctrl + X and then Y to exit and save the file.
Activate the new virtual host with:
sudo a2ensite default-ssl
Restart the Apache web server:
sudo service apache2 restart
2. Set Up Port Forwarding
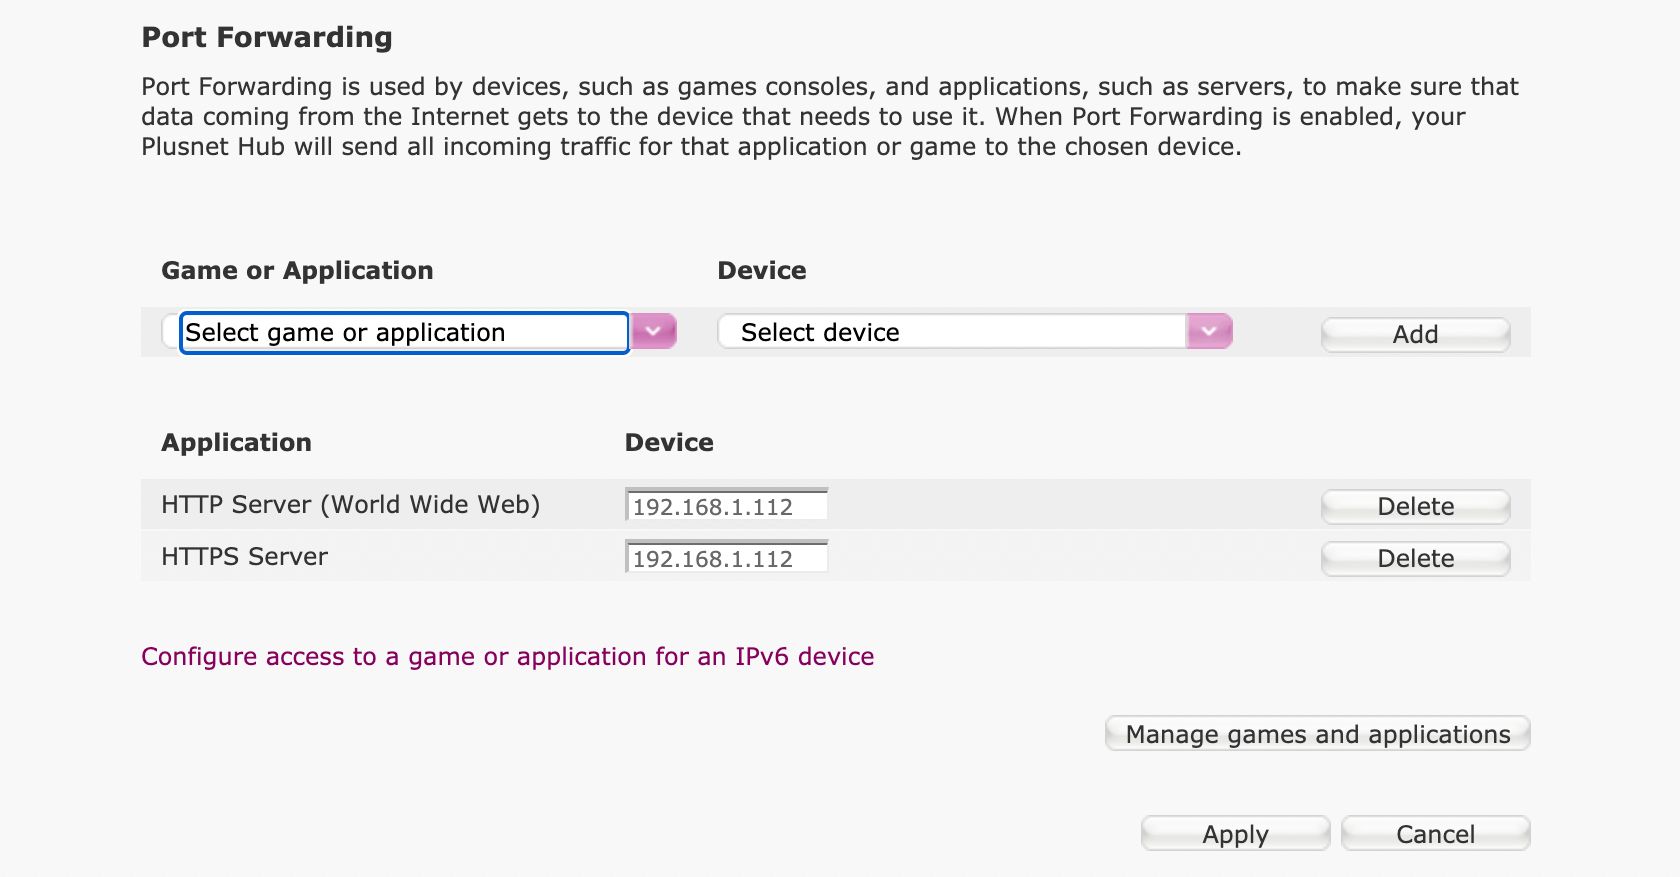
To enable external connections from outside your local network to your Raspberry Pi ownCloud server, you’ll need to set up port forwarding.
To do this, access your wireless router’s settings page in a web browser. Many routers use the IP address 192.168. 1.1 or 192.168.0.1 for this page, but others use a different address such as 192.168.1.254. If you’re not sure, it is possible to find your wireless router’s IP address.
Once in the router settings, you can typically find port forwarding settings in the Firewall section. You may need to access Advanced (or Expert) Settings to reach this.
Forward the ports 80 (HTTP) and 443 (HTTPS) to your Raspberry Pi ownCloud server, using its IP address. The latter can be found in the devices list in the router settings, or by hovering over the Wi-Fi icon on the Raspberry Pi desktop.
3. Get a Dynamic DNS Address
A dynamic DNS (DDNS) service enables you to use a subdomain to visit your ownCloud server instead of your router’s public IP address.
By using a DDNS client on a device or the router, it’s also possible to make the subdomain update automatically to any changes in your router’s public IP address.
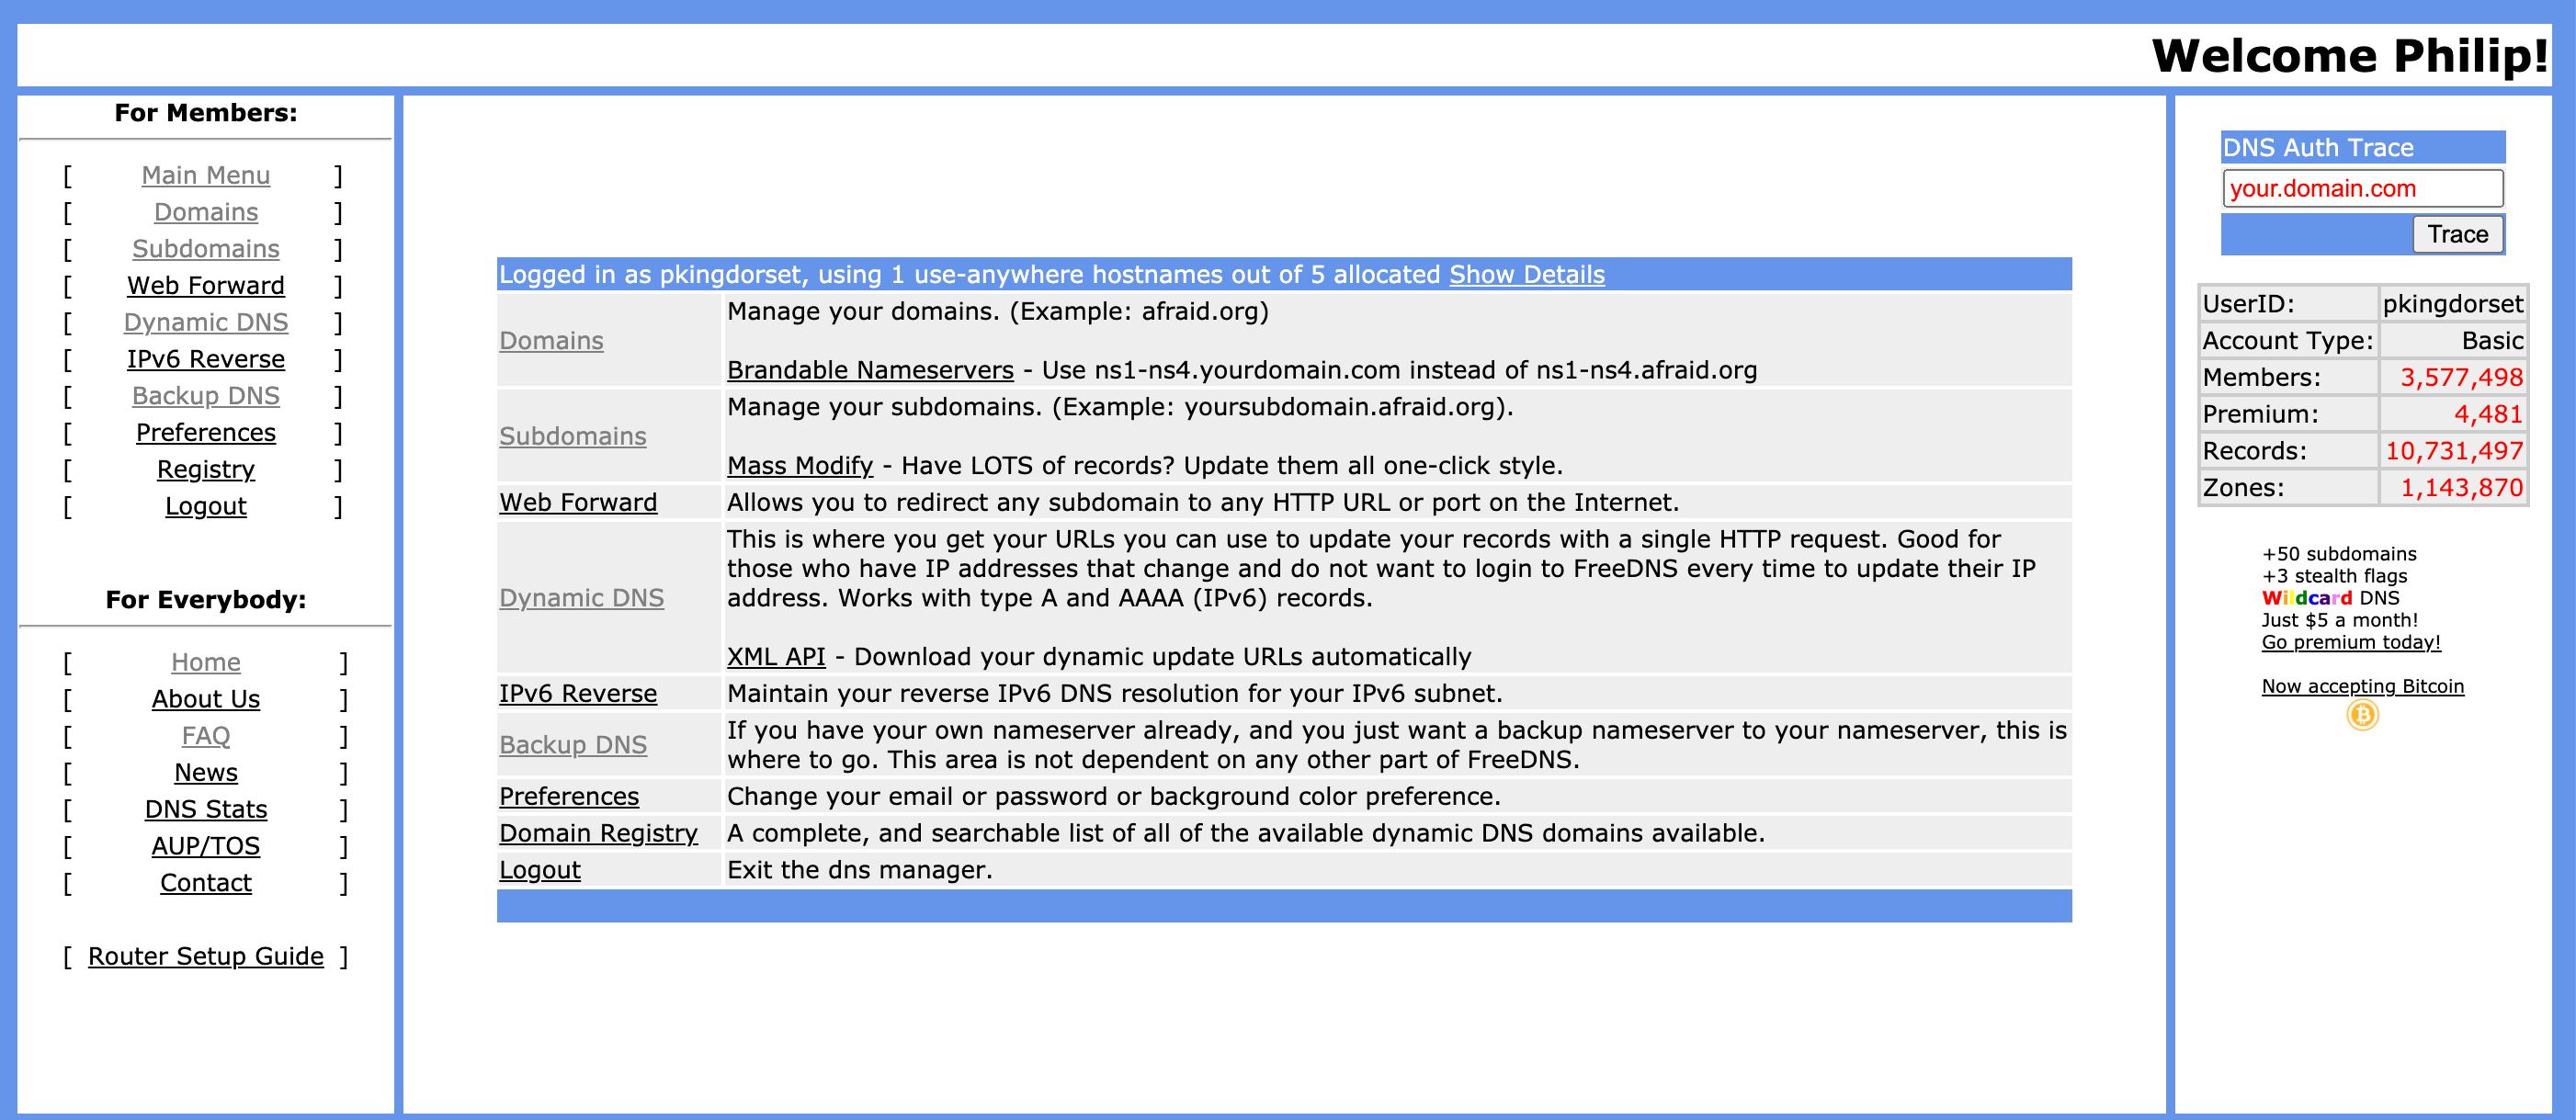
One of the many DDNS providers is FreeDNS. Visit freedns.afraid.org and sign up for a free account that will let you create up to five subdomains.
Once you’re logged into FreeDNS, select Subdomains and choose to add one. Select one of the free domains available (we chose chickenkiller.com) and type in a suitable subdomain name (we used philcloud).
Point it to your home network’s public IP address; to find it, do a Google search for ‘What is my IP’. With all the details filled, click Save.
3. Finish ownCloud Configuration
Back on the Raspberry Pi, you’ll need to add your home network’s public IP address and DDNS subdomain to the list of trusted IPs.
Open ownCloud’s config file:
sudo nano /var/www/owncloud/config/config.php
Under the line starting 0 =>, enter the following (indented to the same level), replacing <Your Public IP Address> with your network’s public IP address and <Your DDNS Subdomain> with the subdomain you set up:
        1 => '<Your Public IP Address>',
2 => '<Your DDNS Subdomain',
Press Ctrl + X and then Y to exit and save the file.
Now, to access your ownCloud server on any device, visit your new DDNS subdomain (or public IP address) followed by /owncloud.
If you see a warning that your connection isn’t private or secure, you can choose to ignore it (by selecting Advanced in Chrome or Firefox) and proceed to the site using HTTP instead.
Your ownCloud Server Is Ready For External Access
By visiting the subdomain you set up in a web browser, you should now be directed to the ownCloud server running on your Raspberry Pi. You can also access it from outside of your local network.


