There are many kinds of synthesizers; the one you are probably most familiar with is the physical instrument, but did you know that you can create those exact same sounds using only your PC?
Ableton’s Learning Synths Playground gives you access to all the vital synth components needed for you to achieve this. Want to know how? We’ll show you.
Modifying the Synth Components in Ableton’s Learning Synths Playground
Modifying the synth components can feel overwhelming at first, especially if you’re not familiar with what they do, but once you grasp the concept it’s like riding a bike. Let’s take a look at what each component does, and how you can optimize them to create your own unique sound in Learning Synths Playground.
Also keep in mind that these settings can be adjusted inside Ableton Live Suite. If you're not familiar with Ableton, check out our beginner's guide for how to get started with Ableton Live.
The Oscillators (Square, Saw, and LFO)
Oscillators generate frequencies that create sound with the use of electrical currents. The sound that you hear is represented by the wave shape, and changing the wave will change the sound too.
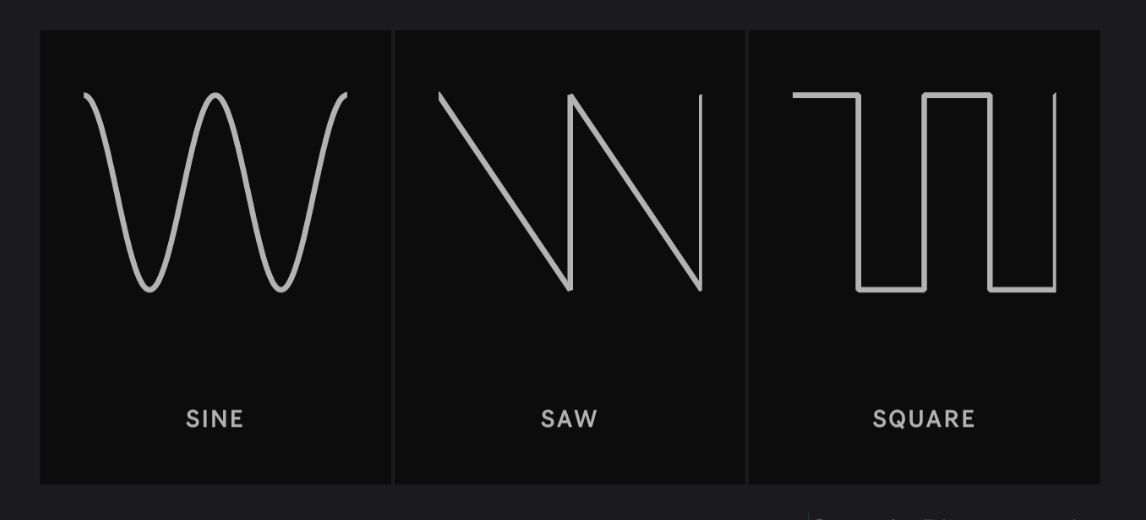
Three of the most common audio oscillators are Sine, Saw, and Square. As the names suggests, these oscillators are visually represented by a shape that resembles a sine wave, a saw, and a square, and these waves are determined by the amplitude (or volume) and width.
When the amplitude is high, the height of the wave will be high, but if it is silent, it will be a straight line instead of a wave. Additionally, the width determines how long the oscillator remains in its cycle, so the wider the wave, the longer the sound will retain.
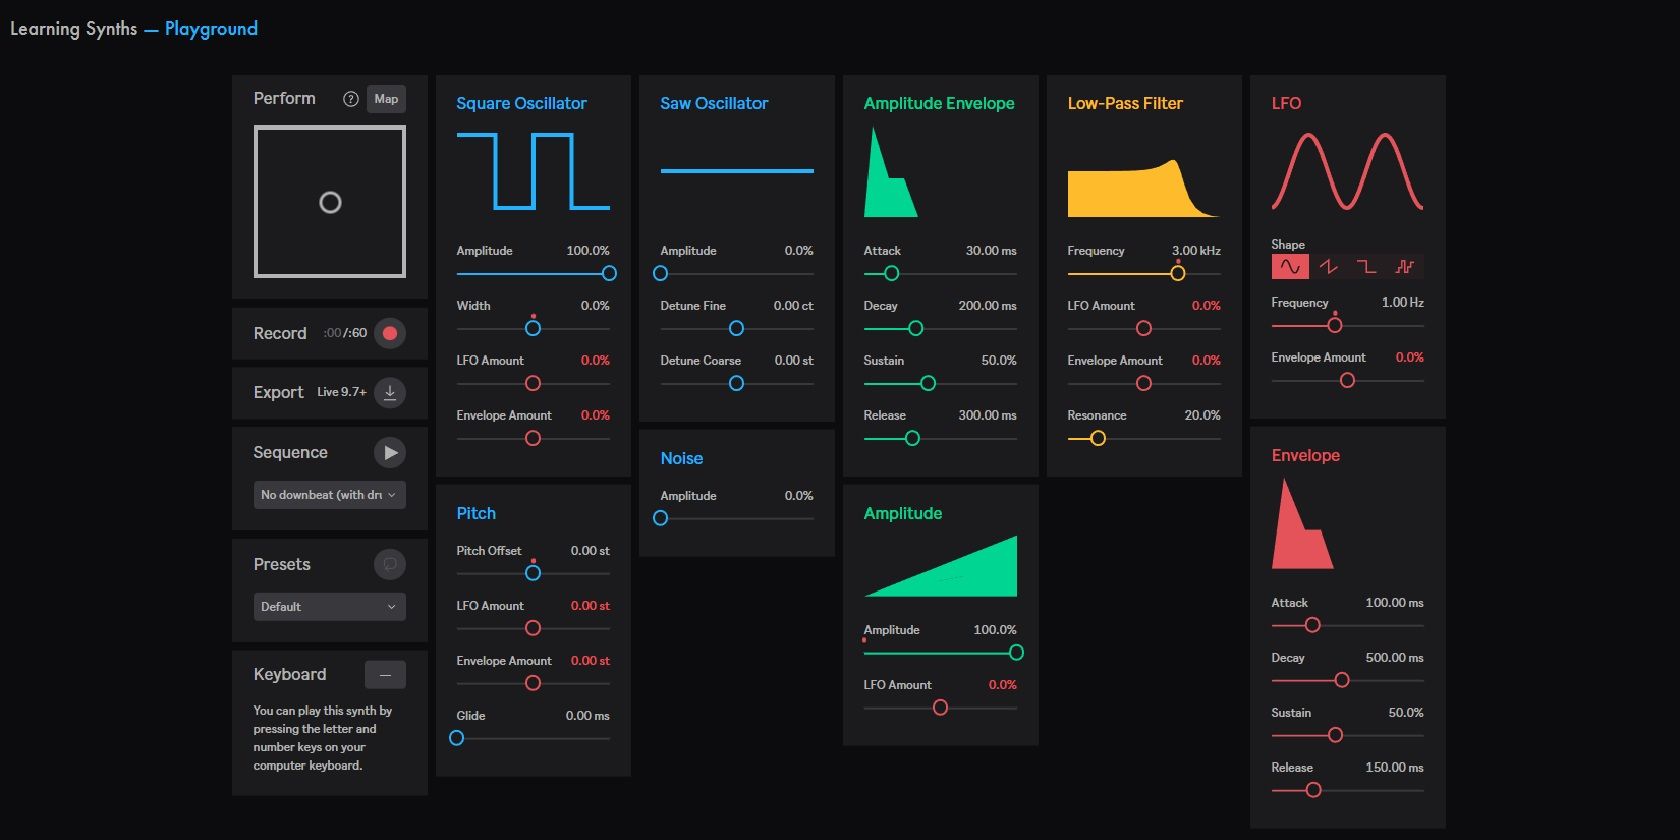
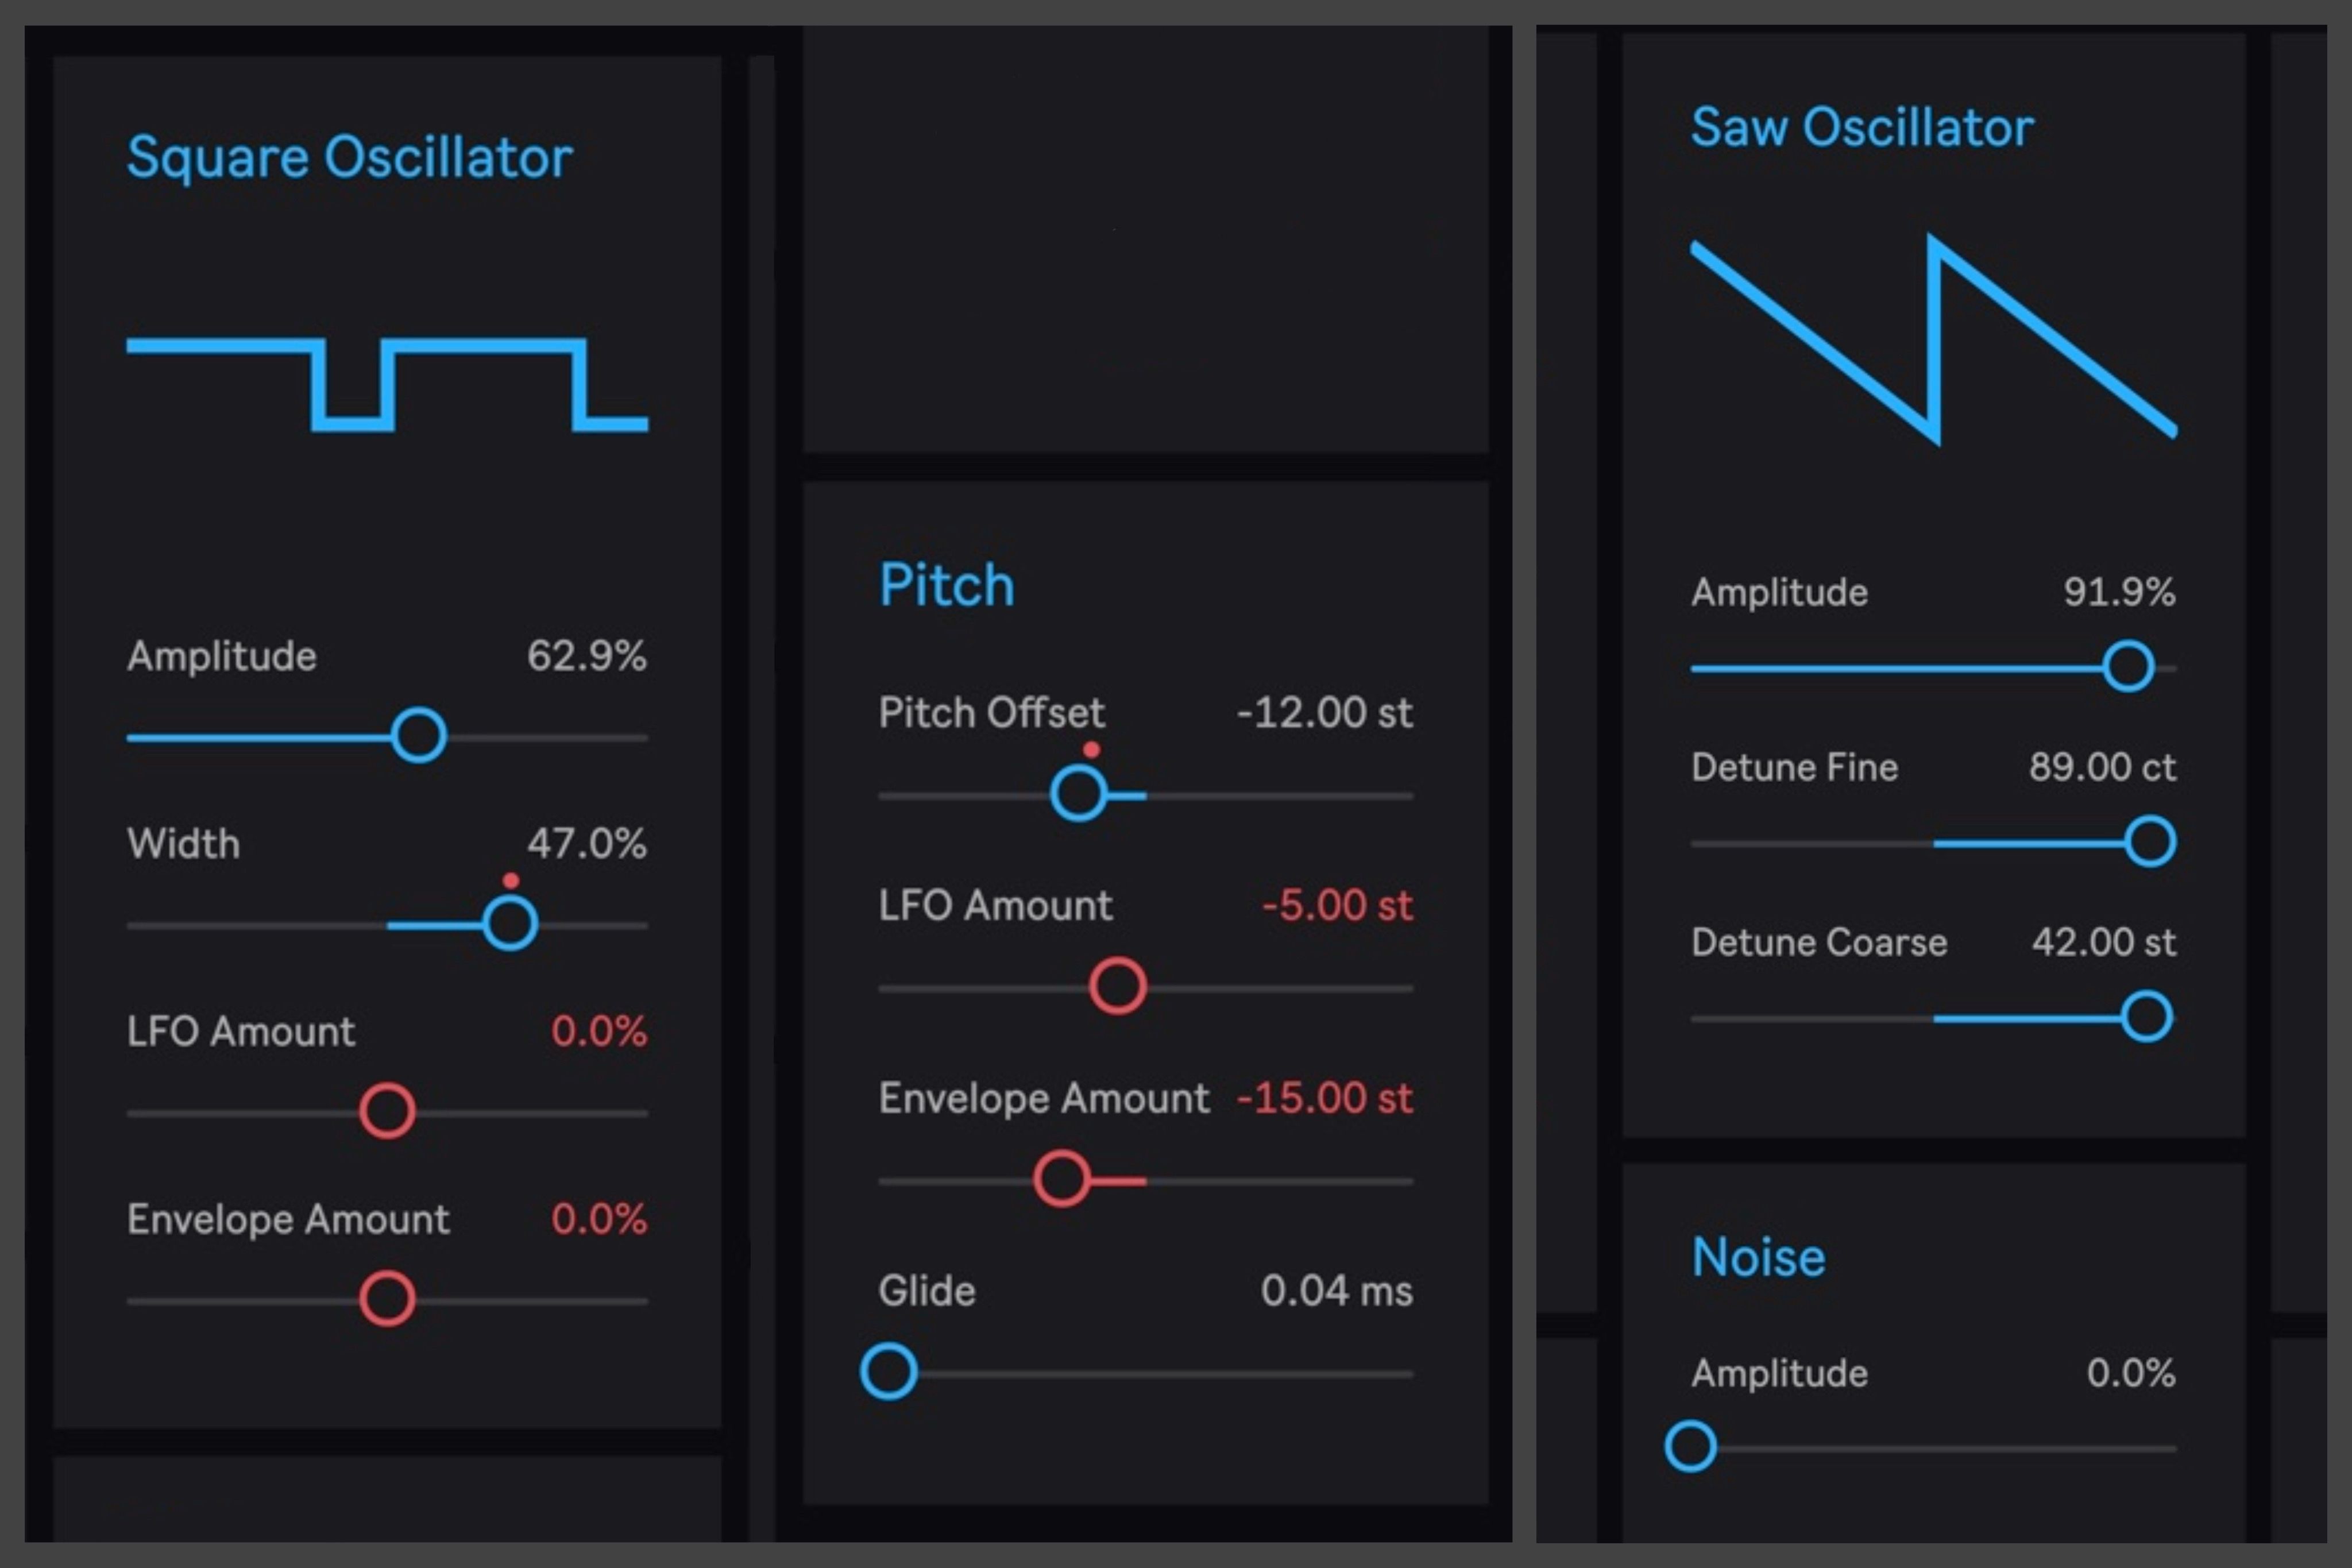
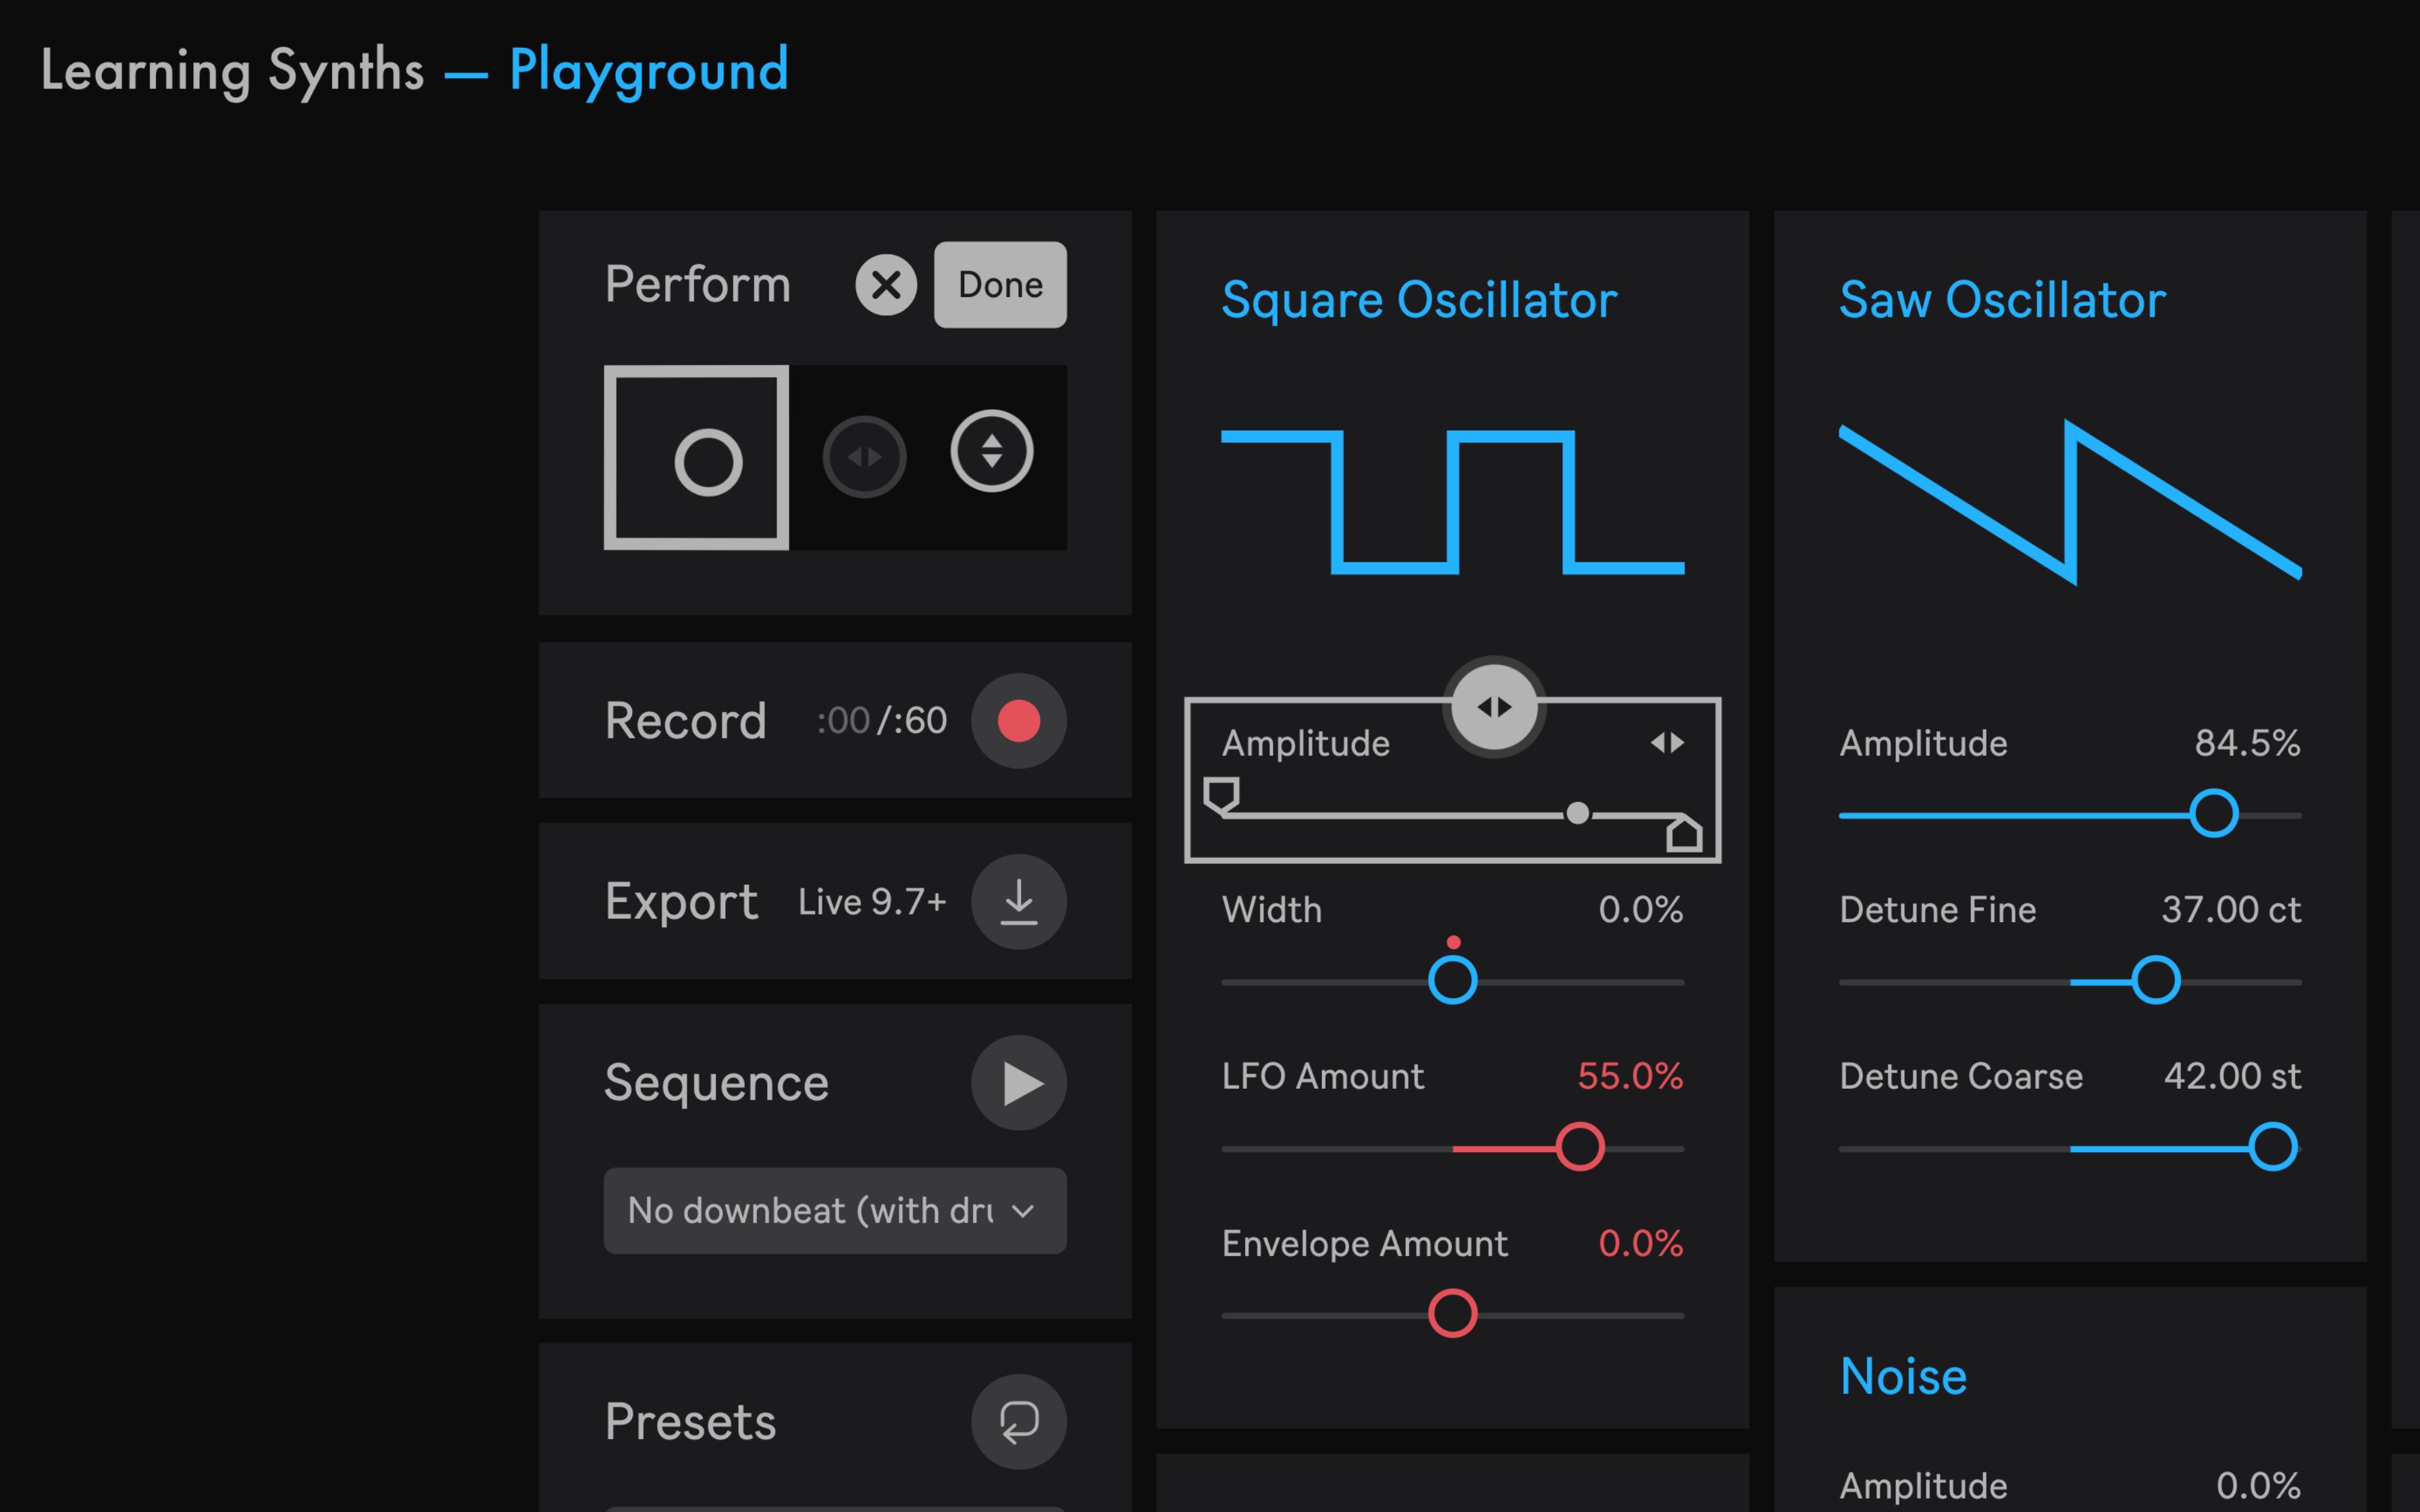
In Playground, the two individual oscillators are Saw and Square. Square is paired with Pitch, which effectively allows you to modulate the oscillator's pitch by offsetting the semitones (st) to a higher or lower note. Saw has a similar component called Detune (Fine and Coarse) that subtly adjusts the pitch, and the additional Noise component allows for adjustment of the amplitude.
To optimize the oscillators and create a sound that suits your specific needs, try to imagine what the sound would look like visually. Is the volume high? Do you want the sound to hold for long periods? Adjusting the wave is the most important step because it will determine your overall sound. Once you have your wave, you can go ahead and tweak the other components.
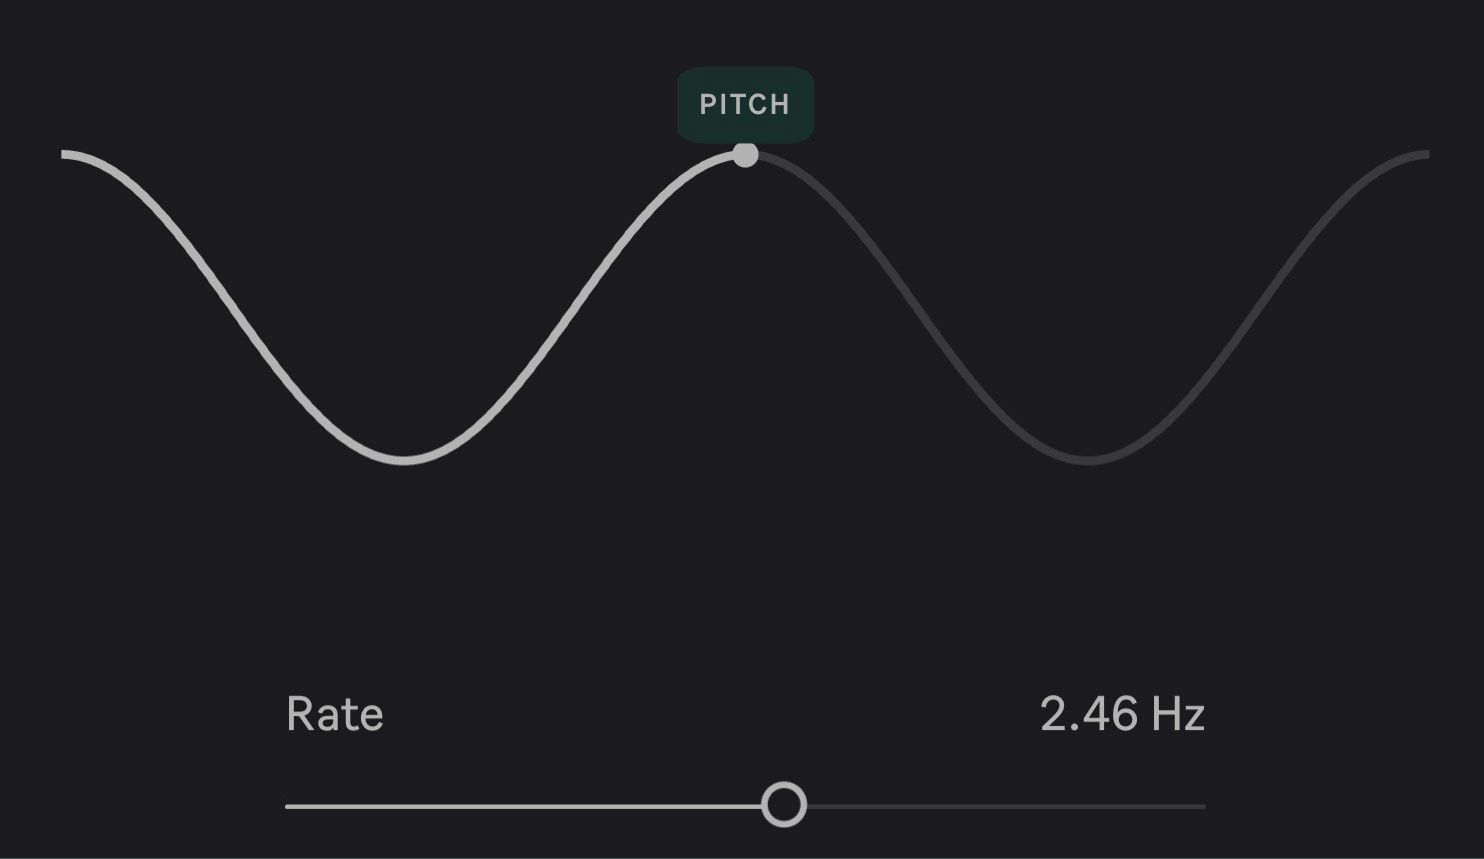
In Playground, you will also find LFO, or low-frequency oscillators. Unlike audio oscillators, LFO’s move slowly in comparison, and they have multiple purposes; they modulate pitch, change the speed of the oscillator, change the amount of modulation, and they also change the modulation wave shape.
The frequency, measured in Hertz (Hz), determines the number of times the oscillator moves from its highest to its lowest point, and back to its highest in a second.
LFO’s don’t typically go higher than 20 Hz, and are most commonly set to 10 Hz. Whatever purpose the oscillator is serving, whether its amplitude, pitch, envelope, or something else, the frequency will play a role in the quickness of the changing sound.
You will see four wave options under LFO that coincide with Envelope beneath it. You will want to adjust the settings under Envelope as well, and then determine how much of an effect you would like that to have on your LFO by deciding the Envelope Amount. The Envelope shape, similar to the wave shape, will give you a visual idea of what sound you will hear.
The Amplitude Envelope
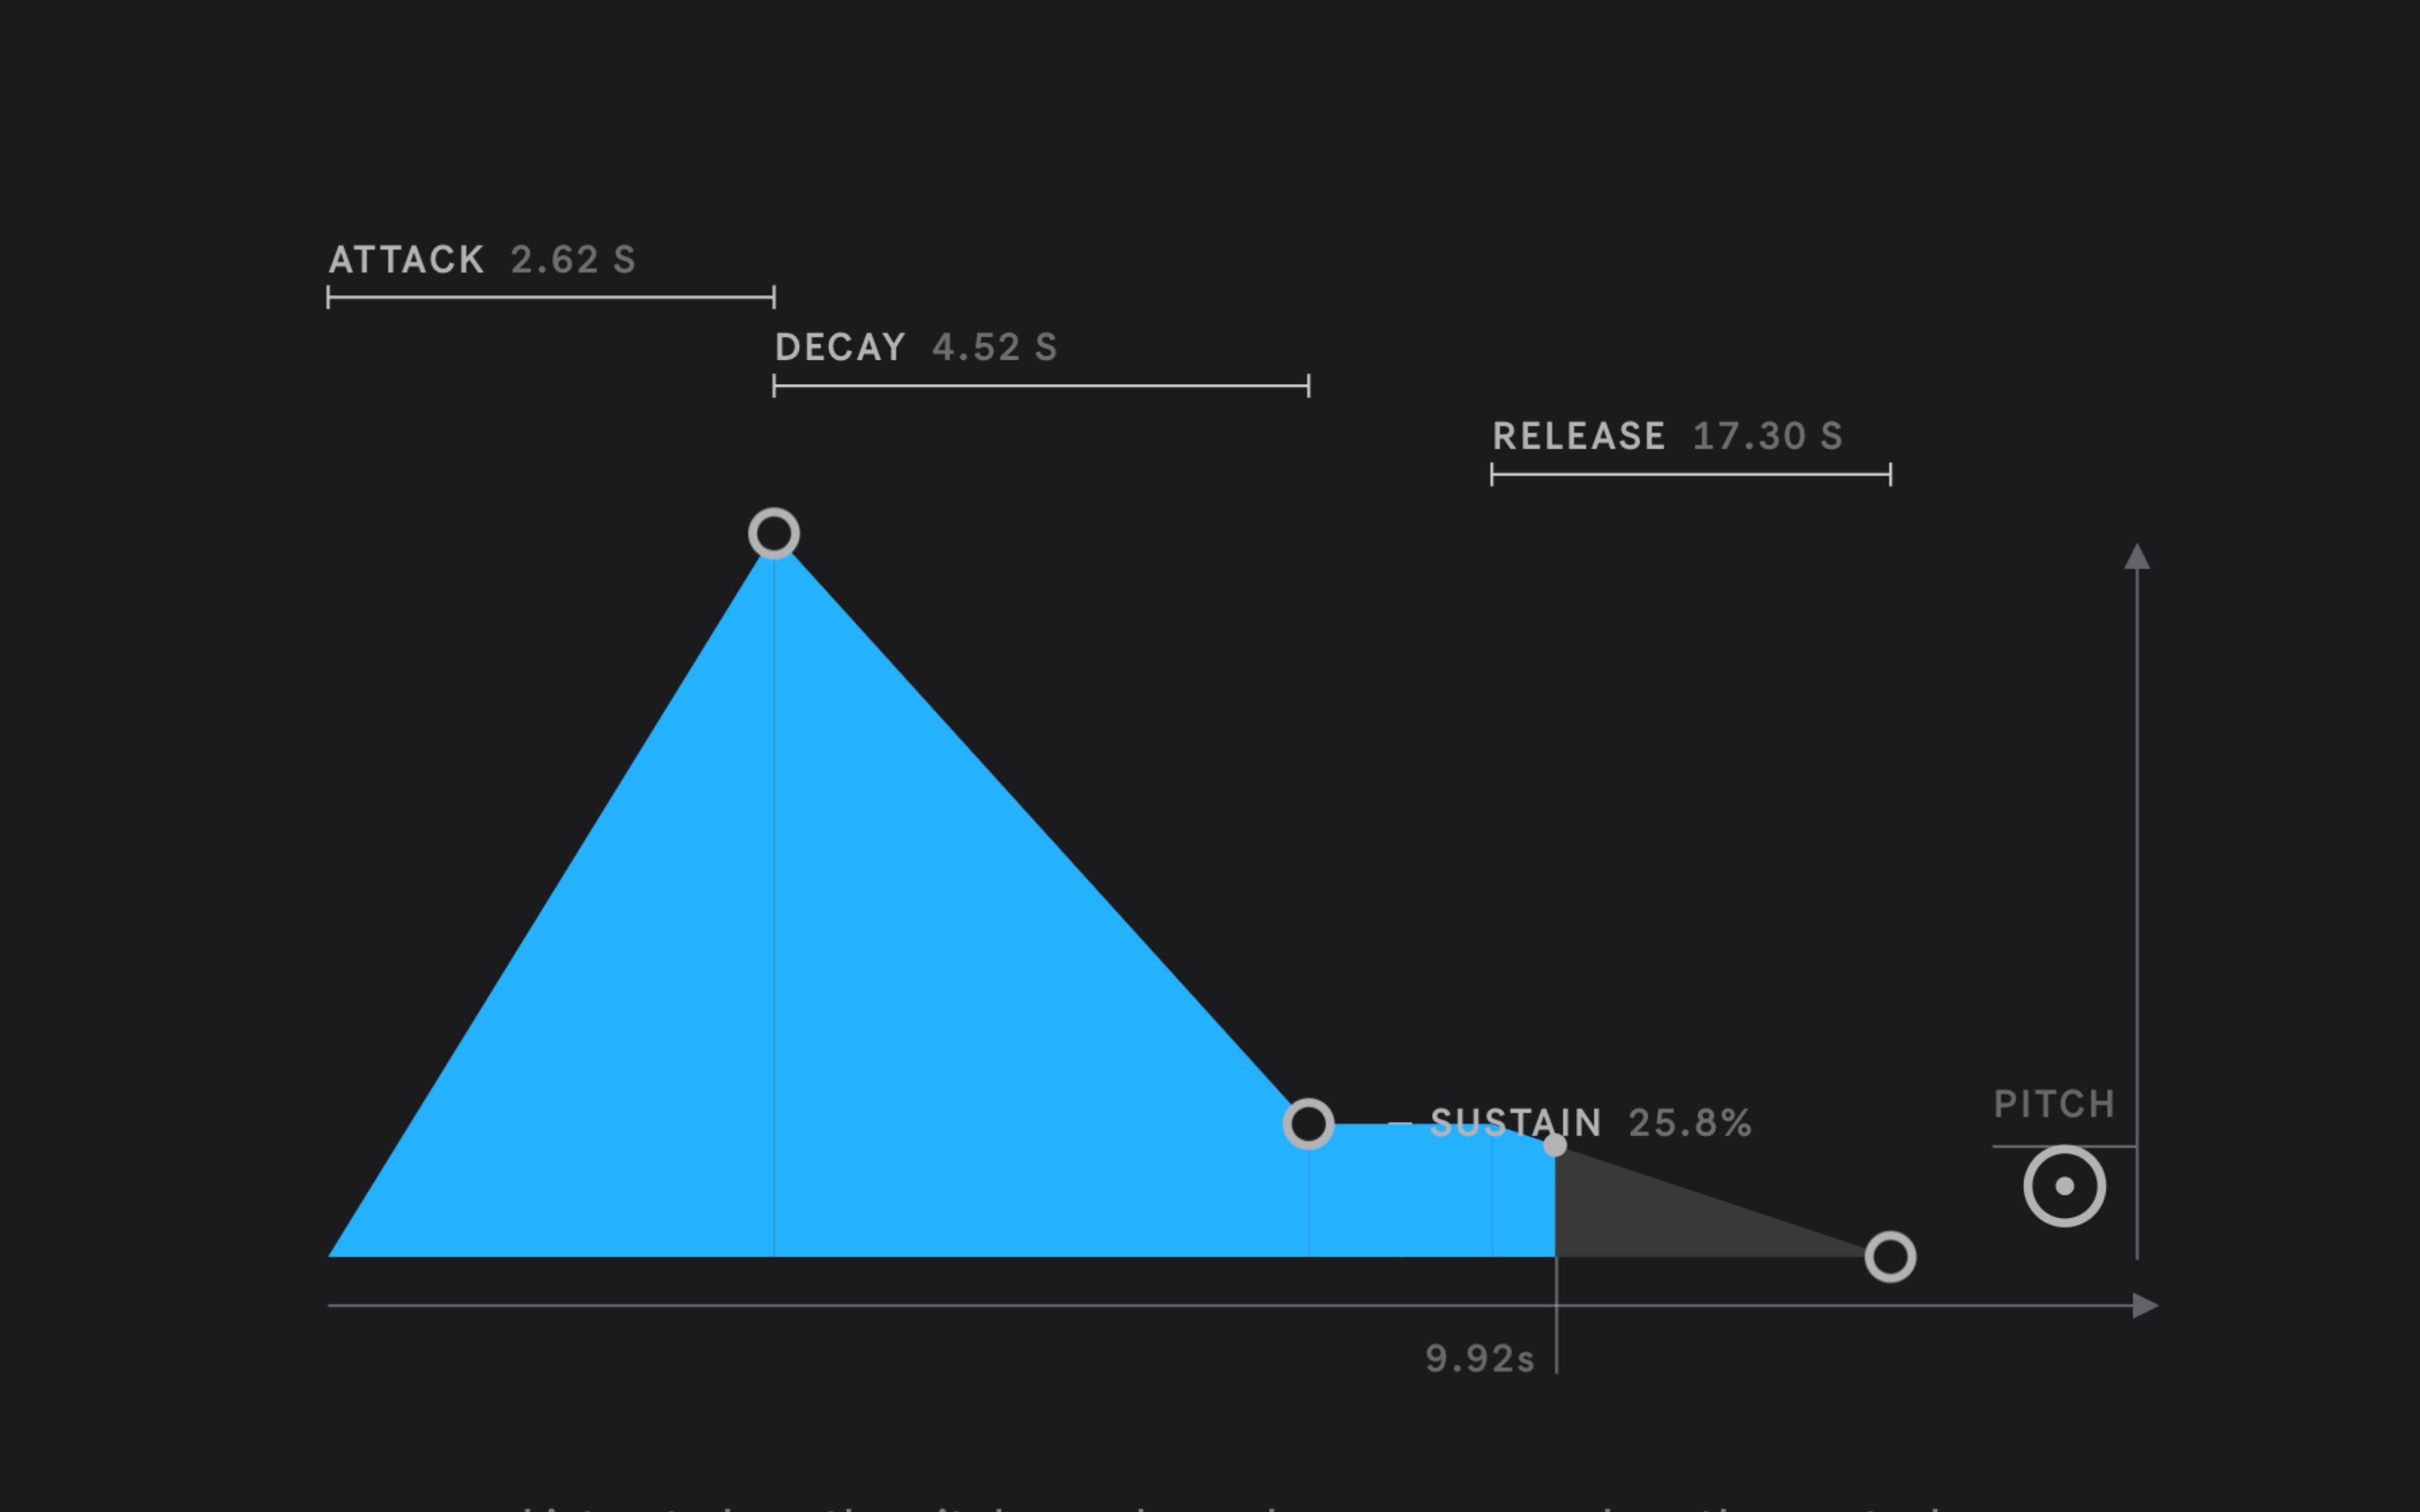
As mentioned above, the amplitude refers to the volume of the sound, so changing the amplitude on an oscillator will essentially modify how loud or soft it becomes. Envelope, on the other hand, consists of four distinct features: Attack, Decay, Sustain, and Release.
Attack determines how quickly or slowly the sound will reach its peak when a new note is introduced, while Decay establishes the amount of time it takes for the envelope to decline from the peak.
Additionally, Sustain refers to how long the note is held after the decay has finished, and Release determines the time it takes for the sound to disappear completely, or for the envelope to fade to its minimum level.
Amplitude and Envelope work together; under Amplitude Envelope you will find the Amplitude component. Just like the wave, you can adjust the envelope shape to achieve your desired sound, and increase or decrease the amplitude and pitch by adding to or subtracting from the amplitude slope.
The Low-Pass Filter
You can think of a low-pass filter similarly you would a dark filter for a photo: if you wanted to cut out the brightness and vibrant colors, you would apply a filter that dampens those features and emphasizes the darker tones. When it comes to a low-pass filter for your synth, the brighter and higher frequencies are filtered out while the lower frequencies escape through.
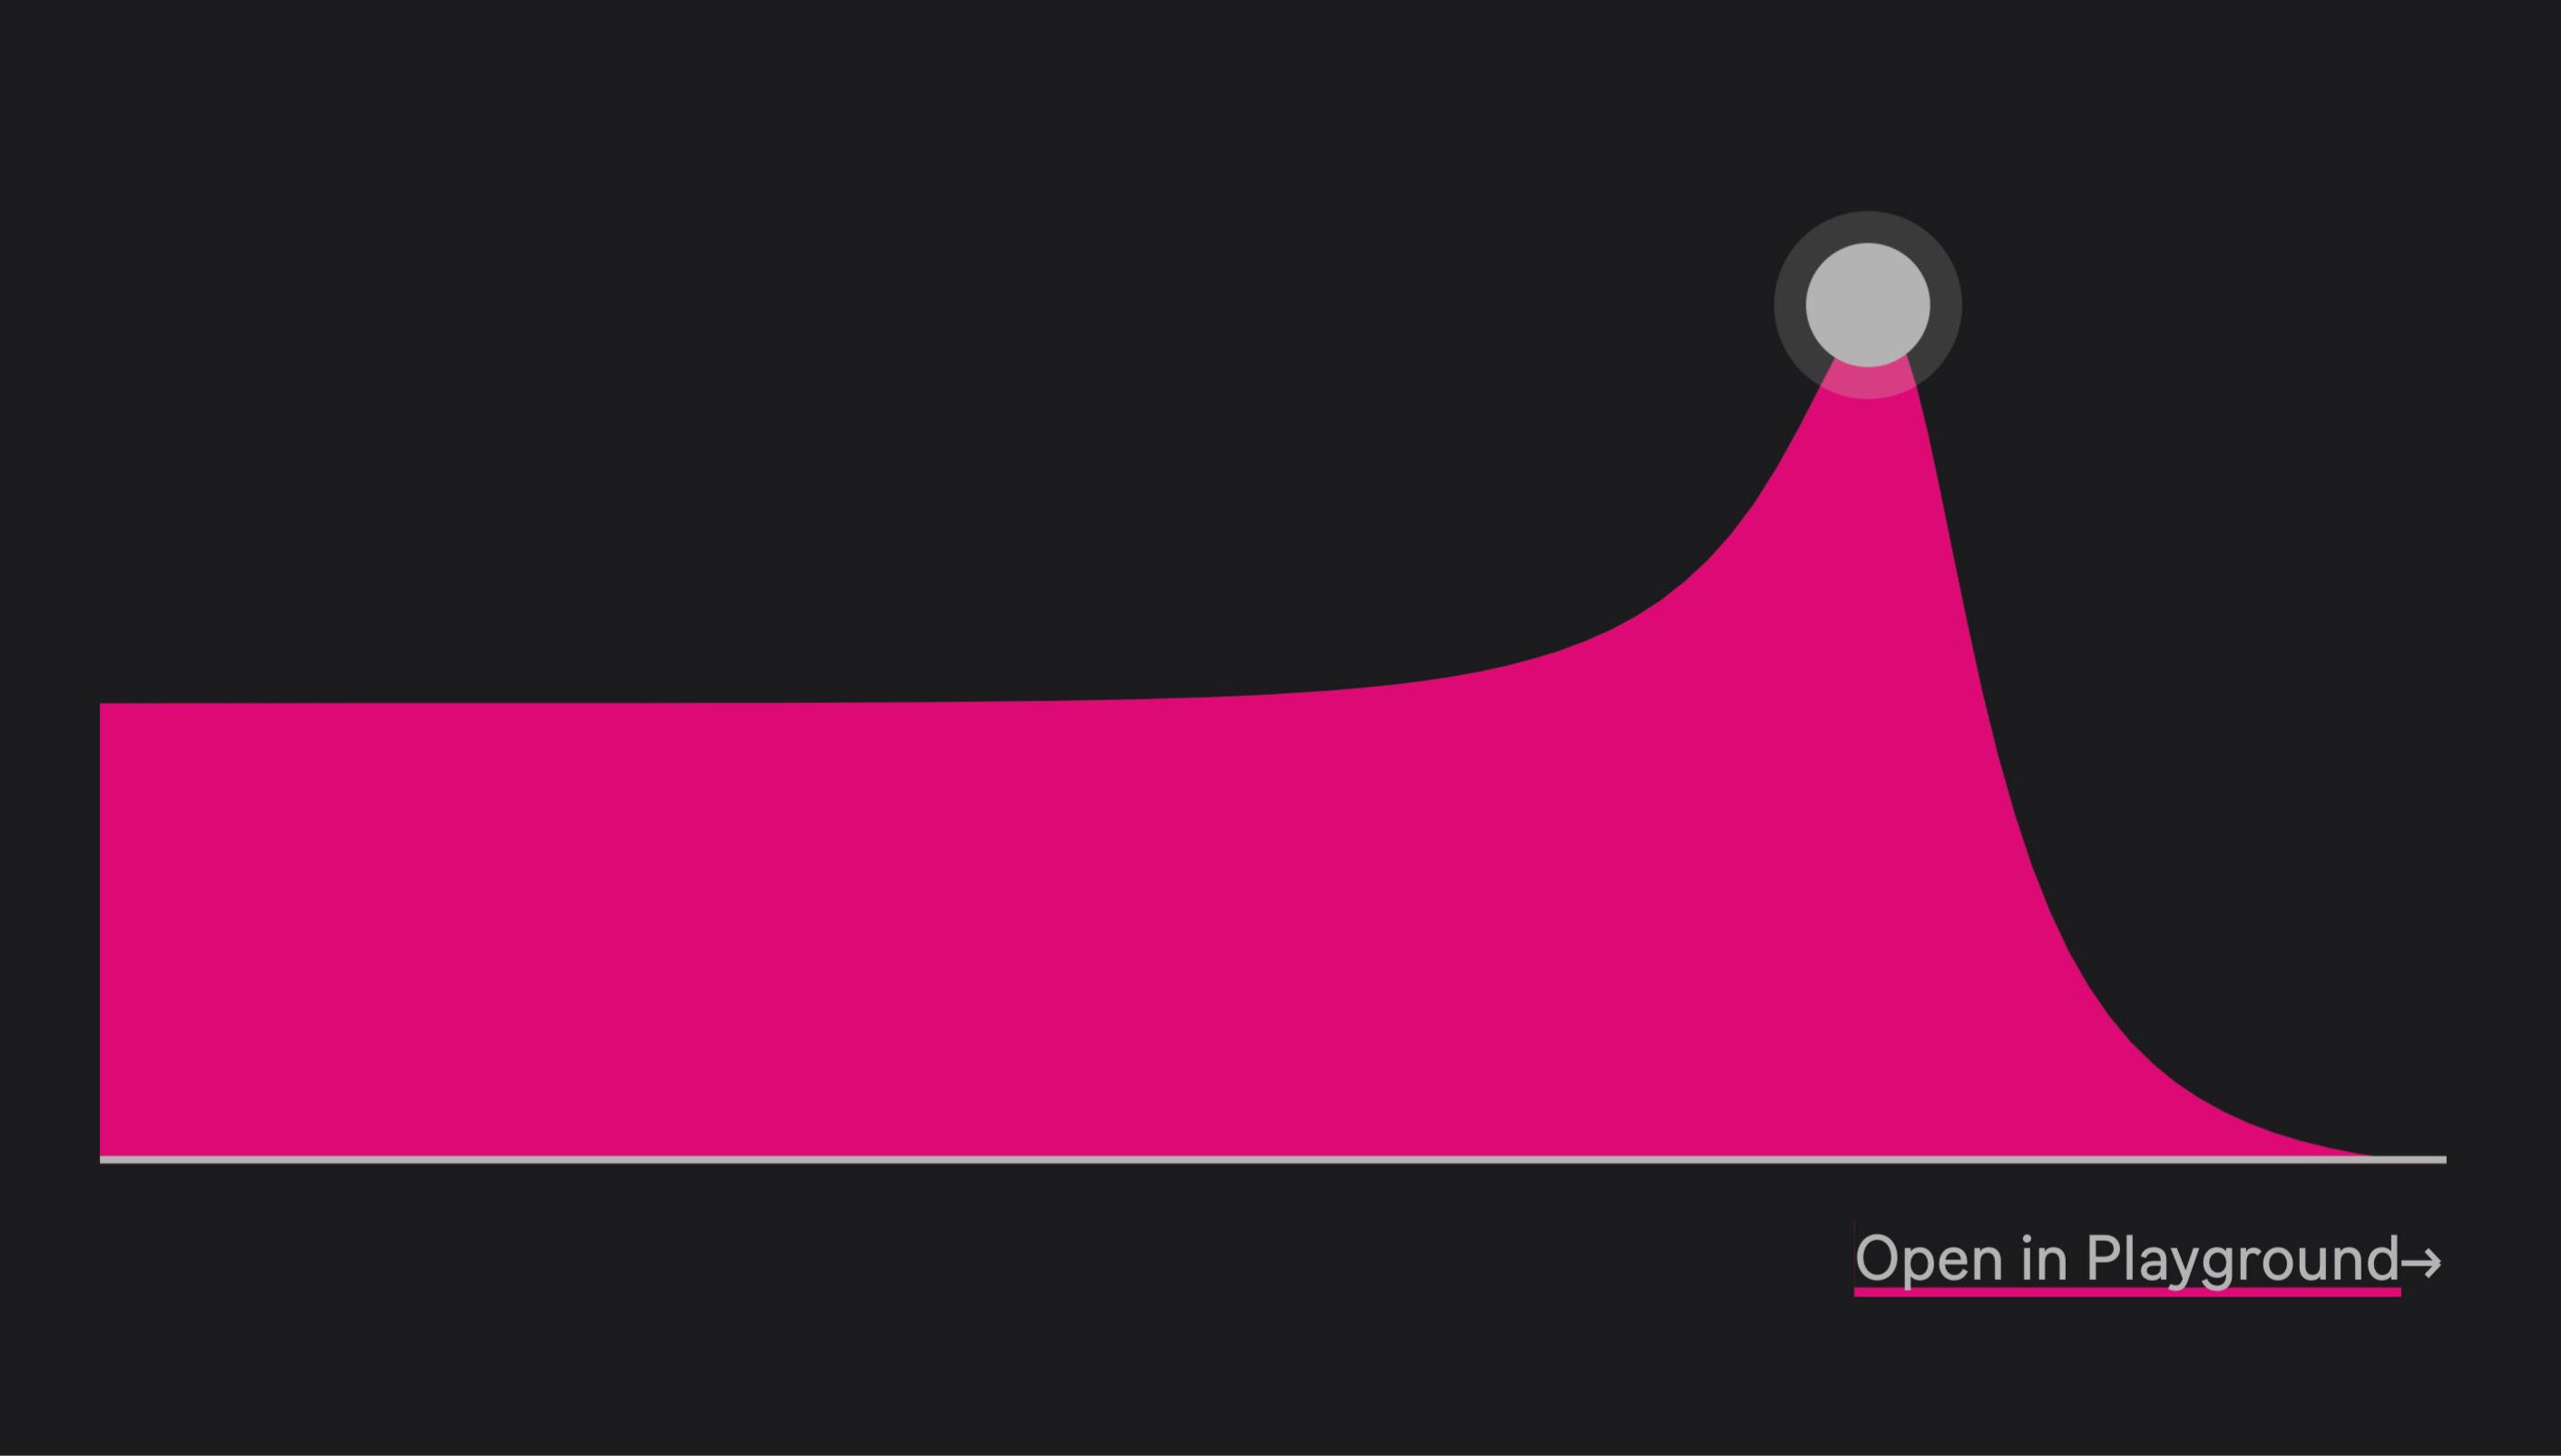
In Learning Synths Playground, the shape of the Low-Pass Filter is determined by the frequency and resonance. The longer the shape is, the more high frequencies are let through. If you want to filter those frequencies, you should shorten the shape across the x-axis (horizontally). Additionally, the higher the point is, the more resonance the sound has, and vice versa.
You can also tweak the LFO Amount and Envelope Amount to further optimize what sound the Low-Pass Filter creates.
How to Set Up Your Own Controls in Map
One of the many cool things about Learning Synths Playground is that you can customize the finest details of the controls to suit your specific needs. However, if you’re looking for a quick way to find your sound, you can make a few easy adjustments using the Map function to alter the Perform box.
With the Perform box, you can control all the components at once. But perhaps there is a component you feel is being adjusted too substantially; Map can make a few minor tweaks to whatever individual component you need, leaving the others in their original range.
All you have to do is click on Map and drag the left and right arrows, or the up and down arrows, to a component you want to adjust. Then drag the arrows on opposite ends of the spectrum to the highest and lowest point you desire and press Done. Now, when you use the Perform box, those components will stay in their new range.
If you're looking for something a little more hands-on and dragging around your cursor doesn't cut it for you, why not check out these awesome MIDI keyboards that you can connect to Learning Synths Playground, or other music software?
Optimize Your Sound in Learning Synths Playground
You can also use your PC keyboard to play the notes you want to hear. For example, pressing the number 4 will play D#3, and the notes are played in order of semitones like would be the case on a musical keyboard.
So if you can't connect to a MIDI, you don't need to worry, because as long as you have your PC, Ableton's Learning Synths Playground has got you covered.

