3D printing delicate parts can be challenging, and this is where support structures come in. Supports ensure that complex parts are not misaligned or detached during the 3D printing process. They are generally used with objects with overhangs or features that stick out from the main body of the print, which can cause the entire model to collapse.
Benefits of Using Supports in 3D Printing
There are many reasons why you need to use support structures in your project. Here are the key ones:
- 3D printers typically have a limited build area, so using supports helps make the most of that space by allowing you to add more intricate details and features to your design.
- Supports also help increase the overall strength of your 3D print. They act as a reinforcement in areas where there may be thinner sections of material.
- They make it easier to 3D print sharp angles that are usually difficult to print and help improve print quality by preventing warping and dimensional inaccuracies.
Though supports are essential, there are times when they are not necessary or even recommended. Below, we discuss the three main scenarios for using them.
1. When the Overhang Is More Than 45 Degrees

Although it’s possible to 3D print most of the overhangs without the need for supports, it is crucial to use supports when the angle is more than 45 degrees as it ensures that your object will hold up to stresses and strains without risking structural failure or deformity. The additional weight and leverage of the overhang make the structure more prone to collapse. By using supports, you can ensure the vertical elements are adequately reinforced.
2. If Your Print Is Taller Than It Is Wide
Printing a 3D model can be difficult if the object is taller than it is wide, as the printer will have a hard time orienting and printing all sides of the model evenly. This is because most printers typically work by laying down thin layers of material on top of each other, starting from the bottom up.
Since taller objects will require more layers to print, they will also tend to warp more easily due to uneven heating or cooling of the material during each layer. Supports help to prevent this from happening as they help to hold parts of the print in place during printing. They also ensure that your 3D models are stable and appear as expected.
3. When Creating Structures With Complex Shapes and Angles

When creating complex structures that require precision and stability, it is important to use supports to achieve the desired shape. These supports can be essential for building parts with intricate curves and unusual angles, as they help to provide the necessary level of stability and support. The supports also prevent designs from warping or breaking during the printing process.
Whether working with plastic or metal, using them enables you to build strong 3D printed objects that will hold up over time. Additionally, using these supports allows you to make precise adjustments to ensure your model matches your original design.
How to Add Supports to 3D Prints

Adding supports is pretty much the same regardless of the slicing program you use. In Cura, you can add them by going to the Print settings menu and selecting the Support option. Once you're in the Supports menu, there are a few different options that you can choose. For example, you can choose to have supports placed everywhere or touch the build plate only, as shown below.

There is also an option to select the pattern of your supports. Whether triangles, lines, grids, concentric, zigzags, or crosses.
Cura also has an option to add custom supports. Custom supports are vital if you want more control over where your supports are placed. To do this, click Custom, and adjust the settings displayed accordingly.

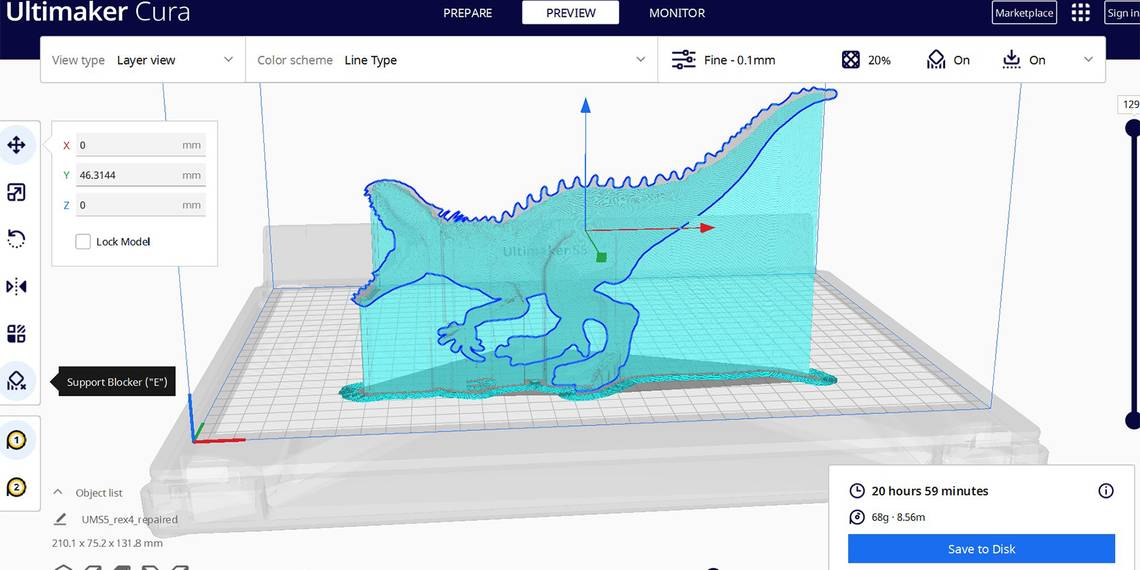
Once done with the settings, you can go to Per Model Settings and select Print as support. You can then slice your design and preview it to see if the supports are added as required. The figure below shows a preview after adding supports to the model.

You can also change the support patterns if you don’t like the one displayed.
Common Issues With Supports and How to Avoid Them
Here are the four common issues people have with 3D printing supports and how you can avoid them:
- Supports not adhering well to the printed object. You can avoid this by using a brim or raft when printing. Brims are lines of extrusion around the edge of an object that help it adhere better to the build plate. Rafts are layers of extrusion underneath an object that also help it stick better.
- Supports are too tricky to remove. You can avoid this by using support materials that are easier to remove, such as water-soluble supports.
- Supports leaving marks on the object. Avoid this by using support structures with a larger contact area or a support material that doesn't stick as well to the printed design.
- Supports not strong enough. You can fix this by increasing the infill settings or using thicker layers.
Supports can be a pain, but they don't have to be if you do some planning. By avoiding these common issues, you'll 3D print with fewer headaches and better results.
How to Remove Supports

There are a few different ways to remove supports from 3D prints. The essential thing in the process is adjusting the 3D printer slicer software settings to make removal easier. You can weaken or lessen them. Below are other key methods for removing supports easily.
- One common way is to use a pair of pliers or tweezers to break off the supports. You can also use a hobby knife to cut them away from the print.
- Sandpaper or a file is also helpful, especially if the supports are not very thick. It can be time-consuming, but it will give you a smoother finish on your print.
- Another way is to use chemicals. There are products available that can dissolve 3D printing supports, and they can be a quick and easy way to remove supports, but you need to be careful not to damage your print in the process.
- You can also soak them in water. Soaking your design in water can help loosen support material and make removing it more straightforward. Be careful not to soak for too long, as this can damage some filaments.
3D Print Overhangs and Complex Shapes Confidently
Supports are helpful when dealing with complex shapes and parts of an object that hang unsupported in the air. With the right supports in place, it is possible to print a wide range of intricate designs confidently, and you won't need to worry about having a failed 3D print due to the complexity of your design.
Adding and removing the supports is not always complicated. Just be sure to take note of the common issues 3D printer hobbyists experience highlighted above and know how to fix them so that you can solve them efficiently in case they happen to you.