The Nik Collection has been around since 1995, and boasts more than 200 presets under DxO company branding.
With Nik plugins, both amateur and professional photographers alike have access to incredibly powerful photo editing tools that are capable of both soft touches and earth-shaking transformations.
We’re going to show you several amazing effects that you can achieve with your images using the Nik Collection 2012 legacy suite in tandem with Photoshop. Let’s get started!
1. Sunlight in Color Efex Pro

The Sunlight preset is one of several different options in Nik for brightening and warming your color photos in a subtle and controllable manner. The great thing about the Sunlight adjustment panel is that many of the popular options to control the image saturation in Photoshop are here in one place.
The Light Strength and Light Temperature sliders serve as the main adjustments to set the tone for finishing touches.
The Brightness and Contrast sliders carve out the rest of the overall mood with Saturation at the tail-end to supply any subtle tweaks that may be required.
Like most of the Nik Collection presets, Control Points are available to freely place anywhere on the image to apply local opacity adjustments.
2. Vintage Camera in Analog Efex Pro

The Vintage Camera presets ensure dramatic changes to your images. As the name suggests, Nik aims to emulate the classic film days with its collection of vintage camera options.
The presets in the left panel set the stage for the rest of your edits using Vintage Camera. You’ll be able to view and select which template is going to work best before moving onto topical changes.
The most important aspect of these menus is arguably the Light Streaks options, which come with its own set of thumbnail presets, edit options, and Control Points.
3. Bright in HDR Efex Pro

HDR effects have arguably become a bit of a cliché in recent years, no thanks to photographers overusing them in editing. But HDR is available as a stand-alone plugin in the Nik Collection.
The best strategy for selecting one of these 28 presets is to find one that makes your image pop without adding too many ghastly distortions. The Bright preset works well for the above image.
Next, the Tone Compression and Tonality menus will help dial back the haloing effects while maintaining a bold look.
In Finishing Touches, a vignette will also help keep the viewer’s focus on your subject.
4. Pro Contrast in Color Efex Pro

Beginners often overlook contrast as an effective tool to use in their editing workflow—at first glance, it’s not as flashy as other effects. But the truth is, contrast is vital if you want to set yourself apart from the countless photographers out there who don’t use contrast smartly or not at all.
Nik makes it easy to make contrast adjustments without comprehensive knowledge of Photoshop. Three main sliders are all you need: Correct Color Cast, Correct Contrast, and Dynamic Contrast. You also have Shadows and Highlights sliders and the ever-useful Control Points.
If anything, you’ll see what a big difference contrast makes when comparing before and after pictures.
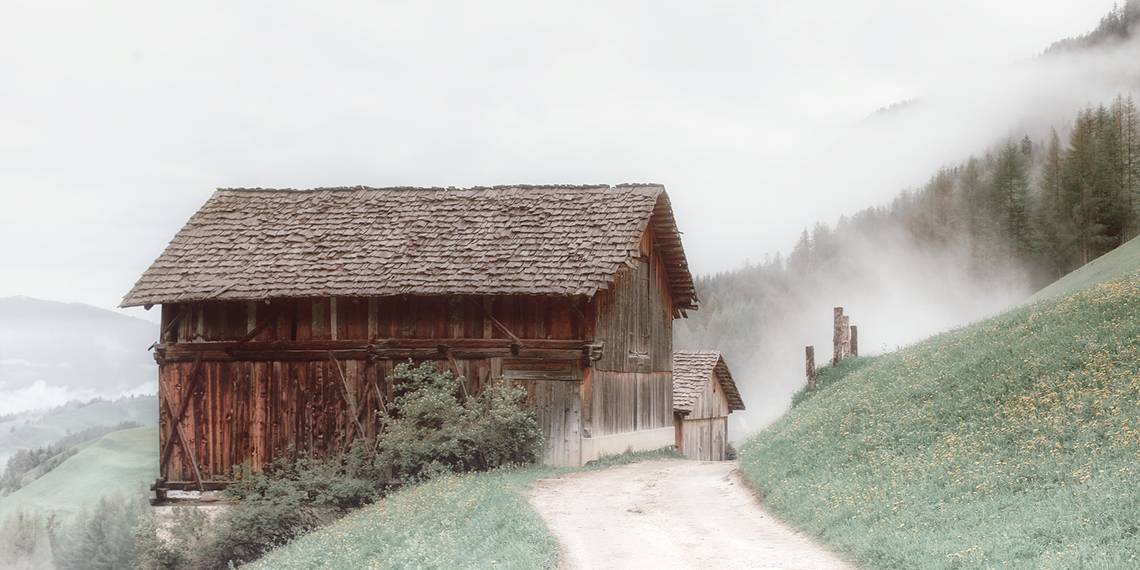
5. Graduated Fog in Color Efex Pro

The Graduated Fog filter is one of those fun ones to play around with, even in images where fog may not be thought of as the obvious choice for an effect.
Perhaps the most useful of the three preset options for a starting point is Foreground. This will place fog at the bottom of your photo, where you’ll be able to shape it to better suit your subject or even to add atmosphere and dimension.
The four main sliders are vitally important in crafting your fog effect. The Vertical Shift slider will control how high in your image the fog will rise. Meanwhile, the Blend and Opacity sliders will determine the quality of the gradient.
And if you don't want the fog to simply rise straight up, the Rotation slider will help place the fog at specific angles.
6. Motion Blur in Analog Efex Pro

The Motion presets in Analog Efex Pro offer a large array of blurring options for your images.
With 10 templates to choose from, there are thousands of artistic looks you can achieve by making edits in the dozens of menu options. Some of which include grids to help place blur where you want it.
The two main menus available in most of the presets are Zoom & Rotate Blur and Motion Blur. These powerful tools shape the totality of the blur effect.
The complimentary menus, like Basic Adjustments, Lens Vignette, and Film Type, make it easy to adjust settings that you’d normally have to use Lightroom or Adobe Camera Raw for.
7. Darken-Lighten Center in Color Efex Pro

More advanced users may consider this plugin to be overkill. Why? Because many of the Nik Collection presets come with their own vignette options. But here’s why you would want to use this effect.
The brilliance of Darken-Lighten lies in its convenience and effectiveness in performing a simple task. With only a handful of sliders, it makes for a quick pitstop to make useful and intuitive changes.
As we will discuss at the end of the list, you’re able to combine multiple effects in Color Efex Pro. This makes Darken-Lighten a great starting point to accentuate your subject before moving onto more dramatic editing choices.
8. Midnight in Color Efex Pro

Sometimes, you want to darken your entire image quickly without trying to figure out which method in Photoshop would work best. Midnight is one of two presets in Color Efex Pro (along with Low Key) that get the job done.
The presets on the right are extremely helpful in determining the general direction you may want to take your image in the darkening process. Not only does it include a darkening option, but it also has an option to color-tone your image too.
The most important starting point is arguably the Shadows slider. This one slider is responsible for controlling what details are revealed in your image.
Control Points are extremely important when using the Midnight preset. Rarely will you import an image and find that Midnight does a perfect job without a single tweak needed.
The Control Points will reduce the Opacity selectively and allow you to recover your subject details. This is especially useful when you have people in your photos.
9. Glamour Glow in Color Efex Pro

Glamour Glow is aptly named. If you want to add a fashionable glow to your image, this may be an effect you’ll want to check out.
Glamour Glow is probably one of the most simple tools to use in Color Efex Pro. There are only three sliders, and Glow is the one you’ll want to pay special attention to.
Glow is somewhat similar to the Gaussian Blur in Photoshop, but a bit more subtle. When it comes to applying it to your subject’s skin, you’ll want to make sure that you don’t go over-the-top with the effect, as you could wipe out skin texture and other fine details.
It's best to use the Glow slider to create an overall blur profile, and then use the Control Points to reduce the Opacity so that vital details can be recovered.
10. Combining Multiple Filters in Color Efex Pro

There’s nothing more annoying than having to access a plugin multiple times in Photoshop because the plugin doesn't have the option to stack filters.
Oddly enough, you can only do this in Color Efex Pro. Other programs, like Analog Efex Pro, require you to make multiple trips. At least Nik got it right for Color Efex Pro.
Basically, once you’re done with one preset, all you need to do is click the Add Filter selection that appears at the end of every menu in Color Efex Pro.
In the above image, we used several of the presets we’ve already discussed and combined them together. When exported, all the effects will be imported into Photoshop as a single layer. It's very useful for file size management.
Make Subtle or Dramatic Edits Using the Nik Collection
We only touched on a few of the presets available in the Nik Collection. There are plenty more that offer you quick solutions to your editing needs, all while giving you the control to make selective adjustments.

The best way to learn how to use these presets is by experimenting with your own images. Check out the Nik Collection for free, and decide for yourself if these presets would be valuable in your editing workflow.
Image Credit: Eberhard Grossgasteiger/Pexels