.jpg?q=50&fit=contain&w=1140&h=&dpr=1.5)
Users often report Windows update errors on Microsoft’s support forum, as well as other tech support-related websites. Those are issues that occur when users try to update Windows 10 and 11 via Settings. When such an update issue arises, Settings displays an error message that reads, “there were some problems installing updates, but we’ll try again later."
Those update errors have unique codes, such as 0x800f0816, for reference. Although they have different codes, they all stop Windows downloading and installing patches or build updates much the same. These are the various ways you fix those update errors in Windows 11.
1. Run the Windows Update Troubleshooter
The Windows Update Troubleshooter is a tool designed specifically for fixing the update process. That troubleshooter won’t necessarily fix every update error, but it can resolve quite a few update issues nonetheless. As it’s a straightforward troubleshooting method, Windows Update Troubleshooting is always worth a try. This is how you can launch that troubleshooter in Windows 11.
- Click Start and select to open the menu’s pinned Settings app.
- Select Troubleshoot on the System tab in Settings.
- Then click Other-troubleshooters to view Windows 11’s troubleshooting tools.
- Click the Run option for the Windows Update troubleshooter.

The Windows Update troubleshooter tool will then open and automatically detect issues. Wait for the troubleshooter to do its stuff. If it applies any fixes, it will say it found issues and made some changes to your system.

2. Run a System File Scan
Windows update errors can arise because of corrupted system files. System File Checker is one of the best tools included in Windows 11 for repairing system files. That command-line utility will verify the integrity of system files and replace corrupted ones. You can run an SFC scan with the Command Prompt like this.
- Right-click the Start menu’s button to select and open Windows Terminal (Admin).
-
Click the Open a new tab button, and select Command Prompt on the menu.
-
Enter this Deployment Image Servicing command and hit Return:
DISM.exe /Online /Cleanup-image /Restorehealth -
To initiate an SFC scan, input the following command and press Enter:
sfc /scannow - Wait for the SFC scan to finish and display an outcome within the Command Prompt.


Running a Deployment Image Servicing scan is an optional step. It’s recommended you run that scan in case an image repair is required. If such a repair is needed, the system file scan won’t be effective without running a Deployment Image Servicing scan beforehand.
3. Check the Windows Update Service Is Enabled and Running
Windows Update is a service that needs to be enabled and running to download and install updates. The OS can’t download and install updates when that service isn’t on. So, check that service, and others needed for updates, are enabled and running when update errors occur.
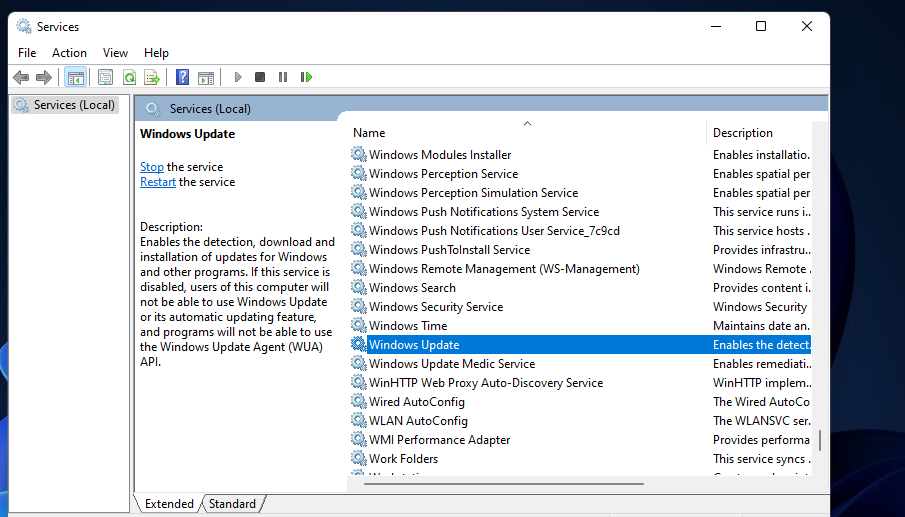
- Press Win + R to open the Run dialog box.
- Type services in the Open box.
- Click OK to open Services.
-
Double-click the Windows Update service.
-
Make sure Automatic is the selected Startup type option.
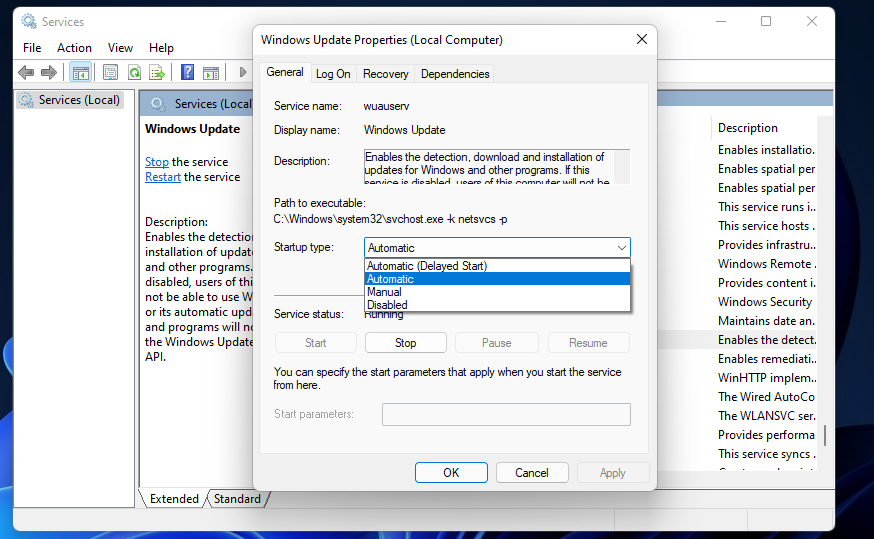
- Click Start if the service isn’t running.
- Press the Apply button to save the new options.
- Then click the OK option on the window.


Also, check that other related services required by Windows Update are enabled and running. These are three other services you should check as outlined above:
- Application Identity
- Background Intelligent Transfer Service (BITS)
- Cryptographic Services
4. Check and Free Up Drive Storage Space
Although space is reserved for Windows updates, issues might still arise when there’s very little free storage space on your hard drive. So, make sure there are at least a few gigabytes of space available on your PC’s C: drive (or primary partition) for updates. Check how much space is left on it by clicking This PC in File Explorer to view the drive storage icon shown directly below.
If that icon shows your storage drive is more than 90 percent full, you should free up some space on it. The best way to free up HDD or SDD storage space is to uninstall larger software packages you don’t need. Also, run a disk cleanup scan to erase junk files.
5. Disable (or Uninstall) Third-Party Antivirus Software
Third-party antivirus utilities can sometimes interfere, or conflict, with Windows updating. To ensure your third-party software isn’t causing any update issues, try temporarily disabling it before checking for updates in Settings. You can turn off many third-party antivirus shields by right-clicking their system tray icons and selecting a disable or pause context menu option.
Alternatively, you can uninstall your third-party antivirus software (and rely on Windows Security) to ensure it can’t undermine Windows updates in any way. To do so, input appwiz.cpl in Run’s Open box and click OK. Then you can remove the antivirus software by selecting it in Programs and Features and clicking Uninstall. Or you might be able to uninstall your antivirus package with a dedicated uninstaller tool for it, such as the Avast Uninstall Utility for example.

6. Clean Boot Windows
Clean-booting Windows 11 will eliminate the possibility of startup software and services conflicting with the update process. You can configure Windows to clean boot by disabling all third-party startup programs and services. To do so, you’ll need to adjust some MSConfig settings as follows.
- Launch Run by right-clicking the Start taskbar button and selecting its shortcut on the Power User menu.
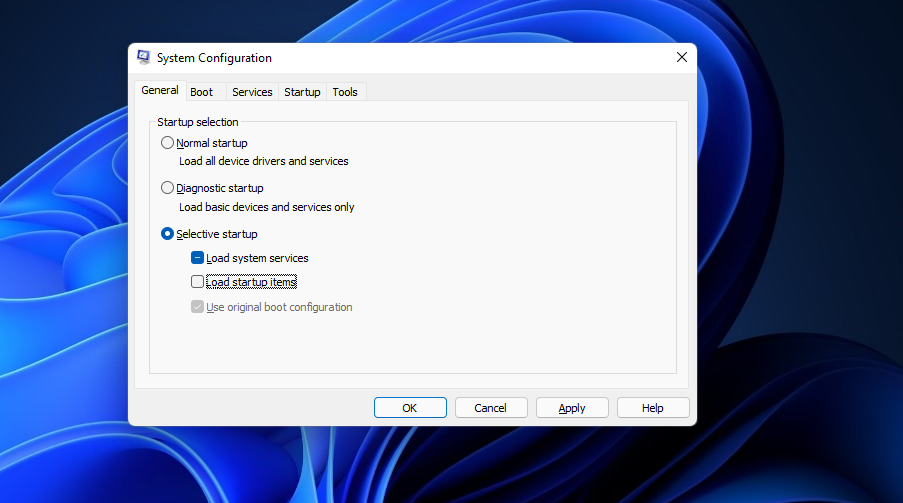
- Type msconfig in the Open box, and select the OK option.
-
Deselect the checkbox for the Load startup option. However, the Load system services and Use original boot configuration options should be selected there.
-
Select Hide all Microsoft services on the Services tab shown directly below.
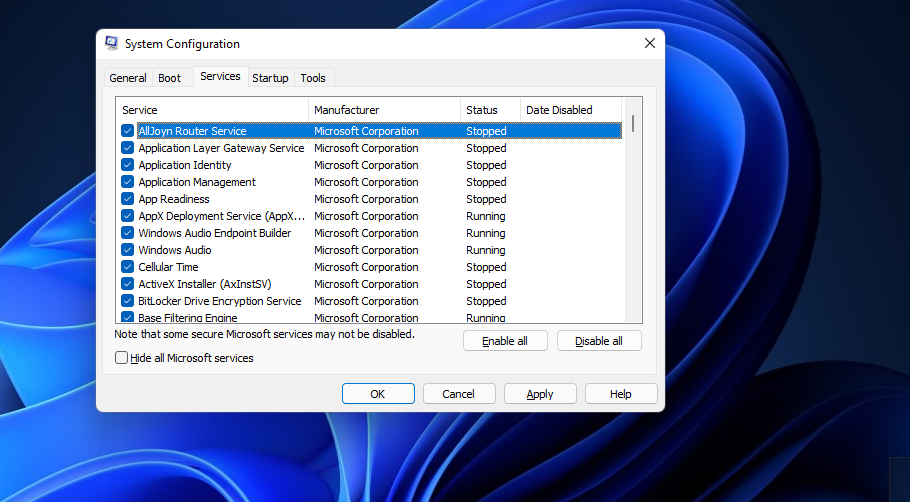
- Click Disable all to remove all listed third-party services from the startup.
- Press the Apply button, and click OK to exit MSConfig.
- Select Restart on the dialog box prompt that will open after you close MSConfig.
- Try updating Windows 11 after the restart.


7. Reset Windows Update Components

Update errors can often be due to corrupted Windows Update components. Therefore, resetting those components is another potential solution for numerous update issues. You can update the Windows Update components by renaming the SoftwareDistribution and catroot2 folders.
- Open the Command Prompt as an administrator within Windows Terminal as outlined in the first couple of steps of the second resolution.
-
Input these four separate commands pressing Return after each:
        net stop bits
net stop wuauserv
net stop appidsvc
net stop cryptsvc -
To rename the SoftwareDistribution folder, input this command and press Enter:
Ren %systemroot%\SoftwareDistribution SoftwareDistribution.old -
Then input this command for renaming catroot2 and press Return:
Ren %systemroot%\System32\catroot2 catroot2.old - To restart the services, input these separate commands pressing Enter after each one.
        net start bits
net start wuauserv
net start appidsvc
net start cryptsvc
Windows will set up new SoftwareDistribution and catroot2 folders for Windows Update when you rename them as outlined above. The net stop and start commands restart the services needed for updating the platform. When you’ve applied this potential resolution, restart Windows 11 and try installing updates again.
8. Reset Windows 11
Windows 11 includes a Reset this PC tool, which is a built-in utility for reinstalling the platform. Resetting the platform will restore it to factory (default) settings and remove all software packages that weren’t pre-installed on your PC. However, you can select an option to reset your PC and preserve user files.

Resetting Windows 11 is the last resort for resolving update errors that will likely fix OS issues other potential resolutions do not. Give other potential resolutions for update errors a try before resetting the platform. If you’ve run out of options, however, you can reset Windows 11 as covered in the MUO guide linked below.
9. Manually Download and Install Updates
Although more of a workaround than a fix, you can manually download and install Windows 11 updates your PC needs from the Microsoft Update Catalog. Thus, you don’t need to click the Check for updates option in Settings to download and install them. You can manually install updates like this.
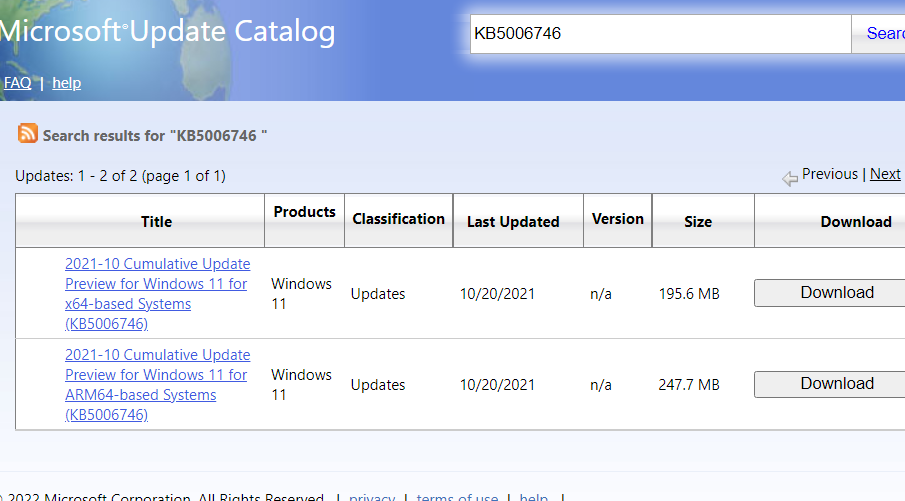
- Open the Microsoft Update Catalog website.
- Enter the KB code number for an update you want to install in the search box there.
-
Select the Download option for a compatible Windows update in the search results.
-
Then right-click the download link in the window and select Save link as.
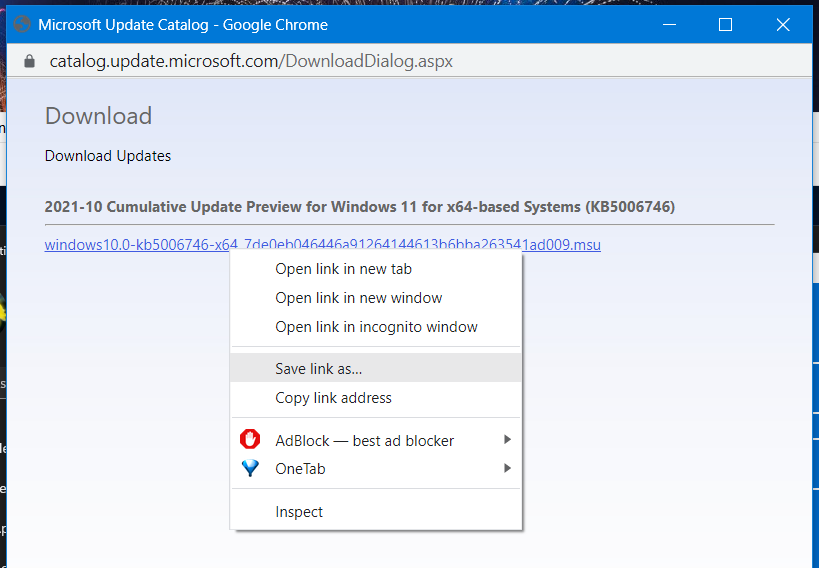
- Choose a folder to download the update package to, and click the Save button.
- Bring up File Explorer (with the Win + E hotkey), and open the folder that includes the downloaded update package.
- Then double-click the update’s MSU file to install it.


Now Windows Update Will Work Again
Although it’s not necessarily essential to fix all update errors, patch updates are important for addressing bugs and the Windows Security app. Those potential resolutions will likely resolve most Windows 11 errors for installing updates so that your PC can receive all the latest updates. Aside from those fixes, restoring Windows to a system restore point and generally updating your PC’s device drivers can also feasibly fix such issues.