
The registry is a system database that incorporates all of Windows's important configuration settings. It’s a good idea to back up the registry every so often, just in case system changes cause issues on your PC. In which case, you can then restore Windows with a good backup registry copy.
You can manually select to back up the registry. However, it’s better to enable regular automatic registry backups in Windows 11. These are three ways you can enable automatic registry backups in Windows 11.
How to Enable Automatic Registry Backups by Editing the Registry
Windows used to automatically back up the registry to a RegBack folder. However, Windows doesn’t do so anymore, possibly because it became increasingly unnecessary with system restoration points. You can re-enable those automatic RegBack backups by manually tweaking the registry as follows:
- Select the search (magnifying glass) button by the taskbar’s Start menu.
- Input Registry Editor in the Type here to search box to locate that app.
- Double-click the Registry Editor search result.
- Then input HKEY_LOCAL_MACHINE\SYSTEM\CurrentControlSet\Control\Session Manager\Configuration Manager within the address bar in Registry Editor and press Enter.
-
Click the Configuration Manager key with the right mouse button to select New > DWORD (32-bit) Value.

- Then input EnablePeriodicBackup to be the new DWORD’s title.
- Double-click the EnablePeriodicBackup DWORD on the right of the Registry Editor.
-
Input 1 within the data box to replace the current value.
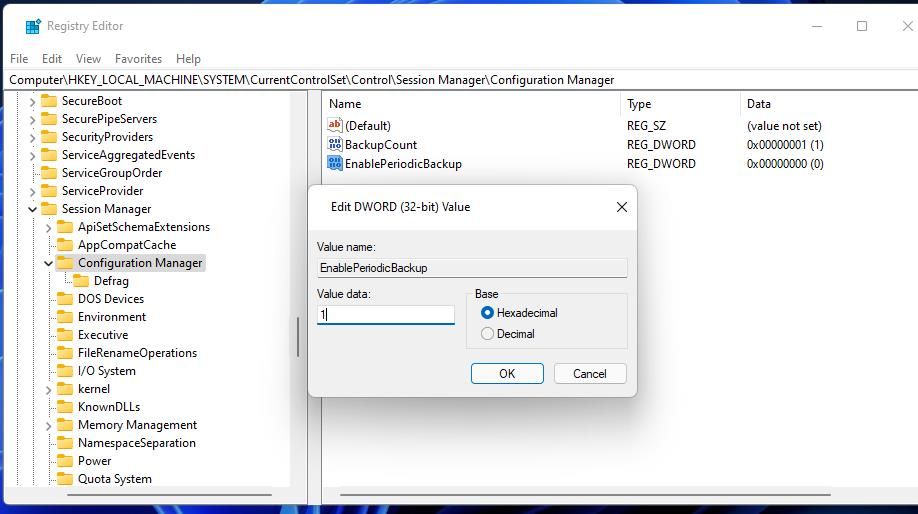
- Select OK to exit the Edit DWORD window.


Windows 11 will now automatically back up your registry within the RegBack folder. You might need to wait for a few days before an automatic registry backup happens (its exact scheduling isn’t entirely clear). You can see the backup data within the Windows\System32\config\RegBack folder shown directly below.

You’ll see Default, SAM, Security, Software, and System hive files there. That RegBack folder usually amounts to 0 KB. When Windows has automatically backed up the registry, the RegBack folder will include megabytes of data.
You can disable the automatic backups by deleting the EnablePeriodBackup DWORD. Open up the Configuration Manager key in the Registry Editor. From there, right-click EnablePeriodBackup and select Delete and Yes.

How to Enable Automatic Registry Backups With Task Scheduler
Instead of editing the registry, you can schedule an automatic registry backup with Task Scheduler. The Task Scheduler has a RegIdleBackUp task that you can enable and schedule to back up the registry. This is how you can schedule regular registry backups with the RegIdleBackUp task:
- Open Windows 11’s search box, and input Task Scheduler there.
- Click Task Scheduler to open its window.
- Then double-click Task Scheduler Library to extend it.
-
Select Microsoft > Windows > Registry to reach the RegIdleBack task shown directly below.
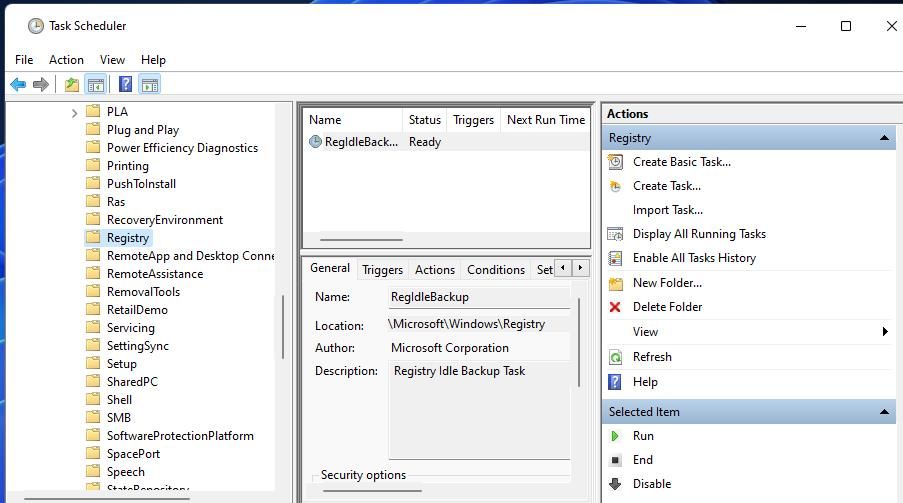
- Double-click RegIdleBack to open its window.
-
Select the Triggers tab.
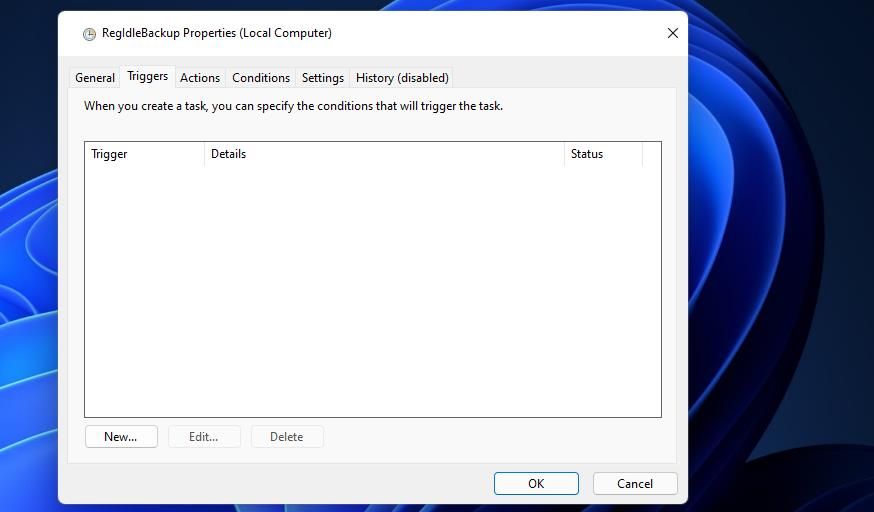
- Press the New button to bring up the New Trigger window.
- Click the Begin the task drop-down menu to select On a schedule.
-
Select the Weekly option.
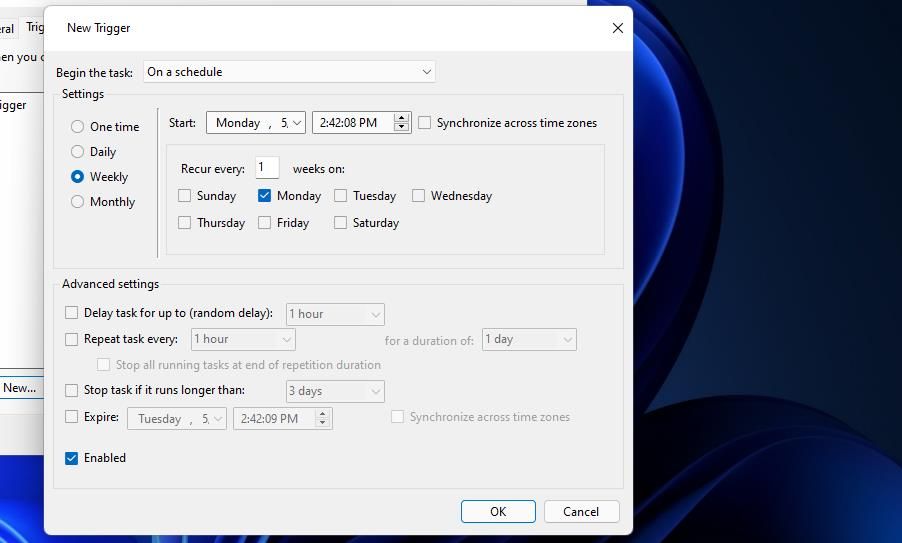
- Choose a start date in the Start drop-down menu.
- Input a value within the Recur every box. For example, you would enter 1 there to set a once-weekly automatic registry backup.
- Select a day for the automatic backup to recur.
- Make sure the Enabled checkbox near the bottom right corner of the window is selected.
- Press the OK button to save the new trigger.
- Then click OK again on the RegIdleBackup Properties (Local Computer) window.


Now you’ve configured the RegIdleBackup task to back up the registry once a week. You can also configure RegIdleBackup to back up the registry at the log-on, startup, or other specified events by selecting alternative options from the Begin the task drop-down menu. The registry will be backed up in the same RegBack folder specified for the previous method.
To remove a scheduled registry backup, delete its trigger for the RegIdleBackup task. You can do that by selecting the trigger within the Triggers tab on the RegIdleBackup Properties window. Then press the Delete button there, and click OK to close the window.
How to Enable Automatic Registry Backups With System Restore
The System Restore utility has been a part of Windows since XP. That tool enables users to roll back Windows to saved system image snapshots, which are otherwise known as restore points. A restore point is another form of registry backup.
Users can select restore points within the System Restore window. However, System Restore won’t automatically set up restore point backups unless that feature is turned on. This is how to enable restore point backups in Windows 11:
- Press the Win + R keyboard key combination.
- Type sysdm.cpl in Run and select OK to bring up a System Properties window.
-
Select the System Protection tab in the screenshot directly below.
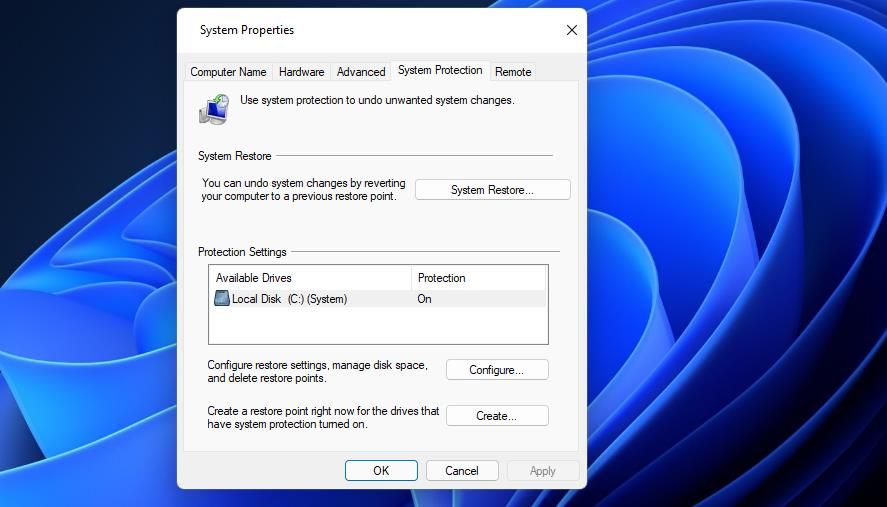
- Click the Configure button from the System Protection tab.
- Then select the Turn on system Protection radio button if it’s disabled.
-
Drag the Max Usage bar’s slider right to increase the number of system restore backups kept. However, bear in mind that dragging that setting to the far right can consume lots of drive storage space.
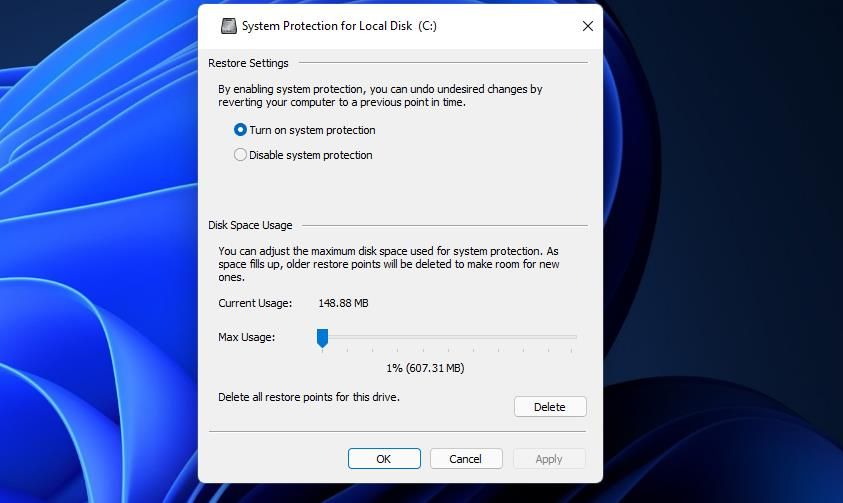
- Press the Apply button to save the new System Restore options.
- Select OK to exit the System Properties window.


System Restore will now automatically save restore points. How often it does so largely depends on the Max Usage setting. There aren’t any options available to set up a specific schedule for System Restore to back up the registry.
You can see and select System Restore’s registry backups within that utility’s window. Click the System Restore button on the System Properties window. Then press the Next button to have a look at the restore point backups available. If there are lots there, you might be able to select a Show more restore points option to view a full list.

To restore a registry backup from there, select a restore point date. Click Next to proceed to the system restoration confirmation step. Select Finish to roll back Windows 11 to the chosen restoration date.
Set Automatic Registry Backups in Windows 11
It’s recommended users activate regular automatic registry backups in Windows 11 one way or another. You probably won’t need to restore Windows registry backups very often. However, such backups can be invaluable for resolving various PC issues. So, make sure you’ve enabled regular automatic registry backups with one of the methods above.