Last month we highlighted Pixelpost, a very capable and easy to use (if slightly outdated) photoblog engine. Despite being a fantastic little freebie, a number of readers got in touch to tell us how great Zenphoto is.
I originally used Zenphoto a few years ago, and immediately noticed that the project has come on leaps and bounds since then. I'll be looking at version 1.4.0.2 in this article, which at the time of writing has only been out for a couple of weeks. If you couldn't be sicker of Flickr and fancy hosting your own hard work then step inside.
Setting Up
Much like Pixelpost, ZenPhoto is designed to run on a web server and you'll need your own hosting package to install. You're going to need an Apache server with PHP version 5.2 or greater and MySQL 5 or better. As of version 2.0 it is now possible to use PostgreSQL and SQLite databases as well.
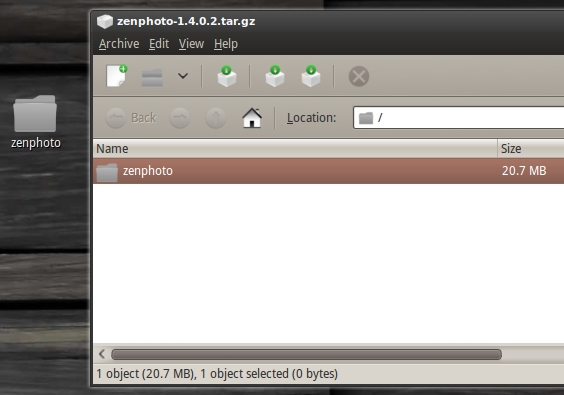
The installation process is a fairly painless experience, and one that Zenphoto prides itself upon. You can download the latest version from the homepage in .ZIP or .TAR.GZ format. Once downloaded (it's around 6MB compressed) extract the folder to a location on your hard drive.

Now upload the folder you just extracted to the desired location on your webserver. If you upload Zen to your root folder (usually a folder called "httpdocs") your Zenphoto gallery will be found at yoururl.com/zenphoto. You will need an FTP client to upload, something like Filezilla is perfect.
The upload process can take a while, depending on your upload speed so whilst that's completing you might as well create a MySQL database. Your hosting company probably provided you with a web control panel like Plesk or CPanel to complete such a task.
Once done make a note of the database name. You'll also need to add a user to the database, make a note of both username and password. You're now ready to install, simply visit yoururl.com/zenphoto/zp-core/setup.php and follow the instructions.

Admin Duties
One you've set database options and defined a username and password, you'll be taken to the admin panel. Zenphoto's admin interface is definitely more attractive and probably easier to work with than Pixelpost, though the general layout remains the same.

One of the first stops you'll want to make is the Options tab, which can take you a while to work your way through. Here you can customize the general settings related to your Zenphoto installation including RSS, plugins, your theme, upload settings, image display and comments.

When you've finally set everything up (and it can take a while) you'll probably want to upload something. Luckily you won't need to create any albums before uploading, as there's an option to do so on the fly. Tags don't quite operate in the same way and do need to be added on the Tags tab and then be attached to each image.

Batch uploading is possible as Zenphoto will accept .ZIP archives that contain recognised image types. Arranging everything just the way you want it is made infinitely easier thanks to the drag and drop interface and galleries can be manipulated in this way too.
Once you've uploaded an image or .ZIP collection, you can then add titles, descriptions and individual attributes to your photos. There's even the option to take care of watermarking for you and a fantastic thumbnail editor, allowing you to get the perfect crop.

EXIF data can be extracted from your images and put to good use, for example using the Google Maps plugin you can show visitors where the image was taken using the latitude and longitude stored in the image (if your camera supports it, of course).

You can add all these settings manually for each image of course, and once you've filled it all out you'll probably have something that looks like this:

Whilst viewing your site's front end you may notice there's a handy Admin Toolbox in the top right corner, allowing you to manipulate various pages. From this box you can go straight into editing an image, log out and get back to the admin panel.
This is a really handy little feature which means you won't be constantly fumbling around with bookmarks or the address bar when you want to change something.

Conclusion
At this stage Zenphoto probably looks a bit drab and boring, and there's still plenty more that can be done with it. I'll be following this up with another post about themes, integrating your galleries and even turning Zenphoto into a blog-style CMS centred around your images.
The exhaustive list of features supported by Zenphoto makes for a thoroughly impressive cost-free package. Let us know what you think of it or share your own gallery in the comments below.