Running a blog can seem like a pretty romantic idea at first. You imagine pushing out two or three blog posts a day, and hundreds or hopefully thousands of fans checking out what you have to say.
The days turn into weeks, and then the weeks turn into months. Blogging become a chore. You realize that you are spending most of your time trying to format your posts so that they look professionally done.
Then you hire a writer, and then two. Soon, you have a team of writers sending you posts every week, and you're now spending all of your time editing and formatting those posts to look the way that you want them to look on the blog that has become a labor of love.
The problem is that all of this editing and formatting has taken away all of the time that you used to have for what you loved to do the most - write.
Wordpress is a brilliant invention, and has made it possible for more and more people to have amazing websites, with beautiful themes. However, there is still the matter of the content area, which still needs to be formatted for pictures, ads and well-spaced content.
Formatting Your Wordpress Content with a Template
A while back, I described to you how you could automatically insert an ad into every single post using the In-Post Template Add-on for Wordpress.
This works brilliantly if you are starting with a new blog - but if you've already been inserting ads into your posts, it'll go back and re-insert a new ad and completely mess up all of your old posts.
Don't worry - there is another solution that is even better. By simply editing one of your standard Wordpress PHP files, and then creating a style sheet, you can create your very own carefully formatted content template that will appear every time you click "Add New" in Wordpress. All your old content will remain untouched.
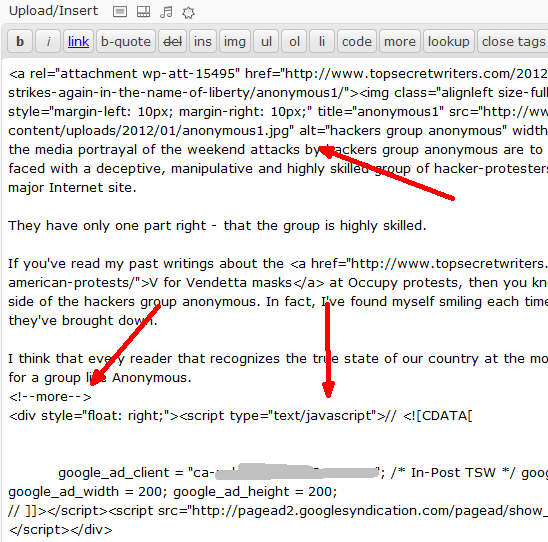
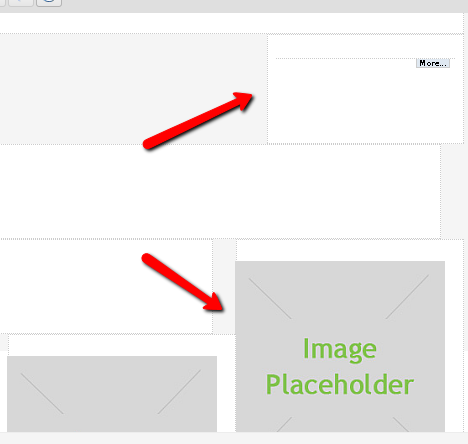
Here's a sample of all of the formatting work that I have going on in my own blog.
I've got a header image that needs to be carefully sized, with padding around it and left justified. I've got the "more" break, followed by my in-post Google Ad. Then, throughout each post I have additional images that are sized to suit and right justified. For the most part, I'm ashamed to say, I've been doing all of this manually - including all articles that my writers send in.
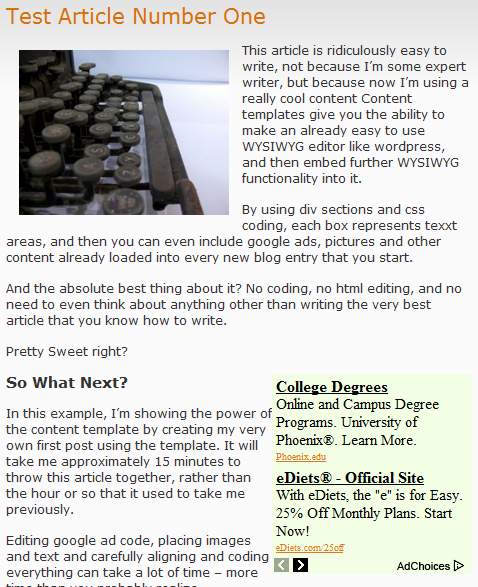
Here's what such a post looks like when it's published.
As you can see, the formatting is a little tricky because in one area I have the image left justified, and in the next section I have the ad right-justified. Then all additional images are right-justified as well. I like this setup for my own blog because it's easier on the eyes and flows well. You may have your own preference for your particular Wordpress blog.
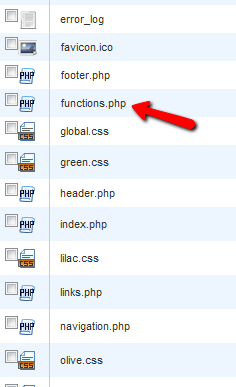
The first step to create your template is to back-up your functions.php file (you'll find it in the root directory of your theme), and then open it for editing.
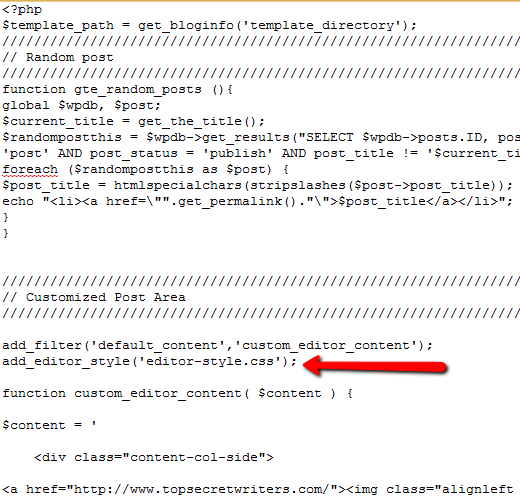
You'll see a bunch of code in here - all functions currently used by your current blog theme. You're going to insert a new section between those functions. Find the end of the first function, and then insert the code that I'm going to detail next.
Now, I have to give credit where credit is due - I actually got this idea from David Hansen over at Smashing Magazine, who wrote an article on this back in October. In this case I'm going to expand on his idea by showing you how to tweak that template for things like ads and pictures.
            add_filter('default_content','custom_editor_content');

            add_editor_style('editor-style.css');

            function custom_editor_content( $content ) {

            $content = '


 Insert your introduction here


 Enter Google Script Here


 Here is second section content


 Here is third section content


 Here is third section content


             ';

             return $content;

            }
Notice how the alignment actually works best using the image alignment built into your theme style, and in the case of the Google Ad, you should use the second div with the style attribute to align where you'd like it to go. It just works best. However, as far as sizing, padding and placement, you'll need to create the css file.
Here's the styling for each section defined above.
body {

             background: #f5f5f5;

            }

            .content-col-main {

            float:right;

            width:70%;

            padding:1%;

            border: 1px dotted #ccc;

            background: #fff;

            }

            .content-col-side {

            float:left;

            width:210px;

            padding:1%;

            border: 1px dotted #ccc;

            background: #fff;

            }

            .content-google-ad {

            float:right;

            width:20%;

            padding:1%;

            border: 1px dotted #ccc;

            background: #fff;

            }

            .content-section-two {

            float:left;

            width:70%;

            padding:1%;

            border: 1px dotted #ccc;

            background: #fff;

            }

            .content-image-three {

            float:right;

            width:210px;

            padding:1%;

            border: 1px dotted #ccc;

            background: #fff;

            }

            .content-section-three {

            float:left;

            width:70%;

            padding:1%;

            border: 1px dotted #ccc;

            background: #fff;

            }

            img { /* Makes sure your images stay within their columns */

             max-width: 100%;

             width: auto;

             height: auto;

            }
You can use either percentages or pixels for sizing. I prefer pixels for images, but it really comes down to preference. If there's too much space between the pictures and text, just tweak the content percentages a bit until it looks good.
After you've saved your .css file, open up a new post and you'll see that your perfectly formatted content template is already in place for you.
All you have to do is click on the image and upload the one you want to use, and then fill in all of the content areas. It really is as easy as that. Everything is automatically aligned and placed where they need to go.
All right-justified Google Code or images are already there - all you have to do is update the content. The time it will take you to put together a post with all of this already done for you will drop by a huge factor, guaranteed.
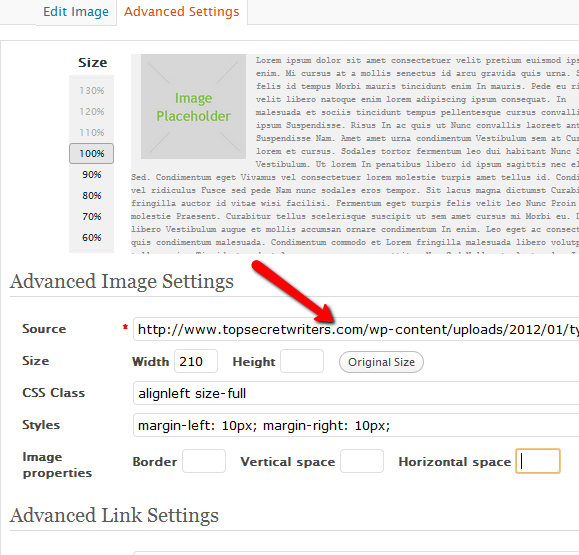
Updating all of the images on the template is as simple uploading the pictures that you want to use to your blog using the media upload tool, and then clicking on the image and pasting the URL to those images in the "Source" field.
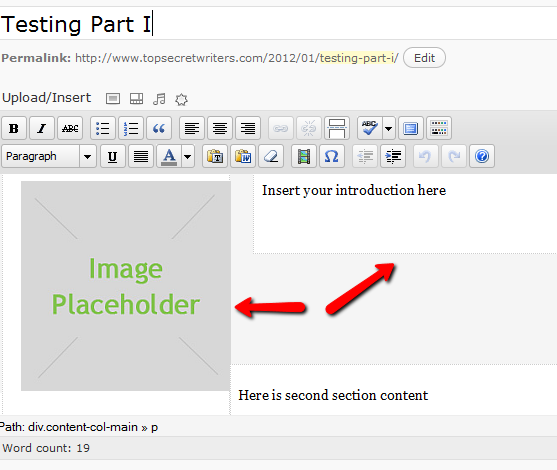
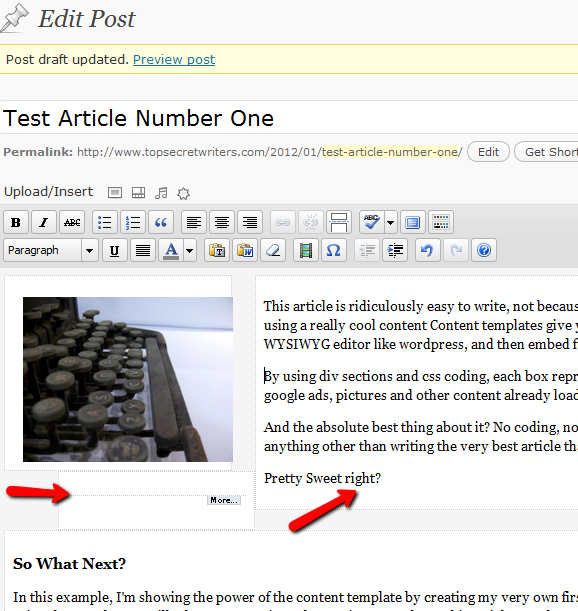
Of course you'll want to update the title and alt tags as well. As you can see here in my test article, writing an article is now just a matter of filling in each of the content areas. I can't tell you how sweet it is to be able to just concentrate on writing, knowing that all of the proper formatting is already in place to make the article look its absolute best.
The final result? Here is my first test article using the new Wordpress content template. All images and ad code is inserted, aligned and spaced perfectly.
If you didn't know any better, you would think that nothing at all has changed on the blog. The formatting looks identical to the way it looked when I slaved over them for an hour or more. Now, all of that effort and trial-and-error formatting is already inserted right into the Wordpress content template.
So now all that's left is sitting back and doing what you've always loved to do - writing.
Does this Wordpress Content template lessen the load on your own blog? Do you have any other formatting tips that people can use in their own templates? Share your thoughts and insights in the comments section below.
Image Credit: Shutterstock


