While building my Raspberry Pi retro gaming centre I ran into some problems with configuring game controllers.
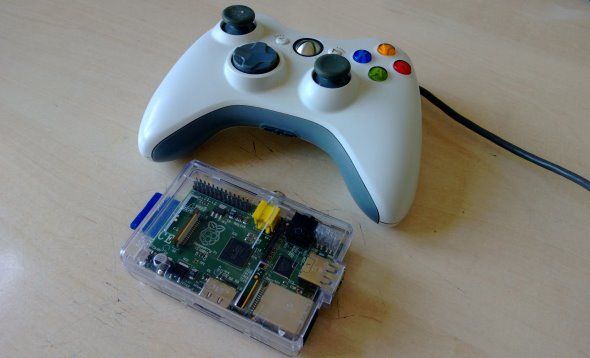
The challenges were straightforward. Would I use my Xbox 360 controller, or resort to a pair of basic USB controllers for two player gaming?
Establishing a solution was difficult. In the end, despite my preferences, I opted to go for a pair of basic, retro-style game controllers which proved great for some classic two player arcade-style gaming.
Although to be honest the majority of my RetroPie use has been to enjoy some classic strategy titles that I could just as easily load up in DOSBox on my PC.
So, how did I deal with setting up a two player gaming profile on my RetroPie, and how easy is it to add an Xbox 360 controller?
Advantages of a Modern Game Controller
Although retro gaming is fun, the controllers often suck. Back in the day, I would regularly go through several joysticks a year, including the hard-wearing, metal shafted two button types (the Competition Pro and similar).
As for two-hand controllers, I found them unreliable and flimsy, probably due to the lack of microswitches in favour of blister switches.
Clearly there is a distinct advantage in using an Xbox 360 controller (or similar) in place of the retro alternatives, from ergonomic comfort to improved reliability.
Setting Up Xbox Game Controllers On The Raspberry Pi
While it wasn’t my final choice, setting up the Xbox 360 controller proved far simpler than I had envisaged.
If you’ve checked the previous guide on installing and setting up a RetroPie system, you’ll know that the configuration file can be edited so that different controllers can be added. Incidentally, adding an Xbox 360 controller to a Linux system isn't all that unusual.
To install the Xbox 360 controller driver, you will need to exit EmulationStation from the navigation menu and enter the following in the command line:
sudo apt-get install xboxdrv
Following this, edit /etc/rc.local, adding
xboxdrv --trigger-as-button --wid 0 --led 2 --deadzone 4000 --silent &
sleep 1
This ensures that the driver launches when the computer boots. Note the use of “--wid” in the instruction, which is for wireless controllers. Change it to --id for wired controllers.
Following this, enter
cd ~/RetroPie/emulators/RetroArch/tools
While in this directory, input the following command:
./retroarch-joyconfig -o p1.cfg -p 1 -j 0
You should increase digits by factor of 1 for each additional controller. If entered correctly, the resulting files should be added to retroarch.cfg:
sudo cat p*.cfg >> ~/RetroPie/configs/all/retroarch.cfg
You can then save and reboot to use your Xbox 360 controller.
How To Set Up Dual Controllers
There is one clear reason why you might use more than one controller – to enjoy multiplayer gaming.
While it is possible to use a keyboard and a USB controller, rather than two controllers, you will find that configuring a pair of different devices is difficult. For the best results (and to avoid configuration issues), you should use two identical controllers. If you want more than this, then you will need to use a powered USB hub.
Begin by opening the retroarch.cfg file via FTP (or by running Raspbian and browsing to RetroPie > Configs > All) and find this line:
input_player1_joypad_index = "0"
Check the lines that follow, and then copy them, down to the last in that section. After the last line, leave a blank line and then paste the selection. You’ve duplicated the first controller profile, but you will need to edit the new block of code so that each instance of “player1” now reads “player2”
Here’s an example. The first two lines of the pasted segment should read:
input_player2_joypad_index="0"
input_player2_a_btn = "1"
Repeat until you reach the end of the copied code, then save and close.
Exit Games Using Your Controllers
The default method for exiting a game in EmulationStation is by restarting your Raspberry Pi – something that can corrupt the SD card as this is only possible in this scenario by removing the power cable.
To overcome this, a workaround exists maps an exit option to your game controller.
You’ll need to edit the retroarch.cfg file to do this, adding the following code:
input_enable_hotkey_btn = "X"
input_exit_emulator_btn = "Y"
You will need to check the retroarch.cfg file to identify the buttons you want to use here. Obviously you don’t want to exit games using the usual controller buttons – instead, you should be looking for the ones that relate to the buttons in the centre of the controller, perhaps labelled "menu" or "start".
Once you know how these buttons are numbered in the config file, replace "X" and "Y" with the corresponding numbers.
You can then save the file and exit to apply the changes.
Conclusion: If You’re Going to Play Retro, Do It Properly
The tips here should help you get on the retro gaming trail in style on your RetroPie device, but for the absolute classic gaming experience you might want to consider utilizing (or building!) an all-in-one multi-button gaming device to replicate those found on the old arcade cabinets.
Whichever your controller solution, make sure you give it a few test runs before "gaming in anger" – and let us know how you get on, and what controller options you decide upon.


