If you're big on email, chances are you've heard of POP and IMAP. They are the two email protocols, comparable to what HTTP is to your browser. Over the years, IMAP has proven to be superior in many ways. IMAP doesn't require you to download messages from the server, messages are only downloaded when opened, multiple mailboxes can be created, messages can be directly deleted from the server, and so on.
So why isn't POP extinct yet? Good question! Unfortunately, some mail providers (most notably ISPs) still aren't supporting IMAP. You're stuck with POP. This causes a huge problem, because a lot of today's application developers don't care about it, thus don't bother to support it. A relative recently confronted me with an issue of not being able to receive her POP account email on her phone because only IMAP servers were supported. In this post, I'd like to show you how to work around this issue.
Get a Gmail Account
If you aren't using Gmail yet, you shouldn't be. It's free, the mailbox UI is great, and it offers you more space than basically any other provider you'll find. Signing up for an email account should take no more than a minute.
If you already have a Gmail account and you're trying to receive email from a POP mailbox on a device that only supports IMAP, it doesn't matter. You need to create a new Gmail account to act as a proxy for your POP account. The method is simple: we're taking your old, outdated POP email account and pushing all of the mail you receive into a shiny and new Gmail account that acts as a mirror of it (but supports IMAP).
Add Your POP Account to Gmail
After you've created your Gmail account and logged in, go to the settings and access the Accounts page (shown across the menu at the top). Here, you should see "Check mail from other accounts (using POP3)" option.
The blurred areas show three POP email accounts that I have currently added to my Gmail account. When you've added a POP account, you'll see them listed there. You can do so by clicking "Add a POP3 mail account you own", which is our next step.
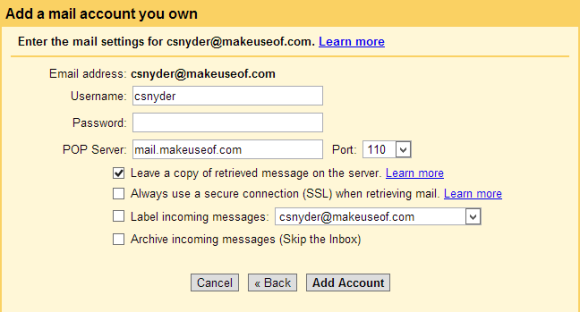
You'll first be prompted to enter your POP email address and then you'll be shown the page above. Here, your username, POP server, and incoming label is already populated for you. If any of those need to be changed, be sure to do so. You'll need to enter accurate information or your email obviously cannot be taken from the POP server and brought here to Gmail, so make sure you do this. If you don't know the information, you can check my article that gives you the mail server information for three of the biggest email providers, or you can simply Google it.
Let me stress that it is extremely important for you to tick the box beside the "Leave a copy of retrieved message on the server" option. If you don't, Gmail will effectively be hijacking all of your POP email rather than just mirroring it. This means you won't be able to access the email from that account from any web service or desktop application, only Gmail.
Add Your POP Address As A Sender Email (Optional)
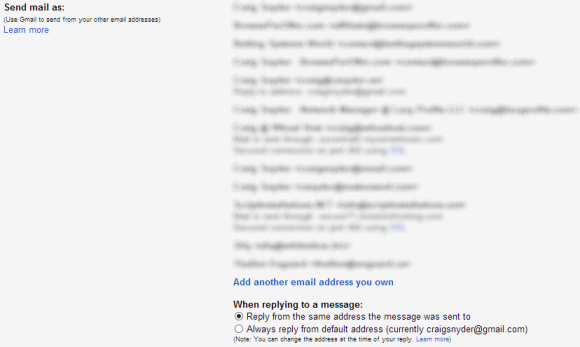
If you want to take this a step further and want to reply to an email that you've downloaded from a POP account to Gmail as the POP email account itself (rather than your Gmail address), you can. On that very same Accounts settings page, you should see the "Send mail as" option.
Keep in mind that not all services that support Gmail will support the functionality to send email from additional addresses, especially those made by third parties. I can't comment on what devices, applications, or services this is limited to (as there are so many out there), but this will work perfectly from the web interface. To be able to send emails from your POP address through Gmail, click the "Add another email address you own" link on that page.
The process for adding an address to send from requires that you confirm an email sent to that address. If you've already completed the step before this one then that email can be confirmed directly through the Gmail inbox you're currently using (which can also test to prove that the previous step actually worked).
Add Your Gmail Account to Your Device
The last step is to simply forget about your POP email account and use this new Gmail account on your phone, Windows 8 Mail, or any other service, device, or application that you're using. Many of these will automatically know Gmail's mail server information, but here it is otherwise:
- Gmail IMAP server address: imap.gmail.com
- Gmail IMAP user name: full Gmail address (you@gmail.com)
- Gmail IMAP password: Gmail password
- Gmail IMAP port: 993
- Gmail IMAP TLS/SSL required: yes
That's it! It's a bit of an annoying fix to have to put effort towards, but it's extremely effective. Hopefully, old-time email providers will eventually catch up to speed and jump on the IMAP bandwagon. Let me know if you require any help in the comments!


