System Preferences is the hub for all of your Mac’s settings—you can adjust speaker outputs, display settings, privacy options, and whatnot from the utility. Apple has done a great job of making the System Preferences easy to use, and with multiple options in each category, you can easily customize your Mac to make it truly your own.
Below, we’ve covered our top 10 tips and tricks for using System Preferences on your Mac. You may know some of these already, but you’ll be sure to learn some new tips as well.
1. Access Settings Directly From the Dock
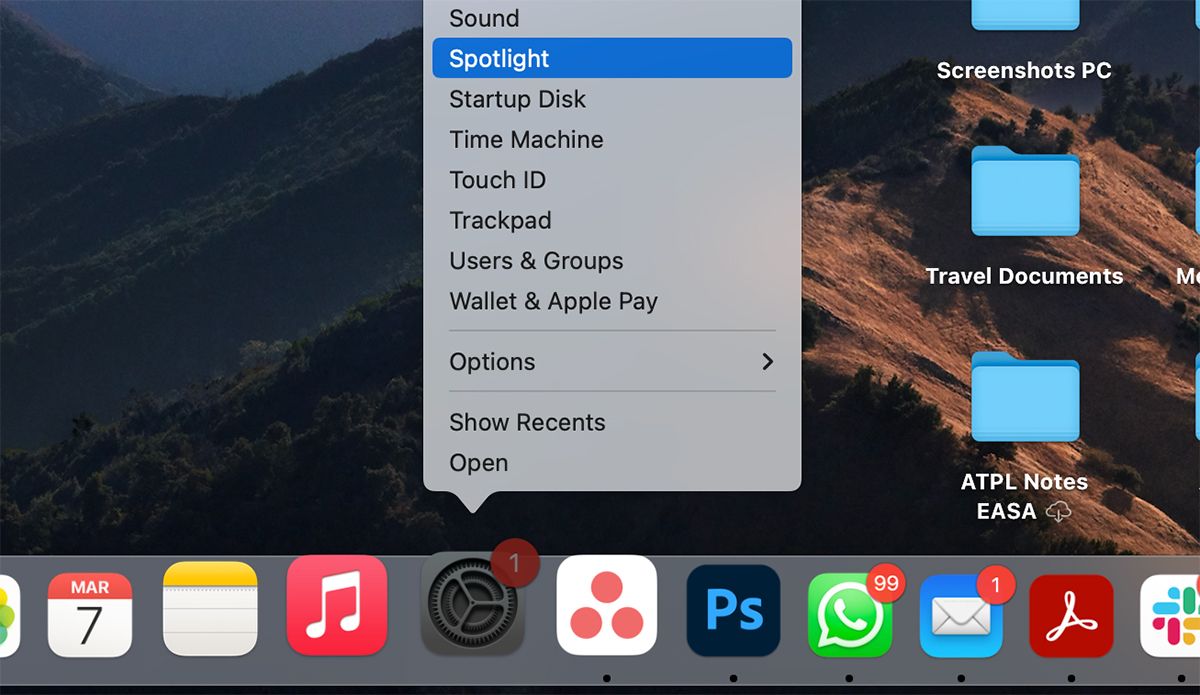
You can launch System Preferences by opening the Apple menu and clicking System Preferences, or from the icon in the Dock. However, did you know that you can select any preference directly from the Dock without ever opening the app?
To do this, click and hold the System Preferences icon in the Dock. This should reveal the entire list of preferences. When you select an item, you’ll be taken right to that particular preference without having to find your way through System Preferences.
2. Use the Search Bar
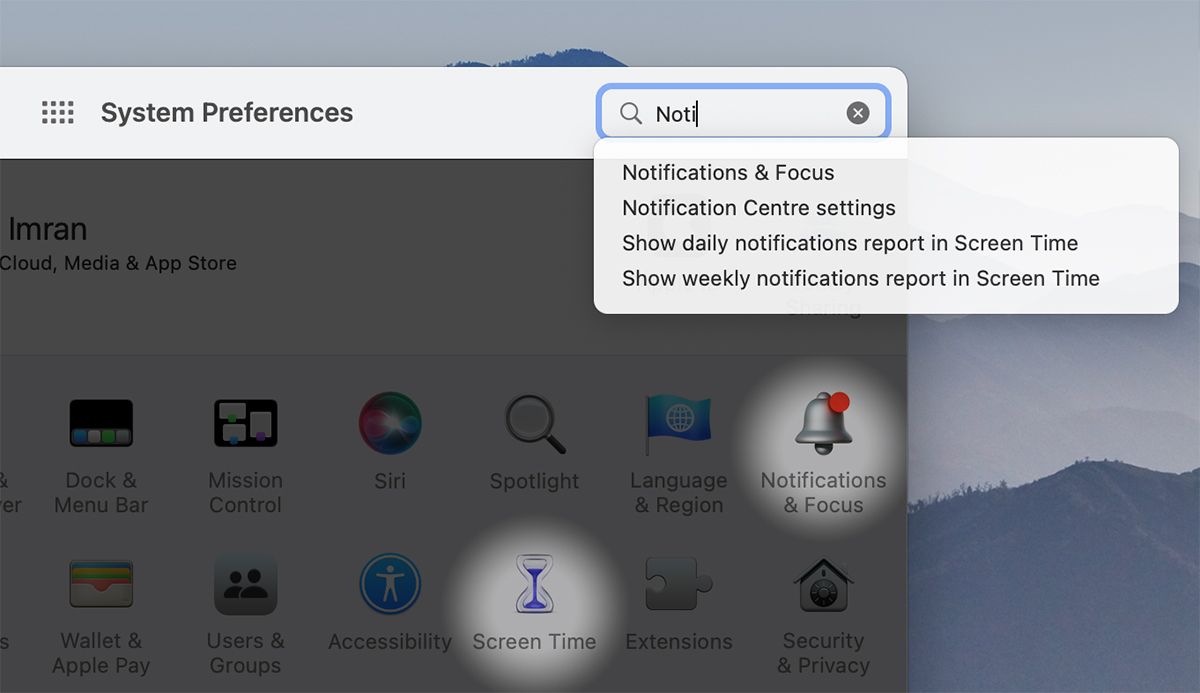
If you’re confused about where to find a specific preference in System Preferences, try using the Search bar! It’s very helpful to use and saves you quite a bit of time navigating through the utility if you only want to change one specific setting.
As you type, possible matches for what you’re looking for appear in the search results, and the relative preference icons are highlighted in the System Preferences window. You can also type a phrase that describes what you want to do if you’re not sure of the specific preference name.
3. Use the Show All Button Efficiently
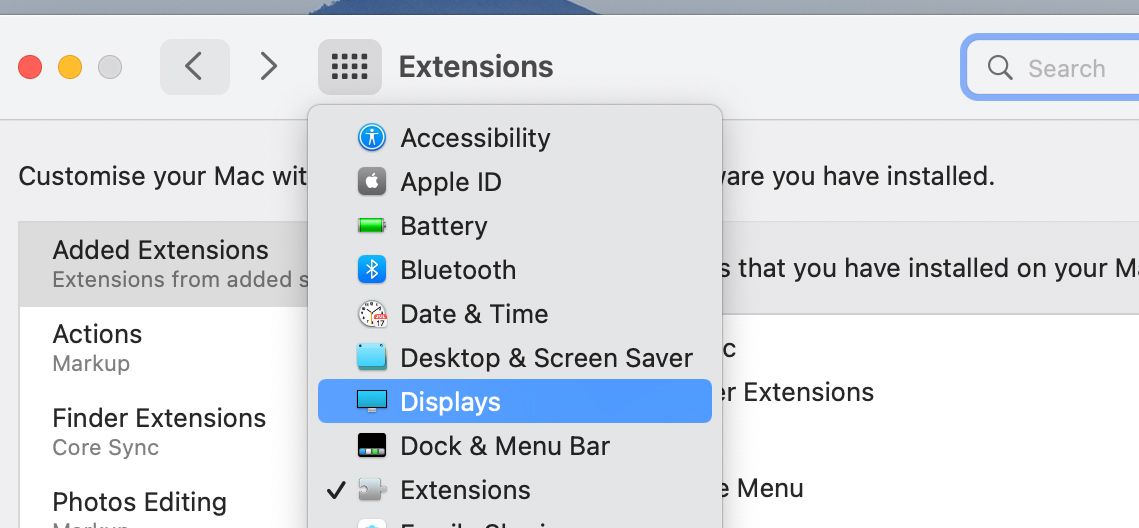
If you want to customize multiple settings in System Preferences, you would typically change one setting then click the Show All (to take you back to the main menu) and then change your other setting. However, the Show All button has a secret—if you keep it pressed down, it brings up a list of all the preferences.
Simply select whichever setting you want to change, and release the button to be taken to that specific preference.
4. Hide Settings From Your View
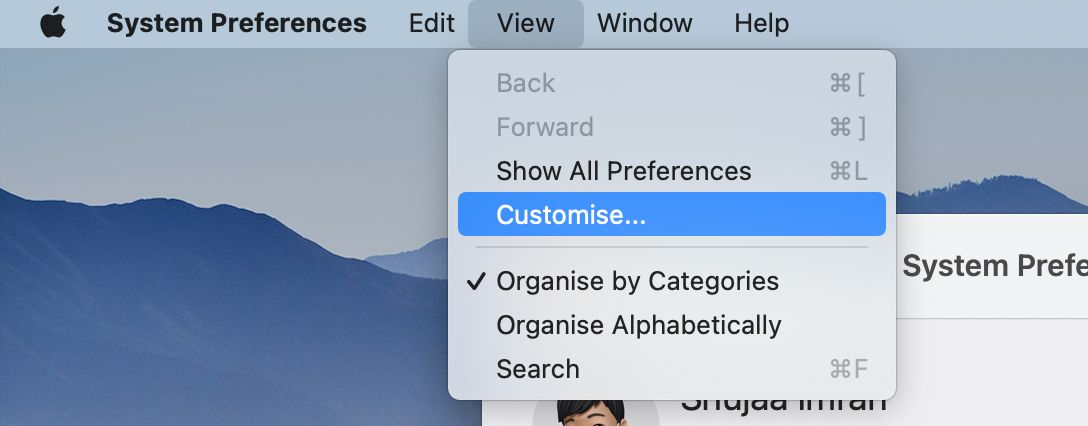
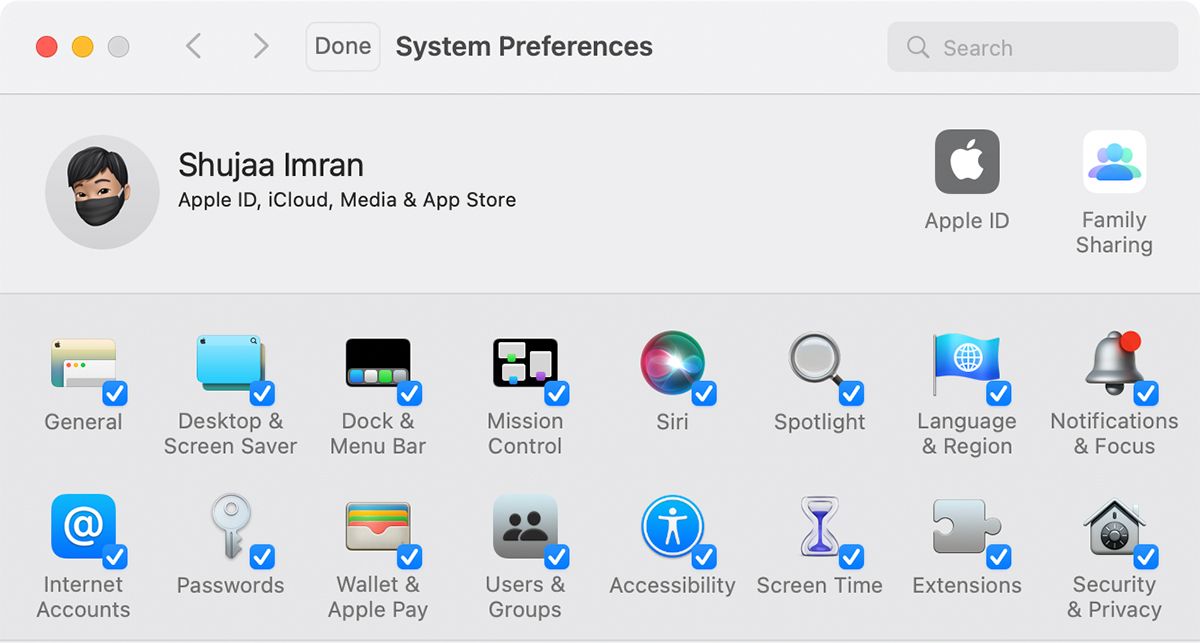
System Preferences has its own grid of arranged preference icons. Third-party apps may also add their own preferences to the utility, which may clutter it up. If this is the case, you can choose to hide items that you rarely access. To do this, select Customize from the View menu with System Preferences open.
A checkmark will appear each to next item in the System Preferences window. Untick the items you would like to hide and click Done.
If you’d like to bring back some of the items you’ve hidden, go to View > Customize again and tick the boxes of the hidden items to enable them in the System Preferences window.
5. Adjust Item Grouping
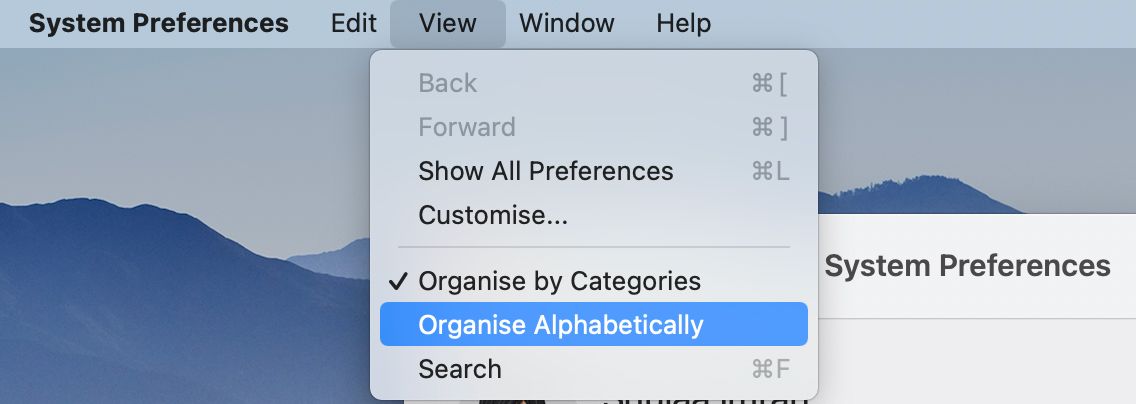
All the preferences in System Preferences are arranged into logical groups and listed category-wise by default. If you want to change things up, you can switch between group organization and alphabetical grouping by selecting Organize by Categories or Organize Alphabetically in the View menu.
6. Use Keyboard Shortcuts
You can access some preferences by using some Keyboard shortcuts. We’ve listed these below:
- Option + F1 or F2: Opens the Displays pane
- Option + F3 or F4: Opens the Mission Control pane
- Option + F5 or F6: Opens the Keyboard pane
- Option + F10, F11 or F12: Opens the Sound pane.
Not all keyboard shortcuts will necessarily work on every Mac model.
7. Unlock Dimmed Settings
You may find certain system-level settings in some preference panes to be disabled or locked. This is to prevent users who lack administrative account privileges from changing crucial settings on your Mac.
If you wish to change a disabled or dimmed setting in System Preferences, click on the lock icon in the bottom-left of the window and enter your administrative password.
If you close the unlocked pane or the System Preferences window, your Mac will automatically lock any unlocked items, for your own security.
8. Enable Apps From Outside the App Store
macOS doesn’t allow any old program without a developer’s license to run by default. Instead, you’ll be asked to change your security settings to allow the app to run. This feature is called Gatekeeper, and it does a good job of protecting your Mac from unauthorized software. However, it can also be pretty annoying if you’ve downloaded a trusted app off the internet, and your Mac won’t allow it to run.
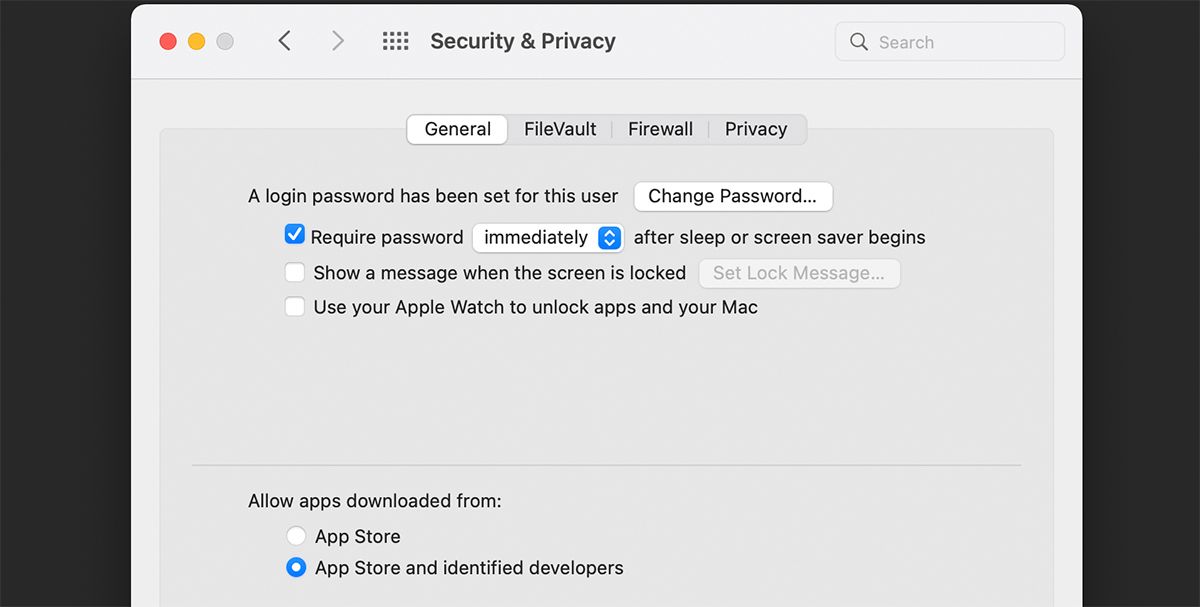
To enable the app, simply go to System Preferences > Security and Privacy. Here, you’ll see the option to enable the specific app to run (a one-time thing), or to change the setting completely to allow any app to run on your Mac. If you want to do the latter, simply select Anywhere under Allow apps downloaded from to disable Gatekeeper.
Just make sure you only run software from trusted developers—contrary to popular belief, Macs can get viruses, which is why Apple has measures like Gatekeeper to keep your system safe.
9. Set Up Autoreplace for Easy Text Expansion
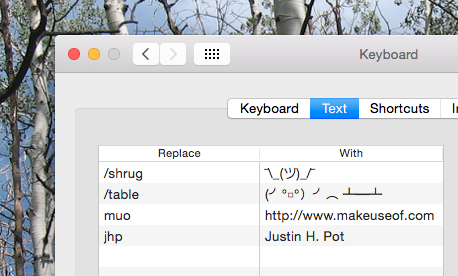
If you head to the Keyboard section of System Preferences, then click the Text tab, you can create text expansions for yourself.
If there are relatively long phrases you find yourself typing often, create a one-word shortcut for it—when you type that phrase in any program, macOS will transform it for you. It’s also a great way to quickly use ASCII art—you can see, I’ve added a "/shrug" command for myself.
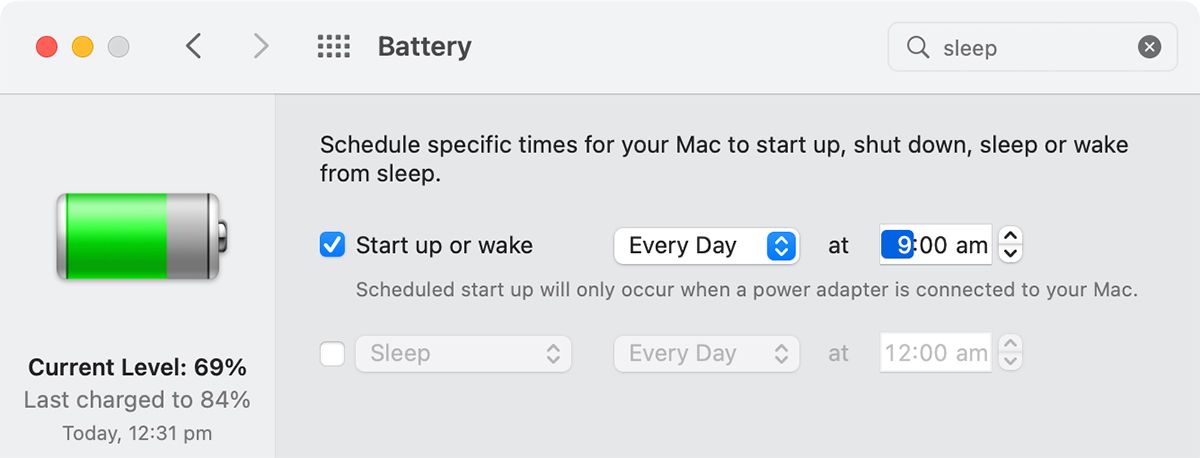
10. Schedule Wake-Up and Sleep Times
If you use your computer on a set schedule and would prefer you didn’t have to wake it up yourself, head to the Battery section of your Mac’s settings. Click Schedule from the left pane, and you can tell your Mac when to wake up and go back to sleep.
If you’ve scheduled your Time Machine backups you could use this to ensure your Mac is on when you want your backup to run, but there are a lot of other potential uses.
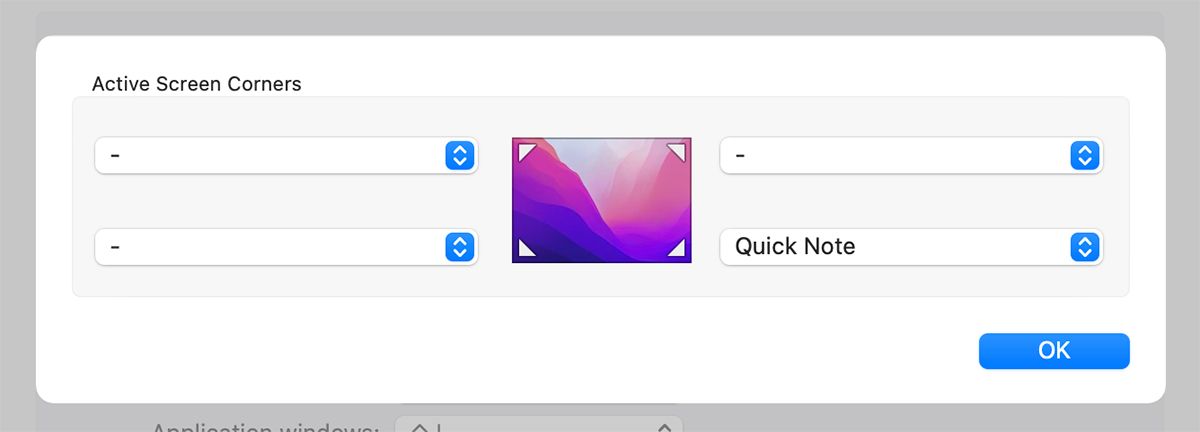
11. Set Up Hot Corners to Quickly Do Anything
Hot Corners is something many Mac users swear by, but not everyone knows about. And it’s kind of hidden: head to Mission Control, then click the Hot Corners button.
You can now trigger a number of things by moving your mouse to a particular corner. You might hate it, but if not, you’ll wonder how you ever used your Mac without it.
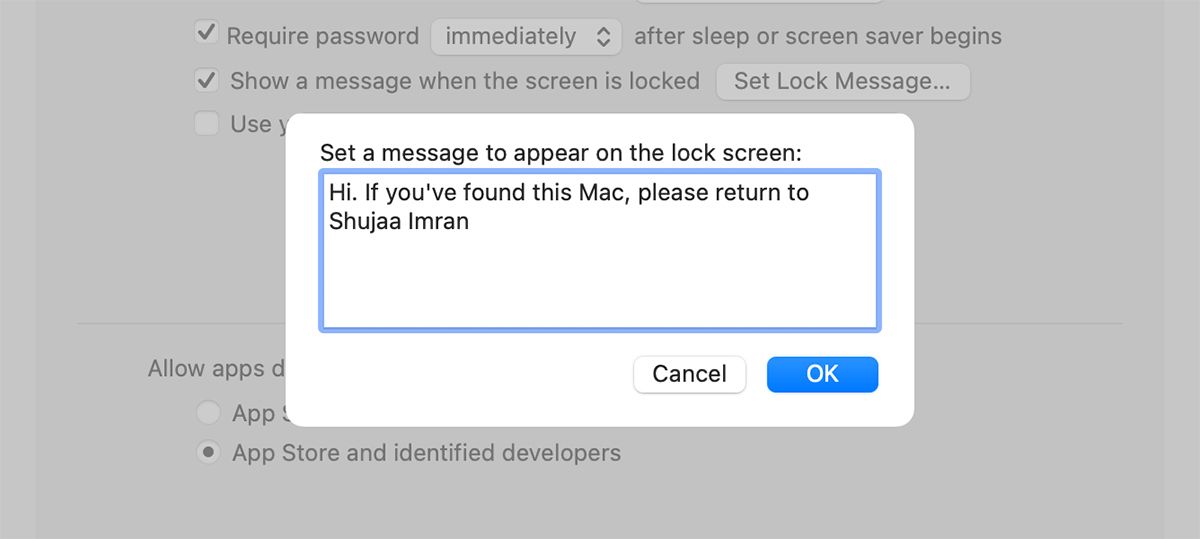
12. Add a Lock Message in Case You Lose Your Mac
In System Preferences, head to Security & Privacy and you’ll find the Set Lock Message button.
Personally, I like to leave contact information, in case I lose my laptop and someone wants to return it. But you could just leave a nasty message for your sister who keeps trying to use your laptop when you’re out of the room and totally needs to stop doing that.
Use System Preferences Efficiently
Hopefully, you’ve learned some new tips and tricks for using System Preferences today and will be able to incorporate them into your workflow. System Preferences is an extensive utility that takes time to explore, but the result can be very fruitful—your own Mac, which works exactly as you want it.

