For the past couple of years now, I have more or less been exclusively using Google Chrome as my day-to-day work browser. And it works pretty much the way I want it to, with its speed and its synchronization with my Google account. Chrome is simply one of the best products that Google has ever produced.
But saying that, there are some irritating things about Chrome that really bother me. One of them was not being able to bookmark any site I wanted to on my New Tab page. But now I have found the solution and I want to share it with all of you.
Now first of all, to clear up any potential misunderstandings, when I say "bookmarks", I don't mean regular bookmarks like these :
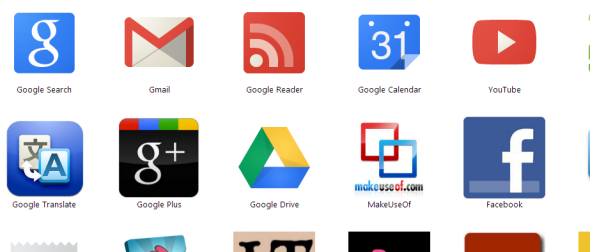
No, in actual fact, what I am talking about are these :
When you open a new tab page in Chrome, you are presented with logos of sites to open. Some of them came preinstalled with Chrome but the vast majority are installed after looking in the Chrome Web Store for them. But this can be a very tedious task because first of all, the Chrome Web Store is enormous (who has the time to plough through a lot of crap to find the obscured gold nuggets?) and secondly, a lot of your favourite sites may not have bookmarks made for them already.
So today I am going to show you how to make New Tab Page bookmarks for any site you want. It's quick, it's easy and you'll be making bookmarks before you know it.
New Tab Page Bookmarks Recipe
Ingredients
- One website logo (128x128 pixels in size, or thereabouts (the world won't come to an end if it's 129x129 pixels) Either do a size search in Google Images for a suitable logo or get a bigger logo and shrink it down using an image editing tool, of which there are LOTS). I prefer SnagIt but that is a paid option. If you want to use something free, you can't go wrong with Irfanview.
- Google Chrome (obviously).
- Notepad (or a similar text file making app).
Step 1 - Make The Folder
Create a new folder in Windows Explorer and inside, place the 128x128 icon.
Step 2 - Make The Script
Open up Notepad (or an equivalent) and copy/paste in the following:
{

            "name": "insert the name of the website here",

            "description": "Link to name of website",

            "version": "1.1",

            "manifest_version": 2,

            "icons": {

            "128": "icon.png"

            },

            "app": {

            "urls": [

            "add link to desired website here"

            ],

            "launch": {

            "web_url": "add link to desired website here"

            }

            },

            "permissions": [

            "unlimitedStorage",

            "notifications"

            ]

            }
The parts in red italics are the parts you have to alter to suit each bookmark. For the purposes of this demonstration, the 128x128 icon is simply named "icon.png" but of course you can name it whatever you want. Simply make sure that you change the name in the script to match the icon name, otherwise nothing is going to show up in Chrome.
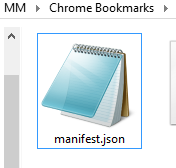
When you have filled in all the necessary details, save the file and name it manifest.json . Then place the saved file inside the same folder as the 128x128 icon.
Step 3 - Go To Your Chrome "Extensions" Page
To get to your Chrome extensions page, simply type
chrome://chrome/extensions
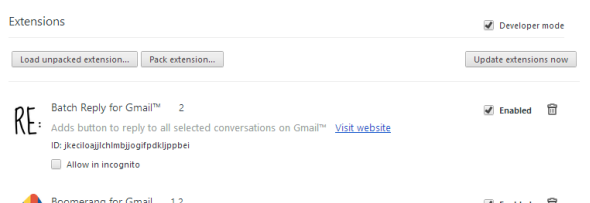
into your browser address bar and hit enter. Then on the page, tick the "Developer Mode" box in the top right hand corner.
This will reveal three options, normally hidden from view, as you can see in the above screenshot. For the purposes of installing our bookmark, we only need the first two "load unpacked extension" and "pack extension".
Step 4 - Load Unpacked Extension
The Load Unpacked Extension option is for extensions which don't come from the Chrome Web Store. Click on that, navigate to the folder you made containing the manifest.json script and the logo and press OK. Upload the actual folder, not the individual files. You will then (hopefully) see your extension sitting nice and pretty sitting in the extensions list.
Here's my one for MakeUseOf :
But it isn't over yet. There's still some more work to be done here. But it's almost done.
Step 5 - Pack The Extension
Now, click on the other button - pack extension. This will open up this box.
Ignore the Private key file option. Instead, focus on the other option - extension root directory. As you did when unpacking the extension, navigate to the new bookmark's folder in Windows Explorer, using the browse button. When you have it in the text field provided in the pack extension box, click the "pack extension" button.
Doing so will create two new files, which you should immediately place inside the folder, alongside the icon and the JSON file - a .CRX file and a .PEM file. The PEM file is supposedly for when you want to update the extension, but for a simple bookmark, if you want to update it, you can just create a new bookmark and uninstall the old one. You can see here how quick and easy that is. Nevertheless, it doesn't hurt to keep a hold of the PEM file.
The CRX file on the other hand is the really important one. When you download and install extensions from the Chrome Web Store, it's a CRX file that you are receiving and installing.
Step 6 - The Final Steps
First of all, uninstall the first version of the extension that you installed in your extensions folder, back in step 4. You can do this by clicking the little trash bin logo to the right of the extension listing. You have to uninstall this because it will otherwise conflict with the packed version of the extension that you are about to install.
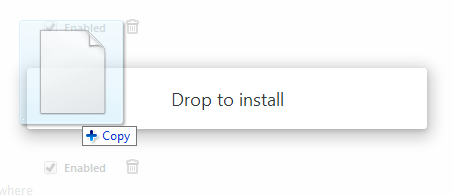
Secondly, keeping your browser on the extensions page (it won't work if your browser is open on any other tab), drag the newly-made CRX file into Chrome. You should immediately see this :
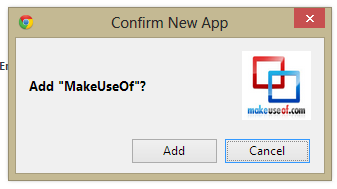
So, do as it says - drop that sucker into Chrome! You'll then see this :
Of course, choose "Add" and your new bookmark will then pop up on your New Tab Page :
Go ahead, give it a spin. Click that baby and be taken into the Interwebs.
Now all that remains is to go back to your extensions page and untick the "Developer Mode" box so the three extra buttons disappear. Unless of course you have a sudden craving to make more bookmarks!
Conclusion
If you are looking for resources for high quality icons, you simply have to use resources such as Google Images, which will give you countless possibilities. Or if you are of the Photoshop / GIMP persuasion, you can make your own icons. If you want a logo for a MakeUseOf bookmark (of course you do), then you can use the (slightly outdated but still valid) logo, which I used, by clicking here.
So what kinds of New Tab bookmarks did you make for your Chrome browser? Did you manage to make your bookmarks without a hitch? Let us know in the comments below. Oh and if you have any great resources for high quality icons, also drop those links in the comments.

