For some time now, I've been trying to develop a very fast and easy way to create a virtual web server (basically a local web server), on my portable hard drive. Not just one though. I wanted to have the ability to set up multiple web servers that I could just configure as my localhost web server with the click of a button.
For those of you that have been following along with my recent articles, I did do this with Server2Go. Many of you liked that approach. The one issue with Server2Go seems to be that it is really intended to be used as a clean web server test base every time you launch it. When you close down the server, it doesn't really retain settings well.
There were a number of readers that suggested Xampp as the best solution for this. Xampp is a long time favorite. Aibek listed it in his compilation of 100 best portable apps, and Dave outlined how to set a Xampp server up on your PC. Of course with XAMPP, you have to install it at the root drive - so one portable drive becomes your web server. Taking this approach, I decided to see if the "subst" DOS command might solve that problem - and sure enough it did!
Installing Multiple XAMPP Web Servers
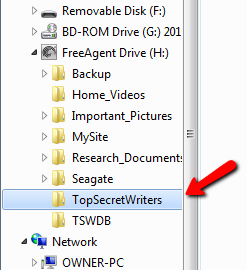
The first thing you're going to want to do is designate a specific folder on your portable hard drive (or portable USB drive, if it's large enough) to hold your entire website. In my case, I created a root directory called "TopSecretWriters".
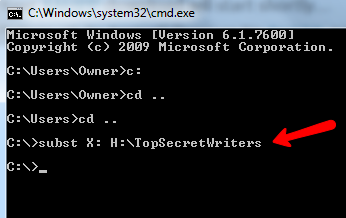
All you have to do next is to tell Windows that the directory on your portable hard drive is a root directory, using the SUBST command. In my case, in the DOS command screen I typed, "subst X: H:\TopSecretWriters".
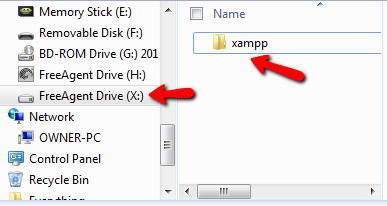
This makes root drive X: directly refer to the TopSecretWriters directory on your portable drive. You'll need to note this, because any time you want to run your web server in the future, you'll need to type this command, otherwise the Xampp installation won't work.
Now, just download a copy of the Xampp ZIP archive (not the Windows installer), and extract the Xampp folder to the new directory you've created.
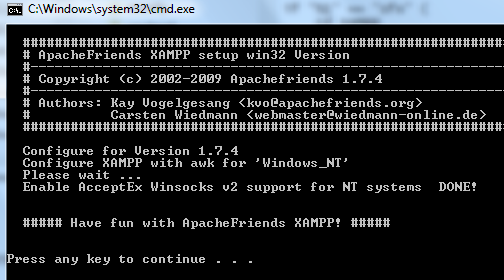
Go into the Xampp folder and double click on the "setup_xampp.bat" file.
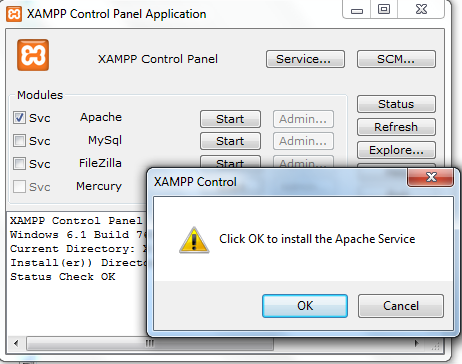
Then, run "xampp-control.exe" and you'll see the following screen:
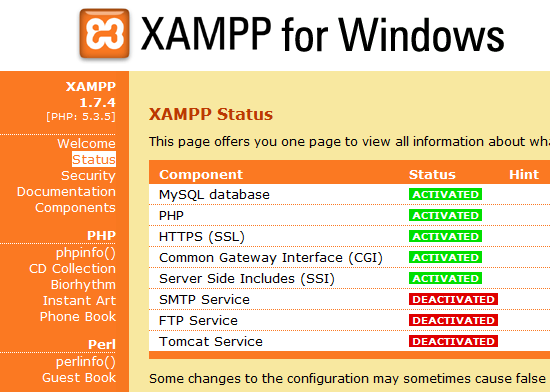
Select both the Apache and the MySql service, and install (press start) both of them. Once they're successfully installed and "running", open up a web browser and go to "http://localhost/". When you do, you'll see the Xampp introduction screen. Click on "Status", it should show most of the components as activated.
Installing A Full Backup Of A Wordpress Website
At this point, you're done setting up the one Xampp web server. Just copy your website into the HTDOCS folder and your site will come up when you go to "http://localhost/".
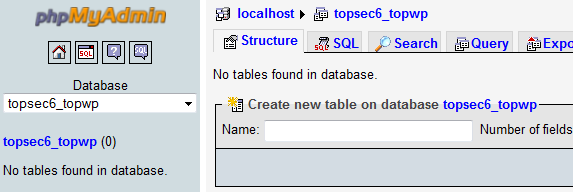
Since most people like to have a local mirror of their Wordpress blog or website, I'm also going to show how to install a full, local instance of your site. You just need your blog's MySQL database, username and password. Launch phpMyAdmin on your local Xampp install by going to "http://localhost/phpmyadmin/". Type the name of your database in the "create new database" field and press "Create".
Don't forget to click on "Privileges" and add a new user with the username and password of your own site's database, and make sure the host is "Localhost".
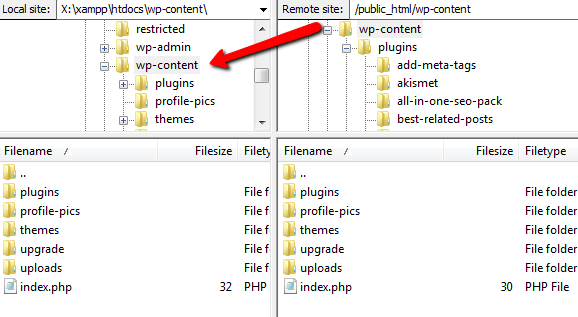
Download and extract a copy of Wordpress that matches the Wordpress version of your site. Set up your local wp-config.php file with the correct database, username and password, and run "http://localhost/wp-admin/install.php". Finally, copy the entire wp-content folder from your actual Wordpress website to the wp-content folder in your local web server Wordpress install.
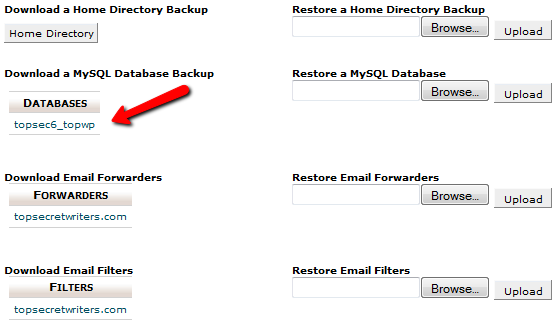
All you have to do now is export your website's MySQL database to your local one, and you're done - complete with all posts, comments and everything else. To do this, just go to your CpanelX control panel, click on "Backups" and select the database for your blog.
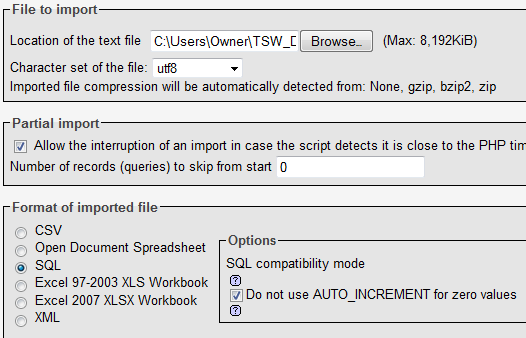
It'll save your entire database as a .GZ zip file. Save this file as a backup. Now, go back into MyPhpAdmin of your local web server, select your database, and then click on the "Import" button. On this screen, all you have to do is click the Browse button and select the .gz file that you just downloaded.
This will import your entire database. Go to "http://localhost/" and you'll see a perfect mirror replica of your live website! Now you can tweak your theme, new ads, or otherwise play around with the local version of your website before you decide to move the changes to your live site.
When you want to set all of this up for another website, just start at the very beginning of this article again, create a new directory on the root of your portable drive for this second website, and when you do the SUBST command, pick a different drive letter.
All of the subsequent steps are for setting up your own local web server. To launch a particular local web server, you just have to go to that directory and launch the "xampp_start.exe" file in that directory. "xampp_stop.exe" will stop that local webserver. This setup will work perfectly so long as you never try to launch two at once - you can only have one localhost webserver at a time!
Give this setup a try and let us know how it worked out for you? Do you have a need to run multiple local webservers at once? Does this solution make it work? Share your experiences and additional tips in the comments section below.


