It's hardly a secret when I tell you that sooner or later you will need a backup of your personal data. Do you have one right now? What keeps most people from preparing regular backups is convenience.
Windows 7 features its own backup tool, also known as the Backup & Restore Feature. Windows 7 Backup has many strong points, but its strongest one yet is convenience. No need to download and install a third party software, and if you know your way around Windows, you'll have no trouble setting it up. If you are unsure and require step by step instructions, this article will guide you through the entire process.
What Does Windows 7 Backup & Restore Do?
It creates a backup of your personal files and you can also include a system image to back up system settings and program files. Per default, the backups runs on a weekly schedule, but the schedule can be customized or turned off. Should disaster strike, you can use the backup to restore personal files to a new installation of Windows.
What Do I Need?
You need a backup medium. Ideally, this is an external hard drive or a network drive, but it can also be a second hard drive or partition within your computer. Regardless of which medium you choose, it requires enough free space to hold your backup.
How Can I Set It Up?
Setting up a backup with the Windows 7 Backup and Restore feature is straightforward, taking only a few easy steps and approximately three minutes.
To launch Windows 7 Backup and Restore :
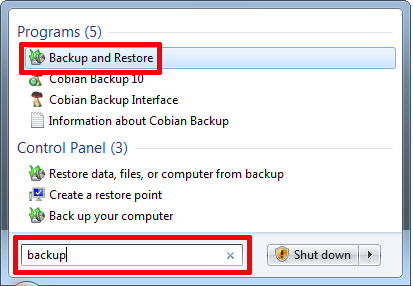
- Go to > Start and type > Backup into the search field.
- From the results select > Backup and Restore and hit > Enter.
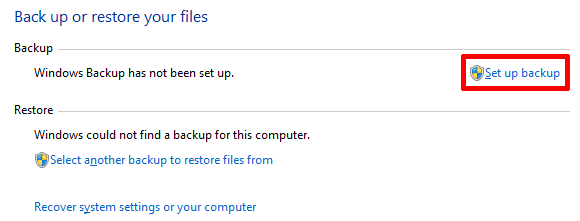
- In the Backup and Restore window, click > Set up backup in the top right. As you can see from the screenshot below, I presently do not have a Windows backup set up. For my custom backups I use Cobian Backup.
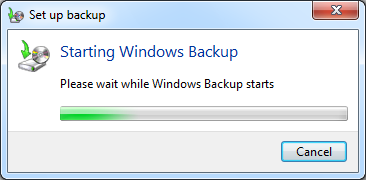
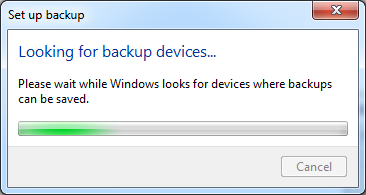
- You will have to wait a moment, while Windows launches the backup tool.
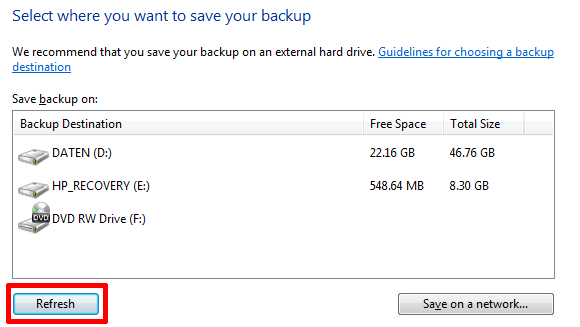
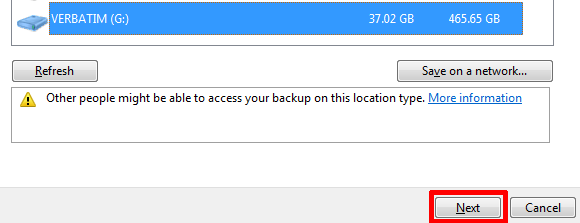
- Once the Set up backup window loads, you will see a list of backup destinations.
- If you wish to connect to an external hard drive, connect the drive now and then click > Refresh.
- Once the desired backup destination appears in the list, select it and click on > Next in the bottom right.
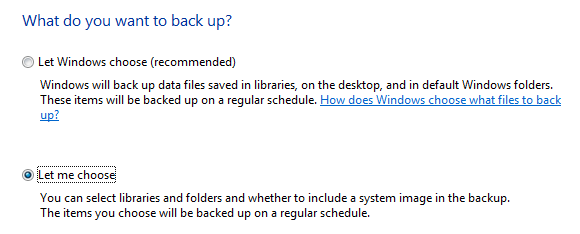
- On the next screen, you can choose what to back up and you can either decide to > Let Windows choose or > Let me choose, i.e. choose yourself.
If you have private data saved outside your user profile, then you should go with the second option and set up a custom backup, which is what I will guide you through now. Note that you can always change your choices later on, by changing the backup settings.
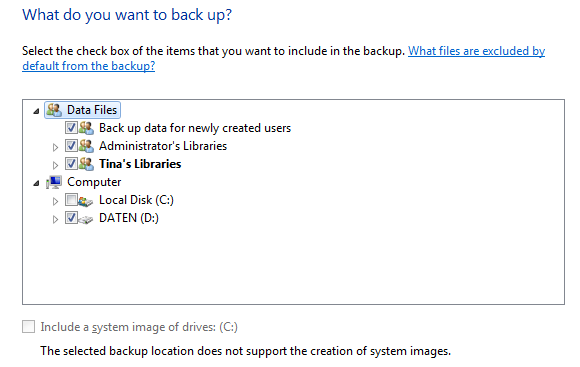
After clicking > Next in the previous window, you can check the drives, partitions, and folders you want to back up. Note that Backup and Restore does not back up Program Files or system files, even if you include the system drive in your backup. However, you can > Include a system image in your backup, provided there is enough space available on your backup destination.
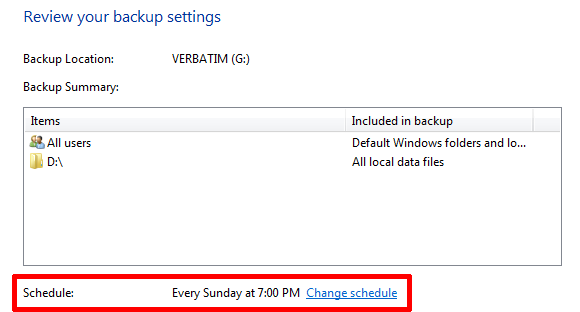
- In a final step you can review your settings and manage the schedule of your backup.
Just to mention it, if you selected the first backup option, i.e. > Let Windows choose, you will be taken straight to the above screen where you can review your backup settings and manage the backup schedule. Creating a system image will not be an option.
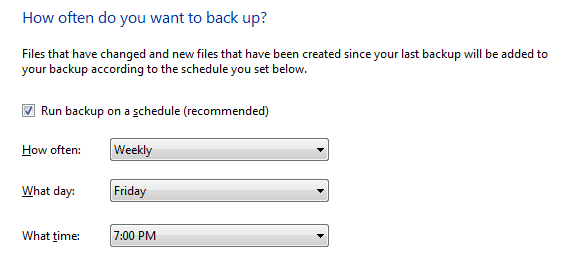
- Click on > Change schedule to create a custom time for your backup.
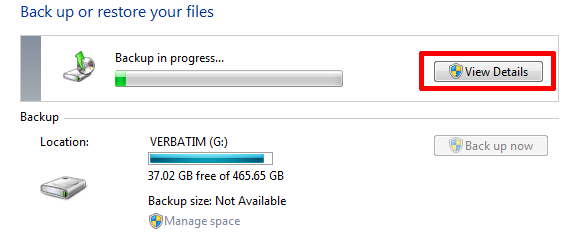
- Click > OK to confirm the schedule, then click > Save settings and run backup in the > Review your backup settings window. This will take you back to the initial > Backup and Restore Control Panel window. The backup you just confirmed will start immediately, but you can stop it by clicking on > View Details. and then > Stop Backup (twice). and either wait for the next scheduled backup, or launch it manually by clicking the > Back up now button.
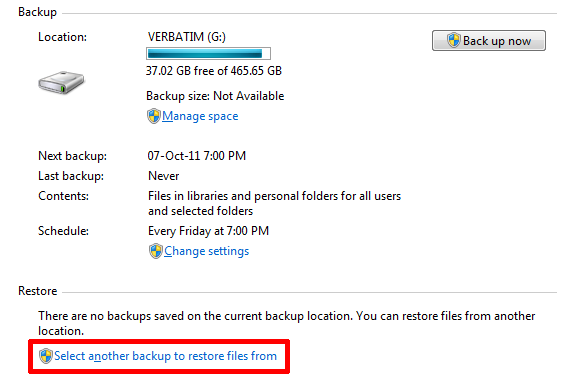
The Backup and Restore window will now list your backup and you can change your backup settings here, for example change what you want to back up or adjust the schedule. At the bottom of the window, there is a small section called > Restore. To restore backups, click > Select another backup to restore files from and browse for a previous backup you wish to restore.
If you wish to pause the backup for a period of time, you can click on > Turn off schedule in the top right. A > Turn on schedule link will then appear under > Schedule. And that's it! That wasn't hard, was it? The only thing you have to remember now is to attach the backup drive when it's time for the backup to run and you're set.
If you enjoyed this article, I also recommend the Windows 7 Backup and Restore Guide. I recently wrote an article on 5 Signs Your Hard Drive Lifetime is Ending & What To Do. If you have lost files, you might be interested in How To Recover Deleted Files Using Windows 7's Restore Previous Versions Tool.
What do you find most challenging about setting up and maintaining regular backups?


