Applications are taking ever more to the web. It's a smart move. Not everyone has a MacBook or a Windows laptop, but nearly everyone has access to a decent web browser. Make your application with a blend of PHP, Javascript, HTML, CSS and MySQL instead of Java and C(++) and suddenly almost every device is a compatible device.
You can learn about PHP like any other language. Jack Cola compiled a list of free sites to learn about programming in PHP. In addition, if you like to play with the language while you learn (you should), you'll need a PHP server that's able to parse your code. One option is to get an account at a web host. You'd use an FTP client like FileZilla or FireFTP to transfer the PHP files to your server. The better option (during development) is to host your own PHP server.
Hosting your own PHP server has two main advantages. First of all you can host it locally so you don't need to bother with transferring your files and only need to refresh the page in your browser to see the latest changes in your code materialise. Second, you can keep your product-to-be private until it's ready to be released to the world wide web. This way you can present a finished (or at least beta) product to your users from day one and get time to work out any security issues before you expose your application to the public.
Zend Server is a PHP server for Mac that allows you to develop locally with minimum hassle.
1. Zend Server
There are a number of different options available for a development server. We're going to use Zend Server. Although you can upgrade to a big pricy plan when you need it, at the start you'll be just fine using the free version. Simply go to the Zend Server website and press the download button.
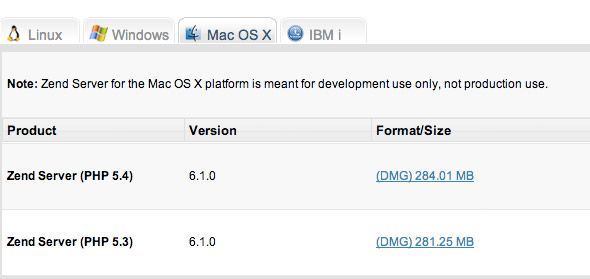
At the next screen, you'll be able to select your operating system. Another advantage of Zend Server is its cross platform compatibility. You can install Zend Server on any of the three popular operating systems, although we'll be focusing on Mac OS X in particular. Configuration of Zend Server is often operating system specific.
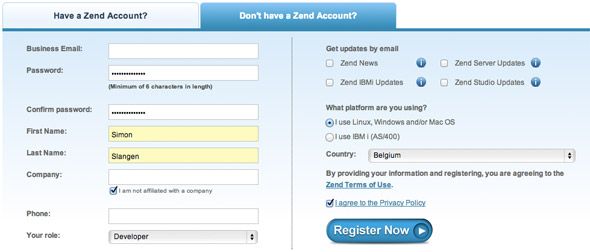
Before you're able to download Zend Server, you'll be asked to create an account. You'll also need this in a minute to activate the free version, so take a moment to fill this out. You can opt out of email updates in the top right. After signing in, your download will start.
1.1 What Version Do I Download?
It's important to make a distinction between the PHP version that's shipped with Zend Server and the version of Zend Server itself. Always download the latest version of Zend Server. As for PHP version, there's a reason they're both listed prominently.
It doesn't usually hurt to use the latest (stable) iteration of PHP, but not all web hosts are up to date with their PHP support. If you're developing with a specific web host in mind (and you have no control over the PHP version used on those servers), keep this in mind when downloading Zend Server to avoid compatibility problems later on.
2. Installation
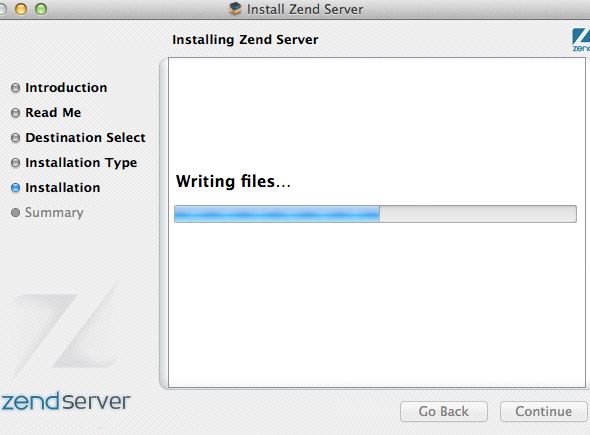
The first part of the installation is pretty conventional. Mount the downloaded .DMG to see the installation file in Finder. Double click to start the installation wizard. Select your the install location and enter an administrative user password to start installing.
The Read Me section is, for once, quite short and actually merits reading. It'll show you what's included besides a PHP server and familiarise you with the terminal commands to start the MySQL server from Terminal. In the next paragraph, we'll show you how to autostart the included MySQL server with Zend Server, so you don't need to know these commands.
2.1 Initial Configuration
Start running Zend Server by double clicking the icon in your Applications folder. The first time you launch Zend Server, it'll take you through a configuration wizard. Accept the license agreement and select the options that apply for you. You're likely looking for a development, not a production server.
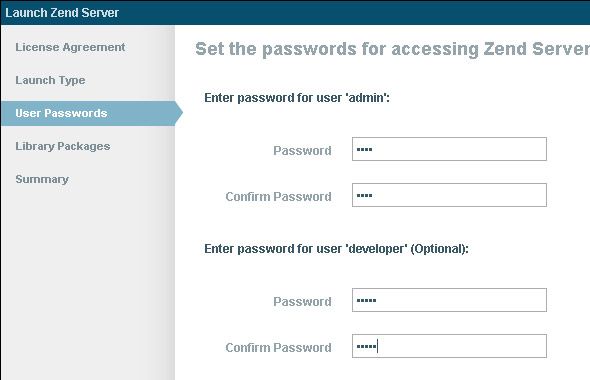
You'll also be required to enter a password for the 'admin' user and (optionally) for the 'developer' user. Remember these credentials. You'll need them to log into your Zend Server later on.
2.2 Autostart MySQL Server
When developing interactive web applications, PHP often goes hand in hand with MySQL or another SQL-based database platform. Learn more (about) SQL with SQLite Database Browser. If you're not going to start using SQL yet, feel free to ignore this section. You can always start the SQL server manually from Terminal. Otherwise, follow the below instructions to autostart the included MySQL server when Zend Server does.
Open the Terminal application from Applications > Utilities > Terminal and run the command,
sudo nano /usr/local/zend/bin/zendctl.sh
Enter your password when asked. This will open the specified file in the nano editor.
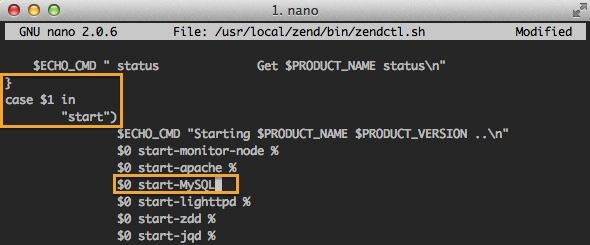
Scroll down with the arrow keys until you encounter the lines,
}

             case $1 in

             "start")
Find the line:
$0 start-apache %
Below it, add a new line that reads
$0 start-MySQL
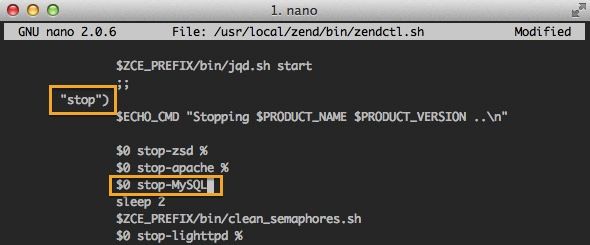
Similarly, when you find the "stop") case, add a line that reads
$ stop-MySQL
As you can see in the screenshot above.
Press ctrl+X to exit, press the Y key to confirm the edits and press Enter to confirm the filename. From now on, MySQL will start with Zend Server.
Finally, to ensure your Mac boots with this changed configuration, run the below three commands in sequence and enter your password when prompted.
cd /Library/StartupItems/ZendServer_init/

            sudo rm zendctl.sh

            sudo ln -s /usr/local/zend/bin/zendctl.sh ./
This removes the current startup item for Zend Server and replaces it with a symbolic link to the file we just edited.
Either restart your computer to have the above changes take effect, or run the following command to round up your configuration of Zend Server.
sudo /Library/StartupItems/ZendServer_init/zendctl.sh restart
3. Take It For A Spin
With Zend Server configured, you can start playing around with it. Some things you need to know before you start off:
- The web directory of your Zend Server is located in "/usr/local/zend/apache2/htdocs". In other words, all the files that are located in this folder will show on your local webserver.
- Your web server is located at the address: localhost:10088
- Your Zend Server configuration and administration is located at the address: localhost:10081
3.1 A Small Example
We'll send you on your way with our take on the classic Hello World example. Create a new file in TextEdit (you'll want to use a more powerful PHP editor later on) and add the following lines:
<?php

             echo "Hello MakeUseOf.com";

             ?>
Save the file to "/usr/local/zend/apache2/htdocs/test.php". Open your web browser and point it to http://localhost:10088/test.php. You'll see a nice welcome message in your browser, created by your small bit of PHP code.
With this introductory example out of the way, it's time to start writing some more interesting code. If you haven't already, there are plenty of websites where you can learn PHP for free.
How are you planning to use your self-hosted PHP server? Just playing around, or making a seriously cool product? Let us know in the comments section below!

