Why would anyone buy a digital picture frame, when there are already plenty of old tablets getting thrown out that could instead be recycled and put to the same use?
With new generations of iPad coming out all the time, and folks upgrading to the latest Android tablet whenever a new one comes out, the piles of "old" tablets keep showing up on places like Ebay and Amazon at rock-bottom prices. Maybe you even have a one or two kicking around a drawer somewhere in your house.
If you've ever wanted to set up a digital display in your home for visitors to see your favorite family photos, then you've come to the right place. I'm going to show you how you can put that old tablet to good use, and all you need is a few connector pieces and a monitor for your display (any size will do).
Making Your Own Digital Photo Frame
You don't need much hardware to accomplish this feat, especially if you already have an old tablet and a monitor you can use. The real secret behind this set up is the app itself, which we'll get to in a moment.
What You'll Need:
- A tablet you can dedicate to the purpose of your digital photo frame. I'm using a first generation Asus Transformer Prime. The only requirement is a micro-HDMI or mini-HDMI port (like shown in the image below.)
- An old monitor with an HDMI input port.
- A micro-HDMI or mini-HDMI to HDMI converter cable, easily accessible via Amazon for usually less than $10.
- A regular HDMI cable to connect your adapter to your monitor.
- An Android or iOS app capable of playing a photo slideshow. I chose Dayframe for Android because it connects with cloud services like Dropbox or Google Drive, allowing for the remote control feature I'll get to later in this article.
Putting the Pieces Together
Once you have all of the hardware together and you've installed the Dayframe app on your mobile device, it's time to piece together the hardware.
First, you'll want to plug the mini-HDMI part of your adapter into the mini-HDMI port on your mobile device. If you're using an Android phone instead of a tablet for this project, make sure to follow Christian's explanation of how to hook your Android phone to a large screen.

As you can see, I purchased an adapter that allows me to plug into a mobile device with either a micro or a mini port.
The next step is just plugging your HDMI cable into the full HDMI end of your adapter, and of course the other end into your monitor.

When you're done, you should have a setup like shown here, where the monitor is mirroring the Android display shown on your mobile device.

Now that you've got the display working, it's time to set up the slideshow software so that it'll display your favorite pictures.
Setting up DayFrame
After you first launch DayFrame, you'll have an option to immediately connect your favorite Cloud services where you can feed it your photos to stream to your display.

You can skip the first step, because further into the software you'll have an option to add photos from any of those services and more.
In my case, I added my Dropbox account in the app and logged in, giving it access to my Dropbox account. As you can see in the screenshot below, all you have to do to add photos to your slideshow is to press the "+" sign next to "Photos" under your chosen cloud account.

Of course, before anything is shown on the monitor, I have to go to my Dropbox account and actually load up the images that I want to include in the slideshow.
Use Your Cloud Account to Remotely Control Your Slideshow
In my Dropbox account, I've created a special folder that I'll use to add and remove images to my slideshow.

For now, I've loaded up about ten or so family photos.

If you've decided to use your Google Drive account or any of the other online services, you'll want to use the same approach so you can easily organize exactly what photos are currently getting displayed, and change them wherever you want.
The cool thing about this is that you can change the active slideshow on your "digital photo frame" at any time and from anywhere - your office, from your cellphone, or when waiting at the doctor's office.
The DayFrame Connection
Going back to the DayFrame app, now that all of the images have been added to Dropbox, you should see all of those images automatically listed in the app as well.

All you have to do to launch your slideshow (and you only have to do this once), is click on the menu button on the right side of the main "Manage Photostreams" screen, and choose "Play slideshow" from the list.

That's all there is to it!
The path of data here is basically from your Dropbox (or any cloud service) photo directory, to your network-connected mobile device, to your new "digital slideshow" display.
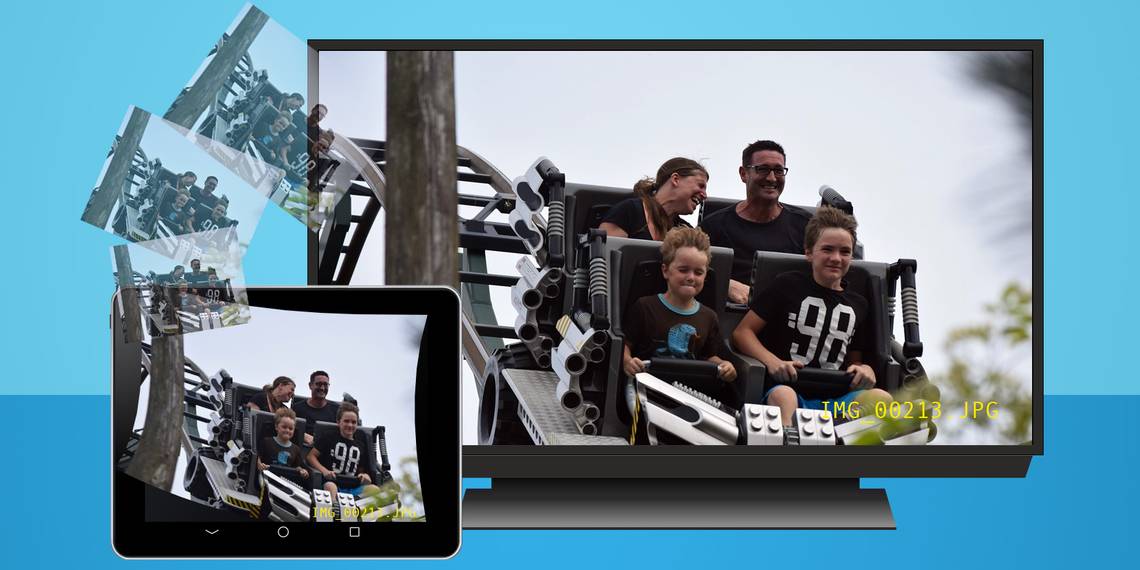
Here's what mine now looks like (it's a huge digital photo frame!)

Now, any time you remove or add photos in your Dropbox folder, your photo slideshow will automatically add them into the cycle.
The beauty of this is that it only requires that you set up this system one time, and then you can update it from anywhere. Unlike a standard digital photo frame where you need to plug in a USB stick or otherwise "load it" with a fixed set of images - this particular setup lets you load the images from the cloud instead, and you can change the images any time you want!
Have you ever considered buying one of those digital photo frames for your home? Would you consider setting up a system like this using one of your old generation tablets? Try it out and let us know how it went! If you chose a different slideshow app, share it in the comments section below!