Macros are a series of recorded actions that you can execute with a single click, saving you time and effort on repetitive tasks. Excel natively supports macros, and you can turn them into a secret weapon to quickly get mundane tasks done.
Excel macros are pretty easy to use once you enable them. The ability to record a macro allows you to create a macro without programming knowledge: start recording, perform the actions, and stop recording.
Let's explore recording Excel macros with a detailed step-by-step guide.
How to Record a Macro in Excel
Although macros are built into Excel, they aren't enabled by default. To use macros, you'll need to enable the Developer tab in Excel. Once you enable the developer tab, recording a macro consists of assigning a shortcut, inputting the details, and performing the macro actions. Here's a detailed guide:
1. Enable the Developer tab
The Developer tab is where you can record your macro. As mentioned before, this tab isn't enabled by default.
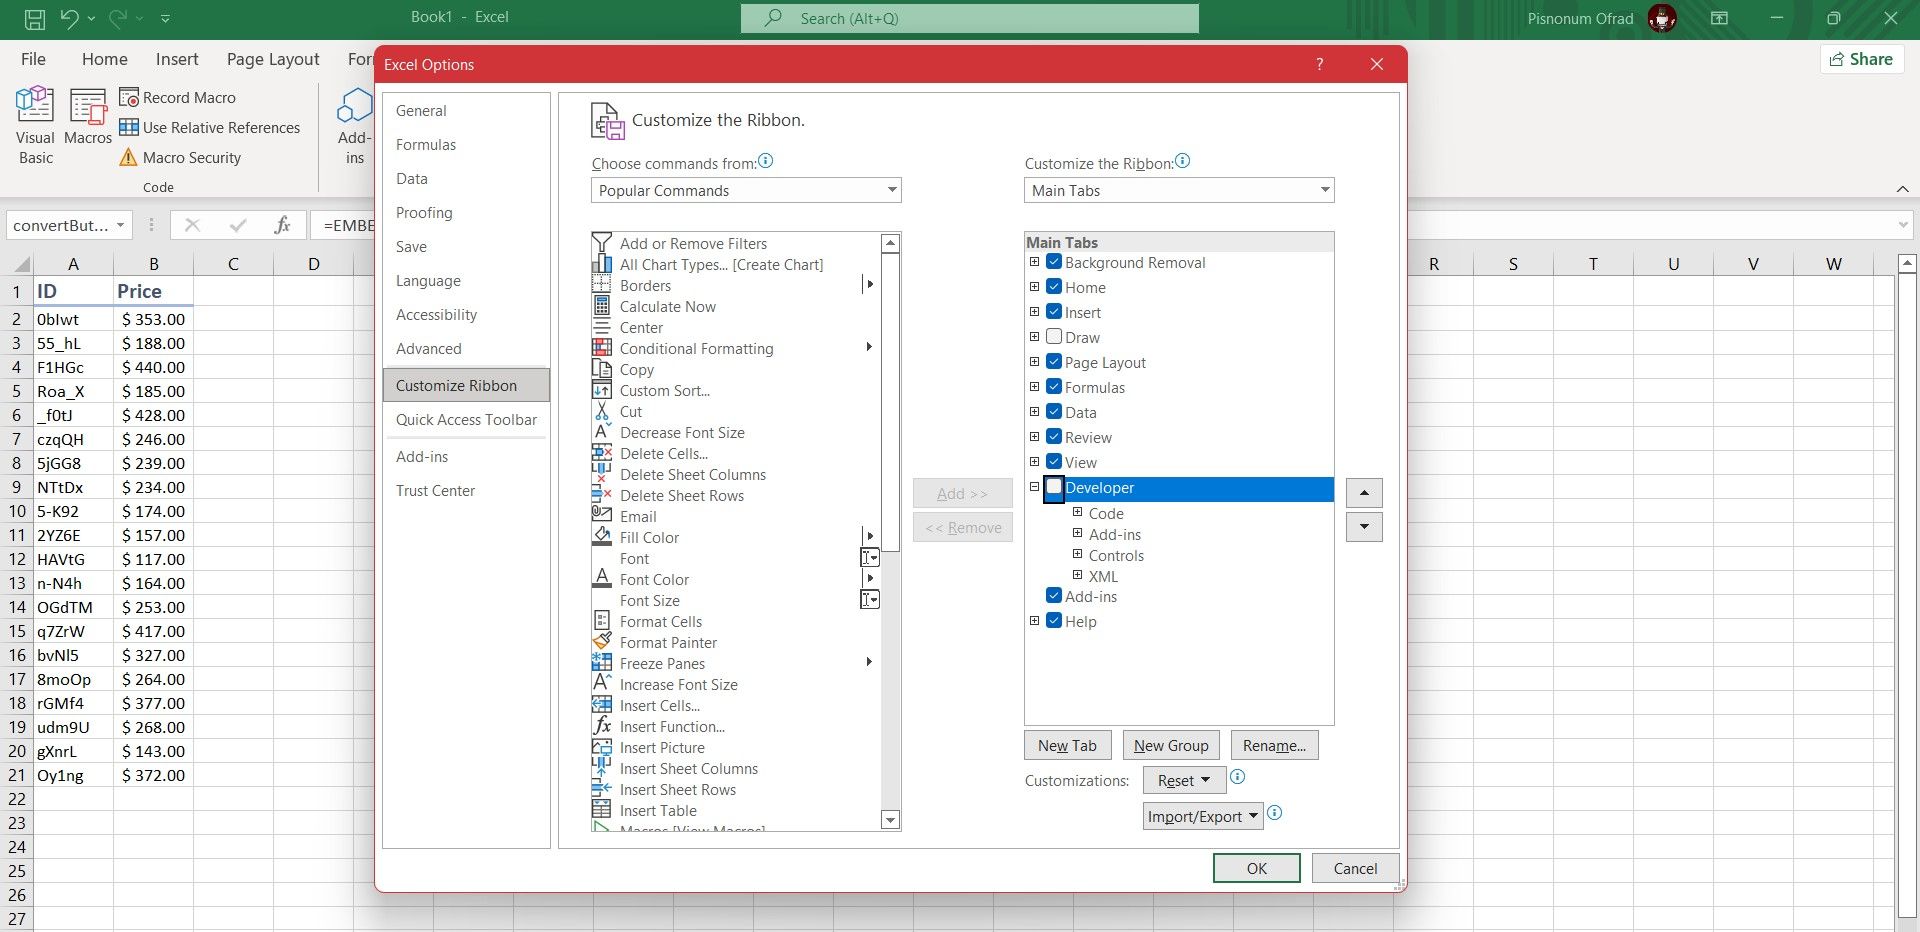
To enable it, go to File > Options > Customize Ribbon. In the Customize the Ribbon column with Main Tabs selected on the dropdown, tick Developer, and click OK.
The Developer tab will now appear in the ribbon. It'll stay here permanently unless you disable it in the same window.
2. Click Record Macro
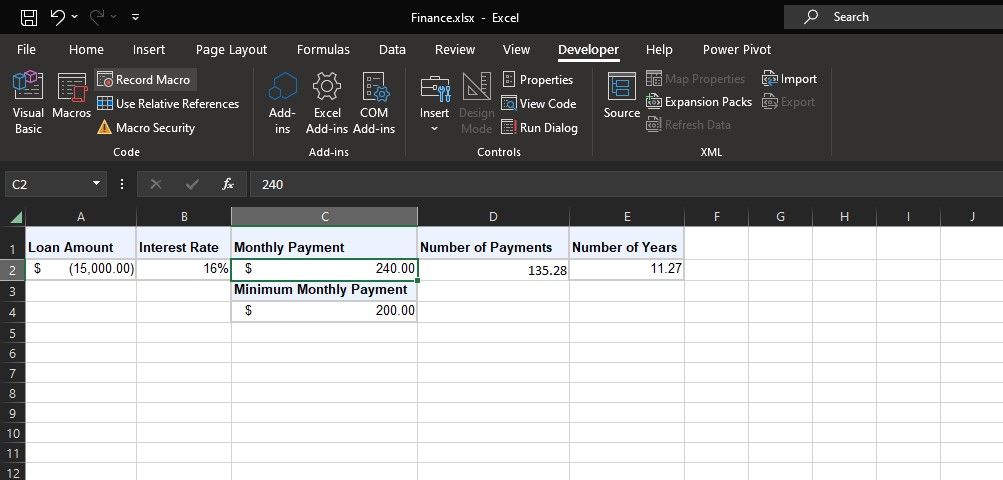
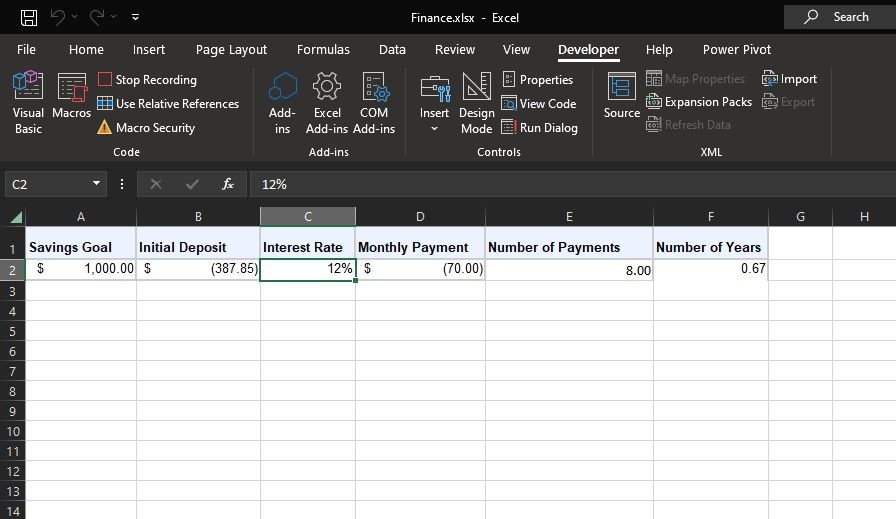
Navigate to the Developer tab you just enabled on the ribbon. In the Code group, click Record Macro. This will open a new window where you'll have to enter the details for your macro.
Alternatively, you can press Alt + T + M + R on your keyboard to bring up the macro dialog.
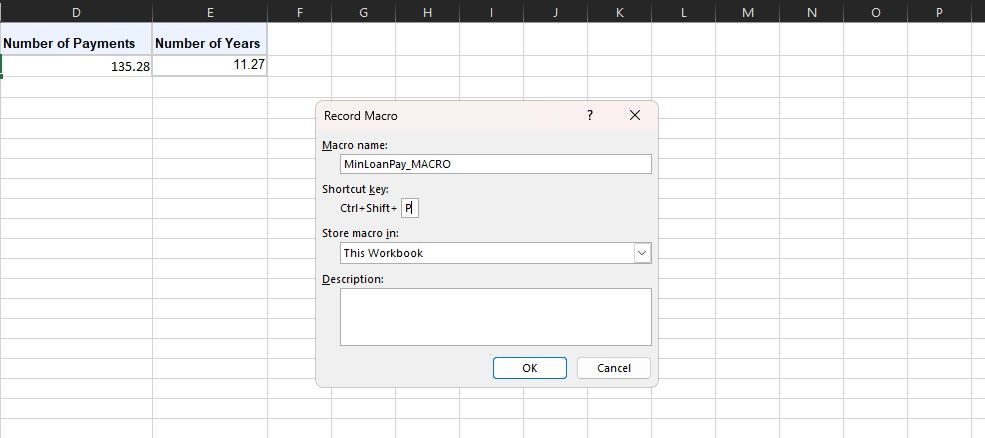
3. Input a Macro Name
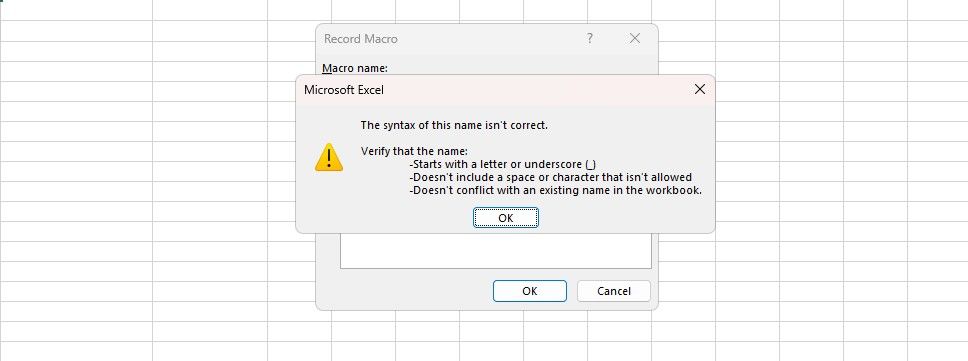
Input a name for the macro within the Macro name field. Make it specific, otherwise, you'll have trouble quickly identifying what the macro does in the future.
The first character of the macro name must be a letter, but subsequent characters can be letters, numbers, or underscores. You can't use spaces and avoid giving the macro the same name as cell references.
4. Assign a Shortcut Key
Assigning a shortcut key will let you run the macro in Excel at any time by pressing that combination. Click within the Shortcut key box and press the key that you want to use in conjunction with Ctrl.
It's best if you hold Shift while selecting your key combination to make it part of the shortcut. Your macro shortcut will override the default Excel shortcuts, if one already exists. For example, if you choose Ctrl + A then it'll override the ability to select everything. Instead, use Ctrl + Shift + A since that isn't an existing shortcut.
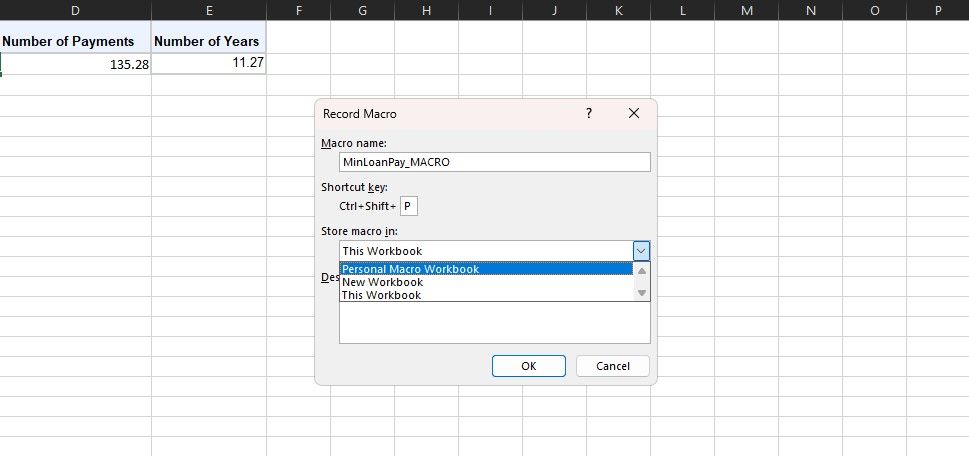
5. Select Where to Store the Macro
Use the Store macro in dropdown to choose where you want to store the macro.
The options available are:
- Personal Macro Workbook: This will make the macro available whenever you use Excel. It'll store the macro in a hidden macro workbook called PERSONAL.XLBS.
- New Workbook: This will make the macro available for any workbooks you create during an existing Excel session.
- This Workbook: This will make the macro available only in the workbook you have open.
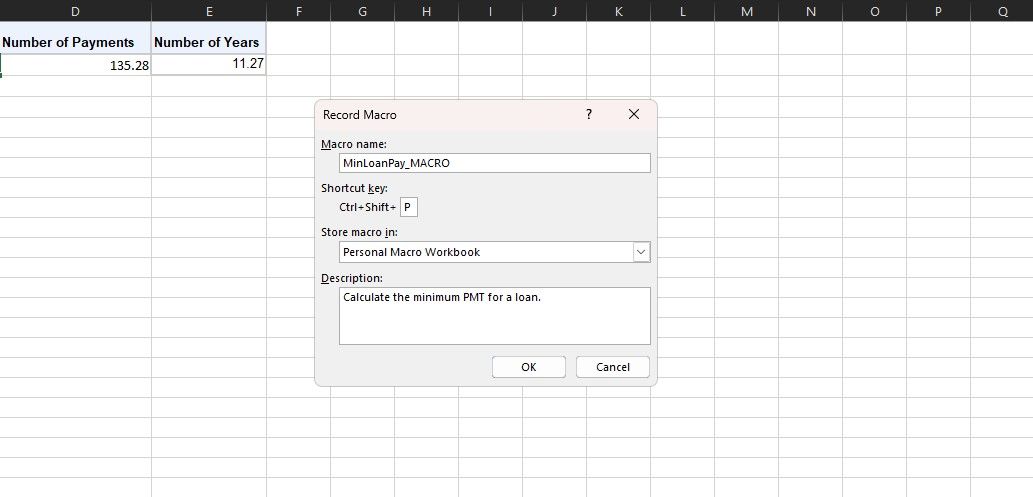
6. Input a Description
The final step in this window is to input a Description into the box. Use this to describe in detail what the macro does.
This field is optional, but it's good practice to be as comprehensive as possible so that you and others can see what the macro does in the future.
7. Click OK
Perhaps the easiest step of all! Click OK when you're happy with what you've submitted to begin recording the macro.
8. Perform Your Macro Actions
The macro is now recording, so perform your steps. This can include typing, clicking cells, applying formatting, or importing external data from websites or places like Microsoft Access.
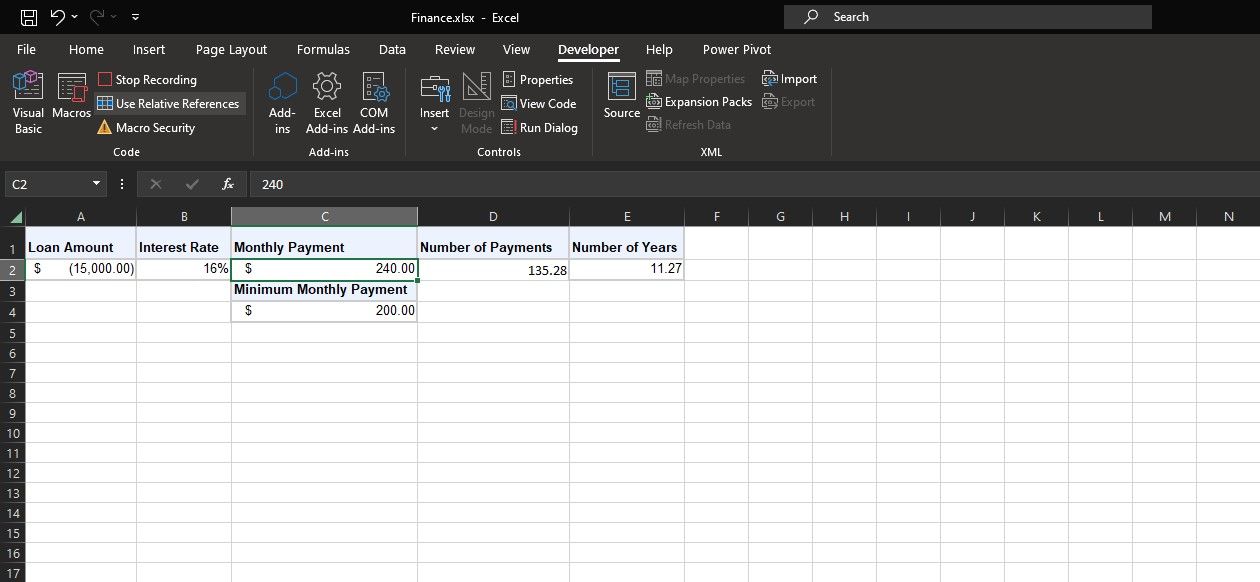
You can toggle the Use Relative References option on the Developer tab to use relative references while recording. When this option is enabled, actions are recorded relative to the initial cell, which can be useful for dynamic macros.
For example, if you click from cell A1 to A3 while recording, running the macro from cell J6 would move the cursor to J8. If disabled, the cursor would move from A1 to A3.
It's best to plan in advance what your actions are going to be so that you don't make a mistake. If you slip up, stop the recording and start again. Alternatively, you could try to fix it by editing the Visual Basic Application (VBA) code for the macro.
9. Click Stop Recording
Once you've completed the macro steps, go back to the Developer tab, locate the Code group, and click Stop Recording.
Alternatively, you can press Alt + T + M + R on your keyboard to stop recording the macro. You have now successfully recorded your Excel macro!
Now that you've got the basics down, you might want to check out the top resources for Excel macros to get an idea of what you could create with the feature. Once you've mastered it, you'll even be able to send emails from Excel or create an automatic data entry form.
Using Recorded Macros in Excel
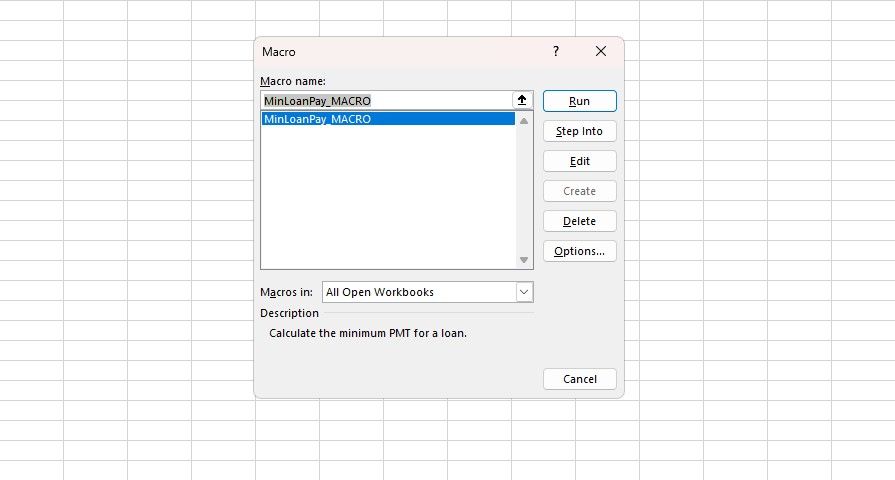
Once you've created your macros, you can access them by clicking Macros from the Developer tab. You can also press Alt + F8 to open this window.
Here, you can select your macro and click Run to apply it. You can also Edit or Delete macros.
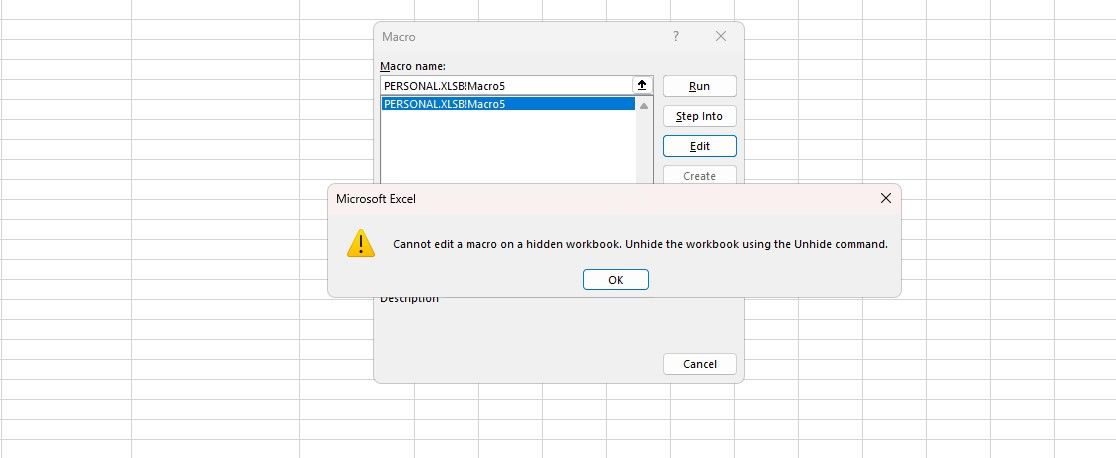
You might encounter the "Cannot edit a macro on a hidden workbook error" when trying to edit or delete a macro. This is because your macro is stored in your personal macro workbook, which is a hidden PERSONAL.XLSB file.
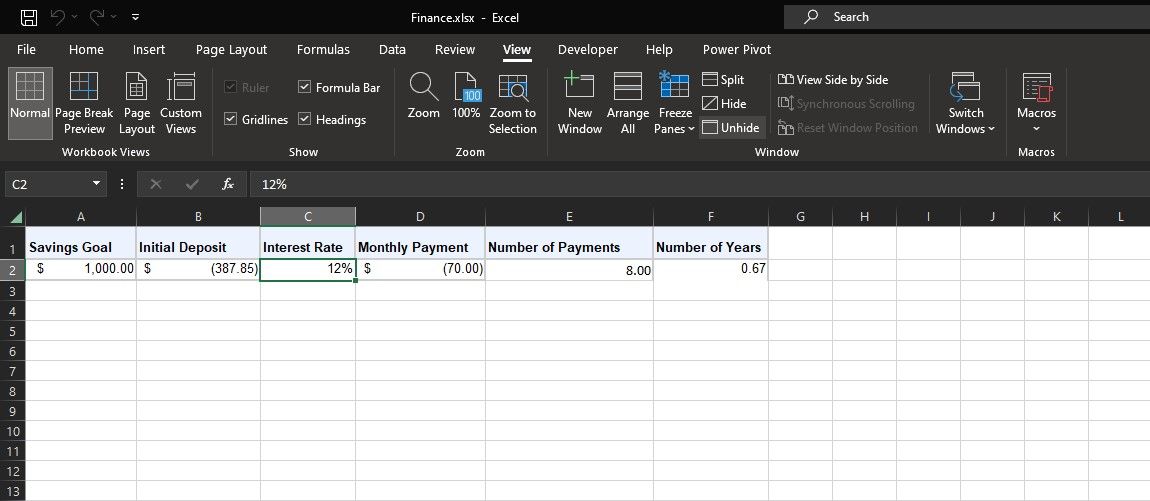
To unhide this workbook, go to the View menu and then click Unhide in the Window section. Select PERSONAL.XLSB and click OK.
Excel will open the PERSONAL.XLSB workbook. This is a blank workbook that stores your personal macros. Now, you can go back to the macros window and edit or delete the macro.
Get the Most Out of Excel With Macros
Excel macros offer a transformative way to automate repetitive tasks, enhancing your productivity levels and freeing up valuable time. By following this guide, you've taken a step towards recording your own macros, granting you a tool to potentially automate manual processes in Excel.
As you become more proficient, you'll find that macros not only simplify your tasks but also open doors to more advanced functionalities. Dive deeper, practice, and discover the full potential of Excel macros to elevate your data management game!


