Powershell is a perfect way for a new coder to get started on Windows. Powershell is equal parts command line tool and scripting language. It gives you the ability to automate your computer via the same commands you use to administer it. If you have a modern Windows system, you already have Powershell. Most of its uses are Windows centric, but you can install Powershell on a Mac or Linux machine as well.
Working With Powershell
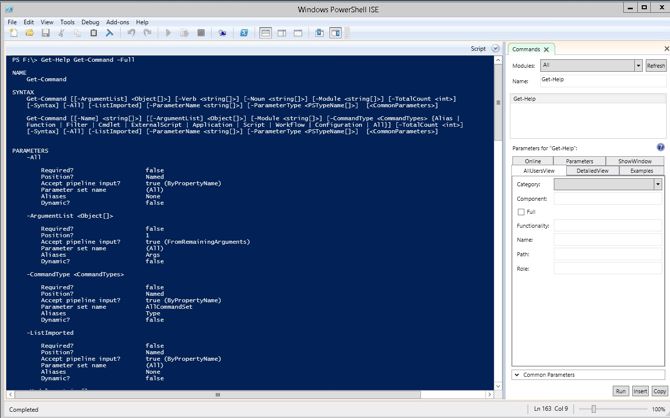
There are two ways to use Powershell. There is the basic command line window, which is used to run commands or invoke pre-written scripts. Then there is the ISE, which combines the CLI window with a basic development environment. Using this, you can write and test your scripts.
The ISE has a searchable list of commands, and you can use its Terminal Window without a file open. The command list allows you to construct your command and insert it. If you are doing more advanced development, install Microsoft's Visual Studio Code. Code includes support for Git version control and other languages.
Powershell is unique in that it is built entirely of commands, Microsoft calls them Cmdlets. These commands are the same if you are working via command line or writing complex scripts. So as you use these commands, you can think about how to string them together to create your first scripts.
The Basics: Get-Command, Get-Help, Get-Member
All Powershell commands take the form of Verb-Noun. The verbs are usually: Get, Set, and New.
Get-Command allows you to see every available command. When running Get-Command, you see that there are tons of commands that start with these.
Digging in further from just the names of cmdlets, you begin to see that they all have a similar structure. You invoke them by name, just like you did with Get-Command. Using parameters changes what information you get. However, if you have only ever used the command with default options, how do you find out how to use advanced parameters?
Using the Get-Help cmdlet with Get-Command shows more information about the cmdlet. We use the cmdlet with the following syntax:
Get-Help Get-Command
You then see the basic information about the parameters. If you want to see the parameter details and some usage examples, add the -Full parameter.
If you only want to see the Examples, you can run:
Get-Help Get-Command -Examples
This cmdlet returns only the examples from the help file. These examples are quite helpful because they include descriptions. This help text explains what the cmdlet and parameters do when run.
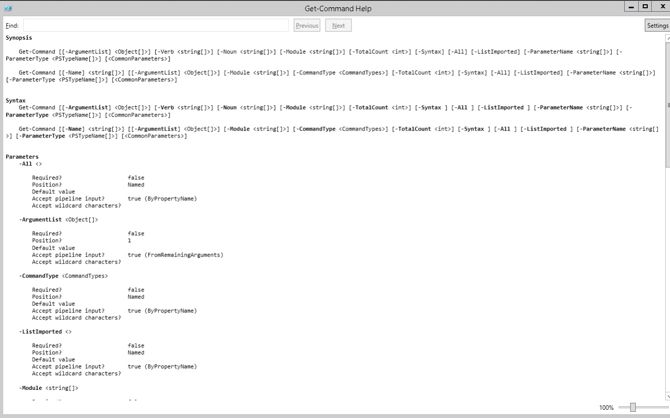
If you want to pop out the help file into a separate window, you can use -ShowWindow. So if you run:
Get-Help Get-Command -ShowWindow
Powershell pops out a window with the full help file. You do not need to use the Full parameter here, as the window pulls the full article.
As you get more advanced with Powershell, you will find that you use Get-Member more often. It is an easy way to see what fields are available from returned data, as well as other methods you can run. Often, cmdlets will have a -Property parameter to allow you to call those.
Working With Files: Get-ChildItem, Remove-Item, Move-Item, Copy-Item
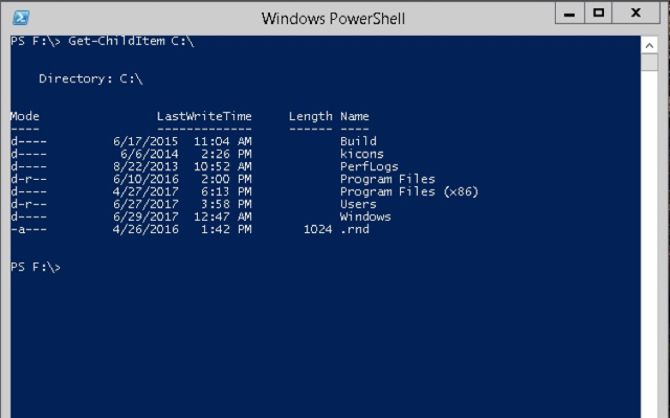
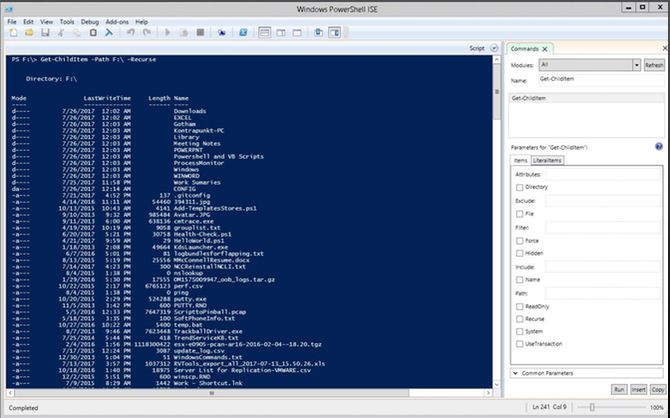
Now that you have some idea of how cmdlets work, and how to get help, let's make changes. You can get the contents of any folder using the Get-ChildItem command. For example, you can get the files of an entire drive using the drive letter. Enter:
Get-ChildItem E:\
Which is short for:
Get-ChildItem -Path E:\
When you run this command, you get a list of files with its Last Write Time, size under the Length property, Name and Mode. The Mode is the attributes of a file or folder. The possible entries are:
- ReadOnly
- Hidden
- System
- Directory
- Archive
- Device
- Normal
- Temporary
- SparseFile
- ReparsePoint
- Compressed
- Offline
- NotContentIndexed
- Encrypted
If you want to get the contents of all the sub directories in a path, you want to use the -Recurse parameter. So then run:
Get-ChildItem -Path E:\ -Recurse
Your files then come out as separate lists for each folder in the path.
To limit the data returned you can use a few different parameters: -File, -Hidden, and -ReadOnly. If you are looking to filter off of the names of the file, you can use wild cards in the Path parameter. To return all of the .doc files in a directory, enter:
Get-ChildItem -Path E:\*.doc
Again add -recurse if you wanted everything from the subfolders as well.
If you want to delete a file use:
Remove-Item -Path E:\OldFile.txt
To skip confirming each file, add the parameter -Confirm $false (Powershell has two constants for boolean values: $true and $false). To force the removal of read-only or hidden files, use the -Force parameter.
Moving files is just as easy. To move everything from your Flash drive to the local drive in a folder use:
Move-Item -Path E:\* -Destination C:\FlashDriveArchive
You can also name a single file in -Path to only move that file. To copy the file rather than move it, you use the same syntax with the Copy-Item cmdlet.
Monitoring and Working With Processes and Services
Every Windows user knows Task Manager. However, there is a quicker way to see the currently running processes from Powershell, Get-Process. If you want to know what all the entries in this table mean, pipe the command to Get-Member. Enter the cmdlet:
Get-Process | Get-Member
Get-member outputs a list of methods and properties associated with Get-Process. The information at the top is what you are interested in. You see the various types of memory have aliases.
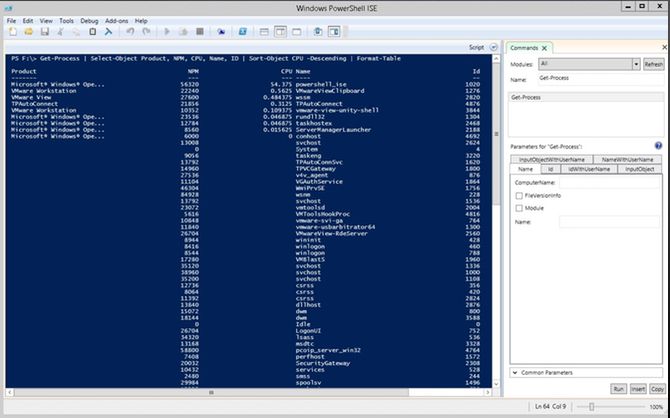
We can also see from this output that we can get the Product property to get a friendlier name to the processes. Let's change the output, so it has better information for us to work with:
Get-Process | Select-Object Product, NPM, CPU, Name, ID | Sort-Object CPU -Descending
(There is more info on Select-Object and Sort-Object in the next section.)
Now that you have the ID from your Get-Process command, you can stop it using the Stop-Process cmdlet. So if you find that a Chrome process is chewing up all your resources, find the ID in the previous command. Then, run:
Stop-Process -ID 45960
Replace 49560 with the ID of your resource hog.
Using the file path, you can start a process using Powershell. To launch Chrome run the following command:
Start-Process -Filepath "C:\Program Files (x86) GoogleChromeApplicationchrome.exe"
(You need to have the quotes around the file path because of the spaces.) The -ArgumentList parameter allows you to pass command line options to the application. In the case of Chrome, you can force it to start in Incognito Mode using the --incognito flag. The entire cmdlet is:
Start-Process -Filepath "C:\Program Files (x86) GoogleChromeApplicationchrome.exe" -ArgumentList "--incognito"
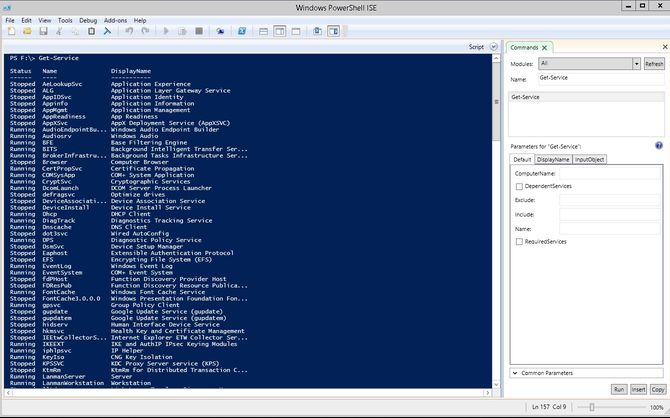
You can do most of these same things with services. Get-Service shows you a list of all the services running on your computer. Same with Starting and Stopping services, you can use Start-Service and Stop-Service.
Working With Data: Sort-Object, Select-Object, Where-Object
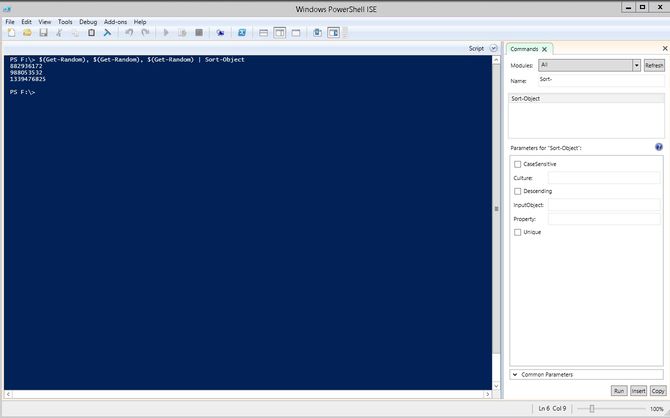
When you are working with the data from a cmdlet, it may not always be the order you want. In those cases, you want to use the Sort-Object. You can call Sort-Object on a variable you created, but primarily it is used by piping another cmdlet. As in the example above, we pipe the output of one object to another and sort it. Let's create an array of three random numbers and pipe it to Sort-Object.
Anything in parentheses runs first. Create a simple array with:
$(Get-Random), $(Get-Random), $(Get-Random)
Be sure to notice the commas separating the values. So to see the random numbers sorted run:
$(Get-Random), $(Get-Random), $(Get-Random) | Sort-Object
The cmdlet outputs the numbers from smallest to largest, if you want to reverse it add -Descending.
When you pipe cmdlets to Get-Member, there are more properties than the default output. You select specific properties by using Select-Object.
Just like Sort-Object, you use Select-Object via a piped cmdlet. For example, to generate a table of services and their status use:
Get-Service | Select-Object DisplayName, Status
While outputting all this data is nice, what if you only want to see specific data? Get-ChildItem has some built-in filtering, but most commands do not. In those cases, you use Where-Object.
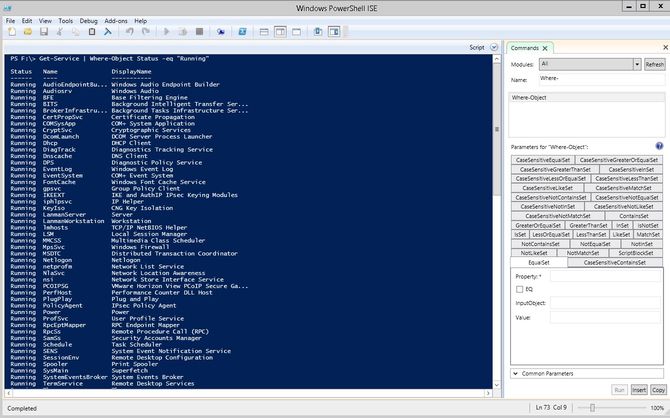
Returning to services again, this time you are only going to get running services. Enter the cmdlet:
Get-Service | Where-Object Status -eq "Running"
That -eq in the comparison is Powershell for =. In Powershell, you perform comparisons with letter combinations:
- eq: equals
- ne: not equal
- lt: less than
- gt: greater than
- ge: greater than or equal to
- le: less than or equal to
- like: use like in wildcard comparisons
Formatting Help: Format-Table and Format-List.
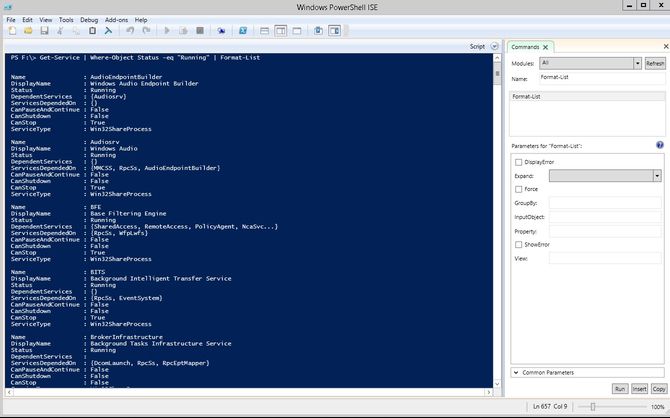
For these various cmdlets, most of the output was in table formats. This displays the data in rows and columns with headers. To display entries listed with their properties individually, pipe the cmdlet to Format-List.
Sometimes you have an output that gets too wide for the Powershell window. When that happens, Powershell forces it into a list output. To make sure that you keep it in the table format pipe your output to Format-Table.
From the Command Line to Scripting: Next Steps
Once you are comfortable, scripting is a matter of entering the cmdlets in a text file and saving it. If you are nervous about trying scripting, don't be. Microsoft has an enormous amount of documentation on every cmdlet. This is above and beyond that already lengthy help documentation, so be sure to check out Technet [No Longer Available].
If you are learning Powershell, let us know in the comments what you are most excited to do. If you have got a bit more experience, we would love to hear about more advanced topics you would like to see covered.

